Connect with us

Appetizers

Romesco: A Flavorful Spanish Sauce for Any Dish

Nourish your taste buds with Romesco sauce, a Spanish culinary treasure that adds a burst of flavor to every dish—discover the secret behind its irresistible allure.

Published

on

delicious spanish sauce recipe

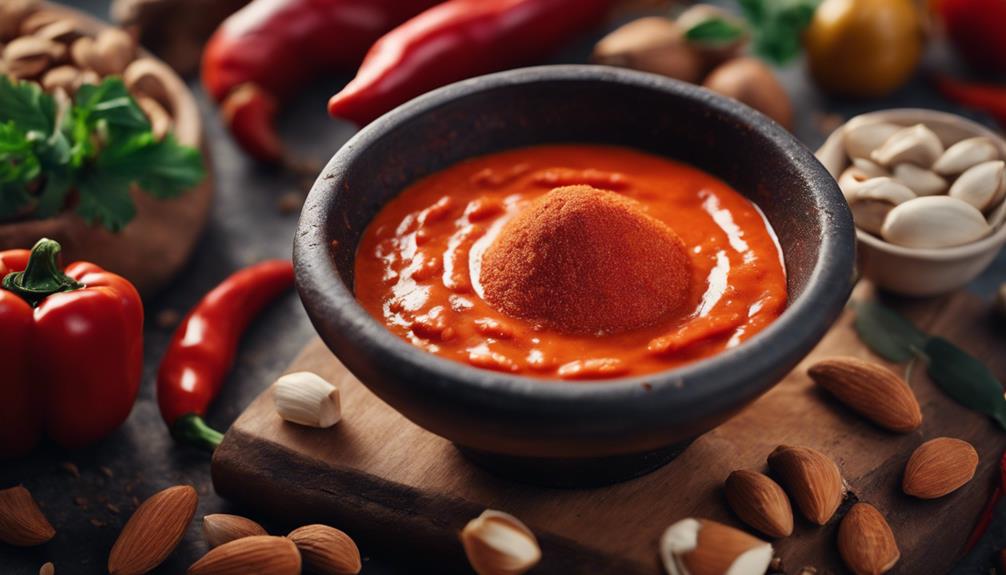
Experience the true essence of Spanish culinary expertise with Romesco sauce—an exquisite blend of roasted red peppers, garlic, almonds, paprika, and vinegar that hails from Catalonia. This delicious sauce is a prized staple in Spanish cooking, enriching meats, vegetables, and seafood with its flavorful, smoky notes. Enhance your dishes with the rich nuttiness of almonds, the bold flavor of garlic, the tangy bite of vinegar, and the intricate depth of paprika, resulting in a mouthwatering, smoky sauce that will excite your taste buds. Embark on a journey into the world of Romesco flavors, promising an adventure in authentic Spanish cuisine and sensational aromas.

Key Takeaways

  • Romesco sauce is a versatile Spanish sauce enhancing meats, veggies, and seafood.
  • Key ingredients include almonds, garlic, vinegar, and paprika for depth and flavor.
  • Roast red peppers for sweetness and smoky essence in the sauce.
  • Pair with grilled veggies, seafood, or use as a pizza topping.
  • Store in a sealed container in the fridge for up to 10 days or freeze for later use.

Romesco Sauce Overview

Romesco sauce, a flavorful Spanish condiment hailing from Catalonia, is known for its rich blend of roasted red peppers, garlic, almonds, paprika, and vinegar. This versatile sauce, originating from the Catalan region, is a staple in Spanish cuisine, offering a unique combination of smoky, nutty, and tangy flavors. With its base of roasted red bell peppers, Romesco sauce provides a vibrant color and robust taste that complements a variety of dishes. Whether used as a dip, spread, or condiment, this Spanish sauce enhances the flavor profile of meats, vegetables, and seafood.

Romesco sauce's popularity stems from its easy preparation. By combining ingredients like roasted red peppers, garlic, almonds, paprika, and vinegar in a food processor, you can create a delectable sauce in under 5 minutes. Its versatility extends to storage, as Romesco sauce can be refrigerated for 5-7 days in an airtight container and frozen for up to 6 months, allowing for convenient meal planning and preparation.

Key Ingredients for Romesco Sauce
romesco sauce recipe essentials

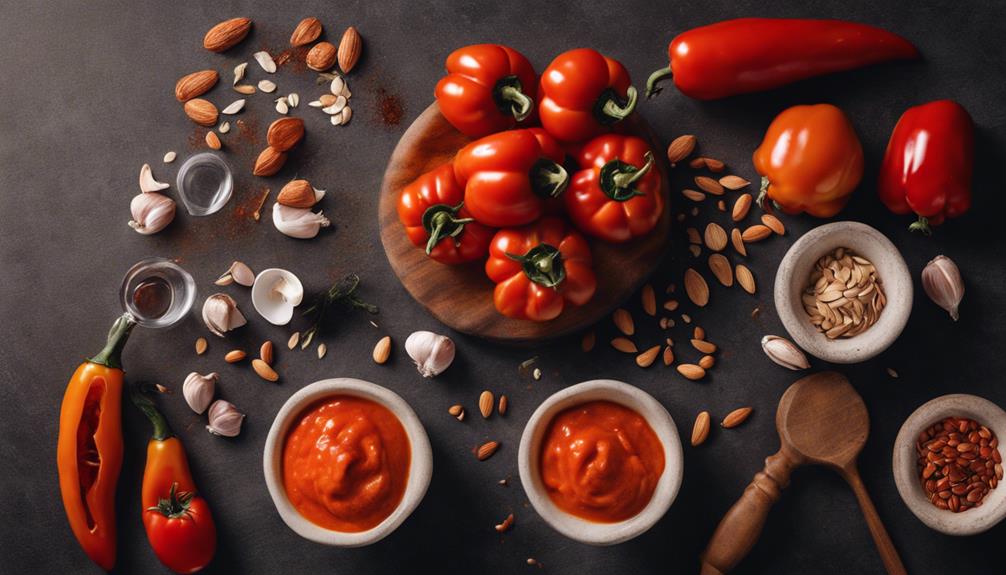
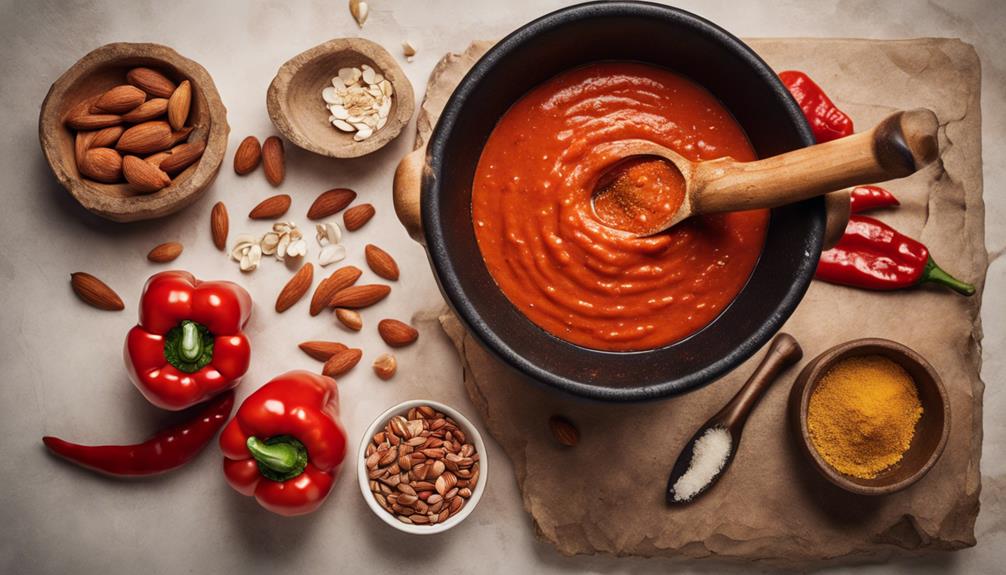
Almonds, garlic, vinegar, and paprika are essential components in crafting the rich and versatile Romesco sauce. These key ingredients, along with roasted red peppers, form the foundation of this flavorful Spanish sauce. The almonds contribute a nutty depth, while the garlic adds a pungent kick. Vinegar provides a tangy acidity that balances the sweetness of the roasted red peppers. Paprika, with its smoky and earthy notes, enhances the overall complexity of the sauce.

The combination of these ingredients results in a sauce that isn't only delicious but also incredibly adaptable. Romesco sauce can be paired with a variety of dishes, from grilled meats and seafood to roasted vegetables and even pasta. The use of roasted red peppers and almonds gives Romesco its signature taste and texture, making it a versatile condiment that can elevate any meal.

Simple Romesco Sauce Recipe
delicious romesco sauce recipe

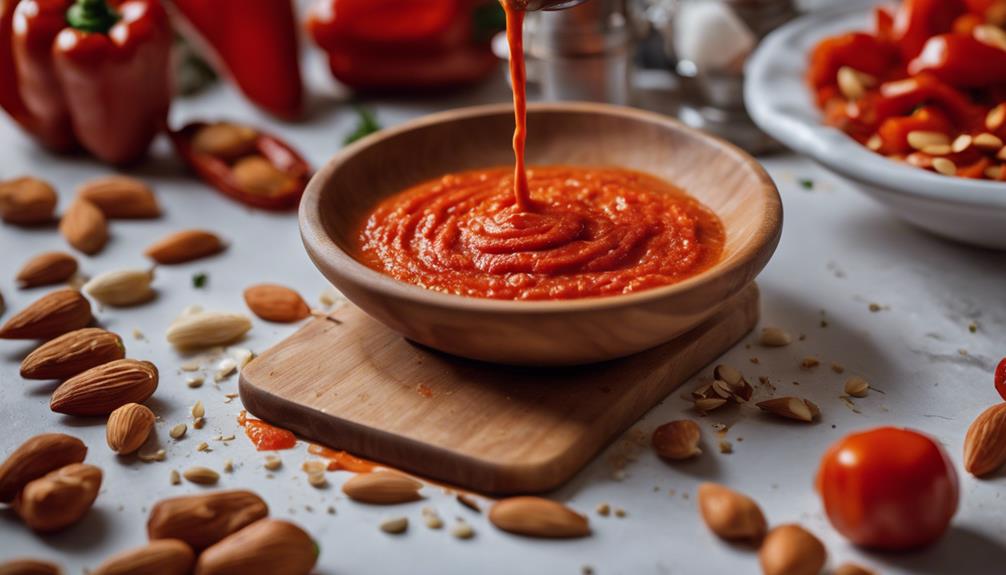
Crafting a flavorful Romesco sauce at home requires just a few simple ingredients and minimal effort. To create this delectable sauce, follow these steps:

  1. Roast the Red Peppers and Tomatoes: Start by roasting red peppers and tomatoes in the oven until they're charred and tender. This process enhances their sweetness and adds a smoky flavor to the sauce.
  2. Toast the Almonds: Toast almonds in a dry skillet until they're golden brown and fragrant. This step brings out the nuttiness of the almonds, which will contribute to the rich texture of the Romesco sauce.
  3. Blend the Ingredients: In a food processor, combine the roasted red peppers, tomatoes, toasted almonds, garlic, paprika, and olive oil. Blend until smooth and creamy, adding salt and pepper to taste. This mixture will result in a luscious Romesco sauce with a perfect balance of flavors and a delightful smoky undertone.

Tips for Perfecting Romesco Sauce

perfecting romesco sauce tips

For a foolproof Romesco sauce, make sure to select high-quality ingredients to elevate the flavors of your dish.

When following a Romesco sauce recipe, make certain you have excellent components like roasted red peppers, smoked paprika, olive oil, and almonds. These ingredients are essential for achieving that authentic Spanish taste that will enhance your dishes.

To perfect your Romesco sauce, control the consistency by adjusting the amount of olive oil added during the blending process in a food processor. This step allows you to tailor the sauce to your desired thickness, whether you prefer it smooth or with a bit more texture.

Advertisement

Roasting Red Peppers for Romesco

perfecting romesco sauce recipe

To prepare Romesco sauce, start by roasting red peppers to enhance their sweetness and deepen their flavor profile. Here's how to get the best results:

  1. Char the Skin: When roasting red peppers, make sure the skin is charred to make peeling them easier and to impart a smoky flavor to the peppers.
  2. Roasting Methods: You can roast red peppers in the oven under the broiler or directly over a gas flame. Both methods work well; choose the one that suits you best.
  3. Steam for Easy Peeling: After roasting, place the peppers in a sealed container to steam. This helps loosen the skin, making it easier to remove and revealing the tender, roasted flesh underneath.

Pairing Romesco Sauce With Dishes

enhancing dishes with romesco

Enhance your next meal with the delectable touch of Romesco sauce, a versatile condiment that enhances a variety of dishes with its nutty and slightly smoky flavors.

When deciding on dishes to use Romesco sauce with, consider pairing it with grilled veggies. The sauce complements the charred flavors of grilled vegetables, enriching their natural taste with its rich profile.

Additionally, Romesco sauce is a perfect match for roasted vegetables, adding depth and complexity to dishes like roasted potatoes, carrots, or cauliflower.

For seafood enthusiasts, incorporating Romesco sauce into seafood dishes can be a game-changer. It pairs exceptionally well with grilled fish or shrimp, infusing the seafood with a robust and savory essence.

Whether you're grilling a piece of salmon or savoring some shrimp skewers, Romesco sauce is there to enhance the flavors.

Looking for new recipe ideas? Try using Romesco sauce in pasta dishes or as a topping for pizzas to introduce a unique Mediterranean twist to your meals.

Advertisement

The possibilities are endless when it comes to the culinary adventures you can partake in with this flavorful Spanish sauce.

Storing Romesco Sauce
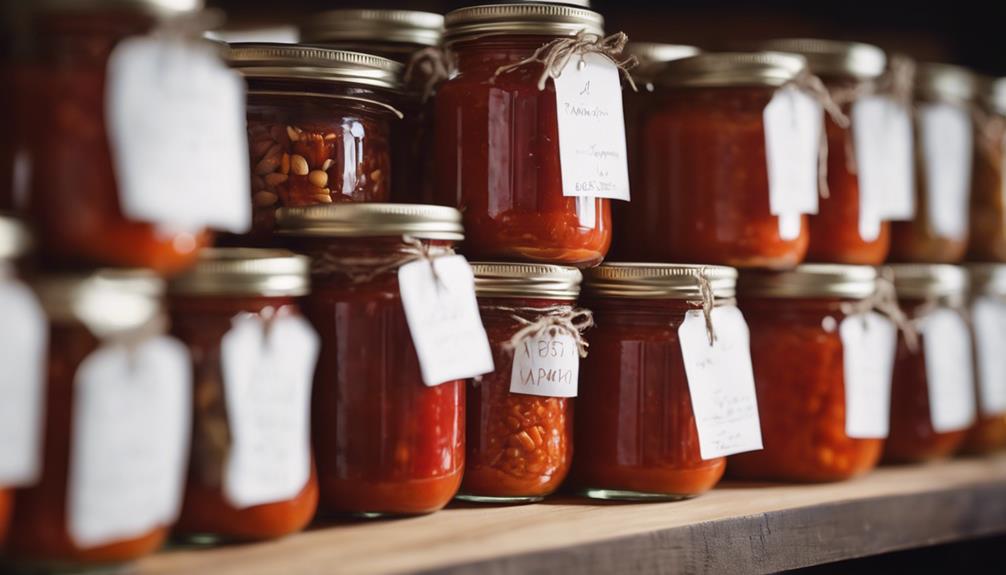
preserving homemade romesco sauce

Storing Romesco sauce properly is essential to maintain its freshness and flavor profile. Here are some key tips for storing your Romesco sauce:

  1. Use a sealed container: After preparing your Romesco sauce, transfer it into a sealed container to prevent air exposure that can lead to oxidation and spoilage.
  2. Refrigerate promptly: Place the sealed container of Romesco sauce in the fridge for best storage. The sauce can last in the refrigerator for about 7 to 10 days, ensuring its flavors remain intact.
  3. Mind the olive oil: Given that Romesco sauce contains olive oil, refrigeration helps maintain its quality. Olive oil can solidify in the fridge, so allow the sauce to come to room temperature and stir well before serving to maintain a consistent texture and flavor.

Freezing Romesco Sauce

chilled romesco for summer

For longer-term storage options, consider freezing your Romesco sauce in freezer-safe containers. Freezing Romesco sauce is a crucial method to extend its shelf life for up to 6 months. When freezing your sauce, it is important to use airtight, freezer-safe containers to maintain its flavor and texture. To make the thawing process easier, store the Romesco sauce in portioned containers for individual use without the need to defrost the entire batch.

Below is a table outlining the process of freezing and thawing Romesco sauce:

TaskInstructions
Freezing Romesco SauceTransfer the sauce into freezer-safe containers.
Leave some space at the top to account for expansion.
Seal the containers tightly to prevent freezer burn.
Thawing InstructionsThaw the sauce in the refrigerator overnight before use.
Stir well post-thawing to guarantee proper consistency.
Use the sauce within 3 days after thawing for best quality.

More Sauce Recipes to Try

explore new sauce varieties

If you're looking to expand your culinary repertoire, consider exploring a tangy citrus infusion sauce to add a fresh zing to your dishes.

Experimenting with a spicy heat variation can bring a whole new level of excitement to your meals, perfect for those who enjoy a kick of flavor.

For a luxurious twist, venture into creating a creamy texture experiment that will elevate the richness of your favorite recipes.

Tangy Citrus Infusion

Consider exploring more sauce recipes that feature a tangy citrus infusion to elevate your culinary creations with a burst of invigorating freshness.

Advertisement

Here are three citrus-infused sauce options to try:

  1. Mojo Sauce: Originating from the Canary Islands, Mojo sauce is a vibrant blend of olive oil, garlic cloves, citrus juice, and spices. Its tangy citrus flavor pairs exceptionally well with grilled meats and seafood, adding a revitalizing kick to your dishes.
  2. Chimichurri Sauce: Hailing from Argentina, Chimichurri sauce is a mix of parsley, garlic, vinegar, oil, and a hint of citrus. This sauce offers a rejuvenating and tangy twist to your grilled dishes, making it a versatile condiment for various meats.
  3. Orange-Ginger Sauce: Create a unique citrus-infused sauce by combining fresh orange juice, grated ginger, soy sauce, and a touch of honey. This sauce provides a sweet and tangy flavor profile, perfect for drizzling over roasted vegetables or grilled chicken. Experiment with this sauce to add a delightful citrusy note to your meals.

Spicy Heat Variation

Wondering how to elevate the heat level of your Romesco sauce? Experiment with different types of spicy peppers to add a fiery kick to your sauce. Consider incorporating roasted red peppers for a subtle heat, or intensify the spiciness by adding cayenne or chili flakes. For a smoky flavor, try using chipotle peppers or adobo sauce, providing a unique twist to the traditional Romesco recipe. To achieve a milder spicy kick, include a touch of hot paprika or a dash of Tabasco sauce. For those seeking a complex and fiery flavor profile, explore the use of harissa paste, a North African chili paste known for its bold taste. Adjust the quantity of spicy ingredients in your Romesco sauce to tailor the heat level to your liking, ranging from mild to extra spicy.

Spicy IngredientsHeat LevelFlavor Profile
Roasted Red PeppersMildSubtle heat
Spicy PeppersMediumIntense spiciness
Chipotle PeppersHighSmoky twist
Hot PaprikaMild to MedSmoky, mild heat
Harissa PasteHighBold and complex flavor

Creamy Texture Experiment

Enhance the velvety texture of your Romesco sauce by experimenting with creamy additions like soaked cashews or Greek yogurt. These elements can introduce a rich and nutty flavor from the cashews while incorporating tanginess and creaminess from the Greek yogurt.

To elevate your Romesco sauce, consider the following:

  1. Soaked Cashews: By blending soaked cashews into your Romesco sauce, you can achieve a smooth and creamy texture that complements the robust flavors of the traditional ingredients. The cashews provide a luxurious mouthfeel and a subtle nuttiness to the sauce.
  2. Greek Yogurt: Incorporating Greek yogurt into your Romesco sauce can add a delightful tanginess and creaminess. This addition not only enhances the texture but also balances the flavors of the sauce, creating a harmonious blend of tastes.
  3. Personalization: Experiment with the amount of soaked cashews or Greek yogurt based on your preferences to achieve the desired consistency and flavor profile. Adjusting these creamy elements allows you to tailor the sauce to your liking, creating a unique variation that suits your palate.

Frequently Asked Questions

What Does Romesco Sauce Taste Like?

Romesco sauce has a rich, smoky, and slightly sweet flavor profile. It offers a creamy texture with a nutty undertone from almonds, along with a tangy and slightly acidic kick from vinegar. It's versatile and adds depth to dishes.

What Is the Most Popular Sauce in Spain?

When in Spain, the most popular sauce you'll find is Romesco. Its rich flavors and versatility have won over many hearts. Made with roasted red peppers, nuts, garlic, and more, Romesco adds a delicious touch to any dish.

What Is Romesco Made Of?

Romesco is made of roasted red peppers, almonds, garlic, olive oil, vinegar, tomatoes, paprika, and seasonings for a flavorful Spanish twist. Nuts like almonds or hazelnuts give it a unique texture and taste.

Advertisement

What Is Spanish Sauce Made Of?

You make Spanish sauce with roasted red peppers, garlic, nuts like almonds, olive oil, and vinegar. It's a rich, smoky, tangy blend perfect for dips, spreads, or sauces on grilled meats, veggies, or seafood.

Can Castelvetrano Olive Salsa Verde be used as a substitute for Romesco sauce in Spanish dishes?

Yes, castelvetrano olive salsa verde can be used as a substitute for Romesco sauce in Spanish dishes. The unique blend of flavors in castelvetrano olive salsa verde adds a rich and tangy taste to the dish, similar to the nutty and smoky flavors of Romesco sauce. However, castelvetrano olive salsa verde brings a fresher, herbaceous profile that can brighten up grilled vegetables, seafood, or roasted meats. Its vibrant green hue and smooth texture also make it an appealing visual substitute for Romesco sauce. Whether paired with traditional Spanish dishes or creative fusion recipes, castelvetrano olive salsa verde offers a versatile and flavorful twist. Additionally, making your own castelvetrano olive salsa recipe allows you to tailor the flavors to suit your personal taste, whether by adding extra herbs, garlic, or a touch of citrus. This customization opens up endless possibilities for pairing, making it a delightful addition to everything from classic tapas to modern culinary creations. Its ability to complement a wide variety of ingredients ensures that the castelvetrano olive salsa recipe will quickly become a go-to option in your kitchen.

Conclusion

You've now discovered the secret to creating a delectable romesco sauce that will elevate any dish to new heights. Like a burst of flavor cascading over your taste buds, this Spanish sauce will add a touch of Mediterranean magic to your meals.

So go forth and whip up a batch of romesco sauce, and watch as your culinary creations are transformed into gourmet delights. Your taste buds will thank you!
Advertisement
Advertisement

Appetizers

Camembert Stuffed Mushrooms: A Gourmet Appetizer

Bring your taste buds on a tantalizing journey with Camembert Stuffed Mushrooms – a luxurious appetizer that promises a burst of flavors and elegance.

Published

on

gourmet mushroom appetizer recipe

Indulge in the gastronomic pleasure of Camembert Stuffed Mushrooms, a gourmet appetizer that combines earthy mushrooms with creamy Camembert cheese. Sauté and season button mushrooms to create pockets for the decadent Camembert filling, enhancing both flavors and presentation. Bake at 375°F for 15-20 minutes until perfectly cooked. Serve elegantly garnished, along with wine pairings, or as a luxurious side dish. Experiment with different cheeses, herbs, and fillings to customize the recipe. Learn about storage tips for preparing ahead of time to maintain the delicious flavors. Take your culinary journey to the next level with these delightful bites.

Key Takeaways

  • Elevate appetizers with creamy Camembert-stuffed mushrooms.
  • Pair with wines for a gourmet touch.
  • Enhance with fresh herbs and balsamic glaze.
  • Experiment with cheese varieties for unique flavors.
  • Present elegantly with garnishes and plating techniques.

Ingredients

For the Camembert Stuffed Mushrooms recipe, gather white button mushrooms, Camembert cheese, fresh herbs, and sautéed mushrooms.

The white button mushrooms serve as the perfect base for the flavorful stuffing.

Camembert cheese, known for its creamy and rich taste, is the star ingredient that elevates these stuffed mushrooms to gourmet status.

The addition of fresh herbs, such as rosemary and thyme, infuses the dish with aromatic flavors that complement the earthiness of the mushrooms and the creaminess of the cheese.

Sautéed mushrooms not only provide a savory foundation for the Camembert filling but also add a depth of umami flavor to each bite.

Advertisement

The harmonious combination of mushrooms and Camembert cheese in this recipe promises a delightful and indulgent appetizer experience that will surely impress your guests with its sophisticated flavors and textures.

Preparing the Mushrooms

cooking with freshly picked mushrooms

To prepare the mushrooms for the Camembert stuffing, start by stemming them and sautéing in a cast iron pan to enhance their flavor and texture.

Here are some key steps to make sure your mushrooms are ready to be filled with the delicious Camembert cheese:

  • Clean the Button Mushrooms: Gently wipe the mushrooms with a damp paper towel to remove any dirt or debris.
  • Sauté with Olive Oil: Heat olive oil in the cast iron pan over medium heat and sauté the chopped mushroom stems until they're soft and fragrant.
  • Create Cavities: Using a small spoon, carefully remove the gills from the mushroom caps to make space for the Camembert cheese.
  • Season Well: Sprinkle the mushroom caps with salt and pepper before filling them with the creamy Camembert cheese mixture.
  • Handle with Care: Be gentle when stuffing the mushrooms to avoid breaking the delicate caps.

Making the Camembert Filling

cheesy delight in progress

Create a decadent Camembert filling by carefully placing the creamy cheese into the prepared mushroom caps. The process of making the Camembert filling for the stuffed mushrooms plays a vital role in achieving a gourmet appetizer. Camembert cheese, known for its rich and creamy texture, adds a luxurious touch to the dish. By stuffing the mushrooms with this delectable cheese, you guarantee a flavorful experience for your taste buds. When baked, the Camembert cheese melts beautifully, blending harmoniously with the earthy flavors of the mushrooms. This filling not only enhances the overall taste but also elevates the visual appeal of the dish.

To further understand the significance of the Camembert filling, let's take a look at the table below:

Key PointsEmotion
Creamy and rich cheeseIndulgent
Melts beautifully when bakedLuxurious
Enhances the flavorGourmet touch
Complements earthy mushroomsHarmonious blend
Elevates visual appealAppetizing

Stuffing the Mushrooms

creating savory stuffed mushrooms

After hollowing out the mushrooms by removing the stems, proceed to stuff them with chunks of creamy Camembert cheese.

When stuffing the mushrooms, make sure to evenly distribute the cheese filling to create a harmonious blend of flavors in each bite.

Here are some tips to perfect the stuffing process:

Advertisement
  • Gently press the Camembert cheese into the mushroom caps to guarantee they're well-filled.
  • Consider mixing the Camembert with other cheeses like Gruyère or Parmesan for a more complex flavor profile.
  • If the mushroom caps are uneven, trim them slightly to create a stable base for the stuffing.
  • Avoid overfilling the mushrooms to prevent the cheese from spilling out during baking.
  • Experiment with different sizes of Camembert cheese chunks to find the ideal balance of cheese in each mushroom.

Baking Instructions

baking bread at home

To bake the Camembert stuffed mushrooms, you should preheat your oven to 375°F as suggested for best results.

The baking process typically takes around 15-20 minutes, but it's important to keep an eye on the mushrooms to make sure they don't overcook.

Following these baking time guidelines will help achieve the perfect oozy and flavorful Camembert cheese filling.

Oven Temperature Recommendation

For best results, set your oven temperature to 350°F (175°C) when baking Camembert stuffed mushrooms. This specific temperature is ideal for ensuring that the mushrooms cook evenly while allowing the Camembert cheese to melt into a creamy consistency.

Here are some key points to take into account when it comes to the oven temperature recommendation:

  • Baking at 350°F helps prevent burning the mushrooms or overcooking the cheese.
  • The lower temperature allows the flavors of the mushroom and Camembert to meld together slowly.
  • Following the recommended oven temperature is essential for achieving the perfect texture of the stuffed mushrooms.
  • Maintaining a consistent temperature throughout the baking process is crucial for a successful outcome.
  • The 350°F setting provides the ideal environment for the ingredients to blend harmoniously, resulting in a delectable gourmet appetizer.

Baking Time Guidelines

Keep a close eye on the oven timer as the Camembert stuffed mushrooms bake at 350°F to make sure the cheese reaches a bubbly, melted consistency without becoming rubbery. The baking time typically ranges from 15 to 20 minutes at this heat.

It's important to make sure the cheese is fully melted and bubbling before removing the mushrooms from the oven. Overbaking can result in the cheese developing a rubbery texture, so be vigilant towards the end of the suggested baking time. Adjust the baking duration based on the size and thickness of the mushrooms and the quantity of cheese stuffed into each one.

Advertisement

A good indicator of readiness is achieving a golden brown color on both the cheese and mushrooms. Remember, the right baking time is essential for a perfect blend of flavors in this delectable appetizer.

Enjoy the delightful taste of melted Camembert oozing out of the button mushrooms by following these guidelines closely.

Serving Suggestions

four word phrase requested

When considering serving suggestions for your Camembert stuffed mushrooms, focus on three key points: presentation tips, pairing options, and plating ideas.

Enhance the visual appeal of your dish by garnishing with fresh parsley or a drizzle of balsamic reduction.

Complement the creamy Camembert and earthy mushrooms with suggested wine pairings to elevate the overall dining experience.

Presentation Tips

Enhance the visual appeal of your Camembert stuffed mushrooms by garnishing them with fresh parsley or herbs. To present your gourmet appetizer in an elegant and appetizing manner, consider the following tips:

Advertisement
  • Arrange the stuffed mushrooms on a sleek white platter for a sophisticated look.
  • Sprinkle a pinch of paprika or black pepper on top for a hint of color and added flavor.
  • Place small decorative toothpicks in each mushroom to make them easier to pick up and enjoy.
  • Use a garnish of microgreens like arugula or watercress to add a touch of freshness and a pop of green.
  • Serve the mushrooms on a bed of rock salt or coarse sea salt to create a visually appealing base that also helps to stabilize them on the serving dish.

Pairing Options

Consider pairing your delectable Camembert stuffed mushrooms with a light Pinot Grigio or Chardonnay to enhance the flavors of this gourmet appetizer. The crisp and invigorating notes of these wines complement the creamy texture of the Camembert and the earthy tones of the mushrooms.

To elevate your culinary experience, serve the stuffed mushrooms alongside a carefully curated charcuterie board featuring an assortment of cured meats, olives, and artisanal breads. This combination adds a variety of flavors and textures to your palate, enhancing the overall dining experience.

For a well-rounded meal, create a balanced flavor profile by pairing the Camembert stuffed mushrooms with a crisp green salad dressed in a light vinaigrette. The acidity of the salad dressing cuts through the richness of the cheese, creating a harmonious blend of tastes.

Additionally, for a more indulgent affair, consider serving the stuffed mushrooms as a side dish with a juicy grilled steak or roasted chicken, adding a hearty and savory element to your meal.

To add a finishing touch, garnish your Camembert stuffed mushrooms with fresh herbs like parsley or chives. This not only provides a pop of color but also introduces a layer of freshness to the dish, enhancing its overall appeal.

Plating Ideas

For an elegant presentation, arrange the hot Camembert stuffed mushrooms on a decorative platter. To enhance the visual appeal and taste of this gourmet appetizer, consider the following plating ideas:

Advertisement
  • Sprinkle a pinch of smoked paprika on top for a hint of smokiness.
  • Drizzle a balsamic glaze in an artistic pattern over the mushrooms for a touch of sweetness.
  • Place a small bundle of microgreens next to the stuffed mushrooms for a fresh and vibrant contrast.
  • Add a few toasted pine nuts for a delightful crunch and nutty flavor.
  • Serve the Camembert stuffed mushrooms on individual small plates lined with delicate lace doilies for a charming and sophisticated touch.

These plating suggestions will elevate your party appetizer and impress your guests with a visually stunning and delicious dish that complements the rich flavors of the Camembert-stuffed mushrooms.

Storage Tips

organizing your home office

Store your prepared Camembert stuffed mushrooms in the refrigerator for up to 24 hours before baking for best freshness.

If you wish to prepare them ahead of time, unbaked stuffed mushrooms can be frozen for up to 3 months, offering a convenient make-ahead option for future use. To freeze them, first, arrange the stuffed mushrooms on a baking sheet before transferring them to a suitable container for storage.

When it's time to bake the frozen stuffed mushrooms, remember to adjust the cooking time accordingly for best results.

Proper storage and reheating methods are essential to preserving the flavors and textures of the dish, ensuring that you can enjoy the delicious Camembert-filled mushrooms as if they were freshly made.

Recipe Variations

cooking recipe adjustments needed

To add variety and unique flavors to your Camembert stuffed mushrooms, consider exploring different recipe variations that can elevate this gourmet appetizer. Here are some ideas to enhance your stuffed mushrooms:

  • Experiment with different types of mushrooms for variety in flavors and textures.
  • Substitute Camembert cheese with other creamy cheeses like Boursin or goat cheese for a different taste profile.
  • Enhance the filling with ingredients like chopped nuts, crispy bacon, or sun-dried tomatoes for added depth of flavor.
  • Try different herbs and spices in the filling, such as thyme, sage, or smoked paprika, to customize the dish to your liking.
  • For a vegetarian option, consider adding cooked grains like quinoa or couscous to the filling mixture for a heartier appetizer.

Frequently Asked Questions

What Does Camembert Go Well With?

Camembert goes well with a variety of foods. Its creamy texture and rich flavor make it a versatile choice for pairing. Try it with fruits, crackers, or even in sandwiches for a delicious treat.

When Were Stuffed Mushrooms Popular?

Back in the day, stuffed mushrooms were all the rage during the 1950s and 1960s. They were the life of the party, stealing the spotlight with their diverse fillings and flavors, making everyone crave more.

How Best to Eat Camembert Cheese?

To enjoy Camembert cheese, savor its creamy texture and rich flavor at room temperature. Pair it with crusty bread, fresh fruit, honey, or nuts for a delightful experience. Whether baked until gooey or eaten as is, Camembert is a versatile delight.

Advertisement

What Do You Serve With Stuffed Mushrooms?

When you serve stuffed mushrooms, think of them as versatile companions that pair beautifully with various dishes. Explore options like grilled meats, salads, or even pasta. Elevate your meal by adding a protein for a satisfying experience.

Can Camembert Stuffed Mushrooms and Herby Chicken Meatballs be served together as appetizers in a party?

Yes, Camembert Stuffed Mushrooms and Herby Chicken Meatballs with yogurt sauce can be a great appetizer combination at a party. The rich and creamy Camembert complements the savory herby chicken meatballs, and the yogurt sauce adds a refreshing touch to the overall flavor profile. Together, these dishes offer a balance of indulgence and lightness, making them an appealing choice for a variety of palates. The herby chicken meatballs recipe is versatile and easy to prepare, allowing you to customize the seasoning to suit your taste preferences. Pair these appetizers with a crisp white wine or a sparkling beverage to elevate the dining experience and impress your guests. You can also serve these appetizers with a medley of colorful fresh vegetable sticks or a simple mixed greens salad to add an extra layer of freshness to the spread. The herby chicken meatball recipe pairs especially well with a drizzle of honey or a sprinkle of chili flakes for those who enjoy a hint of sweetness or a touch of heat. With their harmonious flavors and easy preparation, these appetizers are sure to become a crowd favorite at any gathering.

Conclusion

To sum up, these camembert stuffed mushrooms are a sophisticated appetizer that will impress your guests with their creamy filling and savory flavors. They're like a symphony of tastes, harmonizing perfectly in each bite.

Follow the simple steps outlined above to create this gourmet dish that's sure to elevate any meal or gathering.

Enjoy the rich and indulgent experience of these delectable camembert stuffed mushrooms.

Advertisement
Continue Reading

Appetizers

Broccoli Rabe Ricotta Toasts: A Gourmet Appetizer

Tantalize your taste buds with Broccoli Rabe Ricotta Toasts, a gourmet appetizer that promises a symphony of flavors in every bite.

Published

on

savory ricotta on toast

To make delicious broccoli rabe ricotta toasts, collect blanched broccoli rabe, creamy ricotta, olive oil, garlic, and sea salt. Use sourdough bread with a sturdy crust as the perfect foundation. Boil the broccoli rabe for a few minutes, then sauté it with garlic to enhance the flavor. Homemade ricotta requires whole milk, acid, and salt, heated to 190°F. Spread the ricotta on toasted bread, top with broccoli rabe, drizzle with olive oil, and sprinkle with sea salt. Finish with a garnish of olive oil, chili flakes, herbs, and pine nuts. Serve warm for the ultimate taste experience. These toasts provide a gourmet appetizer that will surely enhance your dining experience.

Key Takeaways

  • Elevate appetizer presentation with garnishes like chile flakes, herbs, and pine nuts.
  • Serve warm to meld ricotta and broccoli rabe flavors for a gourmet experience.
  • Choose wines like Sauvignon Blanc or Chardonnay to complement the dish.
  • Layer creamy ricotta evenly on toasted sourdough for a luxurious base.
  • Balance flavors by pairing bitter broccoli rabe with acidic wines like Pinot Grigio or Prosecco.

Ingredients for Broccoli Rabe Ricotta Toasts

To create delicious Broccoli Rabe Ricotta Toasts, gather blanched broccoli rabe, creamy ricotta, olive oil, garlic, sea salt, and sourdough bread.

The olive oil plays an essential role in sautéing the broccoli rabe to perfection, enhancing its natural flavors and ensuring a delightful texture. A drizzle of olive oil also adds richness and depth to the creamy ricotta, creating a harmonious balance of flavors.

Additionally, the sea salt serves to elevate the taste profile of the dish, bringing out the nuances of the ingredients and providing a savory contrast to the slight bitterness of the broccoli rabe.

When preparing your Broccoli Rabe Ricotta Toasts, remember to use a light hand with the olive oil and sea salt to avoid overpowering the delicate flavors of the dish. These ingredients work together synergistically to create a gourmet appetizer that's both satisfying and nutritious.

Selecting the Best Sourdough Bread

savoring artisanal sourdough loaves

Consider selecting a sourdough bread with a firm crust and airy interior to guarantee the best texture for your Broccoli Rabe Ricotta Toasts.

Opt for slices that are cut to a half-inch thickness to make sure they can hold the toppings effectively.

Advertisement

Before broiling, drizzle a touch of olive oil on the bread slices; this not only enhances the flavor but also adds a delightful crispiness to the toasts.

When choosing your sourdough, look for bread that displays visible nooks and crevices, as these will help absorb the toppings efficiently, creating a harmonious blend of flavors with each bite.

Additionally, a sprinkle of salt on the bread before broiling can enhance the taste profile of the toasts.

Blanching Broccoli Rabe Perfectly

blanching broccoli rabe technique

To achieve perfectly blanched broccoli rabe, make sure to boil it in salted water for 2-3 minutes until it reaches a crisp-tender texture. Once the broccoli rabe has been boiled, drain it and make certain to squeeze out excess water before chopping it for further use.

Blanching the broccoli rabe not only helps to retain its vibrant green color but also guarantees a slightly tender texture, making it ideal for the gourmet appetizer. Additionally, proper blanching is crucial to remove any bitterness that may be present in the broccoli rabe.

After blanching, the broccoli rabe can be sautéed with garlic and a drizzle of olive oil. This step adds a flavorful touch to the dish, enhancing the overall taste profile of the Broccoli Rabe Ricotta Toasts. Remember, the key to a successful dish lies in the precise blanching of the broccoli rabe and the careful selection of ingredients like olive oil for sautéing.

Advertisement

Making Homemade Ricotta Cheese

homemade ricotta cheese recipe

For homemade ricotta cheese, you'll need whole milk, acid like lemon juice or vinegar, and salt heated to 190°F to form curds. The acidity in the lemon juice or vinegar helps to separate the curds from the whey in the milk, resulting in the creamy ricotta texture.

After heating the mixture, the curds are then strained in a cheesecloth-lined colander and left to drain for approximately 20 minutes to achieve the desired consistency. By adjusting the hanging time, you can control the level of moisture in the ricotta, with longer hanging times producing drier ricotta cheese.

Remember to refrigerate any leftover ricotta; it can be stored for up to a week and utilized in various recipes, such as the delectable Broccoli Rabe Ricotta Toasts. For a sweet twist, consider incorporating honey and lemon into the ricotta.

If you seek fresh ingredients, head over to the Eckerton Hill Farm market stand in Union Square.

Assembling the Toasts With Flair

decorating toast creatively and elegantly

For a gourmet twist on your toast, layer the creamy ricotta onto toasted slices of sourdough bread and top it with a sautéed broccoli rabe mixture. Begin by spreading a generous amount of ricotta evenly on each slice, ensuring a creamy base for the flavorful toppings.

In a separate pan, sauté the broccoli rabe with garlic and olive oil until tender and aromatic. Once the broccoli rabe is cooked to perfection, spoon it over the ricotta-covered toasts, distributing it evenly across the surface.

Drizzle a final touch of high-quality olive oil over the assembled toasts to enhance the richness of the dish. To add a burst of flavor, sprinkle a pinch of sea salt over the toasts, providing a satisfying crunch with each bite.

Advertisement

Serve the broccoli rabe ricotta toasts warm, allowing the flavors to meld together for a delightful gourmet appetizer that will impress your guests. The combination of jammy peppers and whipped ricotta adds a luxurious creaminess and a subtle sweetness that perfectly balances the slightly bitter edge of the broccoli rabe. Each bite offers a harmonious blend of textures, from the crisp toast to the velvety ricotta topping. These toasts are not only visually stunning but also a true celebration of bold, vibrant flavors.

Garnishing for Extra Flavor

flavorful garnishes enhance dishes

Enhance the flavor profile of your broccoli rabe ricotta toasts by incorporating a variety of garnishes to elevate the dish to a gourmet level. When it comes to garnishing, consider adding a drizzle of high-quality olive oil to enhance the richness of the ricotta and add a luxurious mouthfeel to each bite. For those who enjoy a bit of heat, a sprinkle of chile flakes can provide a subtle kick that complements the creamy ricotta and bitter broccoli rabe. To add a pop of color and freshness, garnish with fresh herbs like parsley or basil, which not only elevate the visual appeal but also introduce a burst of herbaceous flavor. Additionally, consider incorporating toasted pine nuts for a crunchy texture contrast against the soft ricotta and tender broccoli rabe. By carefully selecting and combining these garnishes, you can create a harmonious blend of flavors and textures that will impress your guests.

GarnishDescription
Olive OilEnhances richness and adds a luxurious touch
Chile FlakesProvides a subtle kick to complement flavors
Fresh HerbsAdds color, freshness, and herbaceous notes
Toasted Pine NutsOffers a crunchy texture contrast

Serving and Presentation Tips

serving and plating guidance

Consider arranging the broccoli rabe ricotta toasts on a stylish serving platter to enhance the presentation and impress your guests. By garnishing the toasts with fresh herbs like parsley or basil, you can add a vibrant pop of color that boosts the overall visual appeal.

Serve the toasts warm to guarantee that the flavors of the ricotta and broccoli rabe meld together perfectly, providing a delightful culinary experience for your guests. Sprinkle a dash of red pepper flakes on top to introduce a subtle heat that complements the dish's flavors.

To further enhance the taste, drizzle a light amount of olive oil over the toasts before serving, and season with a pinch of salt and pepper to elevate the flavors. The combination of the olive oil, salt, and pepper will add depth to the dish, creating a well-balanced appetizer that's sure to be a hit.

Pair these delightful toasts with a glass of white wine for a sophisticated touch that will elevate your culinary presentation.

Wine Pairing Suggestions

wine and food pairings

When pairing wines with your Broccoli Rabe Ricotta Toasts, it's important to take into account the basics of wine pairing and how different flavors can complement each other.

Understanding the complementary flavor profiles of wines like Sauvignon Blanc, Chardonnay, Pinot Grigio, and Pinot Noir can elevate your dining experience.

Advertisement

Wine Pairing Basics

Pair a crisp Sauvignon Blanc or a light Pinot Grigio with broccoli rabe ricotta toasts to complement the dish's flavors. These white wines work harmoniously with the dish's creamy ricotta and slightly bitter broccoli rabe. The acidity in Sauvignon Blanc and Pinot Grigio helps cut through the richness of the ricotta while balancing the earthy bitterness of the broccoli rabe.

When preparing the toasts, consider using olive oil and minced garlic to enhance the overall taste profile. Additionally, a Chardonnay with good acidity or a dry Riesling can provide a touch of sweetness that contrasts and enhances the savory elements of the dish.

Experimenting with different white wine varietals can lead to discovering the ideal pairing that elevates the flavors of the broccoli rabe ricotta toasts. Remember, the right wine pairing can significantly enhance your dining experience, bringing out the best in both the dish and the wine.

Complementary Flavor Profiles

Wondering which wines best complement the flavors of broccoli rabe ricotta toasts?

The bitterness of the broccoli rabe pairs harmoniously with acidic white wines like Sauvignon Blanc or Pinot Grigio.

Advertisement

The creamy texture of the ricotta calls for a light and crisp wine such as Chardonnay or Prosecco.

The savory notes from the garlic and olive oil in the dish find a delightful match in a dry rosé or a light-bodied red like Pinot Noir.

For a touch of elegance, consider serving these toasts with a sparkling wine like Champagne.

If you prefer a non-alcoholic option, invigorating lemonade or fruity iced tea can provide a balanced flavor profile to accompany the dish.

When seeking the perfect wine pairing for your broccoli rabe ricotta toasts, think about how these flavors interact and complement each other to elevate your dining experience.

Advertisement

Frequently Asked Questions

What Takes the Bitterness Out of Broccoli Rabe?

To take the bitterness out of broccoli rabe, you can blanch it in salted water or sauté it with garlic, olive oil, and chili flakes. Pairing it with creamy ricotta cheese and a drizzle of olive oil can also help balance the flavors.

Is Broccoli Rabe More Nutritious Than Broccoli?

In the world of nutrition, broccoli rabe reigns supreme over its regular broccoli counterpart. Packed with vitamins and minerals, broccoli rabe takes the crown for being a nutrient powerhouse, offering a healthier option.

What Is Broccoli Rabe Good For?

Broccoli rabe is good for adding a dose of vitamins A, C, and K, along with iron and fiber, to your diet. Its slightly bitter taste pairs well with creamy ricotta, providing a tasty and nutritious combo.

Does Broccoli Rabe Taste Good?

Yes, broccoli rabe tastes good! Its slightly bitter and nutty flavor, when cooked right, offers a tender texture and vibrant color. Pairing it with ricotta on toasts creates a delicious balance, enhancing your culinary experience.

Can Crispy Brussel Sprouts With Chipotle Cream be a Gourmet Appetizer like Broccoli Rabe Ricotta Toasts?

Indulge in a gourmet appetizer experience with a crispy brussel sprouts recipe paired with chipotle cream. This dish offers a unique twist on traditional appetizers like broccoli rabe ricotta toasts. The perfect combination of flavors and textures makes it a standout dish for any sophisticated gathering. The smoky heat of the chipotle cream perfectly complements the caramelized exterior of the sprouts, creating an irresistible balance of spice and sweetness. Whether served at a casual dinner party or a formal soirée, this crispy brussel sprouts recipe is guaranteed to impress your guests with its gourmet presentation and bold flavors. For an added touch, you can garnish with toasted almonds or a sprinkle of parmesan to elevate the dish even further.

Advertisement

Conclusion

To sum up, these broccoli rabe ricotta toasts are a gourmet delight that will impress your guests with their sophisticated flavors and elegant presentation.

Like a symphony of flavors dancing on your taste buds, each bite offers a harmonious blend of creamy ricotta, vibrant broccoli rabe, and toasted sourdough.

Elevate your next gathering with this appetizer that's sure to leave a lasting impression on all who indulge.

Continue Reading

Appetizers

Curried Peanut Dip: A Spicy and Nutty Appetizer

Indulge in the fiery fusion of red curry paste, coconut milk, and peanut butter in a flavorful dip that will leave your taste buds craving more.

Published

on

spicy nutty curry dip

Experience the robust flavors of a curried peanut dip, made with red curry paste, coconut milk, fish sauce, and peanut butter for a spicy and nutty appetizer. This combination provides plant-based proteins, antioxidants, and healthy fats, resulting in a well-rounded and delicious dish. To prepare, sauté red curry paste, simmer with coconut milk, and mix in peanut butter, vinegar, fish sauce, and honey. Adjust the spice levels by altering the amount of curry paste used. Use it as a dip for cucumber spears or as a dressing for salads. Get creative with serving options and store in the refrigerator for up to four days. Enjoy the blend of fiery spices and rich nuttiness.

Key Takeaways

  • Harmonious blend of red curry paste, peanut butter, and coconut milk for a spicy and nutty flavor.
  • Rich in plant-based protein, antioxidants, and healthy fats.
  • Versatile dip for lettuce wraps, cucumber spears, salads, or rice noodles.
  • Adjust spice levels easily with honey, curry paste, or cayenne pepper.
  • Ideal make-ahead option with up to 4-day fridge storage for peak freshness.

Flavorful Ingredients for Curried Peanut Dip

What makes the curried peanut dip so flavorful? The secret lies in the harmonious combination of key ingredients such as peanut sauce, red curry paste, coconut milk, fish sauce, honey, and rice vinegar.

The rich and creamy texture of the dip is achieved through the blend of coconut milk and peanut butter, creating a luscious base that complements the bold flavors of the red curry paste and fish sauce. This unique fusion results in a dip that boasts a perfect balance of spicy, savory, and sweet notes, appealing to a wide range of taste preferences.

The incorporation of red curry paste brings a fiery kick to the dip, while the coconut milk adds a subtle sweetness that enhances the overall flavor profile. The fish sauce contributes a depth of umami flavor, further elevating the taste experience. Together, these ingredients work in harmony to create a decadent and satisfying appetizer that's sure to impress your guests.

Health Benefits of Spicy Peanut Dip

spicy peanut dip benefits

Spicy peanut dip offers a nutritious boost with its rich plant-based protein content from peanut butter. This flavorful dip combines the goodness of peanut butter, coconut milk, and red curry paste to create a tasty and healthful appetizer.

Here are some health benefits of enjoying this spicy peanut dip:

  • Plant-Based Protein: Peanut butter is a great source of plant-based protein, essential for muscle repair and growth.
  • Antioxidants: The red curry paste in the dip provides antioxidants that help protect your cells from damage caused by free radicals.
  • Healthy Fats: Both coconut milk and peanut butter contribute healthy fats, which are important for brain function and overall well-being.
  • Balanced Flavors: The dip offers a delicious blend of flavors without the need for added sugars or unhealthy fats.
  • Nutrient-Rich Pairing: Enjoying the dip with fresh vegetables adds essential vitamins, minerals, and fiber to your snack, promoting overall health and wellness.

Step-by-Step Preparation Instructions

step by step recipe guide

To prepare the curried peanut dip, start by heating vegetable oil and sautéing jarred red curry paste until fragrant. This process helps to release the flavors of the red curry paste, enhancing the overall taste of the dip.

Next, whisk in coconut milk and simmer the mixture until it's well combined. This step allows the flavors to meld together, creating a rich and creamy base for the peanut dip.

Advertisement

After that, remove the mixture from the heat and stir in creamy peanut butter, vinegar, fish sauce, and honey. These ingredients add depth and complexity to the dip, balancing the spiciness of the curry paste with the sweetness of the honey.

Don't forget to season the dip with salt to taste. Once seasoned, allow the dip to cool down before transferring it to a container and chilling it in the refrigerator. This chilling process helps the flavors to develop further, making it an ideal make-ahead appetizer that can be stored for up to four days in an airtight container.

Serving Suggestions and Pairings

great for meal planning

Consider how the curried peanut dip can elevate your dining experience with its versatile serving options and complementary pairings.

  • Drizzle the peanut sauce over ground chicken lettuce wraps for a flavorful twist.
  • Enjoy it as a delicious dip for Persian cucumber spears, adding a spicy and nutty element to the snack.
  • Create a peanutty dressing by thinning out the dip, perfect for salads or rice noodles.
  • Embrace the dip's versatility by exploring creative serving options, enhancing the overall dining experience.
  • Its spicy-funky-salty-sweet balance makes it a versatile accompaniment for various dishes, appealing to a wide range of palates.

Experiment with different ways to utilize this flavorful dip to enhance your meals. Whether you prefer it as a dip for cucumber spears or as a dressing for rice noodles, the curried peanut dip offers a delightful combination of flavors that will surely impress your taste buds.

Tips for Adjusting Spice Levels

spice level adjustment tips

To adjust the spice level of your curried peanut dip, you can modify the amount of red curry paste used.

For those seeking more heat, consider adding extra curry paste or a pinch of cayenne pepper.

Conversely, if you prefer a milder taste, reduce the curry paste or balance it with a touch of coconut sugar or honey.

Spice Level Adjustment

Adjusting the spice level of the curried peanut dip can be easily achieved by tweaking the amount of red curry paste used. To customize the heat of your dip to your preference, consider the following tips:

Advertisement
  • Increase the spiciness by incorporating chopped fresh chilies or a dash of cayenne pepper.
  • Balance the heat with a touch of sweetness from honey or maple syrup.
  • For a milder version, reduce the amount of curry paste and add more coconut milk or peanut butter.
  • Taste the dip as you go and fine-tune the spice levels gradually to suit your palate.
  • Experiment with small increments of ingredients to find the perfect balance between the heat from the curry paste and the creaminess from the peanut sauce.

Balancing Heat Levels

To achieve a well-balanced heat level in your curried peanut dip, experiment with adjusting the amount of red curry paste added to the recipe.

Red curry paste is the key ingredient that determines the spice levels of this spicy-sweet dip.

If you prefer a hotter dip, consider adding extra chili paste or red pepper flakes to intensify the heat.

Conversely, if you find the dip too spicy, balance it out by incorporating a touch of sweetness from honey or maple syrup.

For a milder version of the dip, reduce the quantity of curry paste and introduce more coconut milk or peanut butter into the mix.

Remember, adjusting the spice levels is a personal preference, so feel free to customize the heat intensity based on your liking.

Advertisement

Experimenting with different types of chili paste or hot sauces can also help you tailor the dip's spiciness to suit your taste buds perfectly.

Personalized Flavor Preferences

Experiment with the red curry paste quantity to customize the spice level of your curried peanut dip according to your flavor preferences. Adjusting the amount of red curry paste allows you to fine-tune the spiciness of the dip to suit your individual tastes.

Here are some tips for personalizing the flavors of your curried peanut dip:

  • Increase the heat by incorporating extra chili paste or a sprinkle of cayenne pepper.
  • For a milder flavor, reduce the amount of curry paste or balance it out with more coconut milk.
  • Personalize the dip to suit your taste preferences by experimenting with different levels of spiciness.
  • Tailor the dip to your liking by gradually adding spices and tasting as you go along to achieve the perfect balance of flavors.

Storage and Shelf Life Information

shelf life details provided

For peak freshness and flavor retention, store the curried peanut dip in a chilled, airtight container.

This dip, made with peanut butter and curry, can be prepared up to 4 days in advance. To guarantee its quality, it's essential to keep it chilled throughout, especially when using it for meal prep or snacking over the week.

The flavors of the dip only get better as they meld together when allowed to chill properly. By storing it in an airtight container, the dip's taste and texture will remain intact for several days. Remember that proper storage is key to maintaining the dip's quality.

Advertisement

Whether it's for a quick snack or part of your meal prep routine, keeping the curried peanut dip chilled and in an airtight container ensures that you can enjoy it at its best for days to come.

Creative Ways to Use Leftover Dip

repurposing leftover dip creatively

Leftover dip can be repurposed in various creative ways to elevate your meals. From using it as a spread for sandwiches to transforming it into a creamy salad dressing or a marinade for proteins, there are endless possibilities to explore.

Get inspired by these tasty dip transformations and dip-inspired recipes to make the most out of your leftovers.

Tasty Dip Transformations

Consider incorporating the extra curried peanut dip into various dishes to add a burst of flavor and creativity to your meals. Here are some innovative ways to transform your leftover dip:

  • Spread it on sandwiches or wraps for a zesty kick.
  • Mix it into cooked grains like quinoa or rice to enhance your side dish.
  • Thin it out with water or broth to create a creamy salad dressing with a Thai peanut twist.
  • Add it to stir-fries or noodle dishes for a pop of exotic flavor.
  • Use it as a filling for baked stuffed bell peppers or mushrooms for a unique appetizer experience.

These simple yet creative transformations will make sure your leftover dip doesn't go to waste. By trying out these versatile ideas, you can turn a single dish into multiple culinary delights.

Dip-Inspired Recipes

To elevate your culinary creations and make the most out of your leftover curried peanut dip, explore these dip-inspired recipes that offer a blend of creativity and flavor.

Transform the dip into a flavorful sauce by mixing it with red curry sauce, curry paste, and fish sauce. This versatile sauce can be used to marinate grilled chicken or tofu, infusing them with a rich and spicy taste.

Advertisement

Alternatively, use the dip as a spread for sandwiches or wraps to add a delightful kick to your lunchtime meals. For a lighter option, thin out the dip with water or citrus juice to create a unique salad dressing that will tantalize your taste buds.

Additionally, consider mixing the dip with cooked noodles or rice for a quick and satisfying meal that's bursting with nutty flavors. You can also repurpose the dip into a marinade for vegetables or proteins before grilling or roasting them to perfection.

Embrace the versatility of your leftover peanut dip and experiment with these creative recipes to elevate your dining experience.

Feedback and Reviews From Users

user feedback and reviews

Users have shared glowing reviews about the creamy, spicy-sweet Curried Peanut Dip, praising its versatility and delicious flavor profile. Here are some key points highlighted in their feedback:

  • The blend of red curry paste, peanut butter, coconut milk, and fish sauce creates a harmonious flavor explosion.
  • Its ability to complement a wide range of foods such as rotisserie chicken, jammy eggs, cucumber spears, and roasted sweet potatoes has been widely appreciated.
  • Many users find it to be an ideal desk-friendly lunch option due to its perfect balance of spicy, funky, salty, and sweet notes.
  • The quick and straightforward preparation process of the dip has made it a convenient go-to choice for various occasions.
  • Overall, the rave reviews emphasize the well-rounded taste profile achieved through the combination of ingredients like red curry paste, fish sauce, peanut butter, coconut milk, honey, and rice vinegar.

Frequently Asked Questions

What Is Peanut Curry Made Of?

Peanut curry typically consists of key ingredients like peanut butter, red curry paste, coconut milk, and a blend of spices. You'll also find fish sauce, rice vinegar, honey, and vegetable oil to boost the flavors.

What Snacks to Dip in Peanut Butter?

For a tasty snack, dip vegetables like carrots and cucumbers or fruits like apples and bananas in peanut butter. Pretzels and crackers add crunch, while toast and bagels offer a heartier option. Granola bars and rice crispy treats are delicious dipped too.

Does Panang Curry Have Peanuts?

You know, Panang curry doesn't usually have peanuts. It's more about that creamy texture and subtle spice. But hey, if you're craving that nutty kick, maybe try out that Curried Peanut Dip!

Advertisement

Can I Substitute Elote Corn Dip for Curried Peanut Dip as an Appetizer Option?

Looking for a unique appetizer option? Consider substituting the curried peanut dip with a spicy elote corn dip recipe. This flavorful and creamy dip features all the delicious flavors of elote, making it a perfect option for a tasty and satisfying appetizer. Give it a try and impress your guests! Pair the elote corn dip recipe with crunchy tortilla chips or fresh vegetable sticks for an irresistible snack that’s sure to be a hit. The combination of smoky spices, tangy lime, and creamy cheese creates a bold and unforgettable flavor profile. Whether you’re hosting a backyard barbecue or a game day gathering, this elote corn dip recipe is guaranteed to steal the spotlight! Not only is this elote corn dip recipe easy to make, but it also offers a versatile serving option that can suit any occasion. You can even customize the heat level by adjusting the amount of chili powder or jalapeños to cater to your guests’ preferences. Once you serve this crowd-pleasing elote corn dip recipe, don’t be surprised if it’s the first dish to disappear from the table!

Conclusion

To sum up, the curried peanut dip offers a perfect blend of spiciness and nuttiness, making it a versatile appetizer for any occasion. With its unique flavor profile and health benefits, this dip is sure to impress your guests.

So, next time you're looking for a flavorful addition to your menu, give this spicy and nutty dip a try. As they say, 'variety is the spice of life,' and this dip certainly adds a flavorful twist to any meal.

Continue Reading
Advertisement

Affiliate Disclaimer
As an affiliate, we may earn a commission from qualifying purchases. We get commissions for purchases made through links on this website from Amazon and other third parties.

Advertisement

Vetted

affordable espresso machines reviewed affordable espresso machines reviewed
Vetted1 day ago

15 Best Home Espresso Machines Under $500: Brewing Quality Coffee on a Budget

Discover top home espresso machines under $500 for quality coffee on a budget, ensuring your brews delight without breaking the...

top 15 compact espresso machines top 15 compact espresso machines
Vetted1 day ago

15 Best Small Home Espresso Machines for Your Daily Caffeine Fix

Dive into the diverse world of small home espresso machines with 15 top picks that promise the perfect caffeine fix.

morning fix coffee machines morning fix coffee machines
Vetted2 days ago

15 Best Espresso Machines and Coffee Makers for Your Morning Fix

Open the door to your perfect morning ritual with these 15 espresso machines and coffee makers, designed to elevate your...

easy espresso machine review easy espresso machine review
Vetted2 days ago

15 Best Easy Espresso Machines for Your Morning Caffeine Fix

Tired of complicated espresso machines? Find the perfect easy-to-use solution for your morning caffeine fix with these 15 top picks!

top home espresso machines top home espresso machines
Vetted2 days ago

15 Best Home Espresso Machines in 2025: From Breville to DeLonghi – Reviews & Recommendations

Discover the top home espresso machines from Breville to DeLonghi in 2025, including innovative features and stylish designs - find...

top espresso machines reviewed top espresso machines reviewed
Vetted2 days ago

15 Best 20-Bar Espresso Machines for the Ultimate Coffee Experience

Hungry for the ultimate coffee experience at home? Discover the top 15 20-bar espresso machines for expert-level brewing and velvety...

manual espresso machine recommendations manual espresso machine recommendations
Vetted2 days ago

15 Best Manual Espresso Machines for Crafting the Perfect Cup at Home

Get ready to elevate your espresso game with the top 15 manual machines for crafting the perfect cup at home...

at home espresso machines guide at home espresso machines guide
Vetted2 days ago

15 Best At-Home Espresso Machines for Your Daily Caffeine Fix

Jumpstart your mornings with the top 15 at-home espresso machines - J...

top espresso machines reviewed top espresso machines reviewed
Vetted2 days ago

15 Best Single Group Espresso Machines for Making Barista-Quality Coffee at Home

Sift through the top single group espresso machines for crafting barista-quality coffee at home, and discover the perfect blend of...

budget friendly espresso machines list budget friendly espresso machines list
Vetted2 days ago

15 Best Low Budget Espresso Machines for Coffee Lovers on a Budget

Jumpstart your mornings with the 15 best low-budget espresso machines that promise quality brews without breaking the bank.

single cup espresso machines single cup espresso machines
Vetted2 days ago

15 Best Single Cup Espresso Machines for Your Perfect Morning Brew

Hungry for the perfect morning brew? Discover the top 15 single cup espresso machines for a personalized coffee experience.

affordable espresso machines round up affordable espresso machines round up
Vetted3 days ago

15 Best Home Espresso Machines Under $200 for Coffee Lovers on a Budget

Get ready to uncover top home espresso machines under $200 with features like 20 Bar Pump and NTC Temperature Control...

Trending