Appetizers
Castelvetrano Olive Salsa Verde: A Fresh and Flavorful Condiment
Indulge in a vibrant Castelvetrano olive salsa verde, a zesty condiment perfect for elevating your dishes with its blend of herbs and olives.
Castelvetrano olive salsa verde is a delicious condiment that combines the smooth Castelvetrano olives with fresh herbs, perfect for enhancing both meats and veggies. The ingredients include a blend of olives, parsley, tarragon, and anchovies, with added flavors from garlic, capers, vinegar, and olive oil. This versatile salsa verde is a great addition to grilled meats, such as salmon, giving them a tangy twist. You can also pair it with roasted veggies, use it as a dip, or spread it on bruschetta for an explosion of flavor. Storing it in airtight containers will keep it fresh for up to three days. For a personal touch, try adding variations like lemon juice or red pepper to customize the taste according to your liking.
Key Takeaways
- Castelvetrano olives and fresh herbs create a vibrant and zesty salsa verde.
- Perfect for pairing with grilled meats, fish, roasted veggies, or as a dip.
- Offers a tangy, briny, and slightly sweet flavor profile.
- Versatile condiment with buttery, briny, and herbaceous notes.
- Enhance with lemon juice, jalapeño, or different olive varieties for personalized taste.
Ingredients
When making Castelvetrano Olive Salsa Verde, you'll need to gather the following ingredients: Castelvetrano olives, known for their important, buttery flavor that adds a unique sweetness and vibrant green color to the salsa verde. These olives play a vital role in providing a delightful briny and slightly fruity note to the condiment.
Additionally, you'll require fresh herbs such as parsley and tarragon to infuse the salsa with a zesty and aromatic flavor profile. Finally, olive oil is essential to bind the ingredients together and enhance the overall texture of the green olive salsa verde.
Combining these ingredients results in an invigorating and tangy condiment that pairs exceptionally well with grilled meats or roasted vegetables. The Castelvetrano olives, in particular, bring a distinct taste that elevates the salsa verde, making it a versatile accompaniment to a variety of dishes.
Cooking Instructions
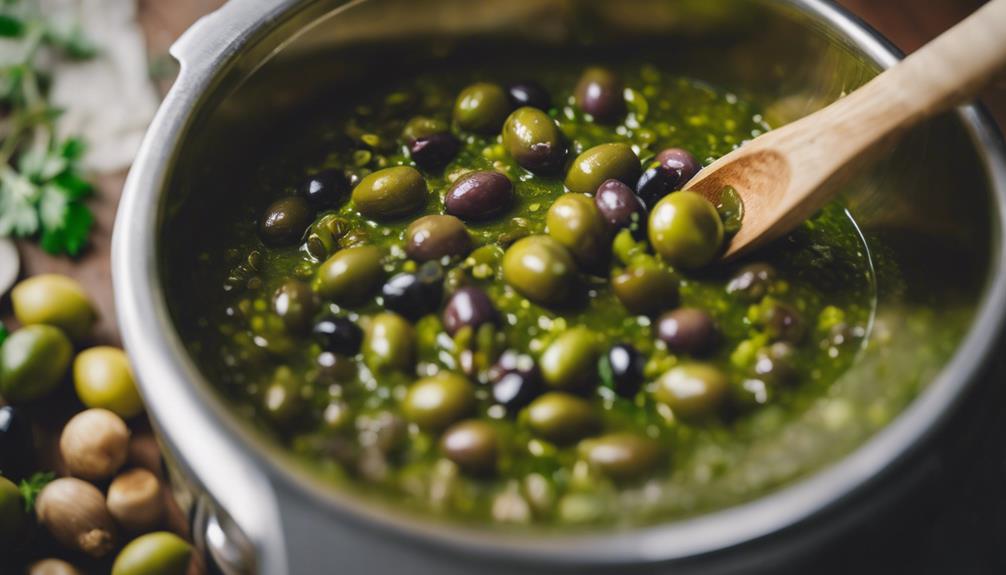
To prepare the Castelvetrano Olive Salsa Verde, start by combining the chopped olives, parsley, scallions, tarragon, and anchovies in a bowl. Add in garlic, capers, vinegar, and olive oil. Season the mixture with salt and pepper to taste. Adjust the flavors by adding more vinegar for a tangier profile or more olive oil for a milder taste. This versatile salsa verde can complement a variety of dishes, including grilled meats like salmon with green olives. Once all the ingredients are well mixed, the salsa verde is ready to be served.
When cooking salmon with green olives, consider using the Castelvetrano Olive Salsa Verde as a flavorful topping. Season the salmon with salt and pepper before grilling or baking. Once the salmon is cooked to perfection, spoon a generous amount of the olive salsa verde on top to enhance the dish with its fresh and tangy flavors. Enjoy this delightful combination as a delicious and nutritious meal option.
Serving Suggestions
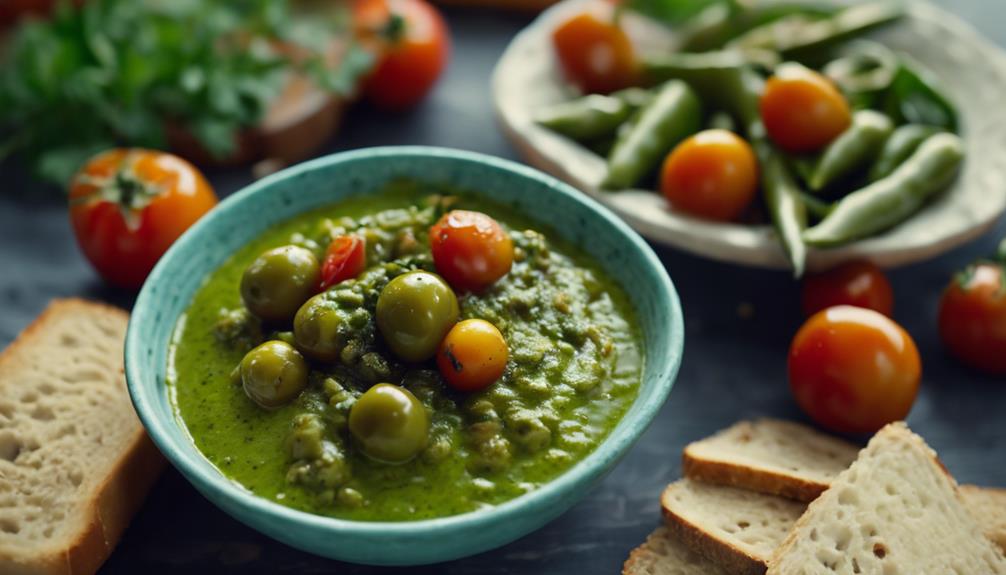
Explore creative ways to enjoy the vibrant flavors of the Castelvetrano Olive Salsa Verde with various dishes and snacks. Here are some serving suggestions to make the most of this zesty condiment:
- Pair it with Grilled Meats or Fish: Elevate your grilled dishes by serving the Olive Salsa Verde as a tangy and invigorating topping, enhancing the flavors with a hint of salt and lemon juice.
- Top Roasted Vegetables: Transform simple roasted vegetables into a gourmet delight by drizzling them with the Olive Salsa Verde, adding a burst of olive flavor to each bite.
- Use it as a Dip: Enjoy the Olive Salsa Verde as a versatile dip for crusty bread or pita chips, offering a delightful combination of tangy olives, salt, and zesty lemon juice.
- Complement a Variety of Dishes: Whether as a dip, topping, or side condiment, the bright and sharp flavors of the salsa verde can enhance a wide range of dishes, providing a fresh and flavorful touch to your culinary creations.
Pairing Options
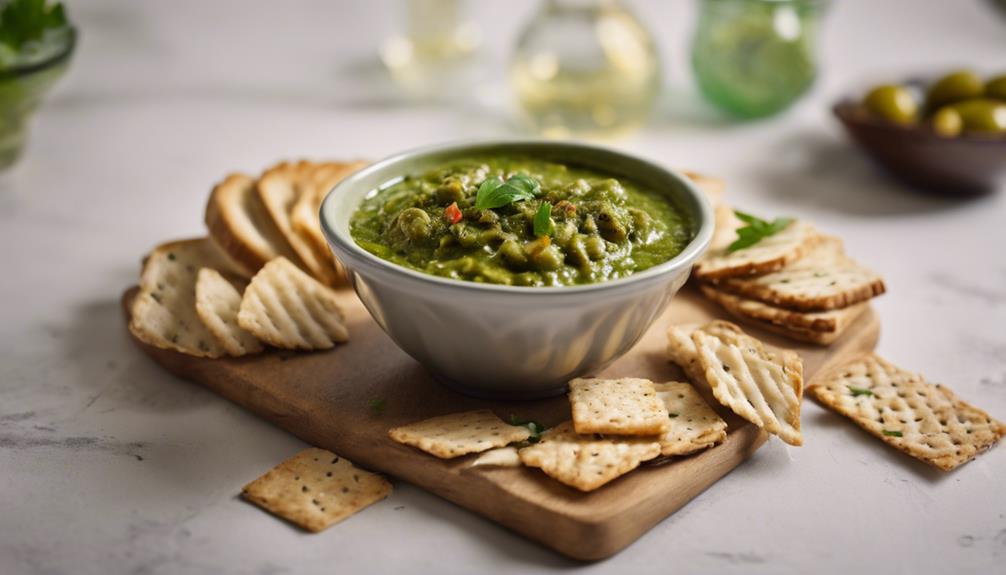
Enhance your culinary experience by discovering the perfect pairings for Castelvetrano Olive Salsa Verde. This green condiment complements a variety of dishes, making it a versatile addition to your meals.
When it comes to grilled meats like chicken or steak, the tangy flavor of the Olive Salsa Verde adds a revitalizing touch. Roasted vegetables such as asparagus, zucchini, or bell peppers also benefit from this condiment, enhancing their natural flavors with a vibrant twist. For seafood lovers, consider topping seared scallops or grilled shrimp with the Olive Salsa Verde for a zesty and invigorating pairing.
Additionally, you can explore using the Olive Salsa Verde as a topping for bruschetta or crostini, providing a burst of flavor to your appetizers. If you're looking to add a Mediterranean flair to your salads, incorporating this condiment into a salad with feta and cucumbers can elevate the dish with its tangy notes.
With a splash of white wine vinegar, the flavors of the Olive Salsa Verde truly come alive, enhancing your culinary creations with each bite. Consider using it as a marinade on a Sheet Pan dinner for a green and flavorful twist.
Storage Tips
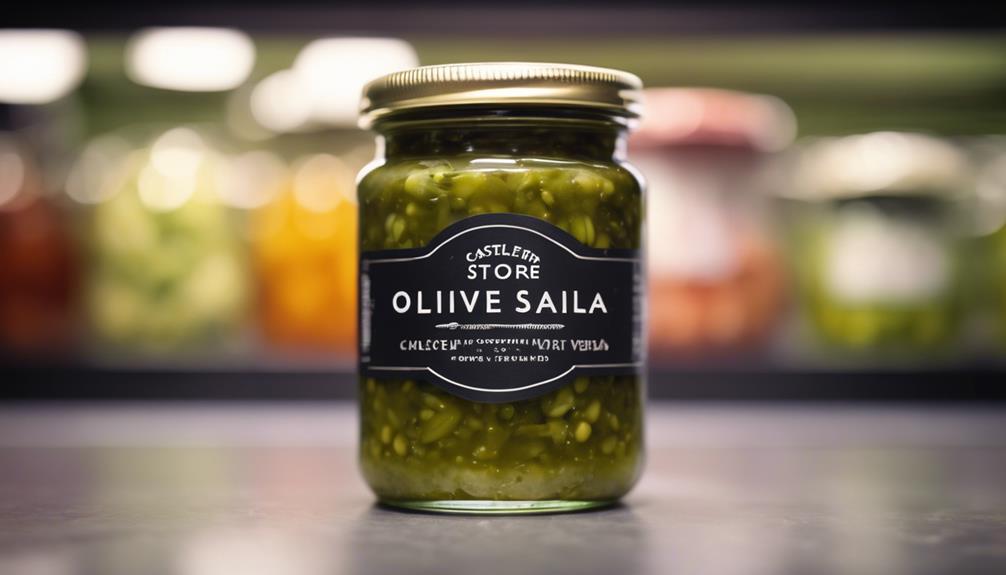
To guarantee the best storage of your Castelvetrano Olive Salsa Verde, it's crucial to select an airtight container.
Refrigerate the salsa verde promptly, following the recommended storage guidelines to maintain its freshness.
Remember to consume any leftovers within three days for the best flavor experience.
Proper Container Selection
For the best storage of your Castelvetrano Olive Salsa Verde, make sure you choose an airtight container that's just the right size to minimize air exposure. To guarantee your salsa stays fresh and flavorful, consider these tips:
- Opt for glass or plastic containers with tight-fitting lids to maintain the salsa's texture and taste.
- Avoid using metal containers as the acidity of the ingredients can react with the metal, affecting the flavor.
- Select a container size that fits the salsa without leaving excess air space, which can lead to quicker spoilage.
- Store leftover salsa in the chosen airtight container promptly to preserve its vibrancy and prevent drying out.
Proper container selection plays an essential role in extending the shelf life of your Castelvetrano Olive Salsa Verde while safeguarding its delicious qualities. Choose wisely to enjoy this fresh condiment for as long as possible.
Refrigeration Recommendations
Properly refrigerate any leftover Castelvetrano Olive Salsa Verde in an airtight container to maintain its freshness and flavors for up to 3 days. Refrigeration is essential in preserving the integrity of the salsa verde, ensuring both food safety and quality.
By storing the salsa verde in the refrigerator, you can prevent spoilage and maintain its freshness for an extended period. Remember to stir well before serving any leftovers to redistribute the flavors evenly.
It's vital to avoid leaving Castelvetrano Olive Salsa Verde at room temperature for prolonged periods as this can compromise its quality and safety. By following these refrigeration recommendations and storing the leftover salsa verde properly, you can enjoy its fresh and vibrant flavors for up to three days.
Make sure to seal the container tightly to prevent any odors from the refrigerator affecting the salsa verde's taste.
Shelf Life Advice
Store any remaining Castelvetrano Olive Salsa Verde in the refrigerator to preserve its freshness and flavors for up to three days. Here are some essential tips for maximizing the shelf life of your salsa verde:
- Use an Airtight Container: Transfer the leftover salsa verde into a clean, airtight container before placing it in the refrigerator. This helps maintain freshness and prevents the absorption of other odors from the fridge.
- Stir Before Serving: Prior to enjoying the leftover salsa verde, make sure to give it a good stir. This will help redistribute the flavors evenly, ensuring a consistent taste experience.
- Maintain Proper Storage: Keep the salsa verde at a consistent refrigeration temperature to preserve its quality. Fluctuations in temperature can affect the texture and taste of the condiment.
- Enjoy Within Recommended Timeframe: To savor the best taste and texture of the Castelvetrano Olive Salsa Verde, consume it within the suggested three-day storage period.
Leaving comments in the browser or visiting the website for future reference can help you remember these storage tips.
Recipe Variations
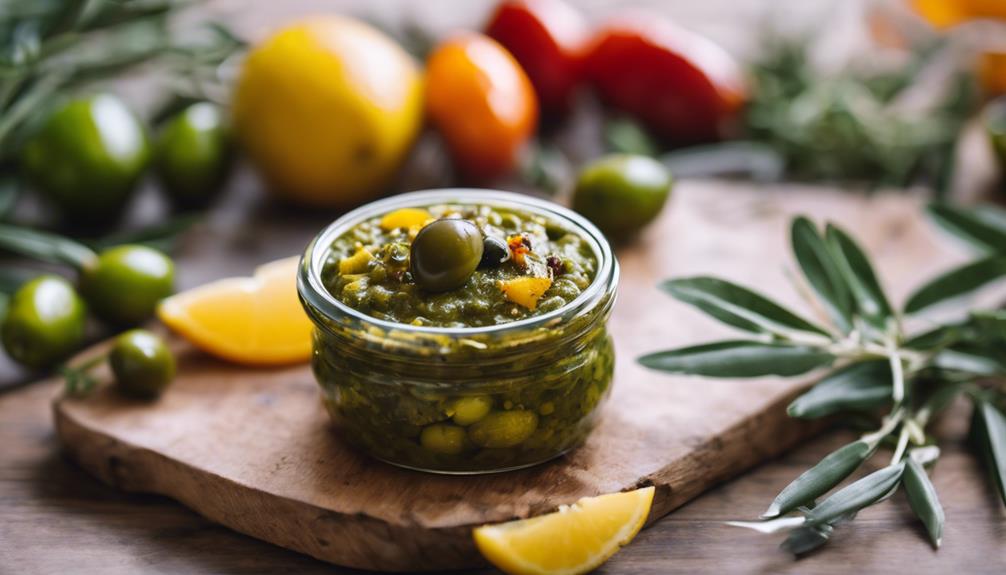
Enhance the complexity of your Castelvetrano Olive Salsa Verde by exploring various recipe variations.
If you're looking to boost the Vitamin C content of your salsa verde, consider substituting parsley with cilantro. Cilantro not only adds a revitalizing twist but also contributes to your daily dose of Vitamin C.
Additionally, if you're watching your saturated fat intake, a squeeze of fresh lemon juice can elevate the flavors without adding extra saturated fats.
For those who enjoy a bit of heat, incorporating finely chopped jalapeño or red pepper flakes can give your salsa verde a spicy kick.
To mix things up even further, experiment with different olive varieties like Kalamata or Gaeta for a unique flavor profile.
If you prefer a hint of sweetness to balance the tanginess, a touch of honey or maple syrup can do wonders in harmonizing the flavors of your Castelvetrano Olive Salsa Verde.
Feel free to comment on or give these variations a try to find your perfect blend.
Frequently Asked Questions
What Are Castelvetrano Olives Good For?
Looking for a tasty twist to your dishes? Castelvetrano olives are perfect for you! These olives, with their buttery texture and mild flavor, are rich in heart-healthy fats and vitamin E, making them a delicious and nutritious choice.
What Do You Put Salsa Verde On?
You put salsa verde on grilled meats like chicken, beef, and pork. It pairs well with seafood dishes such as salmon and shrimp. Also great on roasted vegetables like zucchini and eggplant, as a dip for crusty bread, or in sandwiches and tacos.
What Is the Difference Between Bella Di Cerignola and Castelvetrano Olives?
When comparing Bella di Cerignola and Castelvetrano olives, note the size difference; Bella di Cerignola's larger, while Castelvetrano's smaller. Castelvetrano olives are known for their vibrant green hue and buttery taste, contrasting with Bella di Cerignola's firmer texture.
Should Salsa Verde Be Served Hot or Cold?
When it comes to salsa verde, it should definitely be served cold. Chilling it allows the flavors to blend beautifully, enhancing its brightness and sharpness. Enjoy the invigorating burst of flavor that a chilled salsa verde brings!
What Are the Differences Between Castelvetrano Olive Salsa Verde and Green Olive Tapenade?
Castelvetrano Olive Salsa Verde is a zesty and flavorful Italian sauce made with tangy green olives, capers, parsley, and garlic. On the other hand, Green Olive Tapenade is a savory spread that also includes tangy green olives, anchovies, and olive oil. Both are delicious options for adding a burst of flavor to dishes. While Castelvetrano Olive Salsa Verde leans toward a fresher and herb-forward profile, the Green Olive Tapenade offers a richer, umami-packed experience thanks to the addition of anchovies. Each complements a variety of dishes, from grilled meats to crusty bread, offering versatility in the kitchen. For those looking to recreate the spread at home, a simple green olive tapenade recipe can elevate appetizers or serve as a flavorful condiment for everyday meals. Both sauces bring a Mediterranean flair to your table, making them ideal for entertaining or sprucing up weeknight meals. Whether you opt for the herbaceous Castelvetrano Olive Salsa Verde or follow a green olive tapenade recipe for its robust and salty character, these condiments are sure to impress. Experimenting with different pairings, such as roasted vegetables or pasta, can further showcase their versatility and bold flavors.
Conclusion
To sum up, the Castelvetrano olive salsa verde is a versatile and vibrant condiment that adds a burst of fresh flavors to any dish.
With its unique combination of ingredients and zesty undertones, this salsa verde is sure to elevate your culinary creations.
Whether used as a topping, dip, or marinade, this flavorful condiment is a must-try for any food enthusiast looking to add a touch of sophistication to their dishes.
Try it today and experience the delicious difference for yourself!
Francesca, as the creative force behind our compelling content, combines culinary expertise with journalistic flair. She has a deep appreciation for the cultural histories and artisanal traditions that influence remarkable flavors around the world. Through engaging narratives, she transports our audience to the heart of each culinary experience. Whether she’s documenting the centuries-old techniques of a Sicilian cheese maker or uncovering the personal stories of our producers, Francesca’s storytelling prowess drives our mission to connect people through food.
Appetizers
Chili Cheese Dip: A Crowd-Pleasing Party Favorite
Unleash the ultimate party appetizer with Chili Cheese Dip – a creamy, gooey, and spicy delight that will keep your guests coming back for more!
When hosting an event, wow your guests with the crowd-pleasing Chili Cheese Dip. Created with cream cheese, chili, and shredded cheese, this simple-to-make dish provides a creamy, stringy texture with a spicy punch. Personalize by selecting different chili and cheese flavors to match your preferences. Just layer the ingredients, bake until bubbly, and serve piping hot with tortilla chips or Fritos. Accompany with tortilla chips, Fritos, or veggie sticks. Plan on 1/4 cup servings per person and adjust according to the number of guests. For more tips on perfecting this party favorite, check out the various customization and serving suggestions offered.
Key Takeaways
- Creamy, gooey, and spicy dip with cream cheese, chili, and shredded cheese.
- Customizable with different chili and cheese types for varied flavors.
- Easy 20-minute preparation and baking for hassle-free party planning.
- Serve hot with tortilla chips, Fritos, or vegetable sticks for dipping.
- Plan 1/4 cup servings per person, adjust portions based on guest count.
Easy 3-Ingredient Chili Cheese Dip
Whip up this simple and delicious 3-ingredient chili cheese dip for your next gathering. This cream cheese dip combines the savory flavors of chili, cream cheese, and shredded cheese to create a crowd-pleasing appetizer that's sure to be a hit at any party.
By blending cream cheese with chili and shredded cheese, you can create a creamy and flavorful dip that pairs perfectly with tortilla chips or Fritos Scoops. The simplicity of this dip makes it a convenient choice for any occasion, requiring minimal effort while delivering maximum flavor.
This easy-to-make dip offers a balance of creamy texture from the cream cheese and bold flavors from the chili and shredded cheese. Baking the dip until bubbly enhances the overall taste, creating a warm and satisfying appetizer that will leave your guests coming back for more.
Whether you prefer a spicier chili or a milder cheese blend, this versatile dip can be customized to suit your personal taste preferences.
Best Chili Cheese Dip Recipe
Creating the best chili cheese dip involves combining cream cheese, chili, and shredded cheese in a harmonious blend of flavors. This homemade chili cheese dip is a crowd-pleaser, perfect for any party or gathering.
The cream cheese adds a creamy texture, the chili brings a kick of flavor, and the shredded cheese melts into gooey goodness. What makes this chili dip stand out is its simplicity; it's easy to make in just 20 minutes.
The versatility of this dish allows for customization with different types of chili, cheese, and toppings to suit your taste preferences. Serve this delectable creation with tortilla chips for a crunchy contrast or Fritos Scoops for a heartier bite.
Leftovers can be conveniently refrigerated and reheated, making it a convenient option for a quick and delicious snack. Elevate your party experience with this flavorful and satisfying homemade chili cheese dip, a guaranteed hit at any gathering.
Quick Party Dip Instructions
To prepare this quick party dip, gather your flavorful dip ingredients: cream cheese, chili, and shredded cheese.
Follow the simple preparation steps by layering cream cheese, chili, and shredded cheese in a baking dish.
Once baked, serve this delicious dip with tortilla chips or Fritos and enjoy the flavors!
Flavorful Dip Ingredients
For a delicious chili cheese dip, gather cream cheese, chili, and shredded cheese as your main ingredients. This three-ingredient party dip is quick and easy to make, perfect for serving as an appetizer at gatherings.
The cream cheese provides a creamy base, while the chili adds a flavorful kick, and the shredded cheese brings a gooey, melty texture to the dish. By combining these simple ingredients, you can create a crowd-pleasing snack that's sure to be a hit at any party.
To enhance the flavors of the chili cheese dip, consider selecting your favorite brand of chili to use in the recipe. Additionally, you can adjust the amount of shredded cheese based on your personal preferences, whether you prefer a cheesier dip or a lighter option.
Once baked at 350°F until bubbly, this appetizer can be enjoyed with tortilla chips or Fritos Scoops, providing a satisfying and delicious snack for your guests.
Simple Preparation Steps
Mix the cream cheese, chili, and shredded cheese together in a bowl until well combined for a quick and flavorful chili cheese dip.
This easy-to-make appetizer is a perfect choice for last-minute parties when you need a delicious dish in a hurry.
The combination of creamy cream cheese, zesty chili, and gooey shredded cheese creates a dip that's sure to be a hit with your guests.
Simply blend the ingredients together until smooth, ensuring that each component is evenly distributed for a harmonious flavor profile.
The versatility of this dip allows you to experiment with different types of chili, cheese, and toppings to cater to your preferences or dietary needs.
Serve the chili cheese dip hot alongside tortilla chips or Fritos for a delightful snacking experience that will keep your guests coming back for more.
Enjoy the convenience and savory goodness of this simple yet satisfying party favorite.
Serving and Enjoying
When ready to serve and enjoy the chili cheese dip, make sure it's hot and bubbly straight from the oven.
Here are some quick party dip instructions to help you savor this delicious appetizer:
- Grab Some Chips: Scoop up a generous portion of the hot and gooey dip with crispy tortilla chips.
- Dig In: Take a bite of the creamy base blended with the hearty chili and melted cheddar cheese.
- Savor the Flavor: Let the flavors of the cream, chili, and cheddar cheese mingle on your taste buds.
- Share the Joy: Offer your friends and guests a taste of this easy-to-make and crowd-pleasing appetizer.
- Enjoy Every Bite: Delight in the perfect combination of textures and flavors as you indulge in this savory treat.
Customize Your Chili Dip
To customize your chili cheese dip, consider selecting your preferred type of chili, whether with or without beans. Experiment with various shredded cheese options like Mexican, cheddar, or Monterey Jack to bring a unique twist to your dip. For those who enjoy a bit of heat, adding sliced jalapeños or other spicy peppers can elevate the flavor profile to suit your taste preferences. Remember to serve your chili cheese dip warm alongside tortilla chips or Fritos Scoops for a delightful snack or appetizer at your next gathering. The versatility of this dish shines through as it remains enjoyable even after being out for a while at a party.
Customization Options | Description |
---|---|
Type of Chili | With or without beans |
Shredded Cheese | Mexican, cheddar, Monterey Jack |
Spice Level | Jalapeños, hot peppers |
Serving Suggestions | Warm with tortilla chips, Fritos Scoops |
Baking the Perfect Chili Dip
For baking the perfect chili dip, preheat your oven to 350°F.
Follow these steps to guarantee a delicious outcome:
- Spread a cup of softened cream cheese onto the bottom of a baking dish.
- Layer your favorite chili on top of the cream cheese.
- Sprinkle shredded cheese over the chili layer.
- Bake the chili cheese dip in the preheated oven until bubbly and the cheese is melted, typically around 25 minutes.
Serve your hot and flavorful chili cheese dip with tortilla chips or Fritos for dipping.
Serving Suggestions for Chili Dip
When serving chili cheese dip, consider presentation ideas to enhance the visual appeal of the dish.
Dipping pairings like tortilla chips or Fritos Scoops can complement the flavors of the dip.
Additionally, portion sizes should be sufficient for guests to enjoy without overwhelming their appetites.
Presentation Ideas
You can elevate the presentation of your chili cheese dip by serving it in a hollowed-out bread bowl for a creative and edible twist.
To make your chili cheese dip even more appealing, consider the following presentation ideas:
- Garnish: Add a touch of freshness and flavor by garnishing your dip with chopped fresh cilantro or green onions.
- Dippables: Offer a variety of dipping options like tortilla chips, pretzel rods, or vegetable sticks for guests to enjoy with the chili cheese dip.
- DIY Bar: Create a DIY chili cheese dip bar with different types of chili, cheeses, and toppings to provide a customizable experience for your guests.
- Individual Serving Dishes: For a more elegant and portion-controlled presentation, use mini individual serving dishes or ramekins to serve the chili cheese dip.
These presentation ideas won't only make your chili cheese dip visually appealing but also enhance the overall dining experience for your guests.
Dipping Pairings
Elevate your chili cheese dip experience by exploring a variety of dipping pairings that complement the creamy and cheesy flavors. When serving your delicious dip, consider offering a range of options to satisfy your guests' preferences. Here are some fantastic choices to pair with your chili cheese dip:
Dipping Pairings | Description |
---|---|
Tortilla chips or Fritos | Classic and popular choice for a satisfying crunch. |
Fritos Scoops | Sturdy and crunchy option ideal for scooping up the creamy dip. |
Sliced baguette | Provides a different texture for a more sophisticated dipping experience. |
Fresh vegetable sticks | Carrots, celery, and bell peppers offer a crunchy and healthy alternative. |
Additionally, consider adding a unique twist to your dip selection with pretzels, pita chips, or even nachos. These options bring a variety of textures and flavors to complement the richness of the chili cheese dip. Experiment with different pairings to find the perfect combination for your next gathering.
Portion Sizes
To ensure your guests enjoy the chili cheese dip, it's crucial to plan for 1/4 cup servings per person. When preparing for a small gathering with 8-10 guests, aim to serve about 8-10 portions of the dip.
Remember that the standard serving size for this delectable dish is approximately 1/4 cup per individual. To enhance the experience, consider offering a variety of dippable items such as tortilla chips, Fritos, or vegetable sticks.
Adjusting the portion sizes based on the number of guests attending and the other menu items available is vital. By ensuring that each guest receives an adequate amount to enjoy with their preferred dippable item, you can create a harmonious balance in your party spread.
Adjusting the portion sizes accordingly will contribute to a successful and satisfying culinary experience for everyone involved.
Frequently Asked Questions
How to Make Your Own Chili Dip?
To make your own chili dip, combine cream cheese, chili, and shredded cheese. Customize with your favorite type of chili. Serve hot with tortilla chips. Experiment with cheese blends like cheddar or pepper jack for extra flavor.
What to Eat With Hormel Chili No Beans?
When you pair Hormel Chili No Beans with crispy tortilla chips, it's like creating a perfect harmony of savory and crunchy. The bold flavors of the chili elevate the humble chips, making every bite a delight.
What Can You Put Chili On?
You can put chili on hot dogs, baked potatoes, nachos, fries, burgers, macaroni and cheese, tacos, burritos, enchiladas, omelets, rice, grilled cheese sandwiches, quesadillas, and even pizza for a fusion of flavors. It adds a hearty kick!
How Many Calories Are in Hormel Chili Dip?
To find out the number of calories in Hormel chili dip, check the label for serving size details. The calorie count can vary depending on the ingredients used. Enjoy your flavorful appetizer with chips for a satisfying snack.
Can the Scallion Cream Cheese Dip be a Crowd-Pleasing Party Favorite like Chili Cheese Dip?
Looking for the perfect party appetizer dip? Try the Scallion Cream Cheese Dip! Its creamy texture and bold flavor make it a crowd-pleasing favorite, just like the traditional Chili Cheese Dip. With the perfect balance of savory and tangy, it’s sure to be a hit at your next gathering. Pair this irresistible dip with your favorite crackers or crisp veggies, and watch it disappear in no time. For an extra crunch and burst of flavor, serve it alongside ritz with scallion cream cheese for a delightful combination guests will rave about. Whether you’re hosting a casual get-together or a formal event, this dip is guaranteed to elevate your appetizer game. Plus, it’s incredibly easy to make, saving you time and effort while still impressing your guests. The ritz and scallion cream cheese dip can be prepped ahead of time, giving you more freedom to focus on other party details. With its versatile pairing options and enticing taste, this dip will quickly become a go-to recipe for all your celebrations!
Conclusion
To sum up, chili cheese dip is a versatile and delicious option for any gathering. With just a few simple ingredients and easy instructions, you can whip up this crowd-pleasing party favorite in no time.
Whether you bake it for a melty, gooey texture or serve it chilled for a invigorating bite, this dip is sure to be a hit with your guests.
So next time you're hosting a party, consider adding chili cheese dip to your menu for a tasty treat that everyone will enjoy.
Francesca, as the creative force behind our compelling content, combines culinary expertise with journalistic flair. She has a deep appreciation for the cultural histories and artisanal traditions that influence remarkable flavors around the world. Through engaging narratives, she transports our audience to the heart of each culinary experience. Whether she’s documenting the centuries-old techniques of a Sicilian cheese maker or uncovering the personal stories of our producers, Francesca’s storytelling prowess drives our mission to connect people through food.
Appetizers
Whipped Ricotta Toasts With Prosciutto: an Elegant Appetizer
Indulge in the sophistication of Whipped Ricotta Toasts with Prosciutto, a tantalizing appetizer that promises a symphony of flavors and elegance.
Indulge in a luxurious dining experience featuring Whipped Ricotta Toasts paired with delicate prosciutto, a dish that exudes sophistication and taste. The whipped ricotta, enhanced with garlic, rosemary, salt, and pepper, creates a smooth base that complements the savory prosciutto perfectly. Grilled French bread slices, brushed with olive oil for added richness, offer a crunchy texture. A visually appealing presentation is essential; arrange the toasts creatively on a platter, garnish with fresh herbs, cracked black pepper, or balsamic glaze, and complement with a crisp white wine for an elegant dining experience. Embrace your inner foodie with these captivating appetizers.
Key Takeaways
- Velvety whipped ricotta contrasts with salty prosciutto for a sophisticated flavor balance.
- Artfully layer high-quality prosciutto on grilled French bread slices for a textural delight.
- Garnish with fresh herbs or balsamic glaze for an elegant presentation.
- Pair with a light white wine for a complete dining experience.
- Customizable toppings and a decorative platter enhance the visual appeal.
Ingredients for Whipped Ricotta Toasts
To prepare the Whipped Ricotta Toasts, gather the following ingredients: Whipped Ricotta, Prosciutto, and creamy cheese.
Whipped Ricotta, a velvety and airy version of traditional ricotta, serves as the luscious base for this appetizer.
The creamy cheese, enriched with flavors of garlic, rosemary, salt, and pepper, provides a rich and herbaceous taste that complements the other components perfectly.
Prosciutto, a delicate and savory Italian dry-cured ham, adds a salty and savory element to the dish.
The combination of the sweet and creamy whipped ricotta with the salty prosciutto creates a delightful flavor contrast that tantalizes the taste buds.
When assembled on crispy toast, these ingredients create an elegant appetizer that's both quick to prepare and versatile in its customization options.
With just a few key ingredients, you can create a sophisticated dish that's sure to impress your guests or elevate your snack game effortlessly.
Steps to Whip Ricotta With Olive Oil
Blend the ricotta cheese and olive oil until smooth to create a creamy and luxurious texture. This step is vital in achieving a velvety consistency for your whipped ricotta.
By combining the ricotta with the olive oil, you enhance the richness of the cheese while adding a silky mouthfeel to the mixture. The process involves thoroughly blending the two ingredients together until they're well incorporated, resulting in a homogeneous and creamy base.
Whipped ricotta prepared with olive oil serves as a versatile canvas for various flavor additions such as herbs, garlic, or spices to elevate its taste profile further. The olive oil not only contributes to the smooth texture but also imparts a subtle fruity note that complements the inherent creaminess of the ricotta.
This essential step lays the foundation for creating delectable appetizers like Whipped Ricotta Toasts with Prosciutto, where the whipped ricotta's creamy texture will surely shine alongside flavorful toppings.
Assembling the Prosciutto Toppings
When assembling the prosciutto toppings for the whipped ricotta toasts, consider selecting high-quality prosciutto that's thinly sliced for the best flavor.
Layer the prosciutto pieces artistically on top of the whipped ricotta toasts, ensuring an even distribution of the savory meat.
This attention to detail will elevate the presentation of the dish and contribute to a harmonious balance of flavors in each bite.
Prosciutto Selection Tips
For best results, select thinly sliced prosciutto when assembling the prosciutto toppings for your whipped ricotta toasts. Opting for thinly sliced prosciutto makes it easier to wrap around the creamy ricotta, enhancing the overall texture and presentation of your appetizer.
Additionally, choosing high-quality prosciutto is important to elevate the flavor profile of your dish. The richness and texture of the prosciutto will complement the smoothness of the ricotta, creating a harmonious blend of tastes.
When selecting prosciutto, consider the saltiness level to make sure it balances well with the ricotta. Look for prosciutto with a good amount of marbling, as this will provide added tenderness and juiciness to each bite.
Experimenting with different types of prosciutto, such as Parma, San Daniele, or domestic varieties, can introduce unique flavors to your whipped ricotta toasts. By paying attention to these prosciutto selection tips, you can create a sophisticated and flavorful appetizer that will impress your guests.
Layering Prosciutto Artistically
Artistically layer the thinly sliced prosciutto on top of the whipped ricotta to create a visually stunning presentation for your toasts.
When assembling these appetizers, make sure each toast receives a generous portion of prosciutto, allowing its savory and salty essence to complement the creamy ricotta beneath.
The delicate texture of prosciutto provides a delightful contrast to the smooth ricotta, enhancing the overall sensory experience.
To elevate the aesthetic appeal further, consider folding or gently draping the prosciutto on the toasts, adding a touch of sophistication to the arrangement.
Grilling the Bread for Toasts
Grill the French bread slices directly on the oven rack to achieve a smoky flavor and crispy texture for the toasts. Make sure you slice the bread thinly for best crunchiness.
Brushing the bread with olive oil before toasting not only adds richness but also enhances the overall flavor profile. Preheat your oven to 350 degrees to guarantee that the bread is perfectly heated during the grilling process. This step is crucial in creating a delicious base for the whipped ricotta and prosciutto toppings.
By grilling the bread directly on the oven rack, you allow for even toasting, ensuring that each toast is crispy and flavorful. The olive oil helps in achieving a golden-brown hue and adds a delightful hint of Mediterranean flavor to the toasts.
Incorporating these steps will elevate the texture and taste of the toasts, providing a delicious base for the rest of the appetizer.
Plating and Serving Suggestions
When presenting your Whipped Ricotta Toasts with Prosciutto, make sure you arrange them neatly on a serving platter for an attractive display. Consider using a decorative cheese board or serving plate to elevate the aesthetic appeal of your appetizer.
Garnishing the toasts with fresh herbs, cracked black pepper, or a drizzle of balsamic glaze can add both flavor and visual interest to the dish.
To enhance the overall dining experience, serve the Whipped Ricotta Toasts with Prosciutto alongside a glass of wine or a revitalizing cocktail. Encourage your guests to enjoy the appetizer by providing small plates, napkins, and utensils for easy serving and consumption.
Customization Ideas for Guests
To enhance the guest experience and offer a personalized touch, consider providing a selection of toppings and accompaniments for customizing their Whipped Ricotta Toasts with Prosciutto. Guests can elevate their appetizer by choosing from a variety of toppings such as marinated peppers, olives, or sun-dried tomatoes to add a burst of flavor to the creamy ricotta cheese and savory prosciutto. Offering different types of bread, including baguette slices, sourdough, or gluten-free crackers, allows guests to enjoy this delectable dish according to their dietary preferences.
For a creative twist, set up a DIY station with assorted herbs like basil, thyme, or chives for guests to garnish their toasts and enhance the overall taste. In addition to whipped ricotta, consider including a selection of cheeses like goat cheese, feta, or blue cheese to provide a diverse tasting experience for your guests. Encourage experimentation by presenting drizzles of honey, balsamic glaze, or truffle oil to further elevate the flavors of their Whipped Ricotta Toasts with Prosciutto.
Tips for Hosting With This Appetizer
When hosting with whipped ricotta toasts and prosciutto, make sure your presentation is elegant and inviting.
Consider pairing these appetizers with a light and crisp white wine to elevate the flavors and offer a sophisticated dining experience.
Opt for fresh, high-quality ingredients to enhance the taste and impress your guests.
Hosting Presentation
Enhance your hosting presentation by elegantly displaying these Whipped Ricotta Toasts With Prosciutto on a decorative platter.
To create a visually stunning spread, consider the following:
- Arrange the Whipped Ricotta Toasts With Prosciutto meticulously on a sleek marble serving board, allowing the creamy ricotta to peek through the thinly sliced prosciutto, enticing guests with its luxurious appearance.
- Complement the elegance of the dish by garnishing the platter with fresh herbs such as basil or thyme, adding a pop of color and a hint of earthy aroma.
- Opt for a platter with gold or silver accents to elevate the sophistication of the presentation, creating a sense of opulence that matches the refined flavors of the Ricotta Crostini.
- Complete the look by pairing the platter with delicate serving utensils, such as mini tongs or cheese knives, to offer guests a seamless and graceful experience as they indulge in this upscale appetizer.
Flavor Pairings
For a delightful culinary experience, consider experimenting with various flavor pairings to complement the richness of the Whipped Ricotta Toasts with Prosciutto. The salty notes of the prosciutto are beautifully balanced by the creamy whipped ricotta, creating a harmonious blend of flavors that can be enhanced further with thoughtful combinations.
Try adding fresh herbs like basil or thyme to bring a hint of freshness to each bite, or drizzle honey over the toasts for a touch of sweetness that contrasts with the savory elements. For a more complex flavor profile, consider a balsamic glaze drizzled lightly over the top to add a tangy depth to the dish.
These flavor pairings not only elevate the taste of the appetizer but also provide a visually appealing presentation that will impress your guests. Experimenting with different combinations will allow you to customize the Whipped Ricotta Toasts with Prosciutto to suit various preferences and occasions.
Frequently Asked Questions
What to Pair Ricotta With?
Pair ricotta with a variety of ingredients like prosciutto, honey, peaches, basil, and hot honey for a flavorful combination. Create a balance of textures and flavors by experimenting with different fruits and herbs to enhance your dish.
Why Is My Whipped Ricotta Runny?
When your whipped ricotta turns runny, it's like trying to catch a waterfall with a sieve. Drain excess liquid, add stabilizers like lemon juice or olive oil, avoid over-processing, and store it right to keep that creamy texture intact.
Can I Use Broccoli Rabe Ricotta Toasts as an Alternative to Whipped Ricotta Toasts for an Elegant Appetizer?
Yes, you can use gourmet broccoli rabe ricotta toasts as an alternative to whipped ricotta toasts for an elegant appetizer. The rich, creamy ricotta pairs perfectly with the slightly bitter broccoli rabe, creating a sophisticated and flavorful dish that will impress your guests. The addition of crusty bread and a drizzle of olive oil elevates the dish even further, offering a delightful combination of textures and tastes. Whether you’re hosting a dinner party or enjoying a casual brunch, this broccoli rabe ricotta toast recipe is a versatile option that works for any occasion. Serve it with a sprinkle of sea salt or a touch of red pepper flakes for an extra burst of flavor your guests won’t forget. This broccoli rabe appetizer recipe is also easy to customize—try adding a hint of lemon zest for brightness or a dash of honey for a touch of sweetness to balance the flavors. Its elegance lies in its simplicity, allowing the quality of the ingredients to shine. No matter how you choose to serve it, this dish is sure to become a favorite in your entertaining repertoire.
Conclusion
To sum up, these whipped ricotta toasts with prosciutto are a sophisticated appetizer that will impress your guests with their elegant presentation and delicious flavors.
So, next time you're hosting a gathering or looking to elevate your appetizer game, give this recipe a try. Remember, the devil is in the details, and these toasts are sure to delight even the most discerning palates.
Happy hosting!
Francesca, as the creative force behind our compelling content, combines culinary expertise with journalistic flair. She has a deep appreciation for the cultural histories and artisanal traditions that influence remarkable flavors around the world. Through engaging narratives, she transports our audience to the heart of each culinary experience. Whether she’s documenting the centuries-old techniques of a Sicilian cheese maker or uncovering the personal stories of our producers, Francesca’s storytelling prowess drives our mission to connect people through food.
Appetizers
Burrata Dip With Jammy Tomatoes: a Gourmet Appetizer
Nourish your taste buds with a luxurious Burrata Dip featuring jammy tomatoes and basil chive vinaigrette – a gourmet appetizer that promises to tantalize your senses.
Take your appetizer game to the next level with a delicious burrata dip. To start, gather fresh cherry tomatoes, creamy burrata cheese, fragrant basil, and high-quality olive oil. Slowly roast the tomatoes with garlic and Italian seasoning for a rich flavor. Drizzle sun-dried tomato oil and basil chive vinaigrette over torn burrata balls for an elegant touch. Top it off with fresh basil, salt, pepper, and red pepper flakes for a perfectly balanced blend of flavors. Serve in a shallow dish with crusty baguette slices. Feel free to experiment with different herbs, seasonings, or roasted garlic to make it your own. Impress your guests with this irresistible dish at your next gathering.
Key Takeaways
- Choose fresh burrata for a creamy texture and balanced filling ratio.
- Prepare jammy tomatoes by slow-roasting ripe cherry tomatoes with garlic and herbs.
- Drizzle tomato oil infused with sun-dried tomatoes for a rich flavor.
- Make a basil chive vinaigrette with high-quality olive oil and seasonings.
- Serve the dip with crusty baguette slices and garnish with fresh basil.
Ingredients for Burrata Dip
To make the delicious Burrata Dip, gather fresh cherry tomatoes, creamy burrata cheese, fragrant basil and chives, high-quality olive oil, and a crusty baguette.
The star of this appetizer is the creamy burrata cheese, a type of fresh Italian cheese made from a mix of mozzarella and cream. Its velvety texture and rich flavor make it a perfect base for the dip.
Roasting the cherry tomatoes intensifies their natural sweetness and creates a jammy consistency that complements the burrata beautifully. The combination of the tangy tomatoes with the creamy cheese is a match made in culinary heaven.
Adding fresh herbs like basil and chives enhances the overall aroma and taste of the dip, bringing a fresh and fragrant element to each bite. Drizzling high-quality olive oil over the burrata adds a luxurious touch, elevating the dish to gourmet levels.
Serving the dip with crusty baguette slices allows you to enjoy the creamy burrata with the burst of flavor from the jammy tomatoes in every bite.
Choosing the Perfect Burrata Cheese
Considering the creamy texture and indulgent flavor of burrata cheese, selecting the perfect one for your dip is crucial to achieving a delectable outcome. When choosing the ideal burrata cheese for your gourmet appetizer, keep in mind the following tips:
- Check the Specialty Cheese Section: Look for burrata cheese in the specialty cheese section of your local grocery store or Italian markets. This is where you're more likely to find high-quality and fresh options.
- Inspect the Creamy Texture: Make sure that the burrata cheese has a creamy and luscious texture. The creaminess of the cheese is what sets burrata apart from other varieties.
- Look for Freshness: Opt for burrata cheese that's fresh. The freshness of the cheese contributes significantly to its rich flavor and luxurious mouthfeel.
- Examine the Creamy Cheese Ratio: A good burrata should have a balanced ratio of mozzarella to creamy stracciatella filling, providing a harmonious blend of textures.
- Ask for Recommendations: If you're unsure, don't hesitate to ask the cheese monger for recommendations on the best burrata options available. Their expertise can guide you towards a delightful choice.
Preparing Jammy Tomatoes
To prepare jammy tomatoes, select ripe cherry tomatoes for the best sweetness. Slow roast the tomatoes at 400F with garlic, Italian seasoning, and a drizzle of high-quality olive oil for a rich flavor profile.
The roasting process allows the tomatoes to soften, burst, and release their natural juices, enhancing their umami taste.
Tomato Selection Tips
When preparing jammy tomatoes for the burrata dip, remember to choose ripe cherry tomatoes for the best flavor and sweetness. To select the perfect tomatoes for your gourmet appetizer, consider the following tips:
- Opt for organic or locally sourced tomatoes for a more vibrant and fresh taste in the dip.
- Cherry tomatoes are ideal for roasting as they hold their shape well and caramelize beautifully.
- Look for tomatoes that are firm to the touch and have a deep red color for the best flavor in the dip.
- Select tomatoes that are evenly sized to guarantee even roasting and consistent flavor in the burrata dip.
- Fresh basil can complement the sweetness of the roasted cherry tomatoes, enhancing the overall taste of the dish.
Slow Roasting Technique
For best flavor and texture in your burrata dip, slow roasting cherry tomatoes at 400F with garlic, olive oil, balsamic vinegar, and Italian seasoning is key. This slow roasting technique enhances the natural sweetness and umami flavor of the cherry tomatoes.
By allowing the tomatoes to soften, caramelize, and burst, a rich and jammy consistency is achieved, adding depth and complexity to the flavor profile of the dip. The addition of garlic during the slow roasting process further elevates the taste, creating a luxurious experience when paired with creamy burrata cheese.
The balsamic vinegar contributes a tangy-sweet note that perfectly complements the decadent burrata. The slow-roasted cherry tomatoes with garlic provide a burst of flavor that harmonizes with the creamy texture of the burrata, making this gourmet appetizer a delightful treat for your taste buds.
Drizzling Tomato Oil
Drizzling tomato oil over your burrata dip not only enhances the tomato flavor but also adds a touch of visual appeal to your dish.
The concentrated essence of the tomato oil elevates the overall taste profile, creating a gourmet experience for your palate.
Infusing olive oil with sun-dried tomatoes yields a robust flavor that complements the creamy burrata and jammy tomatoes perfectly.
Enhancing Tomato Flavor
Enhance the sweet, tangy flavor of jammy tomatoes in your burrata dip by drizzling rich tomato oil over the creamy cheese. The tomato oil not only adds a rich, savory depth to the creamy burrata cheese but also creates a luxurious and gourmet taste experience.
To elevate the overall taste profile of your dip, using high-quality, flavorful tomato oil is essential. Here are some reasons why drizzling tomato oil enhances the tomato flavor:
- Intensifies the sweet and tangy notes of the roasted tomatoes.
- Complements the creamy texture of the burrata cheese.
- Adds a rich, savory depth to the overall flavor profile.
- Elevates the dip to a gourmet level.
- Creates a luxurious taste experience that will impress your guests.
Drizzle for Visual Appeal
Adding a drizzle of aromatic tomato oil over your burrata dip not only enhances the flavors but also elevates its visual appeal with a burst of rich color and texture. The richness of the tomato oil complements the creamy burrata cheese, creating a harmonious blend of flavors that will tantalize your taste buds.
This drizzle of tomato oil not only adds a gourmet touch but also creates a beautiful presentation, making it a feast for both the eyes and the palate. To make tomato oil, you can infuse olive oil with sun-dried tomatoes and herbs, adding depth and complexity to the overall taste profile.
When you drizzle the tomato oil over the burrata dip with jammy tomatoes, you aren't just adding a finishing touch; you're enhancing the entire dining experience. The burst of flavor from the tomato oil will leave your guests impressed, turning a simple appetizer into a culinary delight.
Making Basil Chive Vinaigrette
Blend fresh basil, chives, olive oil, garlic, lemon juice, and seasonings until smooth to create the flavorful basil chive vinaigrette for the burrata dip. This herbaceous dressing adds a burst of freshness to the creamy burrata, enhancing the overall taste experience.
Here are some essential points to keep in mind while making basil chive vinaigrette:
- Use high-quality olive oil: Opt for extra-virgin olive oil to guarantee a rich and robust flavor profile.
- Balance the garlic: Adjust the amount of garlic to your preference, ensuring it complements the other ingredients without overpowering them.
- Fresh lemon juice is key: Squeeze fresh lemons for the juice, as it adds a bright acidity that elevates the flavors of the vinaigrette.
- Season generously: Don't shy away from seasoning with salt and pepper to bring out the herb and citrus notes.
- Store in airtight containers: Preserve the vinaigrette's freshness by storing it in airtight containers in the refrigerator or freezer for future use.
Assembling Burrata Dip
To assemble the Burrata Dip, tear open the burrata balls to reveal the creamy stracciatella inside. This fresh mozzarella is known for its indulgent and creamy texture, perfect for creating a rich and flavorful dip.
Once the burrata is exposed, drizzle some sundried tomato oil over it to enhance the cherry notes of the tomatoes. Add a generous amount of a basil sauce for an extra burst of fresh flavor. To elevate the taste further, season the dip with a pinch of salt and pepper.
These simple additions will complement the creamy cheese and juicy tomatoes, resulting in a harmonious blend of flavors.
The process of assembling this dip is straightforward and quick, making it an ideal choice for gatherings or parties where time is of the essence. By following these steps, you can create a delectable appetizer that pairs perfectly with toasty baguette or crispy crostini, offering a gourmet experience for all to enjoy.
Serving and Presentation Tips
To enhance the visual appeal of the burrata dip with jammy tomatoes while serving it to your guests, consider the following tips:
- Garnish with Fresh Basil: Add a touch of color and freshness by sprinkling the dip with vibrant basil leaves.
- Arrange Toasted Baguette Slices: Surround the dip with thick slices of toasted baguette, ready for dipping.
- Use a Shallow Serving Dish: Opt for a shallow dish to showcase the creamy burrata and juicy tomatoes.
- Offer Small Spreading Knives or Spoons: Provide utensils for guests to scoop up the semi-soft Italian cheese and tomatoes onto their bread.
- Highlight the Mozzarella on the Outside: Make sure the outer layer of the burrata is visible, as it adds a delightful texture to the dish.
Variations and Recipe Customizations
To elevate the flavor profile of your burrata dip with jammy tomatoes, consider experimenting with various herbs, seasonings, and additional ingredients for customizing the recipe to your taste preferences. Adding a touch of Italian seasoning can enhance the overall savory notes of the dish.
A pinch of salt and pepper, about 1/2 tsp each, can further elevate the flavors of the creamy burrata and juicy tomatoes. If you enjoy a hint of spice, consider incorporating a dash of red pepper flakes into the mix for a subtle kick.
You could also infuse the dip with roasted garlic for a robust flavor profile or caramelize onions to add a touch of sweetness. These variations allow you to tailor the burrata dip to suit your palate, creating a gourmet appetizer that reflects your unique preferences.
Experimenting with different ingredients can lead to discovering new favorite flavor combinations that will impress your guests and elevate your culinary skills.
Frequently Asked Questions
How Do You Eat Burrata Appetizer?
To enjoy a burrata appetizer, tear open the burrata balls to reveal the creamy center. Drizzle sun-dried tomato oil for extra flavor. Add basil sauce for a fresh taste. Season with salt and pepper, then serve with toasted baguette or crostini.
What Pairs Well With Burrata?
When thinking of what pairs well with burrata, think of sweet roasted cherry tomatoes, crusty bread for scooping, balsamic glaze drizzle, and fresh basil. A chilled glass of white wine or Prosecco complements this creamy delight perfectly.
What Is Burrata Cheese Used For?
Burrata cheese is used for creating decadent appetizers. Pair it with ingredients like basil, sundried tomatoes, or olive oil for rich flavors. Spread it on toasted baguette or crostini for a creamy delight.
Do You Eat Burrata With Crackers?
Do you eat burrata with crackers? Absolutely! They provide a crispy contrast to the creamy cheese. Choose plain or seasoned crackers for a delightful pairing. Experiment with various types for the perfect match. Enjoy this combo at parties or gatherings.
Can Whipped Ricotta Dip with Jammy Peppers Be a Substitute for Burrata Dip with Jammy Tomatoes as a Gourmet Appetizer?
Yes, the jammy peppers and whipped ricotta recipe can definitely be a gourmet substitute for burrata dip with jammy tomatoes as an appetizer. The creamy texture of whipped ricotta paired with the sweet and slightly spicy flavor of jammy peppers creates a delicious flavor profile that is sure to impress.
Conclusion
To sum up, this gourmet appetizer of burrata dip with jammy tomatoes is a delightful combination of creamy, tangy, and sweet flavors that's sure to impress your guests. Its vibrant presentation and explosion of flavors make it a must-have for any gathering, whether casual or formal. If you’re looking for more crowd-pleasing options, you might also want to try a curried peanut dip recipe, which offers a unique blend of spices and nuttiness. Together, these dips can create a versatile and unforgettable appetizer spread for any occasion. Both dips are remarkably simple to prepare, making them perfect for hosts who want to impress without spending hours in the kitchen. The combination of the burrata dip with jammy tomatoes and the curried peanut dip recipe brings a dynamic contrast of flavors and textures, appealing to a wide range of palates. These dishes not only taste amazing but also elevate the overall presentation of your appetizer table, leaving your guests raving long after the gathering ends.
With the perfect balance of textures and the freshness of the basil chive vinaigrette, this dish is a true crowd-pleaser.
So next time you want to elevate your appetizer game, give this recipe a try and watch as it disappears before your eyes, leaving everyone craving for more.
Francesca, as the creative force behind our compelling content, combines culinary expertise with journalistic flair. She has a deep appreciation for the cultural histories and artisanal traditions that influence remarkable flavors around the world. Through engaging narratives, she transports our audience to the heart of each culinary experience. Whether she’s documenting the centuries-old techniques of a Sicilian cheese maker or uncovering the personal stories of our producers, Francesca’s storytelling prowess drives our mission to connect people through food.
-
Vetted3 months ago
15 Best Non-Toxic Espresso Machines for a Healthier Brew at Home
-
Italian Cuisine1 week ago
What Italian Dishes Use Parsley
-
Vetted6 months ago
12 Best Coffee Pods for DeLonghi Espresso Machine to Elevate Your Caffeine Game
-
Vetted4 months ago
15 Best Coffee Beans for Your Breville Espresso Machine – Expert Picks for Perfect Brews
-
Vetted3 months ago
15 Best Espresso Ground Coffees for Your Espresso Machine: A Barista’s Guide
-
Vetted3 months ago
15 Best Coffee Beans to Elevate Your Breville Espresso Experience
-
Vetted6 months ago
15 Best Commercial Automatic Espresso Machines for Your Coffee Shop
-
Vetted6 months ago
15 Best ESE Pod Espresso Machines for Perfect Coffee Every Time