
Choosing between today’s 3D printers mostly comes down to three questions: how fast you need prints done, whether you want multicolor capability, and how much tinkering you’re willing to tolerate. The Bambu Lab P2S Combo stands out as the best overall pick, pairing professional-grade speed and reliability with the AMS 2 Pro system for polished multicolor output. The ELEGOO Centauri Carbon 2 Combo is the strongest value alternative, delivering core-XY performance and multicolor printing at a friendlier price, while the Creality Ender 3 V3 SE remains the smartest entry point for true beginners. The main tradeoff you’ll face is convenience versus cost: enclosed, automated machines print better materials with less fuss, while budget models demand more setup time but leave room to upgrade. Read on for the full breakdown of all 15 models.

Get kitchen staples and gadgets delivered free with Prime
- Fast, free delivery on millions of items
- Prime Video, Amazon Music and more included
- Member-only deals all year
Complete the kit


Key Takeaways
- Multicolor capability was the single biggest differentiator in this lineup — eight of the 15 printers offer it, but the Bambu AMS ecosystem remains the most seamless, which is why the P2S Combo and A1 Combo rank above cheaper multicolor rivals like the ANYCUBIC Kobra X.
- Core-XY architecture (P2S, K2 SE, AD5X, Centauri Carbon 2) consistently beat bed-slinger designs like the Adventurer 5M and Ender 3 V3 SE for speed and print quality, but costs more and takes up more desk space.
- Fully enclosed machines (P2S, P1S, Centauri Carbon 2) handle engineering filaments like ABS and ASA far better than open-frame models like the A1 and A1 Mini, which are best kept to PLA and PETG.
- The Snapmaker U1’s 5-second toolchanger sidesteps the purge-waste problem of spool-swapping systems, making it the smarter pick for anyone who prints lots of multicolor parts and resists wasted filament.
- Beginner-focused models (Ender 3 V3 SE, A1 Mini, A1) succeeded on auto-leveling and out-of-box readiness rather than raw specs — a reminder that a fast printer you can’t calibrate is worse than a slow one that just works.
| Bambu Lab P2S Combo, P2S 3D Printer & AMS 2 Pro, Multi-Color 3D Printing |  | Best Overall | Print Speed: 600 mm/s | Setup Time: Approximately 15 minutes | Filament Drying Temperature: 65 °C | VIEW ON AMAZON | See Our Full Breakdown |
| ELEGOO Centauri Carbon 2 Combo 3D Printer, Multicolor Printing |  | Best Value Multicolor | Color Printing: 4-color via CANVAS system | Max Speed: 500 mm/s | Acceleration: 20,000 mm/s² | VIEW ON AMAZON | See Our Full Breakdown |
| Snapmaker U1 3D Printer, 4-Toolhead with 5s Toolchanger, Multi-Color Printing |  | Best for Professional Multi-Material Work | Toolheads: 4 independent, 5-second automatic changer | Build Volume: 270 x 270 x 270 mm | Max Speed: 500 mm/s | VIEW ON AMAZON | See Our Full Breakdown |
| FlashForge Adventurer 5M 3D Printer with Auto Leveling and High-Speed Printing |  | Best Compact Single-Color Workhorse | Build Volume: 220 x 220 x 220 mm | Max Speed: 600 mm/s | Max Extruder Temperature: 280 °C | VIEW ON AMAZON | See Our Full Breakdown |
| Bambu Lab A1 Combo + LED Lamp Kit, Multi-Color 3D Printing (with AMS lite) |  | Best for Creative and Display Projects | Multi-Color System: AMS lite (included) | Calibration: Automatic with active flow rate compensation | Included Extras: LED lamp kit for illuminated models | VIEW ON AMAZON | See Our Full Breakdown |
| Creality SPARKX i7 Nano Combo 3D Printer |  | Best Big-Build Multicolor Combo | Build Size: 260×260×255mm | Color Support: Multi-color with automatic filament switching | Auto-Leveling: Yes | VIEW ON AMAZON | See Our Full Breakdown |
| Creality K2 SE 3D Printer | 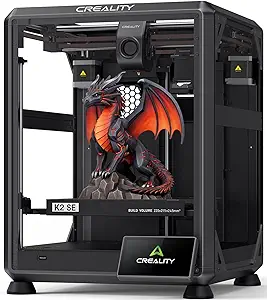 | Best High-Speed Workhorse | Print Speed: 500mm/s | Build Volume: 220×215×245mm | Frame Material: Die-cast aluminum alloy | VIEW ON AMAZON | See Our Full Breakdown |
| Bambu Lab A1 3D Printer |  | Best for Beginners and Kids | Acceleration: 10,000 mm/s² | Calibration: Full auto-calibration | Multi-Color: Optional with AMS lite | VIEW ON AMAZON | See Our Full Breakdown |
| Bambu Lab P1S 3D Printer |  | Best Premium Enclosed Performer | Colors: Up to 16 (with AMS) | Speed: 500mm/s | Acceleration: 20,000 mm/s² | VIEW ON AMAZON | See Our Full Breakdown |
| ANYCUBIC Kobra X 3D Printer |  | Best Native 4-Color Value | Print Size: 260 × 260 × 260mm | Color Capability: Native 4-color printing | Auto-Leveling: LeviQ 3.0 with 49-point accuracy | VIEW ON AMAZON | See Our Full Breakdown |
| FLASHFORGE Adventurer 5M 3D Printer |  | Best Plug-and-Play Speed | Print Size: 220 x 220 x 220mm | Maximum Speed: 600mm/s | Acceleration: 20000 mm/s² | VIEW ON AMAZON | See Our Full Breakdown |
| Creality Ender 3 V3 SE 3D Printer |  | Best Budget Entry Point | Print Speed: Up to 250mm/s | Extruder: Sprite Direct Drive | Auto Leveling: Yes | VIEW ON AMAZON | See Our Full Breakdown |
| Bambu Lab P1S Combo 3D Printer |  | Best Premium All-Rounder | Maximum Printing Speed: 500mm/s | Acceleration: 20000 mm/s² | Frame: Enclosed coreXY | VIEW ON AMAZON | See Our Full Breakdown |
| Bambu Lab A1 Mini 3D Printer + LED Lamp Kit |  | Best for Kids and Casual Creators | Calibration: Fully automatic | Operation: Quiet operation for home use | Included Accessory: LED Lamp Kit | VIEW ON AMAZON | See Our Full Breakdown |
| FlashForge AD5X Multi-Color 3D Printer | 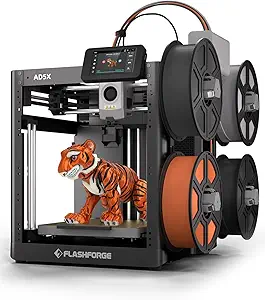 | Best for Rapid Multicolor Prototyping | Print Speed: 600mm/s | Build Volume: 220 x 220 x 220mm | Extruder Temperature: 300°C | VIEW ON AMAZON | See Our Full Breakdown |
More Details on Our Top Picks
Bambu Lab P2S Combo, P2S 3D Printer & AMS 2 Pro, Multi-Color 3D Printing
This combo earns the top spot because it removes nearly every excuse people have for avoiding multi-color printing. 600 mm/s print speed combined with automatic calibration means a first print in about 15 minutes, which is faster to productive output than anything else in this lineup. Compared with the Snapmaker U1, the P2S trades raw toolhead count for a simpler, more refined workflow — the AMS 2 Pro handles color switching without the learning curve Snapmaker’s system demands. The 65 °C filament drying and 50 °C chamber are features that matter more than they sound: they let you run engineering filaments reliably, something the FlashForge Adventurer 5M, capped at a 280 °C hotend and no heated chamber, simply cannot match.
Pros:- 600 mm/s printing that stays precise in practice
- 15-minute setup with fully automatic calibration
- AMS 2 Pro enables true multi-color and multi-material prints
- Smart airflow plus heated chamber for consistent engineering-filament results
Cons:- The base P2S alone cannot print multi-color — you’re locked into the Combo for that capability
- Filament drying and chamber controls add configuration steps casual users may never touch
Best for: Makers and small studios who want professional-grade multi-color output with minimal fiddling
Not ideal for: Tight budgets or small workspaces — the combo footprint and feature set cost more in money and desk space than most people’s first printer needs to
- Print Speed:600 mm/s
- Setup Time:Approximately 15 minutes
- Filament Drying Temperature:65 °C
- Chamber Temperature:50 °C
- Filament Compatibility:Multi-color / multi-material
- Calibration:Automatic
Our verdict“If you want one machine that handles speed, materials, and multicolor without compromise, this is the one to buy.”
ELEGOO Centauri Carbon 2 Combo 3D Printer, Multicolor Printing
ELEGOO’s pitch here is straightforward: four-color printing and engineering-grade material support for noticeably less outlay than the Bambu Lab P2S Combo. You give up some top-end speed — 500 mm/s versus the P2S’s 600 mm/s — but with 20,000 mm/s² acceleration, real-world throughput stays competitive. The CANVAS color system with smart filament detection is the standout: it catches runouts and mismatches before they ruin an hours-long multicolor print. Where the Bambu A1 Combo is friendlier to newcomers, the Centauri Carbon 2 asks more of you during initial setup, and its rigid aluminum frame needs a stable surface because high-speed runs can transmit vibration if it’s not leveled properly.
Pros:- Seamless 4-color printing with smart filament runout detection
- Handles engineering-grade materials, not just PLA
- Rigid aluminum frame keeps high-speed prints accurate
- Fully automated calibration once initially configured
Cons:- Setup is more involved than Bambu’s near-instant experience
- Vibrations at high speed unless the machine sits on a stable, solid surface
Best for: Hobbyists who want four-color and engineering-material capability without paying flagship prices
Not ideal for: Complete beginners expecting plug-and-play — the setup process involves a genuine learning curve the first week
- Color Printing:4-color via CANVAS system
- Max Speed:500 mm/s
- Acceleration:20,000 mm/s²
- Material Compatibility:Wide range including engineering-grade
- Frame:Rigid aluminum
- Calibration:Fully automated
Our verdict“The smart pick if multicolor is the goal but the P2S Combo price isn’t in the plan.”
Snapmaker U1 3D Printer, 4-Toolhead with 5s Toolchanger, Multi-Color Printing
The U1 takes a fundamentally different approach to multicolor than the Bambu P2S or ELEGOO Centauri Carbon 2: instead of routing filaments through one nozzle, it carries four independent toolheads that swap automatically in five seconds. The practical payoff is far less filament waste — no long purge towers — and true multi-material output, mixing PLA with flexibles or support materials in a single job. The 270 x 270 x 270 mm build volume is also the largest in this batch, edging out the Adventurer 5M’s 220 mm cube by a wide margin. The cost of all this capability is literal: at 59 pounds and 22.6 inches wide, it demands dedicated bench space, and its price reflects the hardware.
Pros:- 5-second automatic toolchanger eliminates purge-tower waste
- Genuine multi-material printing beyond just color changes
- 270 mm cubed build volume, the largest here
- 500 mm/s printing with smart calibration and approachable software
Cons:- At 59 pounds and over 22 inches wide, it needs substantial dedicated space
- Complex initial setup with a real learning curve for newcomers
- Premium price driven by the four-toolhead hardware
Best for: Prototypers and small-batch fabricators who mix materials in single prints and hate purge waste
Not ideal for: Casual hobbyists and beginners — the size, weight, price, and setup complexity are overkill for occasional PLA models
- Toolheads:4 independent, 5-second automatic changer
- Build Volume:270 x 270 x 270 mm
- Max Speed:500 mm/s
- Dimensions:22.6 x 13 x 14.2 inches
- Weight:59 pounds
- Warranty:1 year
Our verdict“A workshop machine for people who earn back its cost in wasted-filament savings and multi-material capability.”
FlashForge Adventurer 5M 3D Printer with Auto Leveling and High-Speed Printing
If you don’t need multicolor — and many people discover they don’t — the Adventurer 5M is the honest, budget-conscious choice in this lineup. It shares the 600 mm/s top speed of the pricier Bambu P2S but skips the color hardware entirely, keeping it compact and affordable. The 35-second warm-up and swappable nozzles from 0.25 mm to 0.8 mm make it genuinely versatile for detail work or fast draft prints. Its limitation is material range: the 280 °C extruder ceiling rules out the higher-temperature engineering filaments the ELEGOO Centauri Carbon 2 handles, so this is really a PLA-and-basic-filaments machine. Compared with the Creality Ender 3 V3 SE, it’s far faster and more automated, but less of an absolute beginner’s bargain.
Pros:- Automatic bed leveling removes the most common beginner frustration
- 600 mm/s top speed matches printers costing far more
- Swappable nozzles from 0.25 mm to 0.8 mm for detail or speed
- App-based remote monitoring and control
Cons:- 280 °C maximum extruder temperature limits material options
- Feature-dense settings can overwhelm first-time printer owners
Best for: Students, educators, and makers who want fast, reliable single-color prints in a compact package
Not ideal for: Anyone eyeing exotic filaments like polycarbonate — the 280 °C hotend and lack of a heated chamber are hard limits
- Build Volume:220 x 220 x 220 mm
- Max Speed:600 mm/s
- Max Extruder Temperature:280 °C
- Nozzle Options:0.25 mm to 0.8 mm
- Warm-up Time:35 seconds
- Bed Leveling:Automatic
Our verdict“The best pure value for people who’ve decided multicolor is a want, not a need.”
Bambu Lab A1 Combo + LED Lamp Kit, Multi-Color 3D Printing (with AMS lite)
The A1 Combo is the entry door to Bambu’s ecosystem, and this kit’s LED lamp bundle makes it the only option here aimed squarely at lithophanes, lamps, and illuminated decor — projects the Snapmaker U1 or P2S can technically print but don’t cater to. Multi-color arrives via the AMS lite, though buyers should understand the A1 is single-color without it, same caveat as the P2S Combo. Active flow rate compensation and automatic calibration deliver the accuracy Bambu is known for, and at 28.5 pounds it’s far easier to place than the 59-pound Snapmaker. Print consistency can vary a bit more than on the P-series machines, which is the real reason this is the creative pick rather than the overall one.
Pros:- LED lamp kit opens up illuminated-model projects out of the box
- High-speed printing with active flow rate compensation for accuracy
- Automatic calibration keeps setup simple
- AMS lite enables multi-color printing at an accessible tier
Cons:- Multi-color printing depends entirely on the AMS lite attachment
- Large footprint at over 23 inches wide and 28.5 pounds
- More print-quality variability than Bambu’s P-series machines
Best for: DIY decorators and gift-makers who want to print lamps, lithophanes, and colorful display pieces
Not ideal for: Users chasing maximum print-to-print consistency for functional parts — the P2S holds tighter tolerances
- Multi-Color System:AMS lite (included)
- Calibration:Automatic with active flow rate compensation
- Included Extras:LED lamp kit for illuminated models
- Dimensions:23.01 x 21.06 x 16.77 inches
- Weight:28.5 pounds
- Manufacturer:Shenzhen Tuozhu Technology Co., Ltd
Our verdict“The choice for makers whose end goal is glowing, colorful showpieces rather than engineering parts.”
Creality SPARKX i7 Nano Combo 3D Printer
This option stands out for pairing a genuinely roomy 260×260×255mm build volume with built-in multicolor hardware — a combination most compact printers can’t match. Where the Bambu Lab A1 asks you to add the AMS lite separately, the SPARKX i7 Nano Combo includes automatic filament switching and refill out of the box, which means fewer mid-print interruptions on long, complex jobs. Compared with the Creality K2 SE, it trades raw print speed for a larger bed and a smaller footprint relative to what it produces. The tradeoffs are real: setup leans technical, filament compatibility is narrower than open-frame rivals, and the feature-packed combo format carries a premium. This pick makes the most sense for makers who print large multipart models and want color without babysitting spools.
Pros:- Multicolor printing with automatic filament switching is included, not a paid add-on
- Auto filament refill and real-time monitoring keep long prints running unattended
- 260×260×255mm build volume is larger than most printers in this compact class
- Space-saving footprint relative to its print capacity
Cons:- Complex initial setup demands some technical comfort
- Advanced combo features push the cost above simpler single-color machines
- Limited to certain filament types, restricting material experimentation
Best for: Hobbyists printing large cosplay pieces and multipart models who want multicolor capability included rather than added later
Not ideal for: Absolute beginners — the multicolor system setup and calibration curve will frustrate someone who has never leveled a bed or swapped a nozzle
- Build Size:260×260×255mm
- Color Support:Multi-color with automatic filament switching
- Auto-Leveling:Yes
- Auto Filament Refill:Yes
- Auto Feed & Retract:Yes
- Overall Size:10.24×10.24×10 inches
Our verdict“A strong choice if you want big-print multicolor capability in one box, provided you’re comfortable with a more involved setup than a Bambu Lab A1 demands.”
Creality K2 SE 3D Printer
The K2 SE earns its spot through 500mm/s print speeds anchored by a die-cast aluminum frame that keeps fast prints from turning wobbly. Against the ANYCUBIC Kobra X, it gives up build volume — 220×215×245mm versus a full 260mm cube — but the quick-swap nozzle and modular direct drive extruder make it far more forgiving if you switch between PLA, PETG, or TPU regularly. Multi-color is supported, but unlike the SPARKX i7 Nano Combo, the Creality CFS system is a separate purchase, so budget accordingly if color matters to you. Setup is simple enough that a first-timer can be printing within an hour. The catch: pushing 500mm/s all day demands good filament and occasional tuning, and the feature set can overwhelm someone who just wants a basic machine.
Pros:- 500mm/s print speed dramatically shortens turnaround on multi-part projects
- Die-cast aluminum frame keeps fast prints stable and precise
- Quick-swap nozzle and modular direct drive extruder simplify maintenance
- Auto leveling makes first-time setup genuinely approachable
Cons:- CFS multicolor system sold separately, adding real cost if you want color
- Build volume falls short of the ANYCUBIC Kobra X for large models
- Layered feature set can feel complex for casual users
Best for: Frequent makers and small-batch producers who value print speed and quick nozzle changes over maximum build size
Not ideal for: Buyers who need multicolor on day one without extra purchases, or anyone printing oversized single-piece models that need a 260mm bed
- Print Speed:500mm/s
- Build Volume:220×215×245mm
- Frame Material:Die-cast aluminum alloy
- Multi-Color Support:Yes (with CFS system, sold separately)
- Extruder Type:Modular direct drive
- Nozzle:Quick-swap
- Auto Leveling:Yes
- Connectivity:Creality OS, Creality Print & Cloud
Our verdict“The pick for speed-focused makers who want a rigid, upgrade-friendly workhorse and don’t mind buying multicolor capability later.”
Bambu Lab A1 3D Printer
No printer in this lineup lowers the barrier to entry like the A1. Full auto-calibration means you unbox, answer a few touchscreen prompts, and print — a sharper contrast with the Creality SPARKX i7 Nano Combo’s technical setup. Its 10,000 mm/s² acceleration still beats most entry machines, and active motor noise canceling makes it quiet enough for a bedroom or classroom. Multi-color is possible with the optional AMS lite, but the base unit is single-color; compared with the ANYCUBIC Kobra X, which handles four colors natively, you pay more to unlock that capability. The open-frame, IDEX-free design also means the A1 is happiest with PLA in stable indoor conditions rather than engineering filaments. For a first printer — especially one a teenager will operate — this model is the least intimidating path to consistently good prints.
Pros:- Full auto-calibration removes the most common beginner failure point
- 10,000 mm/s² acceleration delivers fast, detailed prints for the class
- Quiet operation suits shared living and study spaces
- User-friendly touchscreen and minimal assembly
Cons:- Multi-color requires the optional AMS lite add-on
- Open design limits use with warp-prone engineering filaments
- Modest build volume compared with 260mm-class rivals
Best for: First-time buyers, families, and classrooms that want reliable prints with near-zero setup effort and quiet operation
Not ideal for: Users who want multicolor out of the box or need to print temperature-sensitive materials like ABS that benefit from an enclosed chamber
- Acceleration:10,000 mm/s²
- Calibration:Full auto-calibration
- Multi-Color:Optional with AMS lite
- Operation:Quiet with active motor noise canceling
- Interface:Touchscreen
- Dimensions:21.76 × 20.83 × 12.87 inches
- Weight:22 pounds
Our verdict“The easiest entry point into 3D printing here — buy it for simplicity, not for maximum build size or built-in color.”
Bambu Lab P1S 3D Printer
The P1S is the pick when print quality matters more than saving money. Its enclosed chamber handles ABS and ASA reliably — something neither the open-frame Bambu Lab A1 nor the Creality K2 SE can claim — and with 20,000 mm/s² acceleration at 500mm/s, it’s among the fastest enclosed machines available. Setup takes about fifteen minutes. The main tradeoff mirrors the K2 SE’s: multi-color requires the separately attached AMS, though once connected you get up to 16 colors and multi-material support including PVA supports. Skip it if you want to run carbon- or glass-fiber reinforced filaments; the P1S isn’t built for those, and pushing abrasives through it will wear components quickly. Compared with the ANYCUBIC Kobra X, you sacrifice native 4-color convenience but gain chamber-controlled quality across a much broader material range.
Pros:- Enclosed design stabilizes temperatures for warp-prone materials like ABS and ASA
- Up to 16-color and multi-material printing with broad filament support
- 500mm/s speed and 20,000 mm/s² acceleration put it at the head of this lineup
- 15-minute setup despite the premium hardware
Cons:- Multi-color printing requires the separately purchased AMS unit
- Not rated for carbon or glass fiber reinforced filaments
- Premium positioning means paying for capabilities casual users won’t use
Best for: Serious hobbyists and prosumers printing functional parts in ABS, ASA, PETG, or exotic materials who need speed and consistent quality
Not ideal for: Buyers on a tighter budget who mainly print PLA — an open-frame machine like the A1 delivers similar PLA results for less
- Colors:Up to 16 (with AMS)
- Speed:500mm/s
- Acceleration:20,000 mm/s²
- Design:Enclosed chamber
- Setup Time:15 minutes
- Auto Leveling:Yes
- Supported Filaments:PLA, PETG, TPU, PVA, PET, ABS, ASA; capable of PA, PC; not recommended for carbon/glass fiber reinforced polymers
Our verdict“The quality-first choice for makers who print engineering materials and want the fastest enclosed output — just factor in the AMS if color is the goal.”
ANYCUBIC Kobra X 3D Printer
Where nearly every rival here charges extra for color, the Kobra X ships with 4-color printing built in, which is its single strongest argument against the Creality K2 SE or Bambu Lab A1 — both of which need add-on systems to match it. Its full 260mm-cube build volume also edges out the SPARKX i7 Nano Combo by a hair in height, and the LeviQ 3.0 auto-leveling with 49-point scanning keeps the bed dialed in without manual fiddling. Running at 45dB, it’s quiet enough for a home office, and the 720P AI camera lets you check on prints remotely. The tradeoffs: at nearly 21 pounds and 18 inches deep, it demands real desk space, and the sheer number of features — AI monitoring, multicolor management, leveling menus — can overwhelm a true first-timer who would be happier with the A1’s simplicity.
Pros:- Native 4-color printing with no separate multicolor purchase required
- Large 260×260×260mm build volume for ambitious projects
- Quiet 45dB operation fits home and classroom environments
- 15-minute pre-assembled setup plus AI-powered 720P print monitoring
Cons:- Large footprint and 20.9-pound weight demand dedicated bench space
- Feature-rich interface can overwhelm first-time printer owners
- Enclosure-free design limits some engineering filaments
Best for: Creative hobbyists and educators who want vibrant multicolor prints and a large build volume without buying accessory systems
Not ideal for: Compact workspaces or hands-off beginners — it’s bulky, and the feature depth rewards users willing to learn the interface
- Print Size:260 × 260 × 260mm
- Color Capability:Native 4-color printing
- Auto-Leveling:LeviQ 3.0 with 49-point accuracy
- Noise Level:45dB
- Monitoring:720P AI-powered camera
- Setup:Pre-assembled, roughly 15 minutes
- Weight:20.9 pounds
- Dimensions:17.93 × 17.53 × 18.16 inches
Our verdict“The smart pick if multicolor and big builds are the priority and you want everything included in one machine rather than assembled from add-ons.”
FLASHFORGE Adventurer 5M 3D Printer
The Adventurer 5M earns its spot by making 600mm/s printing feel effortless right out of the box. The one-click auto leveling genuinely removes the fiddliest part of setup, and the quick-detachable nozzle means swapping between materials takes seconds instead of a teardown. Compared with the Creality Ender 3 V3 SE, the FlashForge reaches more than double the top speed and heats its nozzle to 280°C in about 35 seconds, which opens the door to PETG and other temperature-hungry filaments the budget Creality handles less gracefully. The tradeoff is physical bulk — at nearly 24 pounds and without an enclosure like the Bambu Lab P1S, it occupies real desk space and struggles with drafts on temperature-sensitive materials. The direct extruder and power recovery round out a package that prioritizes speed with minimal fuss.
Pros:- One-click auto leveling makes setup nearly effortless
- 600mm/s top speed with 20000 mm/s² acceleration
- Quick-swappable nozzle handles up to 280°C for versatile filaments
- Filament run-out and power recovery protect long prints
Cons:- No enclosure, so ABS and ASA results can be inconsistent
- Bulky and heavy at 23.8 pounds for cramped workspaces
Best for: Intermediate makers who want fast, low-maintenance single-color printing without tuning sessions
Not ideal for: Anyone wanting multi-color output — this is a single-extruder machine, unlike the Bambu Lab P1S Combo or FlashForge AD5X
- Print Size:220 x 220 x 220mm
- Maximum Speed:600mm/s
- Acceleration:20000 mm/s²
- Nozzle Temperature:280°C
- Heating Time:35 seconds
- Heating Power:50W
- Item Weight:23.8 pounds
Our verdict“If you want a fast, single-color workhorse that works on day one, this is the most balanced speed-per-effort pick in the lineup.”
Creality Ender 3 V3 SE 3D Printer
Not everyone needs 600mm/s or multi-color capability, and the Ender 3 V3 SE is built around that reality. What it offers is a dependable intro to 3D printing at the lowest commitment level in this roundup: assembly is straightforward, the Sprite Direct Drive extruder delivers consistent filament control, and the flexible build plate pops finished prints off without a scraper. It runs at 250mm/s — respectable, though well short of the FlashForge Adventurer 5M or AD5X — and the silent mainboard keeps it livable in a bedroom or shared office. Some users report calibration drift that requires occasional re-leveling, which is the main gap between it and pricier options like the Bambu Lab A1 Mini. For a first printer destined for PLA projects, those rough edges are tolerable.
Pros:- Easy assembly with auto leveling for quick first prints
- Sprite Direct Drive extruder handles flexible filaments decently
- Silent mainboard makes it apartment-friendly
- Flexible build plate simplifies print removal
Cons:- Some users experience calibration issues requiring re-tuning
- 250mm/s ceiling lags far behind the FlashForge and Bambu options
Best for: First-time buyers and students who want to learn 3D printing cheaply on mostly PLA
Not ideal for: Impatient makers or anyone printing PETG and flexible filaments regularly — the speed cap and calibration quirks will frustrate them
- Print Speed:Up to 250mm/s
- Extruder:Sprite Direct Drive
- Auto Leveling:Yes
- Product Dimensions:15 x 19.6 x 15 inches
- Item Weight:19.8 pounds
- Mainboard:Silent mainboard for quiet operation
Our verdict“A sensible starter machine that trades speed and polish for accessibility, best for buyers testing the hobby before spending more.”
Bambu Lab P1S Combo 3D Printer
The P1S Combo is the most complete package here, pairing an enclosed coreXY frame with the AMS system for true multi-color and multi-material printing. The enclosure matters more than it sounds: it stabilizes chamber temperature, so ABS and ASA print reliably — something the open-frame Adventurer 5M simply can’t match. Setup is quick for a machine this capable, and 500mm/s output keeps pace with rapid prototyping demands. The catches are real, though: multi-color only works with the AMS attached, which adds cost and filament waste during purges, and the hot end isn’t rated for carbon or glass fiber reinforced filaments — makers working with those composites should look toward the Snapmaker U1 or ELEGOO Centauri Carbon 2 instead. For everyone else, it’s the strongest blend of speed, versatility, and print quality in this batch.
Pros:- Multi-color and multi-material printing via the AMS system
- Enclosed coreXY design enables stable ABS and ASA prints
- 500mm/s speed keeps production efficient
- Fast setup despite the advanced feature set
Cons:- Multi-color capability depends entirely on the AMS add-on
- Cannot print carbon or glass fiber reinforced filaments
- At 47.5 pounds, it’s the heaviest machine in this batch
Best for: Serious hobbyists and small studios producing colorful, functional parts in diverse materials
Not ideal for: Composite filament users — carbon and glass fiber reinforced polymers are explicitly unsupported
- Maximum Printing Speed:500mm/s
- Acceleration:20000 mm/s²
- Frame:Enclosed coreXY
- Supported Filaments:PLA, PETG, TPU, PVA, PET, ABS, ASA; capable of PA, PC
- Not Recommended:Carbon/glass fiber reinforced polymers
- Multi-Color:Yes, with Bambu Lab AMS
- Auto Bed Leveling:Yes
- Item Weight:47.5 pounds
Our verdict“The strongest do-everything choice if your budget stretches to the AMS combo and you don’t need composite filaments.”
Bambu Lab A1 Mini 3D Printer + LED Lamp Kit
The A1 Mini leans into a different proposition than everything else here: sheer accessibility. It arrives essentially ready to use, with automatic calibration handling the technical heavy lifting, and at 12.1 pounds it’s the lightest machine in this roundup — easy to tuck on a shelf or move between rooms. The bundled LED Lamp Kit plus the MakerWorld model library makes it feel more like a creative toy platform than a piece of workshop equipment, which suits crafters, gift-makers, and younger users. Compared with the Creality Ender 3 V3 SE, you give up build volume and open-frame tinkering culture in exchange for a smoother, quieter experience. The small print bed is the defining limitation — anyone printing larger decorative pieces will outgrow it quickly, and the compact ecosystem has a learning curve of its own.
Pros:- Near-instant setup with fully automatic calibration
- Quiet operation fits bedrooms and studios
- LED Lamp Kit and MakerWorld library provide ready-made project ideas
- Light 12.1-pound build is genuinely portable
Cons:- Compact build plate limits print size
- Ecosystem features and app-based workflow can feel convoluted to newcomers
Best for: Families, crafters, and casual makers who want guided projects and decorative output over large functional parts
Not ideal for: Functional-part makers and cosplayers — the mini build volume rules out larger prints
- Calibration:Fully automatic
- Operation:Quiet operation for home use
- Included Accessory:LED Lamp Kit
- Model Library:MakerWorld with Bambu Handy app
- Product Dimensions:15.21 x 16.77 x 17.94 inches
- Item Weight:12.1 pounds
Our verdict“The friendliest entry point for hobbyists and kids who want satisfying results without learning the machine’s internals.”
FlashForge AD5X Multi-Color 3D Printer
The AD5X positions itself as the speed-first multi-color alternative to the Bambu Lab P1S Combo. It matches the Adventurer 5M’s 600mm/s ceiling while adding up to four simultaneous colors, and its 300°C direct drive extruder goes 20 degrees hotter than both the Adventurer 5M and the P1S — useful for engineering-grade filaments like nylon. The swappable 0.25mm to 0.8mm nozzle range is a genuine differentiator: fine nozzles capture intricate detail while wide nozzles cut print times on chunky prototypes, a flexibility no other machine in this batch advertises so directly. Mobile app control and remote monitoring suit a workshop workflow. Against the P1S, you trade the enclosure and Bambu’s polished ecosystem for raw speed and nozzle versatility — and beginners may find the calibration demands at high speeds steep, especially compared with the nearly hands-off A1 Mini.
Pros:- Four-color simultaneous printing without an enclosed frame premium
- 600mm/s top speed for fast prototyping cycles
- 300°C extruder handles demanding filament types
- Interchangeable 0.25–0.8mm nozzles balance detail and speed
Cons:- High-speed printing demands careful calibration to avoid quality loss
- Open design and feature depth create a steeper learning curve than Bambu alternatives
Best for: Prototypers and product designers who need fast turnaround on detailed, multi-color parts
Not ideal for: Complete beginners — high-speed calibration and multi-color management involve a real learning curve
- Print Speed:600mm/s
- Build Volume:220 x 220 x 220mm
- Extruder Temperature:300°C
- Nozzle Sizes:0.25mm to 0.8mm
- Multi-Color:Up to 4 colors simultaneously
- Auto Leveling:Yes
- Connectivity:Mobile app control with remote monitoring
Our verdict“The pick for experienced makers who prioritize speed, nozzle flexibility, and multicolor output over turnkey simplicity.”

How We Picked
I ranked these 15 printers on four buyer-facing criteria rather than raw spec sheets. Print quality and speed came first, because a printer that produces wobbly parts at 500 mm/s is worse than a slower machine with clean output. Ease of use was next: auto-leveling, out-of-box readiness, filament runout handling, and how forgiving the machine is when settings aren’t perfect. Versatility covered multicolor support, enclosure status (which determines whether ABS, ASA, and other engineering filaments are realistic), and build volume. Finally, I weighed long-term ownership — bed slingers like the Ender 3 V3 SE need more adjustment over time, while enclosed core-XY machines hold calibration longer but cost more to repair.
The ranking order reflects a simple logic: machines that combine speed, reliability, and multicolor with the fewest compromises sit at the top, value-priced machines that give up one of those traits fill the middle, and specialized or narrowly focused printers round out the list. Where two printers tie on specs, I gave the edge to the one with the more mature ecosystem of slicer support, firmware updates, and community troubleshooting resources — factors that matter far more in month six of ownership than on day one.
Factors to Consider When Choosing 3d Printers
Before zeroing in on a specific model, it helps to understand the structural choices that shape every 3D printer purchase. These are the factors that quietly determine whether you’ll love your printer or end up reselling it.Motion System: Core-XY vs. Bed-Slinger
The printer’s frame architecture affects print quality more than any headline speed figure. Core-XY machines (the P2S, K2 SE, AD5X, Centauri Carbon 2) move the print head on a fixed gantry while the bed only drops between layers, which reduces wobble and lets them print faster without visible artifacts. Bed-slinger designs like the Ender 3 V3 SE and A1 move the heavy build plate back and forth, which caps practical speed and makes tall, thin parts more prone to ringing. A common mistake is chasing advertised speeds of 500–600 mm/s on a bed-slinger — in real prints you’ll rarely exceed half that with acceptable quality. If you plan to print functional parts in quantity, core-XY is worth the premium; for occasional hobby prints, a well-tuned bed-slinger is perfectly adequate.
Enclosure: Which Filaments Can You Actually Print?
An enclosed chamber isn’t about looks — it’s what makes warping-prone materials like ABS, ASA, and some nylons printable. Open-frame printers like the A1, A1 Mini, and most budget Creality machines excel at PLA and PETG but will crack or curl the moment you attempt ABS in a drafty room. Semi-enclosed designs like the Adventurer 5M sit in between, handling PETG comfortably and ABS in a pinch. Buyers frequently overpay for enclosures they’ll never need: if your projects are decorative PLA prints, an open frame saves money and gives better visibility. Conversely, functional-part makers who skip the enclosure often end up buying a second printer within a year — the more expensive path overall.
Multicolor: Systems Are Not Interchangeable
Every multicolor system on this list works differently, and the differences show up in your filament bill. Spool-swapping systems like the Bambu AMS and ELEGOO’s CFS purge old color out of a single nozzle during transitions, which can waste 10–30% of your filament on multicolor prints — fine for occasional color work, painful for production. Toolchanger designs like the Snapmaker U1 carry multiple nozzles and swap in about five seconds with no purge at all, eliminating waste but adding cost and complexity. Ask yourself how often you’ll actually print in multiple colors; many buyers pay a premium for combo bundles and then run single-color spools for a year. If multicolor is your core use case, the toolchanger math favors the U1. If it’s a nice-to-have, a combo bundle is the cheaper route.
Build Volume: Buy for What You Print
Build volume is the one spec you can’t upgrade later, but it’s also the most commonly overbought. A 220mm cube — the standard on the Adventurer 5M, AD5X, and A1 — covers the vast majority of hobby prints, miniatures, and household replacement parts. Larger beds like the K2 SE’s 220×215×245mm or big-volume machines pay off only if you regularly print helmets, cosplay armor, or batch production runs. Two tradeoffs come with bigger beds: more surface to keep level, and longer heating times that add minutes to every print. A smarter strategy for many buyers is a compact printer like the A1 Mini plus a spool of careful part-splitting, rather than paying for volume you use once a quarter.
Reliability Features That Actually Matter
Auto-leveling has become near-universal, but the supporting features separate printers that run unattended from printers that need babysitting. Look for filament runout sensors, which let you resume after a spool runs dry mid-print, and direct-drive extruders (standard on the Adventurer 5M and most Bambu models), which handle flexible filaments far better than Bowden setups. Auto filament refill, as on the Creality SPARKX i7 Nano, quietly saves you from failed overnight prints. Resume-after-power-loss is another underrated feature if your electricity is less than stable. None of these appear in marketing headlines, but they’re the difference between a printer you trust for 12-hour jobs and one you check on every hour.
Total Cost of Ownership Beyond the Sticker
The purchase price is only the entry fee. Budget printers like the Ender 3 V3 SE tend to need replacement nozzles, upgraded beds, and occasional belt tightening within the first year — cheap fixes that still cost time. Multicolor bundles multiply consumable costs: purge towers and transition waste mean a four-color print can consume noticeably more filament than its single-color equivalent. Nozzle temperature ceilings matter too; a 280–300°C extruder like the Adventurer 5M’s or AD5X’s opens up higher-temperature materials, while a lower ceiling quietly locks you out of them. Before deciding, sketch out what you’ll print in the first six months and price the filament that workflow demands — that number often reshuffles which printer is actually cheapest.
Frequently Asked Questions
Is the Bambu Lab P2S Combo worth it over the cheaper P1S Combo?
For most serious hobbyists, yes — but the gap is narrower than the prices suggest. The P2S brings refined motion control, the newer AMS 2 Pro with faster spool switching, and better thermal management, which translates into marginally cleaner surface finishes and fewer failed prints on long jobs. The P1S Combo still produces excellent parts and remains one of the most reliable enclosed printers available, so if your budget is tight, it’s the smarter allocation of funds. The P2S makes the most sense for people printing daily or selling prints, where the small reliability edge compounds. If you print weekly or less, put the savings toward filament instead.
Do I need a multicolor system, or is it a gimmick I’ll stop using?
It depends entirely on what you print. Multicolor genuinely earns its keep for miniatures, figurines, signs, and organizational labels — anything where painting afterward would be tedious. It’s largely wasted on functional parts, brackets, and prototyping, where single-color PLA or PETG covers 95% of use cases. Remember the hidden cost: spool-based systems like the AMS lite on the A1 Combo and ELEGOO’s CFS generate purge waste on every color change, so multicolor prints consume more filament and take longer. A reasonable middle path is buying a single-color printer from a brand with an upgradeable multicolor ecosystem, so you can add the capability later if you miss it.
Can a beginner start on a high-speed printer like the Creality K2 SE, or should they buy an entry model first?
Modern high-speed printers are actually more beginner-friendly than the slow machines of a few years ago, because auto-leveling and preconfigured profiles remove the calibration skills beginners traditionally struggled with. The K2 SE and similar machines work nearly out of the box with default settings, so there’s no technical reason a novice can’t start there. The real argument for starting cheaper — say an Ender 3 V3 SE or A1 Mini — is discovering whether you’ll stick with the hobby before committing serious money. If you already know you want to print functional parts or run long jobs, buying the capable machine first avoids the common pattern of upgrading within six months and losing money on the starter unit.
How does the Snapmaker U1’s toolchanger compare to the Bambu AMS approach?
The fundamental difference is waste. The Bambu AMS and AMS lite route multiple filaments through a single nozzle, purging the old color before extruding the new one — simple and compact, but multicolor prints can waste a meaningful share of their filament, and every color change pauses the print for seconds. The Snapmaker U1 instead carries four separate toolheads and swaps them in about five seconds, so there’s no purge at all and prints finish faster. The tradeoffs are a larger footprint, more mechanical complexity, and a higher entry price for the full system. If you print multicolor parts in volume, the U1’s filament savings pay back over time; for occasional color work, the AMS route is cheaper and simpler.
Is a 3D printer safe to run unattended or overnight?
Modern enclosed printers with quality firmware are generally designed for unattended operation, but precautions still matter. Enclosed models like the P1S and Centauri Carbon 2 contain heat and fumes better and typically include thermal runaway protection, making them the safest choices for overnight prints. Open-frame machines are riskier mainly because drafts and temperature swings cause failures — wasted filament rather than danger — though a poorly maintained machine of any type can develop electrical faults. Practical safeguards include a smoke detector near the printer, avoiding cheap third-party power supplies, and running new filament brands on short test prints before committing to a 12-hour job. Filament runout sensors and auto-leveling, both standard on most models in this roundup, prevent the most common overnight failure modes.
Conclusion
Mapping these 15 printers to buyer types closes the decision cleanly. For the best overall, the Bambu Lab P2S Combo wins on the combination of speed, enclosure, and the most mature multicolor ecosystem — it’s the printer that satisfies hobbyists and small production users alike. The best value pick is the ELEGOO Centauri Carbon 2 Combo, which delivers core-XY speed and enclosed multicolor printing at a price that undercuts the premium tier, with the Bambu Lab A1 as the value choice if you don’t need an enclosure. For beginners and kids, the Bambu Lab A1 Mini or Creality Ender 3 V3 SE offer the gentlest on-ramp — ready-to-print simplicity over headline specs. On the premium end, the Snapmaker U1 justifies its cost for heavy multicolor users thanks to waste-free toolchanging, while the Creality K2 SE suits speed-focused functional-part makers. If your priority is a compact footprint with multicolor, the Creality SPARKX i7 Nano Combo fills that niche, and the FlashForge Adventurer 5M is the balanced mid-range pick when budget and capability need to meet in the middle. Whatever your choice, buy for the parts you’ll actually print, not the specs that look best on a listing.