Italian Cuisine
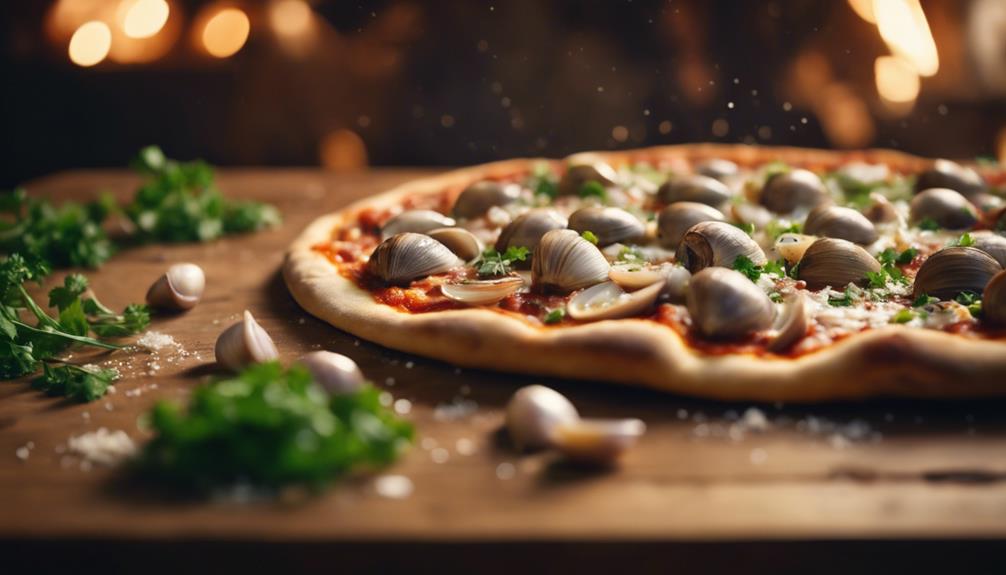
Clam Pizza: A Seafood Twist on a Classic Pie
Embark on a flavorful journey with a seafood-infused Clam Pizza, where the ocean meets the oven for a culinary adventure like no other.
Explore the detailed process of creating a delicious clam pizza, incorporating the flavors of the sea with the classic pizza tradition. Enjoy the decadent taste as you expertly steam fresh clams, ensuring a mouthwatering seafood experience. Enhance your cooking skills by skillfully adding the savory clams onto a crispy, golden-brown crust, blending textures and flavors perfectly. Impress your guests with this culinary masterpiece and enjoy a memorable dining experience together. Consider wine pairings to elevate the meal even further. Follow tips on storing leftovers to savor the delightful flavors for days to come.
Key Takeaways
- Incorporate fresh littleneck clams for authentic seafood flavor.
- Steam clams until open and remove meat delicately.
- Top pizza with clams, garlic, oregano, and pecorino-romano cheese.
- Bake at 500°F for 8 mins for a crispy crust.
- Pair with Sauvignon Blanc or Pinot Grigio for a delightful experience.
Ingredients
To make a delicious clam pizza, gather fresh littleneck clams, garlic, oregano, and Pecorino-Romano cheese as your key ingredients. The star of this seafood delight is unquestionably the clam. These briny bivalves, once shucked, are delicately placed atop the pizza before baking, infusing each bite with a taste of the ocean.
The combination of flavors from the tender clams, pungent garlic, aromatic oregano, and sharp Pecorino-Romano cheese creates a symphony of savory notes that seafood enthusiasts crave. Quality ingredients are paramount when crafting a memorable white clam pizza. Opting for fresh, high-quality clams ensures a superior taste experience.
The distinct flavor profile of the clam, when paired with the richness of the cheese and the earthiness of the oregano, elevates this seafood pizza to a culinary masterpiece. It's no wonder that white clam pizza has become a sought-after choice for those seeking a unique twist on the traditional pizza.
Preparing the Dough
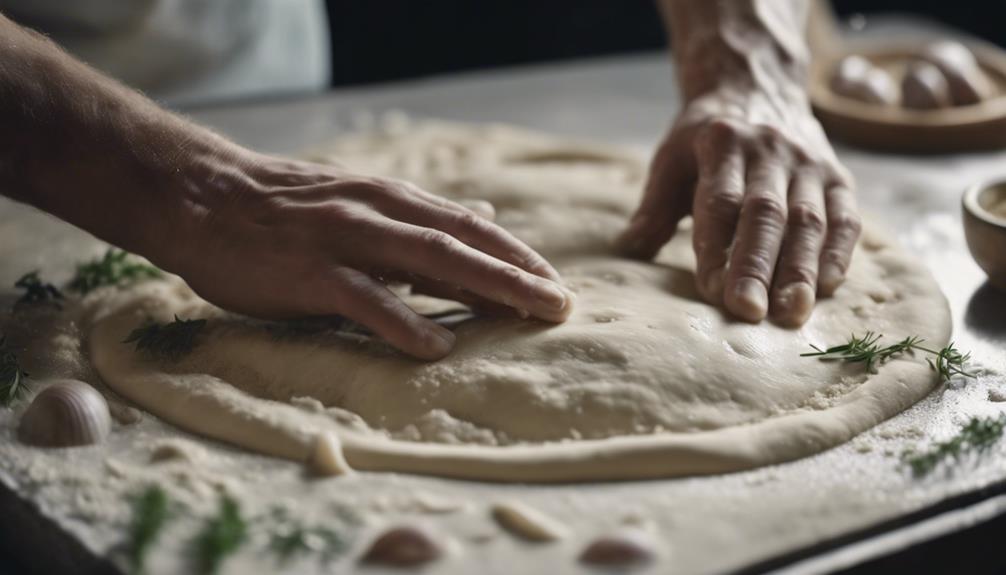
When making clam pizza, start by preparing the dough using a combination of bread flour and white whole wheat flour for a balanced texture. Knead the dough properly to develop gluten, resulting in a stretchy and elastic consistency. Proof the dough at room temperature or in a warm area to allow it to rise and develop flavor. Preparing the dough in advance and letting it rest in the refrigerator overnight can enhance the overall taste and texture of the pizza. Rolling out the dough to the desired thickness and shape is essential for achieving a crispy yet chewy crust when baked.
Dough Preparation Tips | Description |
---|---|
Use bread flour and whole wheat | Provides a balanced texture for the clam pizza dough. |
Proper kneading is essential | Develops gluten, creating a stretchy and elastic consistency. |
Proof the dough for flavor | Allowing it to rise at room temperature or in a warm area enhances taste. |
Rest dough in the refrigerator | Overnight rest improves overall taste and texture of the clam pizza. |
Roll out dough for best results | Achieve a crispy yet chewy crust by shaping the dough to desired thickness. |
Steaming the Clams
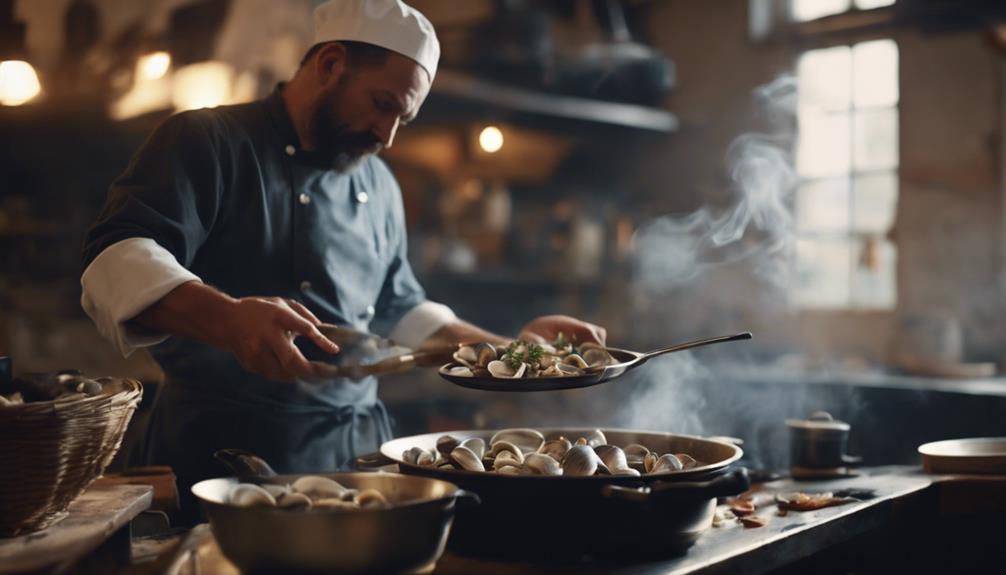
When steaming clams, make sure they're cooked until they open, indicating they're ready to be removed from their shells.
Using fresh clams is crucial for the best flavor and texture in your clam pizza.
The steaming process helps extract the natural juices and flavors of the clams, enhancing the overall taste of your pizza.
Cooking Clams Properly
Steam the clams until they open up, indicating they're cooked and ready to be shelled. This step is important in preparing the white clam pizza, as steaming helps retain the natural juices and flavors of the clams, ultimately enhancing the taste of the pizza.
Properly cooked clams should be delicately removed from their shells and added to the pizza just before baking to avoid overcooking. Steaming the clams is a rapid and simple technique that ensures they're cooked through and tender, making them the ideal topping for a flavorful clam pizza.
It's essential to use fresh clams and steam them correctly to achieve the desired texture and flavor for your homemade white clam pizza. By following these steps and paying attention to the details of steaming the clams, you can create a delicious seafood twist on the classic pie that's sure to impress your taste buds.
Adding Flavor to Clams
Enhancing the flavor of clams through steaming involves opening the shells to release their juices and create a delicious base for your clam pizza.
When steaming clams, it's important to make sure they're only cooked until they open. Overcooking can lead to a rubbery texture, affecting the overall taste of your dish.
To steam clams effectively, a pot with a small amount of water or broth can be used to cook them quickly. The liquid that's released by the clams during steaming holds a rich flavor that can elevate the sauce or broth you're preparing, adding depth to your clam pizza.
Remember, fresh clams should be tightly closed before steaming; any clams that remain closed after cooking should be discarded.
Incorporating Clams Into Pizza
To prepare clams for your pizza, start by steaming them until they open up, allowing for easy removal of the meat from the shells. Steaming the clams is crucial to make sure they are fully cooked and ready to be added to your white clam pie before baking. This method not only cooks the clams but also facilitates the separation of the meat from the shells, making it simpler to incorporate them into your pizza topping.
Here is a helpful table to guide you through the process of steaming clams for your delicious white clam pie:
Steps | Details |
---|---|
1. Purchase Clams | Choose fresh clams from a reputable source for the best flavor. |
2. Clean Clams | Scrub the clams under cold water to remove any dirt or sand. |
3. Steam Clams | Place the clams in a pot with a small amount of water and steam until they open. |
4. Remove Meat | Take out the cooked clam meat from the shells for pizza topping. |
5. Chop or Leave Whole | Decide whether to chop the clams or leave them whole based on preference. |
Following these steps will guarantee your white clam pizza turns out flavorful and satisfying, with perfectly cooked clams enhancing every bite.
Assembling the Pizza
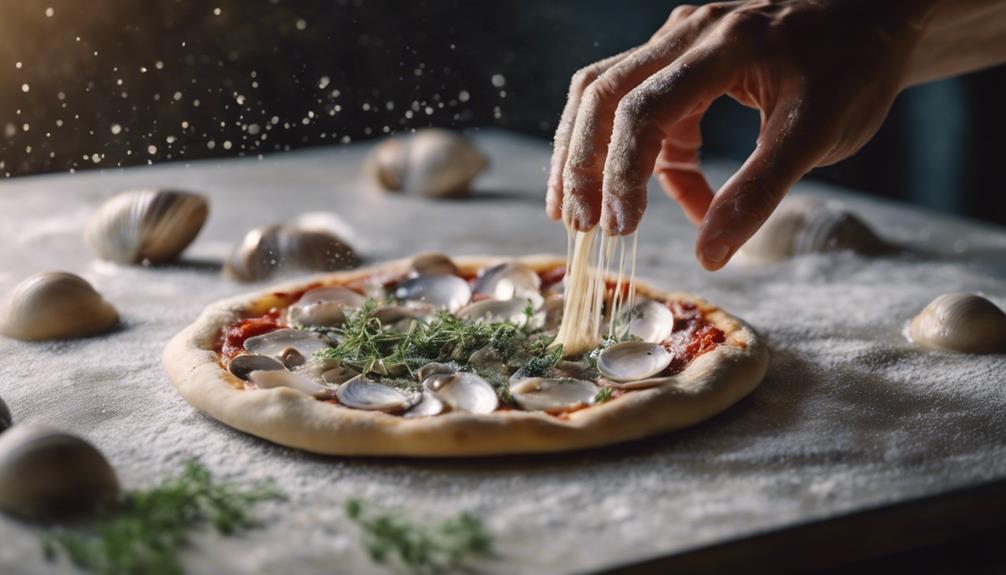
Spread olive oil and minced garlic over the dough to create a flavorful base for your clam pizza.
Once the dough is prepared, generously top it with shredded mozzarella cheese, which will melt into gooey perfection as the pizza bakes.
The star of the show, freshly steamed littleneck clams, should be shucked and evenly distributed across the pizza's surface. These briny morsels will infuse the dish with a taste of the sea, enhancing each bite with their unique flavor.
To add a touch of saltiness and depth, sprinkle pecorino romano cheese over the clams. This final layer of cheese will create a harmonious balance of flavors in the finished pie.
As you assemble the pizza, make sure that each component is spread out evenly to guarantee a consistent taste throughout. The careful arrangement of ingredients will contribute to a delicious outcome when the pizza is baked to perfection.
Baking to Perfection
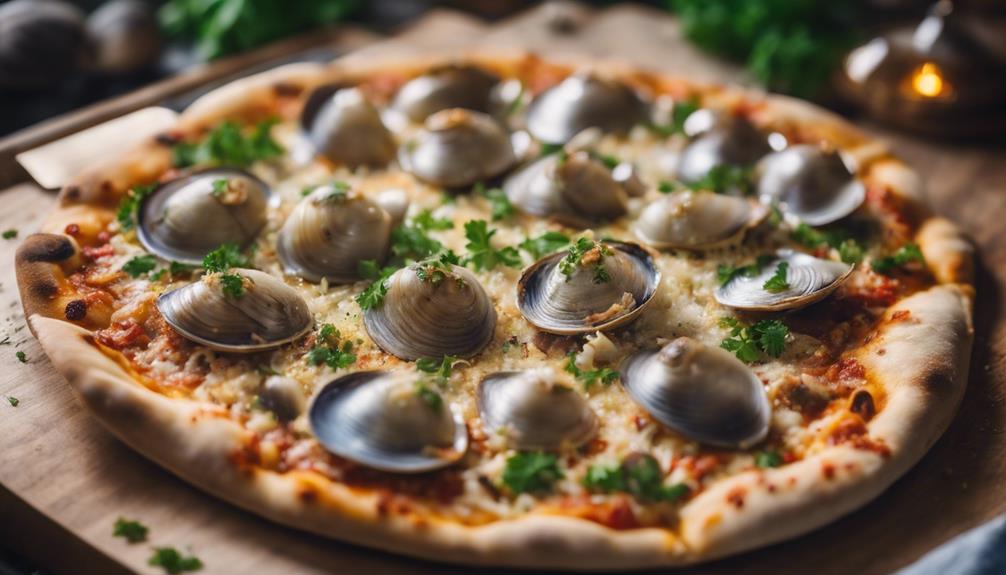
When baking your clam pizza, achieving a crispy crust is vital for a delightful texture.
The oven temperature of 500°F guarantees that the cheese melts perfectly and the clams cook just right.
Timing is essential to reach the pinnacle of perfection in your seafood pizza creation.
Crispy Crust Secrets
How can you achieve the perfect crispy crust for your clam pizza?
To guarantee a delightful crunch in every bite, preheat your oven to a scorching 500°F. This high temperature is crucial to achieving that sought-after crispiness while maintaining a tender interior.
When preparing your pizza, opt for a pizza stone or baking sheet dusted with cornmeal to prevent sticking and enhance the crust's texture. Shape the dough thinly and evenly to promote consistent crispiness throughout.
Once your pizza is assembled, bake it for approximately 8 minutes, or until the crust turns a beautiful golden brown, signaling its crisp perfection.
Oven Temperature Tips
To achieve the ideal bake for your clam pizza, make sure your oven is preheated to a scorching 500°F. The high temperature is essential for achieving a crispy crust while thoroughly cooking the clams and other toppings. It's important to maintain this heat by refraining from frequently opening the oven door, as fluctuations can affect the baking process. Keep a close eye on your clam pizza while it's in the oven to prevent burning at such high temperatures. Once the pizza is done, allow it to rest briefly. This resting period lets the flavors of the clams and other ingredients meld together, enhancing the overall taste of the pizza.
Oven Temperature Tips | |
---|---|
Preheat to 500°F | Avoid opening oven door frequently |
Monitor pizza closely | Allow pizza to rest post-baking |
Timing for Perfection
Maintaining the high heat of 500°F in the oven for precisely 8 minutes is key to achieving a crispy crust and perfectly cooked clam pizza with melted cheese. This timing allows the high baking temperature to swiftly cook the clams without risking overcooking, preserving their freshness and flavors.
The brief baking time also guarantees that the seafood toppings retain their natural essence, enhancing the overall taste of the pizza. As the pizza bakes, keep an eye on the crust's color – a golden brown hue indicates that it's ready to be savored.
Proper timing in the oven is essential, as it plays a significant role in maintaining the delicate balance of textures and flavors in the clam pizza. By adhering to this precise timing, you can enjoy a delectable seafood twist on a classic pie that showcases the briny goodness of clams harmoniously combined with gooey melted cheese on a crispy crust.
Adding the Final Touches
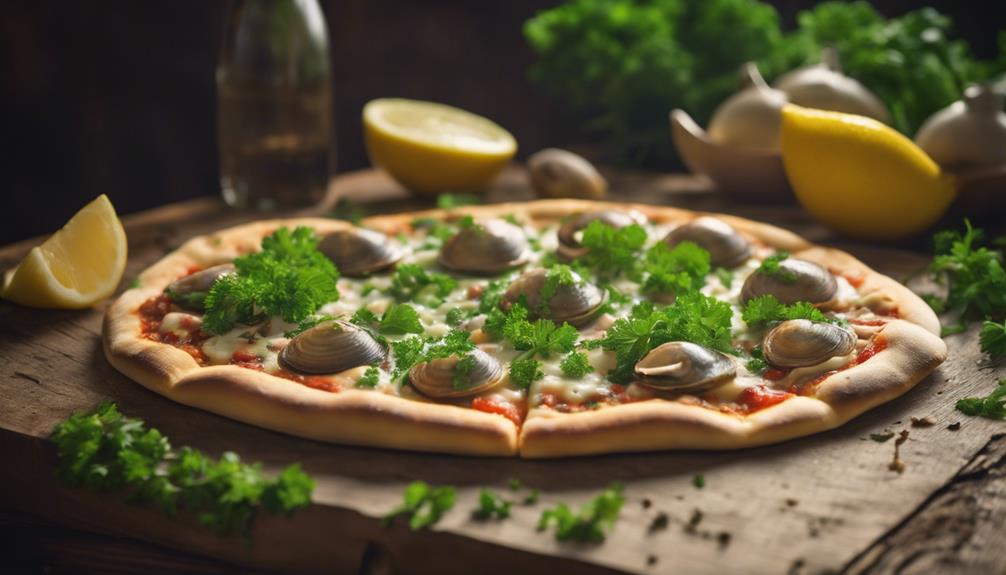
Sprinkle grated pecorino romano cheese generously over the olive oil-tossed clams to enhance the flavors before baking the pizza to perfection. The addition of this sharp and salty cheese complements the briny taste of the clams, creating a harmonious blend of flavors that will tantalize your taste buds.
As the pizza bakes, the cheese will melt and form a golden crust, adding a deliciously crispy texture to each bite.
Once the pizza is ready, the clams will be heated through, releasing their savory juices and infusing the pizza with their distinct seafood essence. The final touches of pecorino romano cheese and perfectly cooked clams are essential components of the New Haven style clam pizza experience, offering a unique twist on the classic pie that seafood lovers will appreciate.
Now that the pizza is baked to perfection with the added final touches, it's time to slice it into wedges and serve it hot. This seafood-infused masterpiece is ready to be enjoyed, providing a delightful culinary experience for all who indulge in its flavors.
Serving and Enjoying
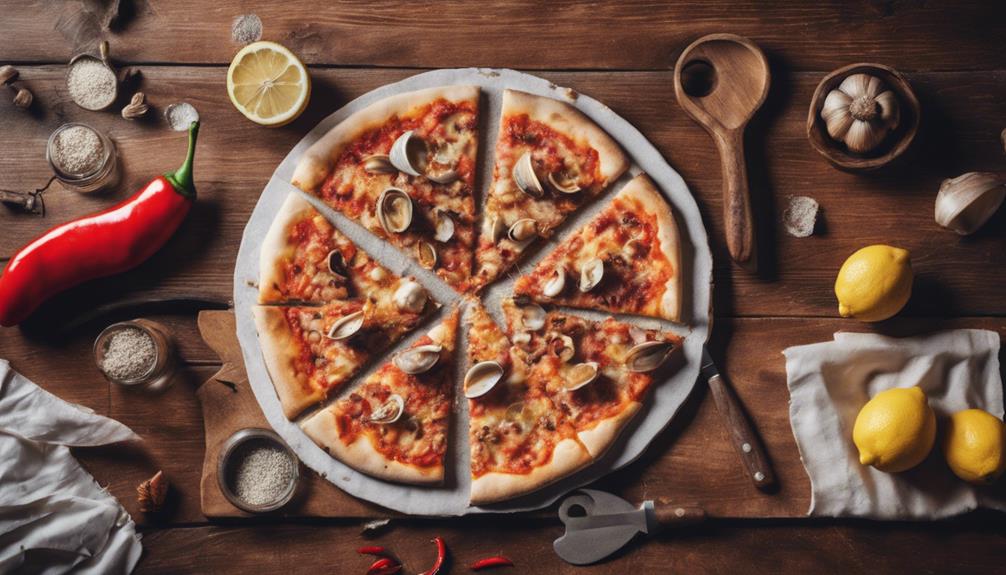
Once the clam pizza is hot and ready to serve, the next step is to savor and enjoy each flavorful bite with your loved ones. Here are some tips to enhance your clam pizza experience:
- Engage your senses: Take a moment to appreciate the aroma of the freshly baked pizza, allowing the scent of the clams to whet your appetite.
- Explore the flavors: Delight in the burst of seafood flavor from the shucked clams, complemented by the richness of pecorino romano cheese that blankets the pizza.
- Savor each bite: As you bite into the slice, notice the blend of textures – the softness of the clams contrasting with the crispy crust and gooey cheese.
- Share the experience: Invite your friends and family to join in the culinary adventure, sharing stories and creating lasting memories around the table with this unique New Haven style clam pizza.
Wine Pairing Suggestions
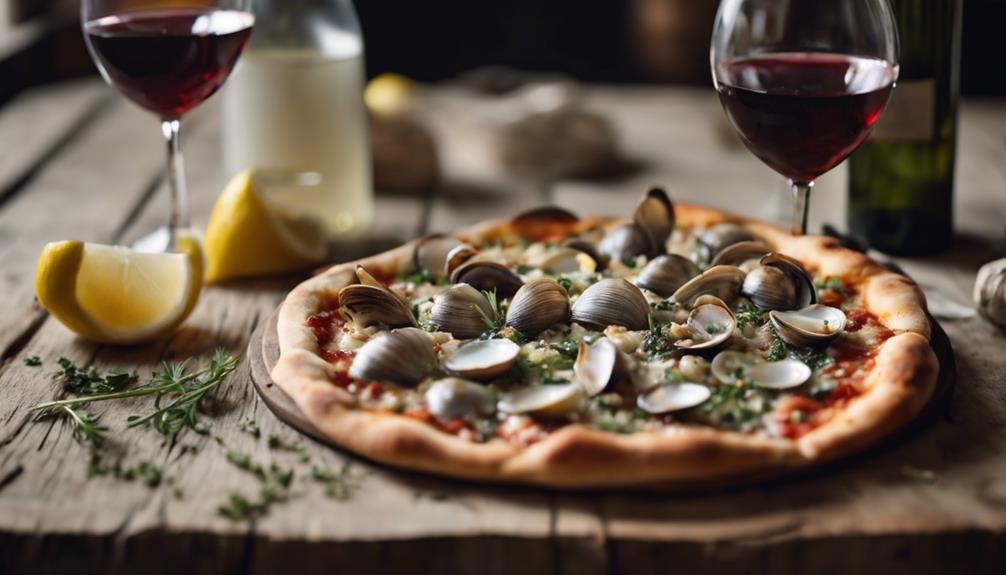
Consider enhancing your clam pizza experience by choosing the perfect wine pairing to complement the flavors of the dish.
When it comes to white wine, opt for a light-bodied Sauvignon Blanc or Pinot Grigio to harmonize with the briny essence of the clams.
If you prefer a more acidic touch, a Chardonnay or Vermentino can intensify the seafood notes in your pizza.
For a daring fusion, indulge in a bubbly glass of Prosecco or Champagne to elevate your Clam Pizza experience.
If rosé is your preference, select a fruity variation to enhance the seafood flavors.
Even if you lean towards red wines, a light-bodied Pinot Noir can still be a suitable match for the Clam Pizza, complementing its flavors without overpowering them.
Experiment with these wine pairings to find the perfect accompaniment to your seafood-inspired pizza.
Tips for Leftovers
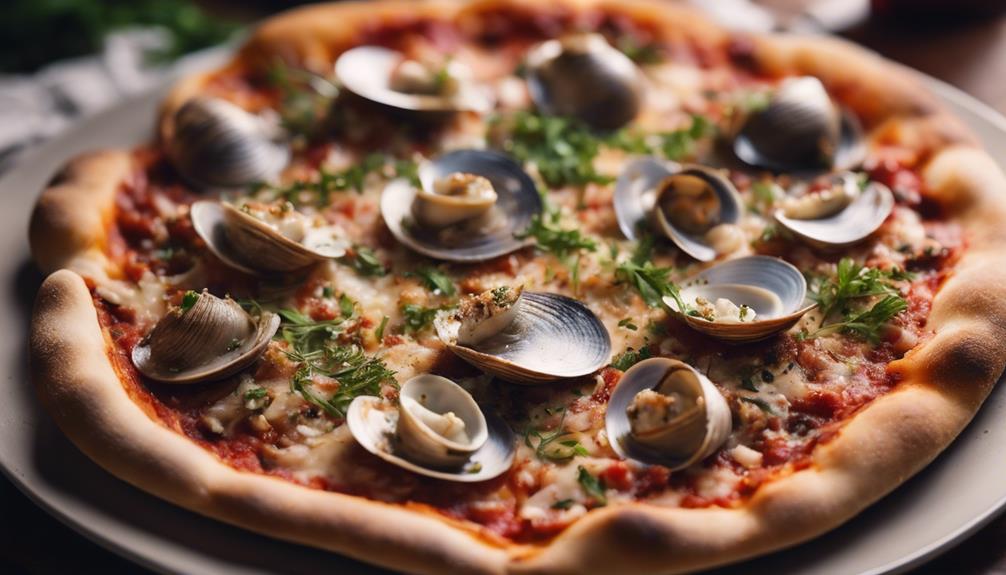
To maximize your clam pizza experience, make sure you know how to handle any leftovers effectively. Here are some tips for dealing with leftover clam pizza:
- Storage: Store leftover clam pizza in an airtight container in the refrigerator for up to 3 days to maintain freshness.
- Reheating: Reheat leftover clam pizza in a preheated oven at 350°F for about 10-15 minutes for the best results, ensuring the crust remains crispy.
- Avoid Microwaving: Avoid microwaving leftover clam pizza as it can make the crust soggy and diminish the flavors.
- Refresh with Fresh Toppings: Consider adding fresh toppings like arugula or cherry tomatoes to refresh leftover clam pizza and enhance its flavors when reheating.
For longer storage, freeze leftover clam pizza slices individually wrapped in foil or plastic wrap. By following these tips, you can enjoy your clam pizza even more, making the most out of every slice.
Frequently Asked Questions
What Is Clam Pizza Called?
You call clam pizza 'White Clam Pizza' or 'Clam Pie.' It's a seafood twist on a classic pie, featuring fresh littleneck clams, garlic, cheese, and olive oil. This delicious combination is a favorite in New Haven, Connecticut.
What Ingredients Are on a Seafood Pizza?
Seafood pizzas typically include ingredients like clams, shrimp, calamari, or anchovies. They might have a white sauce base, garlic, herbs such as oregano or basil, and a mix of cheeses for a flavorful twist.
Where Did Clam Pie Originate?
Clam pie originated in New Haven, Connecticut. The iconic white clam pie, with its thin crust and fresh littleneck clams, was first created at Frank Pepe Pizzeria Napoletana in the 1960s. Its unique flavors have made it a nationwide favorite.
How Many Calories Are in a White Clam Pizza?
Curious about the calorie count in a white clam pizza? It typically ranges from 250-300 calories per slice. Varying based on ingredients and size, this seafood twist on a classic pie offers lean protein with fewer calories.
How Did Clam Pizza Become a Seafood Twist on a Classic Italian Dish?
Clam pizza became a seafood twist on a classic Italian dish thanks to the addition of a shocking ingredient in Italian cuisine: clams. This unconventional topping provides a burst of briny flavor and texture, creating a unique and memorable dining experience for those seeking a departure from traditional pizza options.
Conclusion
Indulge in the delectable flavors of clam pizza, a unique twist on a traditional favorite that will transport your taste buds to a seaside paradise.
With each bite, savor the savory combination of tender clams, tangy sauce, and gooey cheese, all baked to perfection on a crispy crust.
Experience a culinary journey like no other with this seafood-inspired pizza that's sure to leave you craving more.
Francesca, as the creative force behind our compelling content, combines culinary expertise with journalistic flair. She has a deep appreciation for the cultural histories and artisanal traditions that influence remarkable flavors around the world. Through engaging narratives, she transports our audience to the heart of each culinary experience. Whether she’s documenting the centuries-old techniques of a Sicilian cheese maker or uncovering the personal stories of our producers, Francesca’s storytelling prowess drives our mission to connect people through food.
Italian Cuisine
Caserecce Alla Crudaiola With Burrata: an Italian Delight
Craving a taste of Italy? Try Caserecce Alla Crudaiola with creamy burrata for a tantalizing culinary experience that will transport you to the streets of Rome.
Indulge in the delicious flavors of Caserecce Alla Crudaiola with creamy burrata. This Italian dish combines fresh diced tomatoes, minced garlic, fragrant basil, and high-quality olive oil. The luscious burrata adds a luxurious touch. Cook the pasta in a large pot of salted water, stirring occasionally. Ensure the perfect pasta texture by tasting it before the recommended time. Fresh ingredients like ripe plum tomatoes and basil enhance the dish. Enjoy with a glass of Pinot Grigio, alongside crusty bread, and a drizzle of extra virgin olive oil. Get creative by using different types of pasta or cheeses for a unique twist. Broaden your culinary horizons with this delightful meal.
Key Takeaways
- Fresh diced tomatoes, garlic, basil, olive oil, and creamy burrata create a flavorful alla Crudaiola sauce.
- Cook pasta al dente in salted water, stirring occasionally, and reserve pasta water for a perfect texture.
- Pair with Pinot Grigio, serve with crusty bread, and garnish with basil and olive oil for a complete experience.
- Burrata adds a velvety, decadent touch with its oozing, creamy center, best served at room temperature.
- Customize with different pasta, adjust ingredients, or explore vegan options for a unique twist on this Italian classic.
Ingredients for Caserecce Alla Crudaiola
For this flavorful dish, you'll need fresh diced tomatoes, minced garlic, fragrant basil leaves, high-quality olive oil, and creamy burrata cheese.
Caserecce alla Crudaiola is a traditional Italian pasta dish that highlights the vibrant flavors of these simple yet exquisite ingredients.
The combination of the juicy tomatoes, pungent garlic, aromatic basil, and rich olive oil creates a delectable sauce that perfectly coats the caserecce pasta, ensuring each bite is bursting with freshness.
The addition of burrata cheese elevates this dish, providing a luxurious creaminess that balances the acidity of the tomatoes and adds a velvety texture to the overall taste profile.
The choice of caserecce pasta, with its twisted tube-like shape, is ideal for capturing and holding the chunky tomato sauce, maximizing the enjoyment of each mouthful.
Step-by-Step Cooking Instructions
To begin preparing Caserecce Alla Crudaiola with Burrata, you'll need to cook the pasta according to the package instructions until al dente. This step guarantees that the pasta maintains its firmness and texture when combined with the alla Crudaiola sauce.
Once the pasta is cooked, you can proceed with the following steps:
- Prepare the alla Crudaiola sauce: Combine diced tomatoes, minced garlic, fresh basil leaves, and olive oil in a bowl. Season the mixture with salt and pepper to taste.
- Mix the sauce with the pasta: Toss the cooked caserecce pasta with the prepared alla Crudaiola sauce until well combined. Make sure that the pasta is evenly coated with the flavorful ingredients.
- Add the burrata cheese: Gently tear the creamy burrata cheese into pieces and scatter them over the pasta. The creamy texture of the burrata will complement the freshness of the alla Crudaiola sauce.
- Serve and enjoy: Plate the Caserecce Alla Crudaiola with Burrata, garnish with additional basil if desired, and savor this delightful Italian dish while it's still warm.
Tips for Perfectly Cooked Pasta
Achieve perfectly cooked pasta by using a large pot of boiling, salted water. For that quintessential al dente texture with your summer pasta, stir the caserecce occasionally during its cooking process to prevent sticking and guarantee uniform cooking.
While following the package instructions for cooking time, it's advisable to taste the pasta a few minutes before the recommended duration to secure the ideal firmness. Remember to reserve a cup of the pasta cooking water before draining; this can be utilized to adjust the sauce's consistency if necessary.
Overcooking the pasta should be avoided at all costs, as it can lead to a mushy texture, causing a loss of the pasta's distinctive flavor. By following these tips diligently, you can elevate your summer pasta dishes to a level that will impress even the most discerning of palates.
The Importance of Fresh Ingredients
Fresh ingredients play an essential role in elevating the flavors of Caserecce Alla Crudaiola with Burrata, enhancing the overall taste and authenticity of the dish. When preparing this delectable pasta dish, it's important to select the finest ingredients to achieve the best results. Here's why fresh ingredients are paramount:
- Ripe Plum Tomatoes: The use of ripe plum tomatoes guarantees a burst of freshness and sweetness in every bite of the pasta, enhancing the overall flavor profile.
- Garlic Cloves: Fresh garlic cloves add a robust and aromatic element to the dish, infusing it with a delightful pungency that complements the other ingredients perfectly.
- Basil: Incorporating fresh basil leaves imparts a fragrant and herbaceous note to the pasta, elevating its taste and providing a vibrant green color that enhances the visual appeal.
- High-Quality Olive Oil: Opting for high-quality olive oil enhances the richness of the dish, contributing a smooth and luxurious texture that coats the pasta beautifully.
Serving Suggestions and Pairings
When serving Caserecce Alla Crudaiola with Burrata during the summer, it's important to take into account complementary flavors and accompaniments that enhance the overall dining experience.
To elevate this dish, consider pairing it with a light white wine such as Pinot Grigio or Sauvignon Blanc, which will complement the freshness of the tomatoes and basil in the sauce. Additionally, serving a side of crusty bread alongside the pasta will allow you to soak up every bit of the flavorful sauce, enhancing the meal's indulgence.
For an authentic touch, garnish the dish with extra basil leaves and a drizzle of high-quality extra virgin olive oil. To further enhance the flavors, opt for a Pugliese or Sicilian olive oil, which will add a distinctive taste to the pasta.
Burrata: The Creamy Indulgence
Indulge in the creamy richness of burrata, a luscious Italian cheese renowned for its velvety texture and decadent flavor profile. Burrata is a fresh cheese made from mozzarella and cream, originating in the Puglia region of Italy. Its outer shell consists of solid mozzarella, encasing a soft, stringy curd and cream mixture that oozes out when cut. The word 'burrata', meaning 'buttered' in Italian, aptly describes the rich and indulgent nature of this cheese.
Burrata is a staple in Italian cuisine, adding a luxurious and creamy element to various dishes.
The creamy interior of burrata pairs exceptionally well with fresh ingredients like tomatoes, basil, and arugula.
Drizzling burrata with high-quality extra virgin olive oil enhances its flavor and adds a subtle fruity note.
When serving burrata, allow it to come to room temperature for the best creamy consistency, ensuring a delightful experience for your taste buds.
Variations and Customizations
Consider incorporating diverse elements to elevate the depth of flavor in your Caserecce Alla Crudaiola with Burrata, allowing for a personalized culinary experience. By customizing this traditional Italian dish, you can create a unique version that suits your taste preferences. Here are some variations and customizations to inspire your culinary creativity:
Variations | Customizations |
---|---|
Use different pasta types | Rigatoni, tortiglioni, or penne for varied texture |
Adjust ingredient ratios | Tomatoes, garlic, basil, and olive oil to match your preferences |
Swap burrata for other cheeses | Mozzarella or ricotta for a different flavor profile |
Enhance flavor complexity | Add capers, olives, or sun-dried tomatoes for a rich taste |
Explore vegan options | Omit cheese or try plant-based alternatives like cashew-based cheese or tofu |
These adjustments can transform your Caserecce Alla Crudaiola with Burrata into a personalized culinary masterpiece that reflects your unique taste preferences.
Frequently Asked Questions
What Does Crudaiola Mean in English?
Crudaiola means "raw" in English. In Italian cuisine, it refers to a raw tomato sauce with fresh ingredients like tomatoes, garlic, and herbs. The term showcases the simplicity and freshness of uncooked elements.
What Meat Goes With Burrata?
When pairing burrata, you crave a robust meat like Italian sausage. Its savory and slightly spicy notes beautifully contrast with the creamy burrata, creating a harmonious balance that elevates the dish to a new level of indulgence.
Can I Use Burrata in Other Italian Dishes Besides Caserecce Alla Crudaiola?
Yes, you can absolutely use burrata in other Italian dishes besides caserecce alla crudaiola. Consider pairing it with fresh tomatoes and basil for a simple caprese salad, or using it as a creamy topping for homemade pizzas. The possibilities are endless when it comes to Italian dish ideas for you.
Conclusion
To sum up, caserecce alla crudaiola with burrata is a delightful Italian dish that combines the freshness of tomatoes and basil with the creamy indulgence of burrata cheese.
By following the step-by-step instructions and using fresh ingredients, you can create a delicious meal that's sure to impress your guests.
So why not try your hand at this flavorful pasta dish and savor the taste of Italy in your own home? Bon appétit!
Francesca, as the creative force behind our compelling content, combines culinary expertise with journalistic flair. She has a deep appreciation for the cultural histories and artisanal traditions that influence remarkable flavors around the world. Through engaging narratives, she transports our audience to the heart of each culinary experience. Whether she’s documenting the centuries-old techniques of a Sicilian cheese maker or uncovering the personal stories of our producers, Francesca’s storytelling prowess drives our mission to connect people through food.
Italian Cuisine
MVP Pizza Marinara Vodka Pesto: A Fusion Pizza You'll Love
Get ready to tantalize your taste buds with the irresistible fusion of marinara, vodka, and pesto in the MVP Pizza Marinara Vodka Pesto – a culinary masterpiece that will leave you craving more.
Explore the delicious combination of marinara, vodka, and pesto in the MVP Pizza Marinara Vodka Pesto, a culinary masterpiece that blends classic flavors with a modern twist. Treat your taste buds to a symphony of tastes by carefully layering Vaca sauce, marinara, and pesto, generously sprinkling cheese, and baking to perfection at 500°F for a crispy crust. Decorated with a distinct stripe pattern, this pizza ensures a feast for both the eyes and the palate. Enhance your dining experience with recommended wine pairings such as Pinot Grigio or Sauvignon Blanc for a refreshing complement. Dive into other options like Veggie Delight or Meat Lover’s for a delectable journey through various flavors.
Key Takeaways
- Fusion of marinara, vodka, and pesto sauces for a unique flavor blend.
- High-quality ingredients for a rich and satisfying taste experience.
- Artfully layer sauces and cheese for a visually appealing presentation.
- Bake at 500°F for a crispy crust and melted cheese perfection.
- Pair with Pinot Grigio or Pale Ale for a delightful taste contrast.
Ingredients Needed for MVP Pizza
To make the MVP Pizza, gather essential ingredients like cheese, Vaca sauce, marinara sauce, and pesto before starting the preparation.
The cheese serves as the simple yet vital base for the pizza, ensuring a rich and gooey texture in every bite.
The Vaca sauce, a homemade creation, adds a unique and creamy element to the pizza's flavor profile. When combined with the marinara sauce, the fusion of flavors creates a remarkable depth that tantalizes the taste buds.
Additionally, the pesto sauce contributes a revitalizing and herbaceous note that enhances the overall culinary experience.
It's imperative to use high-quality ingredients to achieve the signature taste of the MVP Pizza, as the balance of these sauces and cheeses is what makes this dish truly exceptional.
Step-By-Step Preparation Instructions
To begin preparing the MVP Pizza Marinara Vodka Pesto, first gather the necessary Ingredients Needed such as:
- Pizza dough
- Vaca sauce
- Marinara sauce
- Pesto
- Grated cheese
Follow the Pizza Assembly Steps by:
- Spreading Vaca sauce on the dough
- Creating visually appealing stripes with marinara and pesto
- Generously sprinkling cheese
Finally, proceed to Baking and Serving the pizza, emphasizing:
- The layering of ingredients
- The fusion of flavors
- Presenting a memorable dining experience.
Ingredients Needed
For creating the MVP Pizza Marinara Vodka Pesto, gather all the necessary ingredients listed in the recipe. You'll need a MVP base with simple cheese, homemade Vaca sauce made daily, marinara sauce, and pesto. Additionally, make sure you have ample grated cheese to emphasize a delightful flavor.
The process involves layering ingredients in distinct stripes, painting sauce inside the lines, and generously adding grated cheese for a visually appealing and tasty result. The final presentation of the MVP Pizza showcases culinary artistry and highlights the cheese quantity, making it a standout fusion pizza.
Pizza Assembly Steps
Begin by spreading a layer of homemade Vaca sauce as the essential base for your MVP pizza.
To achieve the perfect fusion of flavors, alternate between marinara sauce and pesto, creating distinct stripes on the pizza.
Guarantee an even distribution of grated cheese on top, generously covering the entire surface.
The artistic process of painting the sauces inside the lines is vital for a visually appealing final result.
Pay close attention to the quantity of cheese used, as it plays a significant role in the presentation of your MVP pizza.
- Spread a layer of homemade Vaca sauce on the pizza base.
- Alternate between marinara sauce and pesto to create distinct stripes.
- Generously sprinkle grated cheese for even coverage.
- Carefully paint the sauces inside the lines for an artistic touch.
- Pay attention to the quantity of cheese for the final presentation.
Baking and Serving
Start by preheating your oven to 500°F for the perfect baking environment to achieve a perfectly cooked MVP pizza.
Once the oven reaches the desired temperature, carefully place the assembled MVP pizza on a baking sheet or pizza stone to guarantee even cooking of the crust and toppings.
Slide the pizza into the preheated oven and bake for approximately 10-12 minutes, or until the cheese is melted and bubbly, and the crust is golden brown.
When the baking time is complete, remove the MVP pizza from the oven using oven mitts to safeguard your hands from the heat.
Allow the pizza to cool for a few minutes before slicing it into desired portions using a sharp knife or pizza cutter.
This brief cooling period helps the flavors to settle and makes it easier to handle the slices.
Tips for Achieving the Perfect Crust
To achieve the perfect crust for your Fusion Pizza, make sure your oven is preheated to a high temperature of around 500°F for a crispy finish. Here are some tips to help you achieve the ideal crust for your pizza:
- Use a pizza stone or baking sheet preheated in the oven to guarantee even cooking and a crispy bottom.
- Consider incorporating semolina flour into your dough to add a delicious texture and enhance the flavor of the crust.
- Experiment with different hydration levels in your dough to strike the right balance between chewiness and crispiness in the crust.
- Don't rush the process; allow your dough to rest and rise properly to develop the desired texture and flavor in the crust.
- Keep an eye on the baking time and temperature to prevent burning or undercooking, ensuring a perfectly cooked crust for your Fusion Pizza.
The Art of Layering Flavors
Achieving the perfect crust sets the stage for mastering the art of layering flavors in your Fusion Pizza creation.
When crafting the MVP pizza, strategically placing the Vaca sauce, marinara sauce, and pesto in distinct stripes is key. By artfully painting these sauces inside the lines on the pizza dough, you not only create a visually appealing pie but also enhance its flavor profile.
The generous addition of grated cheese in between the sauce stripes further elevates this culinary masterpiece. This emphasis on cheese distribution during the layering process underscores the significance of each ingredient's role in contributing to the overall taste experience.
As you meticulously assemble your MVP pizza, remember that the final presentation reflects the careful attention paid to layering flavors, resulting in a fusion pizza that not only looks stunning but also delivers a symphony of tastes with each bite.
Grating Cheese: a Crucial Step
Grating cheese is an essential step that greatly impacts the flavor and texture of the MVP Pizza, serving as the primary topping for this fusion creation.
When preparing the MVP Pizza, the following points about grating cheese should be considered:
- The grated cheese used for the MVP Pizza is generously added to guarantee a rich and flavorful cheese experience.
- Quality of grated cheese plays a significant role in the overall taste and texture of the pizza, making it a key ingredient.
- Grated cheese is evenly distributed on the pizza to create a visually appealing stripe design and ensure balanced cheese coverage.
- The choice of grated cheese adds depth and richness to the MVP Pizza, enhancing the overall flavor profile of this unique fusion pizza.
These considerations highlight the importance of grating cheese in the MVP Pizza creation process, ensuring a delicious and satisfying culinary experience for all pizza enthusiasts.
Baking and Serving Suggestions
When it comes to baking and serving your Fusion Pizza, it's crucial to pay attention to a few key points.
First, consider the baking temperature to guarantee a perfectly cooked crust and gooey cheese.
Next, think about the serving size suggestions to satisfy your hunger without overwhelming your taste buds.
Lastly, explore creative presentation ideas to elevate your dining experience and impress your guests.
Baking Temperature Tips
To achieve peak baking results for the MVP Pizza Marinara Vodka Pesto, preheat your oven to 500°F (260°C) and use a pizza stone or baking sheet for even heat distribution.
Monitor the pizza closely and aim to bake it for 10-12 minutes until the crust achieves a desirable golden brown color and the cheese becomes bubbly.
Remember to allow the pizza to rest for a few minutes after baking. This step is essential as it lets the flavors meld together, enhancing the overall taste experience.
Avoid undercooking the pizza by ensuring that the cheese has completely melted and the toppings are heated through.
Maintain the recommended baking temperature consistently throughout the baking process to avoid uneven cooking or burning.
Always keep safety in mind when handling hot items from the oven to prevent burns and accidents.
Serving Size Suggestions
For best presentation and portion control, slice the MVP pizza into 8 equal pieces after allowing it to cool for a few minutes. This step guarantees that each serving is of a consistent size, making it easier for guests to enjoy the pizza without the hassle of uneven portions. By following this suggestion, you can also ensure that all the flavors and toppings are distributed evenly across each slice, enhancing the overall dining experience.
When serving the MVP pizza, it's recommended to do so while it's still hot and fresh. This allows the flavors of marinara, vodka, and pesto to be at their peak, providing a delightful fusion of tastes. The unique stripe design and generous cheese topping should be showcased during serving, adding to the visual appeal of this fusion pizza.
Presentation Ideas
Consider placing the MVP Pizza on a wooden pizza board to enhance its rustic charm and artisanal appeal. To guarantee a perfect bake, utilize a pizza stone or preheated baking sheet for a crispy crust and even cooking.
Make the baking process seamless by using a pizza peel to transfer the MVP Pizza in and out of the oven effortlessly. After baking, elevate the presentation by garnishing the finished MVP Pizza with fresh basil leaves or a drizzle of olive oil for a burst of color and flavor.
For a polished finish, cut the MVP Pizza into equal slices using a sharp pizza cutter or wheel, ensuring a professional and appealing presentation.
Serve on a wooden pizza board for rustic charm.
Use a pizza stone or preheated baking sheet for a crispy crust.
Employ a pizza peel for easy oven transfers.
Garnish with fresh basil or olive oil for added flavor.
Slice evenly with a sharp pizza cutter for a professional look.
Pairing Options and Beverage Recommendations
Enhance your dining experience with the MVP Pizza by exploring a variety of beverage pairing options. When enjoying this flavorful fusion pizza, consider pairing it with a light and crisp white wine such as a Pinot Grigio or Sauvignon Blanc to provide a revitalizing contrast to the rich marinara, vodka, and pesto flavors. For those who prefer beer, a pale ale or a lager can complement the savory and cheesy elements of the MVP Pizza perfectly. If you're looking for a non-alcoholic option, a fruity iced tea or a citrus-infused soda can elevate the taste experience. Additionally, sparkling water serves as a palate cleanser between each delectable bite of the pizza. To balance the creamy and rich components of the MVP Pizza, opt for a Sangria or a fruity cocktail with its acidity enhancing the overall dining experience.
Beverage Type | Recommended Pairing |
---|---|
White Wine | Pinot Grigio or Sauvignon Blanc |
Beer | Pale Ale or Lager |
Non-Alcoholic | Fruity Iced Tea or Citrus-Infused Soda |
Sparkling Water | Cleanses the Palate |
Cocktail/Sangria | Balances Creamy Elements |
MVP Pizza Variations to Try
Exploring different MVP pizza variations can introduce exciting and diverse flavors to your dining experience. Here are five delicious variations to try:
- Veggie Delight: This variation of the MVP pizza is packed with fresh vegetables like bell peppers, tomatoes, and mushrooms, offering a burst of natural flavors.
- Meat Lover's: For those who enjoy a hearty pizza, the Meat Lover's version of the MVP pizza is a perfect choice, featuring savory toppings like pepperoni, sausage, and bacon.
- BBQ Chicken: Indulge in the rich flavors of barbecue sauce, grilled chicken, and red onions with the BBQ Chicken MVP pizza variation, a sweet and tangy delight.
- Buffalo Chicken: Spice up your pizza experience with the Buffalo Chicken variation, which combines buffalo sauce, crispy chicken, and a drizzle of ranch dressing for a zesty kick.
- Greek Goddess: Experience a taste of the Mediterranean with the Greek Goddess variation of the MVP pizza, showcasing feta cheese, olives, and fresh herbs for a delightful fusion of flavors.
Frequently Asked Questions
What Is the Name of the Italian Pizza With Pesto?
You're looking for the Italian pizza with pesto, right? Well, it's called MVP Pizza Marinara Vodka Pesto. It's a delicious fusion pizza that combines marinara, vodka, and pesto sauces, creating a flavorful masterpiece.
What Is the Pizza That Is Just Sauce?
When you're craving a saucy delight, try the 'MVP Pizza Marinara Vodka Pesto.' This pizza is a flavorful masterpiece, with layers of marinara and pesto sauces that make it a standout choice for sauce lovers.
Could the Seafood in Clam Pizza be Incorporated in the Fusion Pizza?
By blending unique flavors, the clam pizza seafood twist can definitely be incorporated into fusion pizza. The delicate taste and texture of the seafood can add a surprising element to the traditional fusion pizza, creating a memorable dining experience for adventurous foodies. The possibilities are endless!
Conclusion
To sum up, the MVP Pizza Marinara Vodka Pesto is a must-try fusion dish that will tantalize your taste buds with its unique combination of flavors.
Stay tuned for more innovative recipes and culinary creations that will elevate your dining experience to new heights.
Keep experimenting in the kitchen and let your creativity shine through in every dish you prepare.
Exciting surprises await those who dare to push the boundaries of traditional cooking.
Enjoy the journey of culinary exploration!
Francesca, as the creative force behind our compelling content, combines culinary expertise with journalistic flair. She has a deep appreciation for the cultural histories and artisanal traditions that influence remarkable flavors around the world. Through engaging narratives, she transports our audience to the heart of each culinary experience. Whether she’s documenting the centuries-old techniques of a Sicilian cheese maker or uncovering the personal stories of our producers, Francesca’s storytelling prowess drives our mission to connect people through food.
Italian Cuisine
Via Carota Insalata Verde: The Classic Italian Salad You Need to Try
Yearning for an authentic taste of Italy? Discover the Via Carota Insalata Verde, a classic Italian salad that promises to tantalize your taste buds.
When you yearn for an authentic taste of Italy, the Via Carota Insalata Verde beckons as a prime choice. This classic Italian salad features a mix of butter lettuce, endive, romaine, and watercress paired with a special vinaigrette comprising Muraglia Olive Oil, dry sherry vinegar, shallots, mustards, thyme, and garlic. The careful selection and preparation of these ingredients deliver a crisp, invigorating, and complex flavor profile. This delightful culinary experience promises to elevate your palate with every bite.
Key Takeaways
- The salad features a blend of butter lettuce, endive, romaine, and watercress for a complex and flavorful experience.
- The vinaigrette includes Muraglia Olive Oil, sherry vinegar, shallots, mustards, thyme, and garlic for a unique taste.
- Properly washing and cutting the greens is crucial for maintaining their crispness and flavor.
- Experiment with different greens and dressings to customize the salad to your preferences.
- Serve the salad alongside pasta, grilled meats, or pizza for a well-rounded and delicious meal.
Salad Ingredients
To prepare Via Carota Insalata Verde, gather butter lettuce, endive, romaine, watercress, and the special vinaigrette ingredients. These greens form the base of the renowned Via Carota salad, known for its invigorating and crisp texture. The unique blend of butter lettuce, endive, romaine, and watercress contributes to the salad's complexity of flavors and nutritional value.
The vinaigrette recipe plays an important role in enhancing the overall taste of the salad. Combining Muraglia Olive Oil, dry sherry vinegar, shallots, mustards, thyme, and garlic results in a harmonious dressing that perfectly complements the freshness of the greens. Properly washing and cutting the greens is essential to maintain their crispness and flavor profile.
When preparing the Via Carota Insalata, make sure that the greens are mixed well to distribute the flavors evenly. Layering the greens with the vinaigrette allows for a balanced distribution of dressing, enhancing both the taste and presentation of this classic Italian salad.
Homemade Dressing Recipe
Enhance the flavor of your Via Carota Insalata Verde with a homemade dressing featuring aged sherry vinegar, shallots, mustard seeds, honey, and thyme. To fully enjoy this dressing, follow these steps:
- Rinse and Soak: Begin by rinsing minced shallots in cold water to mellow their sharpness. Then, soak them in warm water along with aged sherry vinegar to create a harmonious base for your dressing.
- Embrace Variety: Experiment with different salad greens like butter lettuce, watercress, or arugula for diverse textures and flavors that complement the dressing's complexity.
- Time-Saving Elegance: Opt for homemade dressing to save time in meal preparation. Impress guests with its rich flavors and versatility in various culinary applications.
- Quick Fix: For a speedy version, whisk together diced shallot, aged sherry vinegar, Dijon mustard, olive oil, salt, and pepper. Refrigerate for later use, ensuring convenient and flavorful meal enhancements.
Salad Greens Selection
When crafting Via Carota Insalata Verde, the selection of salad greens plays a pivotal role in achieving the dish's distinctive taste and visual appeal.
By combining a variety of lettuces such as butter lettuce, romaine, and frisee, you can create a balanced and flavorful salad experience.
Experimenting with different greens allows you to enhance the overall flavor profile and elevate the salad's presentation.
Leafy Greens Variety
Explore the diverse range of leafy greens that make up the flavorful and textured combination in Via Carota Insalata Verde. The salad boasts a variety of greens carefully selected to create a harmonious blend of flavors, textures, and colors.
Here are four key aspects to take into account when it comes to the leafy greens variety in Via Carota's signature salad:
- Butter Lettuce: Adds a delicate and slightly sweet flavor to the mix, providing a soft and buttery texture that contrasts well with other greens.
- Endive: Brings a slightly bitter note to the salad, balancing out the sweetness of the butter lettuce and adding a crisp texture.
- Romaine: Offers a sturdy and robust base, adding a fresh crunch to each bite and contributing to the overall structure of the salad.
- Watercress: Infuses a peppery kick, elevating the flavor profile with its distinctive taste and enhancing the visual appeal with its vibrant green leaves.
The combination of these greens in Via Carota Insalata Verde creates a dynamic and well-rounded culinary experience that's both satisfying and nutritious.
Dressing and Pairing
To enhance the flavor and texture of your salad, the Via Carota Insalata Verde dressing combines aged sherry vinegar, shallots, mustard seeds, honey, and thyme for a delightful punch.
The aged sherry vinegar adds a rich and tangy note, while the shallots provide a subtle onion flavor and the mustard seeds contribute a mild spiciness. Mixing in a hint of honey adds a touch of sweetness, and the thyme brings a fragrant herbal essence to the dressing.
When pairing this flavorful dressing with salad greens, you have a variety of options to choose from, including butter lettuce, endive, romaine, red leaf lettuce, watercress, spinach, arugula, or a mixed box of salad greens. Each green brings its unique texture and flavor profile to the dish, allowing you to customize your salad to your preferences.
Remember to follow the dressing assembly instructions carefully, as the process of combining the vinegar, shallots, and other ingredients is essential to achieving the perfect balance of flavors in your Via Carota Insalata Verde.
Flavorful Dressing Assembly
For a flavorful dressing assembly, start by rinsing minced shallots in cold water before adding warm water to the vinegar and shallot mix, allowing it to sit for 2 minutes to enhance the flavors. This simple step allows the shallots to mellow and infuse their essence into the aged sherry vinegar, creating a rich base for the dressing.
Additionally, incorporating mustard seeds into the mixture adds a subtle crunch and a hint of nuttiness, elevating the overall texture and taste profile.
Once the dressing is prepared, make sure your greens are slightly damp for the best dressing adherence by using a salad spinner to remove excess moisture effectively. This method guarantees that the dressing coats each leaf evenly, providing a delightful burst of flavor in every bite.
Serving Suggestions
When considering serving suggestions for Via Carota Insalata Verde, it's essential to focus on three key points: presentation tips, pairing recommendations, and ingredient variations.
These aspects contribute to enhancing the overall dining experience and ensuring that the salad complements the main dish effectively.
Presentation Tips
Consider layering the salad greens in a visually appealing manner to create height and texture in your Via Carota Insalata Verde presentation. By following these presentation tips, you can enhance the aesthetic appeal of your dish:
- Create Height: Layer the different types of lettuce strategically to build a visually striking presentation that catches the eye.
- Use Lettuce Pockets: Pool the dressing in lettuce pockets to infuse each bite with flavor while adding a beautiful and decorative element.
- Variety is Key: Incorporate at least three different types of lettuce to provide a diverse taste and texture experience for your guests.
- Balance the Mix: Aim for a well-balanced selection of lettuce varieties such as butter lettuce, romaine hearts, and frisee to maintain a harmonious blend of flavors and textures.
Following these simple yet effective tips won't only enhance the overall presentation of your Via Carota Insalata Verde but also contribute to a delightful dining experience.
Pairing Recommendations
Enhance your dining experience by pairing Via Carota Insalata Verde with complementary dishes that elevate its flavors. This classic Italian salad harmonizes beautifully with pasta dishes like cacio e pepe or carbonara, enhancing the overall taste profile.
For a satisfying meal, consider serving Via Carota Insalata Verde alongside potato gnocchi or grilled meats such as pork chops or chicken thighs. The salad also acts as a suitable side for pizza, absorbing any extra dressing and providing a revitalizing contrast to the rich flavors.
Due to its versatility, Via Carota Insalata Verde serves as an ideal accompaniment to a variety of main dishes, offering a light and flavorful balance. When combined with other dishes, this salad not only introduces a pop of color and freshness but also elevates the overall dining presentation, making every bite a delightful experience.
Ingredient Variations
To add a creative twist to the classic Via Carota Insalata Verde, experiment with ingredient variations that can elevate the salad's taste and presentation.
Here are some suggestions to enhance your salad experience:
- Mix Up the Greens: Instead of the traditional mix of butter lettuce, endive, romaine, and watercress, try incorporating arugula, spinach, or even kale for different textures and flavors.
- Customize Your Vinaigrette: Play around with the vinaigrette by adding a touch of honey for sweetness, a hint of Dijon mustard for extra tang, or a splash of balsamic vinegar for depth of flavor.
- Try Different Dressings: While the classic vinaigrette is delightful, consider experimenting with a lemon herb dressing, a creamy avocado dressing, or a zesty citrus vinaigrette to change things up.
- Elevate the Presentation: Instead of tossing the greens and dressing together, try layering the different greens on a platter and drizzling the vinaigrette over them just before serving for a more visually appealing presentation.
Salad Nutritional Benefits
Discover the nutritional benefits of Via Carota Insalata Verde, a salad brimming with essential vitamins and fiber. This salad offers a powerhouse of nutrients derived from an array of greens, providing a significant dose of vitamins A, C, and K vital for overall health.
The inclusion of endive in the mix adds a valuable source of folate, essential for cellular growth and division within the body. The sherry shallot vinaigrette, made with heart-healthy olive oil, enriches the salad with monounsaturated fats, contributing to a well-rounded diet.
Not only does this salad support digestion with its fiber content, but it also aids in fortifying the immune system due to its nutrient-rich composition. By incorporating Via Carota Insalata Verde into your regular meals, you can enjoy a delicious dish that not only tantalizes your taste buds but also nourishes your body with a plethora of health benefits.
Preparation Tips
For best results when preparing Via Carota Insalata Verde, start by making sure you have all the necessary ingredients and utensils ready on your kitchen counter. Here are some essential tips to help you achieve the perfect assembly of this classic Italian salad:
- Prepare the Lettuces:
Wash and dry each type of lettuce thoroughly.
Roughly chop some lettuces while keeping others intact to create a textural contrast in the salad.
- Layering:
Begin by placing a layer of one type of lettuce at the bottom of your serving bowl.
Continue layering with the other lettuces to create a visually appealing presentation.
- Dressing Application:
Drizzle the Sherry Shallot vinaigrette over each layer of lettuce as you assemble the salad.
This ensures that the dressing evenly coats the greens for maximum flavor.
- Final Assembly:
Once all the lettuces and dressing are layered, gently toss the salad just before serving to mix the flavors while maintaining the beautiful presentation.
Salad Pairing Ideas
Consider pairing Via Carota Insalata Verde with a variety of dishes to enhance your dining experience. This versatile salad is an ideal side salad to accompany classic Italian dishes like pasta carbonara and cacio e pepe. Its light and invigorating nature also makes it a perfect match for grilled meats such as pork chops or chicken thighs, providing a balanced meal.
The addition of red onion in the salad adds a subtle sharpness that complements the flavors of the main dishes. When serving pizza, this salad absorbs the extra dressing beautifully, elevating the entire meal. The combination of various lettuces in Via Carota Insalata Verde, along with its flavorful vinaigrette, creates a sensory feast when enjoyed alongside other dishes.
Its adaptability makes it a go-to option for enhancing the dining experience with an array of flavorful main courses.
Epic Salad Variations
Explore the epic salad variations offered by Via Carota Insalata Verde, featuring a delightful mix of butter lettuce, endive, romaine, watercress, and a special vinaigrette.
To delve deeper into the salad world of Via Carota, consider the following:
- Crafting the Perfect Dressing: Williams and Rita Sodi, the masterminds behind Via Carota Insalata, emphasize the importance of using ingredients like Muraglia Olive Oil and dry sherry vinegar to create the signature dressing that elevates the flavors of the salad.
- Green Preparation Techniques: Properly washing and cutting the greens is essential in the recipe for Via Carota Insalata Verde. Attention to detail in this step guarantees the desired texture and flavor profile of the salad.
- Flavorful Vinaigrette: The vinaigrette for Via Carota Insalata Verde is a blend of shallot, vinegar, extra virgin olive oil, mustards, thyme, and garlic, resulting in a rich and flavorful dressing.
- Immediate Serving: Serving the salad immediately after preparation is key to enhancing the flavors of Via Carota Insalata Verde, ensuring an excellent taste and texture experience.
Additional Recipe Recommendations
Discover some more delicious recipes to add variety to your culinary repertoire.
If you enjoyed the Via Carota Insalata Verde, you might also like to try the Easy Tomato Salad with Chickpeas and Feta. This salad offers a simple yet flavorful combination of ripe tomatoes, hearty chickpeas, and creamy feta cheese, perfect for a light and satisfying meal.
For a invigorating twist, explore the Shrimp and Endive Salad with Blood Oranges. This unique salad brings together succulent shrimp, crisp endive leaves, and tangy blood oranges for a burst of flavor in every bite.
If you're looking for a fun presentation, create the Best-Chopped Salad in a Salami Cup. This creative dish features a classic chopped salad nestled in a cup made of savory salami slices.
Additionally, the Simple French Carrot Salad offers a quick and delicious way to enjoy the natural sweetness of carrots with a touch of butter and salt.
Frequently Asked Questions
What Is the Meaning of Insalata Verde?
Insalata Verde translates to 'green salad' in Italian, featuring a blend of fresh greens like butter lettuce, endive, romaine, and watercress. It's renowned for its vibrant colors and flavors, often dressed with a sherry shallot vinaigrette for a tangy finish.
What Are the 4 Types of Salad?
Green salads, bound salads, fruit salads, and vegetable salads make up the four common types of salad. Green salads feature leafy greens, bound salads have ingredients held together by dressing, fruit salads mix fresh fruits, and vegetable salads focus on vegetables.
What Are the Salad Items List?
Imagine this: buttery lettuce, crisp endive, crunchy romaine, and peppery watercress. Add a special vinaigrette with Muraglia Olive Oil and dry sherry vinegar. Delish!
Is Salad a Vegetable or Fruit?
Salad is a dish that can contain vegetables, fruits, or both. The classification as a vegetable or fruit depends on the main ingredients used. With a mix of greens and fruits, salads offer a variety of flavors and nutrients.
Can I Use Antipasto Salad as a Side Dish for Via Carota Insalata Verde?
Yes, you can use classic Italian antipasto salad as a side dish for Via Carota Insalata Verde. The combination of marinated vegetables, cured meats, and savory cheeses in the antipasto salad complements the fresh and crisp flavors of the Insalata Verde perfectly. It’s a great addition to any meal.
Conclusion
To sum up, the classic Italian salad, via carota insalata verde, is a delightful dish that's worth trying. With its fresh salad greens, flavorful homemade dressing, and endless variations, this salad is sure to impress your taste buds.
So why not give it a try and experience the taste of Italy right in your own kitchen? Don't miss out on this culinary journey that will elevate your dining experience to new heights.
Bon appétit!
Francesca, as the creative force behind our compelling content, combines culinary expertise with journalistic flair. She has a deep appreciation for the cultural histories and artisanal traditions that influence remarkable flavors around the world. Through engaging narratives, she transports our audience to the heart of each culinary experience. Whether she’s documenting the centuries-old techniques of a Sicilian cheese maker or uncovering the personal stories of our producers, Francesca’s storytelling prowess drives our mission to connect people through food.
-
Vetted3 months ago
15 Best Non-Toxic Espresso Machines for a Healthier Brew at Home
-
Italian Cuisine1 week ago
What Italian Dishes Use Parsley
-
Vetted6 months ago
12 Best Coffee Pods for DeLonghi Espresso Machine to Elevate Your Caffeine Game
-
Vetted4 months ago
15 Best Coffee Beans for Your Breville Espresso Machine – Expert Picks for Perfect Brews
-
Vetted3 months ago
15 Best Espresso Ground Coffees for Your Espresso Machine: A Barista’s Guide
-
Vetted3 months ago
15 Best Coffee Beans to Elevate Your Breville Espresso Experience
-
Vetted6 months ago
15 Best Commercial Automatic Espresso Machines for Your Coffee Shop
-
Vetted6 months ago
15 Best ESE Pod Espresso Machines for Perfect Coffee Every Time