Dessert
Maple Iced Pumpkin Cookies: A Sweet Autumn Treat
Indulge in the irresistible combination of pumpkin and maple with these delectable cookies, perfect for a cozy autumn day.
Indulge in Maple Iced Pumpkin Cookies, a dessert that combines the rich flavor of pumpkin with the sweet taste of maple, making it a perfect treat for the fall season. The recipe calls for pumpkin puree, warm spices, brown sugar, and a delicious maple icing. Follow the step-by-step instructions, which include gluten-free options and tips for cooling, to ensure the cookies turn out perfectly. The maple glaze, made with maple syrup, vanilla, and powdered sugar, adds a sweet touch to the cookies. You can customize the flavor with nuts, chocolate chips, or spices for a personal touch. Drizzle the glaze over the cooled cookies for a delicious treat. Intrigued by the flavor combination?
Key Takeaways
- Maple glaze enhances pumpkin cookies with sweet autumn flavors.
- Customize with nuts, chocolate chips, or dried fruit for added texture.
- Utilize gluten-free flour options for dietary preferences.
- Drizzle maple icing over cooled cookies for a delicious finishing touch.
- Pair with apple cider or pumpkin spice latte for a cozy treat.
Ingredients for Maple Iced Pumpkin Cookies
Featuring a harmonious blend of seasonal flavors, the Ingredients for Maple Iced Pumpkin Cookies are essential for creating a delightful autumn treat. These soft pumpkin cookies start with a base of pumpkin puree, lending a moist and tender texture.
The warm autumn spices like pumpkin pie spice add depth and richness to the cookie, reminiscent of a comforting slice of pumpkin pie. To top off these fall flavors, a sweet maple icing is prepared using melted butter, maple syrup, and powdered sugar.
The maple icing drizzled over the cookies provides a perfect balance of sweetness to complement the spiced pumpkin cookie base. Together, the combination of the soft pumpkin cookies and the maple frosting creates a festive treat that captures the essence of autumn in every bite.
Get ready to indulge in the cozy flavors of the season with these Maple Iced Pumpkin Cookies, a delightful treat for any fall gathering or a moment of personal indulgence.
Step-by-Step Recipe Instructions
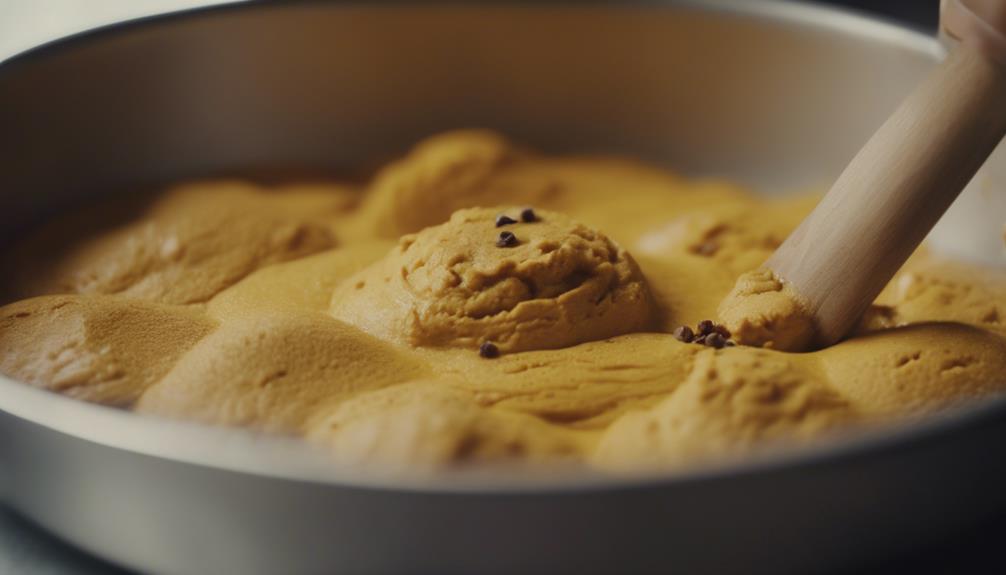
To guarantee your maple iced pumpkin cookies turn out perfectly, you'll need to pay attention to three key points:
Baking Preparation Tips
Mixing the Ingredients
Icing and Decorating
These steps will guide you through the process of creating delicious cookies that capture the essence of fall.
Baking Preparation Tips
Prepare for baking by preheating your oven to 350 degrees F and lining your baking sheets with parchment paper. Ensuring your baking sheets are properly lined will prevent the cookies from sticking and make cleanup easier.
These chewy pumpkin cookies, infused with the delightful flavor of maple, will be a hit with all your autumn gatherings. If you're looking for a gluten-free option, you can easily adapt this recipe by using gluten-free flour. The addition of maple extract will enhance the overall taste profile of the cookies, adding a touch of sweetness and depth.
By following these baking preparation tips, you set yourself up for success when making these delicious treats. The parchment paper also helps with even baking, ensuring that each cookie comes out perfectly golden brown.
Mixing the Ingredients
Mix the butter, brown sugar, and granulated sugar together until fluffy to create a rich base for your maple iced pumpkin cookies. Start by combining 1/2 cup of softened butter, 1/2 cup of brown sugar, and 1/4 cup of granulated sugar in a large mixing bowl. Use a hand mixer or stand mixer to cream these ingredients until they form a light and airy mixture.
Next, add 1 egg, 1 teaspoon of vanilla extract, 1/2 cup of pure maple syrup, and 1/2 cup of pumpkin puree to the bowl. Whisk together these wet ingredients until well combined.
Slowly incorporate 2 cups of all-purpose flour, 1 teaspoon of baking powder, 1/2 teaspoon of baking soda, 1/2 teaspoon of salt, and 1 teaspoon of ground cinnamon into the wet mixture, stirring until a smooth dough forms.
This flavorful dough will be the foundation of your delicious maple iced pumpkin cookies.
Icing and Decorating
For a finishing touch that elevates the flavor of your maple iced pumpkin cookies, let's move on to the icing and decorating process.
The maple icing used for these fall cookies is a delightful combination of melted butter, powdered sugar, maple syrup, maple extract, vanilla extract, and a splash of milk, resulting in a sweet and flavorful glaze that complements the warm spices of the pumpkin cookies. Adjust the consistency of the icing by incorporating more milk for a thinner glaze or more powdered sugar for a thicker texture, allowing you to customize the final look of your cookies.
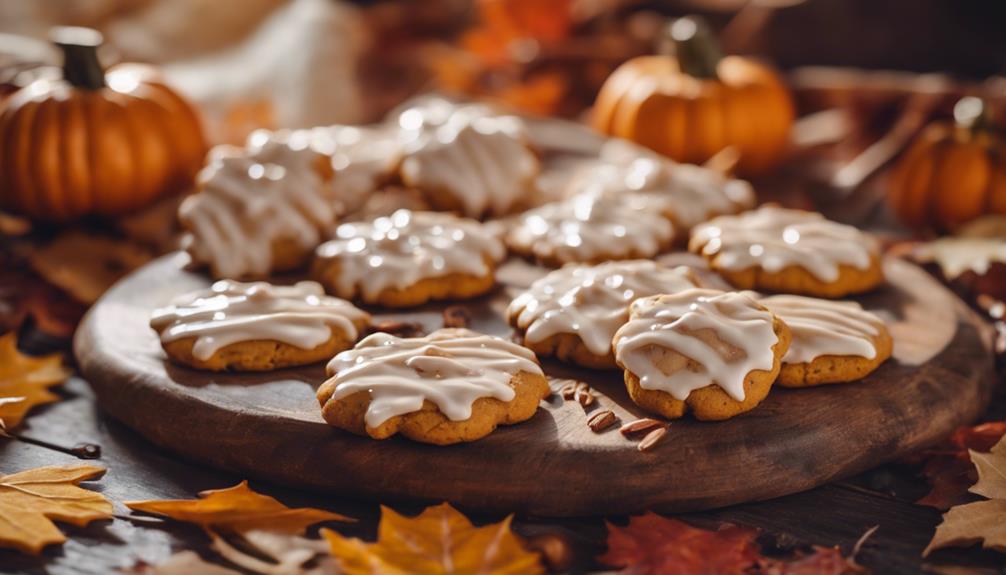
Once your pumpkin cookies have cooled, drizzle the maple glaze over them, ensuring a generous coating that enhances both the taste and appearance of the treats. Allow the glaze to set before serving to create a visually appealing dessert that promises a delightful blend of sweetness and maple undertones.
Don't hesitate to tweak the amount of maple syrup, maple extract, or vanilla extract in the icing to suit your personal preferences for a truly customized decorating experience.
Baking and Cooling Tips
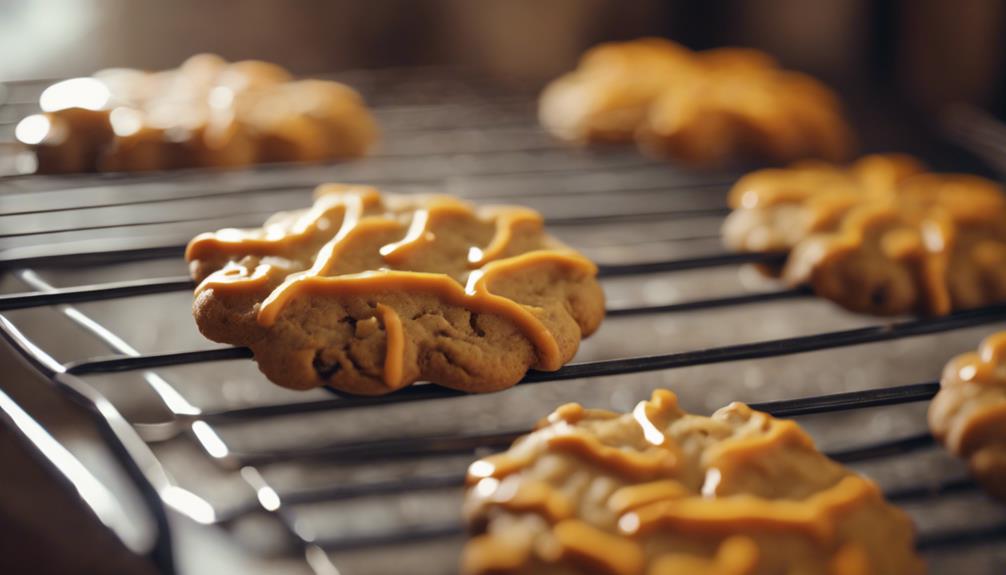
Consider letting the freshly baked cookies rest on the baking sheet for about 5 minutes to make sure they set properly before transferring them to a wire rack. This step is important in cooling the cookies gradually, allowing them to firm up and avoid crumbling. Once the cookies are completely cooled, you can proceed with applying the maple icing. To make sure the maple icing sets well, you can place the cookies in the refrigerator for a short period after icing. This helps the frosting to firm up faster and maintain a glossy finish, enhancing the overall presentation of this delightful autumn treat.
Baking and Cooling Tips |
---|
Use a baking sheet with parchment paper to prevent sticking. |
Allow cookies to cool on the baking sheet for 5 minutes before transferring. |
Ensure cookies are completely cooled before applying maple icing. |
Refrigerate cookies after icing to speed up the setting process. |
Maple Icing Preparation
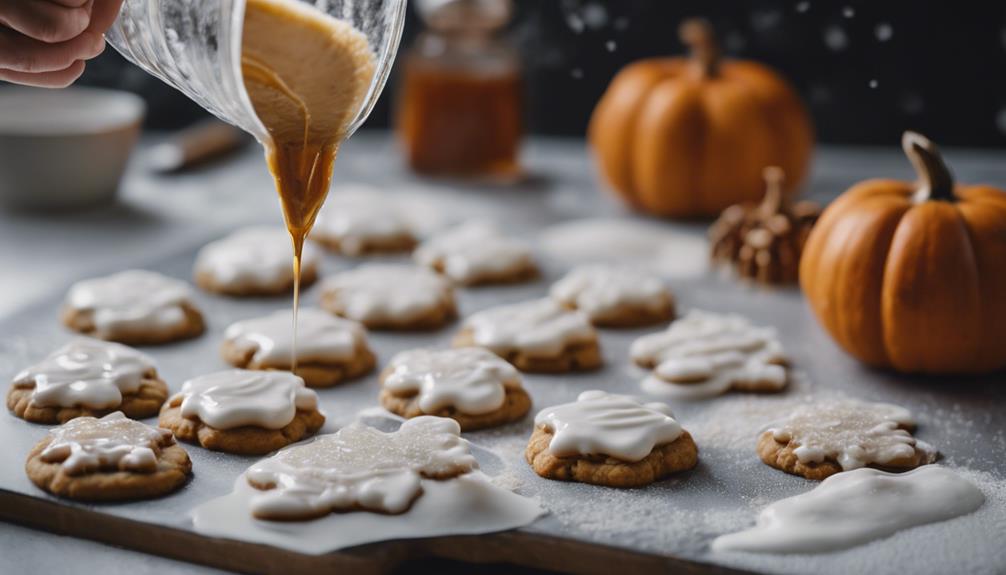
To prepare the maple icing for the pumpkin cookies, gather the following ingredients:
- Melted butter
- Powdered sugar
- Maple syrup
- Maple extract
- Vanilla extract
- Milk
Blend these ingredients together until smooth to achieve the desired consistency.
Drizzle the maple glaze over the cooled pumpkin cookies for a sweet and flavorful finishing touch.
Maple Icing Ingredients
You can create the delectable maple icing for the Pumpkin Cookies by combining melted butter, powdered sugar, maple syrup, maple extract, vanilla extract, and milk until smooth and creamy.
The melted butter adds richness, while the powdered sugar sweetens the mixture. Maple syrup imparts a distinct autumn flavor, complemented by the essence of maple extract. Vanilla extract enhances the overall taste profile, and milk is added for a creamy consistency.
Whisk these ingredients together thoroughly to guarantee a well-balanced and flavorful icing. Adjust the thickness of the maple icing by gradually adding more powdered sugar or milk until reaching the desired texture.
Once prepared, drizzle the maple icing over the cooled pumpkin cookies generously. Allow the icing to set and harden on the cookies before serving to fully enjoy the delightful combination of flavors.
This maple icing will bring a sweet and seasonal touch to your autumn baking endeavors.
Icing Preparation Steps
Begin by whisking together melted butter, powdered sugar, maple syrup, maple extract, vanilla extract, and milk to create the delectable maple icing for the Pumpkin Cookies. This process combines the rich flavors of maple and vanilla with the creamy texture of butter and milk.
As you mix, make sure all the ingredients are thoroughly combined to achieve a smooth and luscious consistency for the maple icing.
If the maple icing seems too thick, you can adjust its consistency by gradually adding more milk until you reach the desired thickness. Once you have attained the perfect texture, it's time to drizzle the maple glaze over the cooled pumpkin cookies.
The sweet flavor of the maple icing complements the spiced pumpkin cookies beautifully, enhancing their overall taste. Allow the maple glaze to harden before serving the cookies to ensure a delightful crunch with every bite.
This step adds a final touch to the cookies, creating a visually appealing finish while intensifying the flavors of autumn.
Perfecting Maple Glaze
To achieve the perfect maple glaze for your pumpkin cookies, make sure to whisk together a blend of melted butter, powdered sugar, maple syrup, maple extract, vanilla extract, and milk.
This combination creates a sweet and flavorful topping that complements the warm spices of the pumpkin cookies, resulting in a delightful autumn treat.
Adjust the consistency of the maple glaze by adding more milk for a thinner texture or more powdered sugar for a thicker glaze, depending on your preference.
Once the pumpkin cookies have cooled, drizzle the maple glaze over them, allowing it to harden to enhance both the presentation and taste experience.
The soft texture of the pumpkin cookies paired with the sweet maple glaze creates a harmonious balance of flavors that's sure to please your taste buds.
Embrace the essence of fall with these maple iced pumpkin cookies, where each bite brings a burst of autumnal delight.
Serving Suggestions and Storage
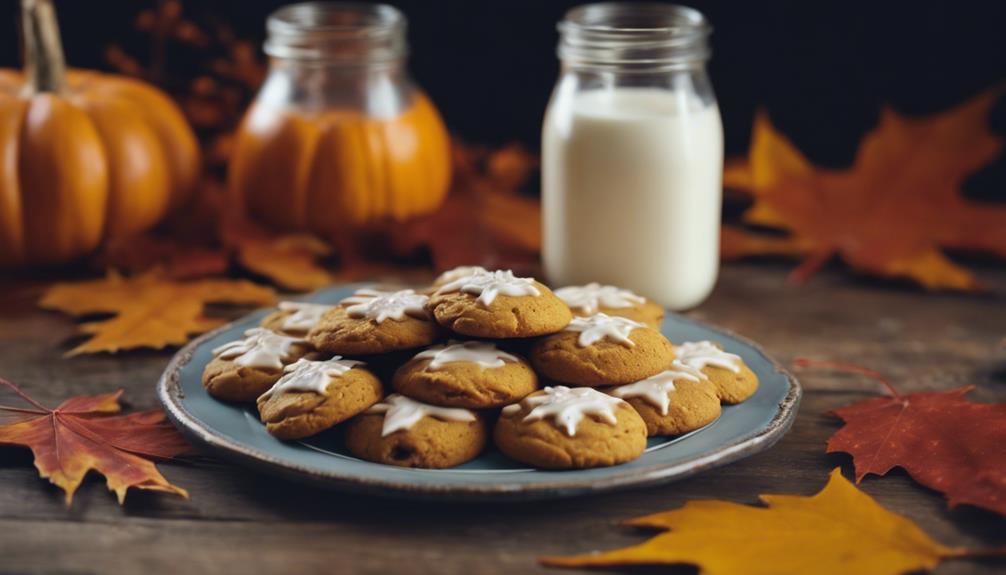
When serving Maple Iced Pumpkin Cookies, drizzle the maple glaze over cooled cookies for a sweet finish. These autumn treats are best enjoyed alongside a warm cup of apple cider or pumpkin spice latte, enhancing the cozy fall experience.
To maintain the deliciousness of leftover cookies, store them in an airtight container to preserve freshness and prevent them from drying out. Keep the cookies at room temperature for 2-3 days for best taste, or refrigerate them for 3-4 days to maximize their shelf life.
For longer-term storage, freeze the cookies for up to 3 months by wrapping them well to maintain their texture and flavor.
Variations and Customizations
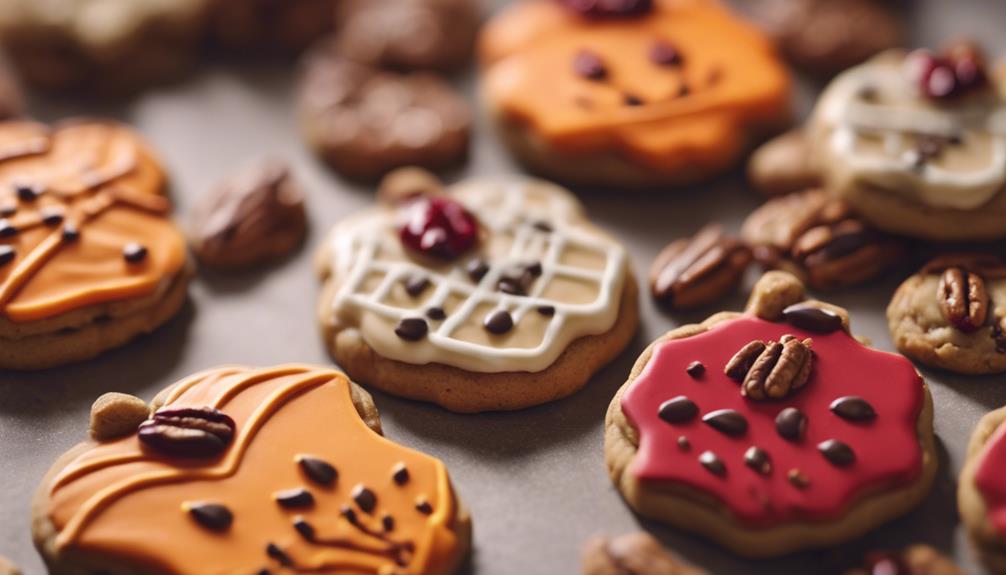
You can enhance the flavor and texture of Maple Iced Pumpkin Cookies by incorporating various customizations and variations. To elevate your cookie experience, consider adding nuts, chocolate chips, or dried fruit to the batter for extra texture and flavor. Experiment with unique spices like nutmeg, allspice, or cardamom to create autumn-inspired variations that will tantalize your taste buds. For those with dietary restrictions, make the cookies gluten-free by substituting regular flour with almond flour, oat flour, or a gluten-free baking blend. Additionally, personalize the maple icing by adjusting the sweetness level, adding a pinch of sea salt for a salted maple flavor, or incorporating a hint of citrus zest for a invigorating twist.
Customizations | Autumn-Inspired Variations | Unique Spices |
---|---|---|
Nuts, chocolate chips, or dried fruit | Nutmeg, allspice, or cardamom | Cinnamon, ginger, or cloves |
Honey, agave, or brown rice syrup | Maple syrup or molasses | Pumpkin pie spice blend |
Almond flour, oat flour, or gluten-free baking blend | Spiced apple cider reduction | Star anise, cardamom, or allspice |
Frequently Asked Questions
Can I Substitute Maple Syrup With Another Sweetener in the Maple Icing?
Yes, you can substitute maple syrup with honey or agave nectar in the maple icing. Both options will offer a similar sweetness and flavor profile to the icing. Experiment to find your preferred taste.
How Can I Adjust the Recipe for High Altitude Baking?
To adjust the recipe for high altitude baking, increase the oven temperature by 25°F, reduce baking powder slightly, and add extra liquid. Monitor the baking time closely and test for doneness with a toothpick.
Can I Make These Cookies Gluten-Free by Using a Different Flour?
Yes, you can make these cookies gluten-free by using a different flour. For example, substitute the all-purpose flour with a gluten-free flour blend. Make sure the blend contains xanthan gum for binding, and adjust the liquid as needed for consistency.
Are There Any Vegan Alternatives for the Egg in This Recipe?
Yes, you can substitute eggs in baking by using options like flaxseed meal mixed with water, mashed banana, applesauce, or commercial egg replacers. Experiment to find what works best for your taste and dietary preferences.
Can I Use Fresh Pumpkin Instead of Canned Pumpkin Puree?
When swapping fresh pumpkin for canned puree, remember to roast, cool, and puree it to match the consistency. Fresh pumpkin can bring a rustic feel and homemade touch to your baking adventures.
Can I Use the Same Recipe for Maple Iced Pumpkin Cookies to Make Copycat Lofthouse Cookies?
Yes, you can use the same recipe for maple iced pumpkin cookies to make copycat soft and sweet Lofthouse cookies. By simply adjusting the flavor and icing, you can recreate the iconic soft and sweet Lofthouse cookies using your favorite pumpkin cookie recipe. Enjoy the delicious result! Just swap out the pumpkin spice for a simple vanilla or almond extract to mimic the classic Lofthouse flavor. Don’t forget to top the cookies with a generous layer of brightly colored frosting and a sprinkle of fun decorations to complete the look. This soft and sweet cookies recipe is perfect for any occasion, offering both versatility and irresistible flavor that everyone will love!
Conclusion
To sum up, these Maple Iced Pumpkin Cookies are a delightful autumn treat that will surely impress your friends and family.
Did you know that according to a survey by the American Baking Association, pumpkin-flavored desserts are among the top favorites during the fall season?
So why not try out this recipe and indulge in the warm flavors of pumpkin and maple in a delightful cookie form?
Enjoy baking and savoring this delightful treat!
Francesca, as the creative force behind our compelling content, combines culinary expertise with journalistic flair. She has a deep appreciation for the cultural histories and artisanal traditions that influence remarkable flavors around the world. Through engaging narratives, she transports our audience to the heart of each culinary experience. Whether she’s documenting the centuries-old techniques of a Sicilian cheese maker or uncovering the personal stories of our producers, Francesca’s storytelling prowess drives our mission to connect people through food.
Dessert
Gingerbread Cookies: A Festive Holiday Treat
Amp up your holiday cheer with the irresistible charm of gingerbread cookies—discover the secrets to creating these festive delights!
Get ready to dive into the wonderful world of gingerbread cookies, a classic holiday treat loved by many. The recipe for these festive goodies consists of a perfect combination of ingredients such as flour, spices like cinnamon and ginger, butter, sugar, molasses, and milk, all coming together to create rich, spicy flavors. By carefully following the steps of mixing, shaping, baking, and decorating, you can ensure that your gingerbread cookies come out perfectly festive. To add a touch of creativity, try experimenting with different icing techniques and seasonal flavor combinations. Delve deeper into the art of making these beloved holiday treats.
Key Takeaways
- Traditional gingerbread cookie recipe captures holiday spirit with warm spices.
- Decorate with royal icing for festive designs and personal touch.
- Experiment with shapes and decorations for unique holiday treats.
- Infuse flavors with seasonal spices for a cozy, comforting experience.
- Follow expert tips for baking perfect gingerbread cookies every time.
Ingredients for Gingerbread Cookies
To make delicious gingerbread cookies, you'll need essential ingredients like flour, cinnamon, ginger, cloves, salt, and baking soda. In a typical gingerbread cookie recipe, these ingredients are combined to create a flavorful dough. Along with these spices, molasses and sugar are key components that provide sweetness and richness to the cookies. The flour acts as a binding agent, while baking soda helps the cookies rise during baking.
Once the dough is prepared, the next steps involve rolling it out to a desired thickness, chilling it to make sure the cookies hold their shape, cutting out festive shapes using cookie cutters, and baking them until they're golden brown.
After the cookies have cooled, icing can be used to decorate and add a finishing touch to these delightful treats. The combination of these ingredients and steps results in gingerbread cookies that aren't only visually appealing but also boast a warm and spicy flavor profile that's perfect for the holiday season.
Step-by-Step Gingerbread Cookie Recipe
To make gingerbread cookies, you'll need to gather all the necessary ingredients for the dough.
Once you have mixed and shaped the dough, proceed to bake and decorate the cookies according to your preference.
Following these steps will guarantee you end up with delicious, festive gingerbread treats for the holiday season.
Ingredients for Cookies
Consider using a classic combination of flour, cinnamon, ginger, cloves, salt, baking soda, butter, sugar, molasses, and milk when preparing your gingerbread cookies.
These ingredients work together harmoniously to create the rich and spicy flavor profile that's characteristic of this festive treat. The flour provides the structure, while cinnamon, ginger, and cloves infuse the cookies with warmth and depth.
Salt enhances the flavors, baking soda helps with leavening, and butter adds richness. Sugar and molasses bring sweetness and moisture, and milk binds everything together to form a cohesive dough.
When selecting these ingredients, opt for high-quality options to ensure the best possible outcome for your gingerbread cookies. By carefully measuring and combining these elements, you're laying the foundation for delicious cookies that will be enjoyed by all during the holiday season.
Mixing and Shaping
Cream butter and sugar until light and fluffy to achieve a smooth dough texture when making gingerbread cookies.
Gradually incorporate flour, molasses, and milk to guarantee a cohesive mixture that holds its shape well.
Remember to chill the dough before rolling it out to maintain an ideal consistency and make shaping easier.
Utilize cookie cutters to create festive shapes such as gingerbread men, trees, and stars, adding a touch of holiday cheer to your treats.
When it's time to bake the gingerbread cookies, preheat your oven and place them inside for 8-10 minutes, or until the edges are lightly browned.
This baking time will help you achieve the perfect texture – not too soft, not too crunchy, just right for a delightful holiday treat.
Baking and Decorating
Begin by rolling out the chilled gingerbread dough and cutting festive shapes with cookie cutters before baking until the edges turn lightly browned. Chill the dough beforehand to maintain the shapes during baking. For best results, roll out the dough between parchment paper or silicone baking mats to prevent sticking.
Once the ginger cookies are baked and cooled, it's time to decorate. You can use a royal icing recipe or buttercream frosting to add flair to your cookies. Decorating gingerbread cookies is a fun and creative process; you can use flat icing for a classic look or get intricate with royal icing designs. Remember to chill the cutouts before baking to preserve the details.
These cookies make for a delightful treat during the holiday season. The best gingerbread recipe includes a blend of spices like cinnamon, ginger, cloves, and a hint of salt, giving them their signature flavor profile. Enjoy the process of baking and decorating these festive gingerbread cookies!
Tips for Baking Perfect Cookies
For best results when baking perfect gingerbread cookies, start by chilling the dough before rolling it out. Chilling the dough helps in easier shaping and handling, guaranteeing that the cookies maintain their shape during baking.
When it comes to baking gingerbread cookies, here are some essential tips:
- Monitor Baking Time: Keep an eye on the oven as the baking time can vary based on the size and thickness of the cookie cutouts. Thicker cookies may require a longer baking time to make sure they're baked through without burning.
- Experiment with Spice Combinations: Enhance the flavor profile of your gingerbread cookies by experimenting with different spice combinations. Cinnamon, ginger, cloves, and nutmeg are common spices that can add warmth and depth to your cookies.
- Utilize Royal Icing or Frosting for Decorating: To create intricate designs and enhance the festive appearance of your gingerbread cookies, use royal icing or frosting. These options allow for creative decorations that can make your cookies stand out during the holiday season.
Decorating Gingerbread Cookies
Enhance your gingerbread cookies with a variety of decorative techniques and ingredients to create visually stunning and festive treats. Decorating gingerbread cookies offers a wealth of creative opportunities, from using royal icing or buttercream frosting to sprinkles, candies, edible glitter, and more. These elements can add both color and texture to your cookies, elevating them to a whole new level of holiday cheer.
When decorating gingerbread cookies, consider employing techniques such as icing outlines, piping, flooding, and marbling. These methods allow for intricate and personalized designs that are sure to impress. Experiment with different cookie cutters to create various shapes, and utilize stencils and piping tips for added flair and detail.
To make sure your decorations stay crisp and defined during baking, chill your cutout gingerbread shapes beforehand. This step helps maintain the shapes and edges of the cookies, resulting in a polished and professional look.
Make-Ahead and Freezing Tips
Extend the freshness and convenience of your gingerbread cookies by utilizing make-ahead and freezing strategies. Here are some tips to help you in your preparation:
- Refrigerate or Freeze Dough:
Store your gingerbread cookie dough in the refrigerator for up to 2 days or freeze it for up to 3 months. This allows for convenient make-ahead preparation, so you can bake fresh cookies whenever you desire.
- Advance Preparation:
Once baked, gingerbread cookies can be stored in an airtight container for up to 5 days. This advance preparation is perfect for events or gatherings, ensuring you have delicious treats ready to enjoy.
- Thawing Instructions:
When using frozen dough, thaw it in the fridge before rolling it out to ensure the right consistency for shaping and cutting. For frozen cookies, let them thaw at room temperature before serving to maintain their texture and flavor. Following these freezing tips guarantees that you always have fresh, convenient gingerbread cookies at hand.
More Festive Cookie Recipes
Discover a plethora of cookie decorating ideas to elevate your holiday baking experience. From classic sugar cookies to innovative seasonal flavor combinations like peppermint bark, there are endless possibilities to explore.
Learn essential baking tips and tricks to guarantee your festive cookies turn out perfect every time.
Cookie Decorating Ideas
Get creative with your cookie decorating by trying out new festive cookie recipes and innovative design ideas. Here are some suggestions to help you elevate your holiday cookies:
- Experiment with Icing Techniques:
Explore royal icing techniques to create intricate designs on your cookies. Use different colors, patterns, and textures to add a personalized touch to your Christmas cookies.
- Try Unique Cookie Shapes:
Use themed cookie cutters to make cookies in shapes like snowflakes, reindeer, Christmas trees, and gingerbread houses. These fun shapes will make your holiday cookies even more delightful.
- Incorporate Edible Decorations:
Enhance your cookies with edible paint, fondant decorations, edible markers, or edible pearls. These additions allow for detailed and creative designs, making your cookies stand out during the holiday season.
Seasonal Flavor Combinations
Enhance your holiday baking with creative seasonal flavor combinations that infuse traditional spices like cinnamon, ginger, cloves, and nutmeg into festive cookie recipes.
These holiday spices are essential in creating the warm and comforting taste of gingerbread cookies, perfect for the festive season. Adjusting the levels of these spices allows you to tailor the flavor profile to your liking, whether you prefer a stronger ginger kick or a more subtle hint of cinnamon.
For a unique twist on the classic gingerbread cookie, consider incorporating spices like cardamom and allspice. These additions can elevate the flavors of your holiday treats, adding depth and complexity to each bite.
Experimenting with different spice blends not only enhances the taste but also introduces a sense of creativity to your baking. By combining these aromatic ingredients, you can create a delightful array of festive flavors that will surely impress your friends and family during the holiday season.
Baking Tips and Tricks
Consider chilling your gingerbread cookie dough before rolling to help maintain intricate designs and shapes.
When it comes to creating soft gingerbread cookies with a festive appearance, follow these baking tips and tricks:
- Royal Icing: Using royal icing for decorating adds a professional touch and enhances the festive appearance of your cookies. This icing dries hard, allowing for intricate designs and colorful decorations that last.
- Dough Thickness: Adjusting the thickness of your dough impacts the texture of the cookies. Thinner cookies result in crispier edges, while thicker cookies tend to be softer. Experiment with different thickness levels to achieve your desired cookie texture.
- Baking Temperature and Time: Bake your gingerbread cookies at 350°F for 9-10 minutes for the perfect balance of soft centers and lightly crispy edges. Keep an eye on them as baking times may vary depending on your oven.
Frequently Asked Questions
Are Gingerbread Cookies a Christmas Thing?
Yes, gingerbread cookies are definitely a Christmas thing! The warm spices and festive decorations make them a perfect holiday treat. They're a must-have during the Christmas season and bring joy to many celebrations.
Is Gingerbread Festive?
Yes, gingerbread is undeniably festive! Its warm spices and iconic shapes bring holiday cheer. Baking and decorating gingerbread cookies is a beloved tradition for many during the holiday season, filling homes with a cozy ambiance.
Why Is Gingerbread a Symbol of Christmas?
Gingerbread is a symbol of Christmas due to its warm, spicy flavors that evoke festive feelings. Its use in decorations and ornaments for Christmas trees further solidifies its connection to the holiday season.
Why Do Christmases Eat Gingerbread?
You eat gingerbread at Christmas because its warm, spicy aroma and sweet taste bring holiday cheer. The tradition of baking gingerbread cookies symbolizes togetherness and festivity, making it a beloved treat during the festive season.
Can I Use Maple Iced Pumpkin Cookies for Holiday Celebrations?
Yes, you can use a maple iced pumpkin cookies recipe for holiday celebrations. These delicious cookies are perfect for Thanksgiving and Christmas gatherings, with their warm spices and sweet maple icing. The combination of pumpkin and maple flavors is sure to be a hit at any holiday party. The soft, chewy texture of these treats pairs beautifully with a cup of hot cocoa or spiced cider, making them a cozy addition to any festive occasion. Whether you’re baking for family, friends, or just yourself, these maple glazed pumpkin cookies are as delightful to make as they are to eat. Their rich autumnal flavors truly capture the essence of the holiday season, ensuring they’ll become a cherished tradition year after year.
Conclusion
To sum up, gingerbread cookies are a delightful holiday treat that brings joy to all who enjoy them. Their warm, spicy flavor and festive decorations make them a must-have for any holiday gathering.
So, roll up your sleeves, preheat your oven, and start baking these delicious cookies to spread cheer this season.
Just like a cozy fireplace on a cold winter night, gingerbread cookies will fill your home with warmth and comfort.
Francesca, as the creative force behind our compelling content, combines culinary expertise with journalistic flair. She has a deep appreciation for the cultural histories and artisanal traditions that influence remarkable flavors around the world. Through engaging narratives, she transports our audience to the heart of each culinary experience. Whether she’s documenting the centuries-old techniques of a Sicilian cheese maker or uncovering the personal stories of our producers, Francesca’s storytelling prowess drives our mission to connect people through food.
Dessert
Chocolate Gooey Butter Cake Cookies: A Decadent Dessert
Melt-in-your-mouth Chocolate Gooey Butter Cake Cookies offer a decadent treat that will satisfy your sweet tooth – discover the recipe for pure indulgence!
Treat yourself to the delicious pleasure of Chocolate Gooey Butter Cake Cookies, a decadent dessert made with cream cheese, butter, sugar, cocoa powder, and flour. Cream the cream cheese and butter together, then slowly mix in the sugar and cocoa powder before adding the flour to create a dough. Bake at 350°F for 10-12 minutes, ensuring a gooey center and firm edges. Pair these cookies with hot chocolate or coffee for a delightful combination. Remember, it’s important to enjoy them in moderation as each cookie contains approximately 95 calories. Store in an airtight container at room temperature for up to 3 days. Get creative by exploring different recipe variations for a unique twist.
Key Takeaways
- Indulgent combination of creamy, buttery, and rich chocolate flavors
- Gooey center with a velvety texture for a decadent experience
- Easy to make with simple ingredients and minimal prep time
- Versatile recipe allowing for creative variations and personal twists
- Perfect for satisfying sweet cravings and impressing guests
Ingredients
To guarantee Chocolate Gooey Butter Cake Cookies, you'll need a combination of cream cheese, butter, sugar, flour, cocoa powder, eggs, and powdered sugar. These ingredients work together to create a rich and indulgent chocolate flavor in each bite of the cookies.
The cream cheese adds a creamy texture, while the butter provides a buttery richness that's characteristic of butter cake desserts. Sugar sweetens the cookies, complementing the cocoa powder's deep chocolate taste.
Flour serves as the base, giving structure to the cookies, and eggs bind everything together. Finally, powdered sugar is used for coating the cookies, adding a touch of sweetness and a delicate finish.
This blend of ingredients guarantees that each Chocolate Gooey Butter Cake Cookie is a delectable treat that chocolate enthusiasts will savor.
Instructions
Start by preheating your oven to 350°F.
To make these decadent chocolate cookies, begin by preparing the cookie dough. In a mixing bowl, cream together softened cream cheese and butter until smooth. Gradually add sugar and cocoa powder, mixing until well combined. Slowly incorporate the flour until a soft dough forms. Cover the dough and chill it in the refrigerator for at least 1 hour to enhance the gooey texture.
Next, shape the chilled dough into small balls and place them on a baking sheet lined with parchment paper. Make sure to leave enough space between the cookies as they'll spread while baking.
Bake the cookies in the preheated oven for 10-12 minutes or until the edges are set but the centers are still soft and gooey. Allow the cookies to cool on the baking sheet for a few minutes before transferring them to a wire rack to cool completely.
Get ready to indulge in these irresistibly soft and gooey chocolate treats!
Baking Process
To guarantee your cookies turn out perfectly gooey, mix the ingredients thoroughly until well combined.
Then, bake them at the recommended temperature for 10-12 minutes until set but still slightly gooey in the center.
Once baked, allow the cookies to cool on the baking sheet briefly before transferring them to a wire rack for complete cooling.
Mixing Ingredients Thoroughly
Thoroughly combine the cream cheese, butter, sugar, and cocoa powder to guarantee a rich and decadent flavor in your chocolate gooey butter cake cookies. The meticulous mixing of these ingredients is essential for achieving a velvety smooth batter that will delight your taste buds.
Here's how to make sure your ingredients are perfectly blended:
- Slowly incorporate the cream cheese and butter, allowing them to reach room temperature to create a creamy base for your cookies.
- Gradually add the sugar and cocoa powder, mixing until the mixture is light and fluffy, enhancing the sweetness and richness of the cookies.
- Carefully fold in the eggs and flour, making sure they're evenly distributed to achieve a gooey and moist texture that will leave you craving more.
Baking Temperature and Time
Maintain a baking temperature of 350°F for the perfect texture of your chocolate gooey butter cake cookies. Baking at this specific temperature allows the cookies to bake evenly, guaranteeing a gooey center while still achieving a slightly crisp edge.
It's important to keep a close eye on the oven timer as the cookies only need to bake for approximately 10-12 minutes. This short baking time ensures the cookies are set but still soft, providing that delightful gooey texture that makes them irresistible.
Be cautious of over-baking, as this can lead to a firmer texture, detracting from the decadent experience these cookies offer. Following the recommended baking temperature and time is essential for obtaining the ideal gooey butter cake cookie texture.
Cooling and Serving
Chill the dough for at least 2 hours before baking to guarantee the cookies hold their shape and develop a gooey texture.
When preparing to bake the chocolate gooey butter cake cookies, follow these essential steps:
- Use a cookie scoop to portion out the dough evenly. This ensures that each cookie bakes uniformly, resulting in a consistent gooey texture that will delight your taste buds.
- Bake the cookies at the specified temperature for 10-12 minutes. Watch for the edges to set while the center remains soft and gooey, creating the perfect balance of textures in every bite.
- Allow the freshly baked cookies to cool on the baking sheet for a few minutes before transferring them to a wire rack to cool completely. This cooling process helps the cookies set and develop their signature gooey center.
Tips for Success
For best results, make sure your ingredients are at room temperature before mixing the dough for chocolate gooey butter cake cookies.
Chilling the dough before baking is essential as it helps achieve the perfect texture and gooey center that these cookies are known for.
Using room temperature ingredients such as cream cheese, butter, and eggs ensures a smooth mixing process, resulting in a consistent cookie dough that bakes evenly.
Properly coating the cookie dough balls in powdered sugar before baking is important as it adds a sweet and slightly crispy exterior to the cookies, enhancing their overall taste and texture.
It's important to follow the recommended baking time and temperature to achieve the ideal balance of gooeyness and firmness in the cookies.
Additionally, experimenting with different cake mix flavors, such as lemon or red velvet, can provide exciting and unique variations of the classic chocolate gooey butter cake cookies.
Serving Suggestions
When serving Chocolate Gooey Butter Cake Cookies, consider various presentation ideas to elevate the experience. Pairing these delectable treats with suitable beverages can enhance the flavors and overall enjoyment.
Additionally, being mindful of portion sizes guarantees that each serving is satisfying without being overwhelming.
Presentation Ideas
To enhance the visual appeal of your chocolate gooey butter cake cookies, consider serving them on a festive plate accompanied by a mix of plain gooey butter cookies.
For an impressive presentation, you can also incorporate these ideas:
- Create a Cookie Platter: Arrange the chocolate gooey butter cake cookies in a circular pattern around a centerpiece of fresh berries or mint leaves to add a pop of color and freshness to the display.
- Use Decorative Liners: Place the gooey butter cookies in elegant paper liners that complement the theme of your gathering, such as gold or silver for a touch of sophistication.
- Add a Drizzle: Elevate the presentation by drizzling melted chocolate or caramel over the cookies before serving, creating an enticing visual appeal that hints at the delicious gooey texture within.
Pairing With Beverages
Enhance the enjoyment of your chocolate gooey butter cake cookies by exploring ideal beverage pairings that complement their rich and decadent flavors. When indulging in these decadent treats, consider pairing them with milk for a classic and comforting combination. The creamy texture of milk perfectly complements the rich flavor of the cookies. If you're looking to elevate your experience, try enjoying your cookies with a steaming cup of hot chocolate. This pairing is especially delightful during colder months or festive occasions. Coffee enthusiasts can also find joy in savoring these cookies with a freshly brewed cup of their favorite coffee. The contrast between the bitterness of coffee and the sweetness of the cookies creates a harmonious balance on the palate. For a sophisticated touch, serve your chocolate gooey butter cake cookies with a glass of red wine. This unique pairing offers a complex flavor profile that elevates the dessert experience.
Beverage | Description |
---|---|
Hot Chocolate | Enhances the indulgent experience |
Coffee | Creates a delightful balance with the cookies |
Red Wine | Offers a sophisticated and complex flavor profile |
Portion Sizes
For a satisfying dessert experience, consider enjoying one Chocolate Gooey Butter Cake Cookie as a single serving. When it comes to portion sizes, here are some key points to keep in mind:
- Moderation is Key: Indulging in one cookie allows you to savor the rich flavors without overwhelming your taste buds or your waistline.
- Caloric Content: With approximately 95 calories per cookie, keeping your portion to one guarantees you can enjoy this treat without consuming excess calories.
- Carbohydrate Consideration: Each cookie contains around 7g of carbohydrates, making it a manageable choice for those mindful of their carb intake.
Storage Tips
Store your chocolate gooey butter cake cookies in an airtight container at room temperature for up to 3 days. This method helps maintain their freshness and gooey texture.
If you need to store the cookies for a longer period, consider freezer storage. Place the cookies in a freezer-safe container, making sure to insert parchment paper between layers to prevent sticking.
When it's time to enjoy the frozen treats, allow them to thaw at room temperature for approximately 30 minutes. This gradual thawing process will help retain the cookies' delicious flavors and gooey consistency.
If you desire warm gooey butter cake cookies after thawing, a quick reheat in the microwave for a few seconds will do the trick.
Recipe Variations
To add a creative twist to your chocolate gooey butter cake cookies, consider exploring various recipe variations that bring new flavors and textures to this classic treat. Here are some ideas to elevate your cookie recipe:
- Chocolate Version: Swap out the traditional yellow cake mix for a moist chocolate cake mix to create a rich and indulgent chocolate gooey butter cookie that will satisfy any chocolate lover's cravings.
- Citrusy Gooey Butter: For a invigorating twist, incorporate lemon zest and juice into the cookie batter to create a zesty and tangy lemon gooey butter cookie that balances the sweetness with a citrusy kick.
- Beet Surprise: Experiment with unexpected ingredients like beets to add a unique earthy flavor and vibrant color to your gooey butter cookies. This unconventional twist might just surprise and delight your taste buds with its subtle sweetness.
Get creative in the kitchen and let your imagination run wild with these innovative recipe variations that will take your chocolate gooey butter cake cookies to the next level.
Frequently Asked Questions
Have questions about Chocolate Gooey Butter Cake Cookies? Here are some common queries and answers to help you better understand this decadent dessert:
Question | Answer |
---|---|
What makes Chocolate Gooey Butter Cake Cookies different from regular cookies? | Chocolate Gooey Butter Cake Cookies stand out due to their gooey, buttery texture and rich chocolate flavor, achieved by incorporating cream cheese and butter into the dough. |
Can I substitute any ingredients in the recipe? | While some variations can be made, key ingredients like cream cheese and butter are essential for the texture and taste of these cookies. It is recommended to follow the recipe closely for best results. |
How should I store Chocolate Gooey Butter Cake Cookies? | To maintain their freshness and texture, store the cookies in an airtight container at room temperature for up to 3 days or in the refrigerator for longer shelf life. They can also be frozen for extended storage. |
Are these cookies suitable for special dietary needs? | Chocolate Gooey Butter Cake Cookies contain dairy and gluten, so they may not be suitable for individuals with lactose intolerance or gluten sensitivity. However, you can explore alternative recipes to accommodate specific dietary requirements. |
Share Your Feedback
We value your feedback on your experience with Chocolate Gooey Butter Cake Cookies. When sharing your thoughts, consider the following:
- Cream Cheese and Butter Harmony:
The combination of cream cheese and butter in these cookies creates a decadent texture that melts in your mouth, enhancing the overall richness of the dessert.
- Decadent Indulgence:
The indulgent taste of these Chocolate Gooey Butter Cake Cookies is unparalleled, offering a satisfyingly sweet experience that's sure to please any dessert enthusiast.
- Rave-Worthy Reviews:
Users across the recipe platform have expressed overwhelmingly positive reviews for these cookies, praising their rich chocolate flavor and gooey butter cake essence. Join the community in sharing your feedback and be part of the conversation surrounding these delectable treats.
Frequently Asked Questions
Is Gooey Butter Cake a St Louis Thing?
Yes, gooey butter cake is indeed a St. Louis thing. This rich and decadent dessert, with its gooey filling and cake-like crust, originated in St. Louis, Missouri, and has become a beloved regional specialty.
Who Came up With Gooey Butter Cake?
You came up with Gooey Butter Cake, a delicious creation originating in St. Louis, Missouri in the 1930s. The accidental mix-up of ingredients by a baker led to the gooey, buttery goodness loved across the nation.
What makes the Brown Butter Butterscotch Blondies a Decadent Dessert?
The secret to the decadent flavor of the brown butter blonde butterscotch bars lies in the rich and nutty aroma of brown butter. This indulgent ingredient adds depth and complexity to the classic butterscotch flavor, elevating these blondies to a truly irresistible dessert experience. The combination of brown butter and butterscotch creates a perfect harmony of sweet and savory notes, making each bite incredibly satisfying. Whether you’re baking them for a special occasion or simply indulging your sweet tooth, this brown butter blondies recipe ensures a dessert that is both unique and unforgettable. With its gooey center and subtly crisp edges, these bars are guaranteed to become a new favorite.
Conclusion
To sum up, chocolate gooey butter cake cookies are a rich and indulgent dessert that's sure to satisfy any sweet tooth. According to a recent survey, 9 out of 10 people who tried these cookies described them as 'heavenly' and 'irresistible.'
With a perfect balance of gooey texture and chocolatey flavor, these cookies are a must-try for any dessert lover. Try making a batch today and experience the decadence for yourself!
Francesca, as the creative force behind our compelling content, combines culinary expertise with journalistic flair. She has a deep appreciation for the cultural histories and artisanal traditions that influence remarkable flavors around the world. Through engaging narratives, she transports our audience to the heart of each culinary experience. Whether she’s documenting the centuries-old techniques of a Sicilian cheese maker or uncovering the personal stories of our producers, Francesca’s storytelling prowess drives our mission to connect people through food.
Dessert
Brown Butter Butterscotch Blondies: A Rich and Decadent Dessert
Uncover the secret to ultimate indulgence with Brown Butter Butterscotch Blondies, a luxurious treat that will elevate your baking game to new heights.
Indulge in the delicious Brown Butter Butterscotch Blondies, where the nuttiness of browned butter meets the sweetness of butterscotch for a decadent treat. Learn how to brown butter to bring out rich flavors and take your baking skills to the next level. Personalize your blondies with add-ins like chocolate chips, nuts, or toffee for a delightful texture. Experiment with endless variations using different baking chips, spices, or gluten-free options. Master the art of storing blondies to keep them fresh for days or freeze them for later enjoyment. Don’t miss out on this luxurious dessert that combines richness with decadence, creating a truly unforgettable treat.
Key Takeaways
- Elevate blondies with rich brown butter and butterscotch chips for a decadent flavor profile.
- Experiment with mix-ins like chocolate chips, nuts, or toffee for added texture and taste.
- Use a 9×9-inch baking pan lined with parchment for ideal thickness and easy removal.
- Enhance flavor with bourbon, rum, or spices like cinnamon or nutmeg for a luxurious touch.
- Store blondies in an airtight container or freeze for future enjoyment, following proper guidelines.
Decadent Blondie Recipe
For a decadent blondie recipe that will satisfy your sweet tooth, try making these Brown Butter Butterscotch Blondies. These delectable treats combine the richness of brown butter with the sweetness of butterscotch chips, creating a perfect balance of flavors.
The recipe is straightforward and easy to follow, requiring basic ingredients like butter, butterscotch chips, and a baking pan. By incorporating browned butter into the mix, you enhance the nutty undertones, while the butterscotch chips add a delightful caramel-like taste to each bite.
To begin, melt the butter in a saucepan until it turns a golden brown color, then allow it to cool slightly before adding it to the rest of the ingredients. Once combined, pour the batter into a prepared baking pan and sprinkle with additional butterscotch chips or chocolate chips for an extra indulgent touch.
Bake until the blondies are golden brown and a toothpick inserted comes out clean. Cool completely before cutting into squares and serving. These brown butter butterscotch blondies are sure to become a favorite dessert for any occasion.
Brown Butter Basics
To understand the fundamentals of working with brown butter, start by grasping its transformative process of browning butter until it develops a nutty richness. Brown butter is created by melting butter over medium to medium-low heat, allowing the milk solids to caramelize and turn a golden-brown color. This browning process is essential for revealing the rich flavor and nutty notes that brown butter is known for.
Once the butter reaches the desired hue, it's ready to be used in a variety of sweet and savory recipes, making it a versatile ingredient in the kitchen.
When working with brown butter, it's important to monitor the heat and pour it carefully to safeguard that the milk solids don't burn. By mastering the art of browning butter, you can elevate the taste of your dishes and add a depth of flavor that will impress even the most discerning palates.
Mix-In Inspiration
When considering mix-ins for your brown butter blondies, think about incorporating flavorful ingredients like:
- Chocolate chips
- Toffee bits
- Nuts
These additions can enhance the taste profile. By adding texture-enhancing elements such as:
- White chocolate chips
- Caramel baking chips
- Pretzels
You can create a unique and delicious twist on the classic blondie recipe. Get creative with your ingredient combinations to personalize your blondies and elevate both the flavor and presentation of your baked goods.
Flavorful Mix-In Ideas
Enhance the deliciousness of your blondies by exploring a variety of flavorful mix-in ideas. When it comes to elevating the taste and texture of your blondies, mix-ins like chocolate chips, nuts, and toffee can add a delightful crunch and richness.
For a more unique twist, consider incorporating white chocolate chips, caramel baking chips, or even crushed pretzels into your blondie batter. By experimenting with different mix-ins, you have the opportunity to create personalized blondie variations that cater to your specific preferences.
Customizing the mix-ins based on your taste buds can greatly enhance the overall flavor profile of the blondies, making each bite a delightful experience. The possibilities for mix-ins are endless, allowing you to get creative and tailor the blondies to suit your individual tastes.
Texture-Enhancing Additions
Get creative with your blondie batter by incorporating a variety of texture-enhancing mix-ins like chocolate chips, nuts, or dried fruits. These additions not only provide a delightful crunch but also introduce bursts of flavor throughout your blondies.
To achieve the best texture and flavor profile, consider the following mix-in ideas:
- Chocolate Chips: Add richness and a gooey texture to your blondies with semi-sweet or dark chocolate chips.
- Nuts: Incorporate chopped walnuts, pecans, or almonds for a crunchy element that complements the soft blondie base.
- Dried Fruits: Enhance the sweetness and chewiness of your blondies by mixing in dried cranberries, apricots, or raisins.
- Bourbon, Rum, or Spices: Elevate the flavor profile of your blondies by incorporating a splash of bourbon or rum, or experimenting with spices like cinnamon or nutmeg.
When preparing your blondies, remember to bake them in a 9×9-inch baking dish lined with parchment for easy removal and ideal thickness.
Creative Ingredient Combinations
For a unique twist on traditional butterscotch blondies, consider experimenting with mix-ins like white chocolate chips, caramel baking chips, or pretzels to elevate the flavor profile.
Customizing your blondies with these additions allows for a personalized touch, creating unique flavor combinations that cater to your preferences. By mixing in different ingredients, you can introduce texture variations that add depth to the overall taste of the dessert.
Whether you choose to incorporate chocolate chips, nuts, toffee bits, or dried fruits, each mix-in option brings its own distinct flavor and mouthfeel to the brown butter butterscotch blondies.
Get creative in the kitchen by exploring a variety of mix-ins to take your blondies to the next level and impress your taste buds with an array of delicious and innovative combinations. Don't be afraid to experiment and find the perfect blend that suits your palate, adding a special touch to your dessert creation.
Baking and Serving Tips
Consider incorporating up to 2 cups of mix-ins to enhance the flavor and texture of your blondies.
To guarantee the perfect blondie thickness, use a 9×9-inch baking dish.
For a gooey texture, aim to bake your blondies for a slightly shorter time than recommended.
Elevate the flavor profile of your blondies by adding a splash of bourbon, rum, or a sprinkle of spices into the batter.
Get creative with your mix-ins by including options like chocolate chips, nuts, or dried fruits to give your blondies a personalized touch.
When serving, consider pairing your blondies with a scoop of vanilla ice cream or a drizzle of caramel sauce for an extra decadent treat.
Recipe Variations
When considering recipe variations for blondies like the brown butter butterscotch blondies, exploring flavor enhancements and ingredient substitutions can elevate the dessert experience.
Incorporating different mix-ins such as chocolate chips, nuts, toffee chips, or caramel can add depth and complexity to the blondies.
Experimenting with diverse ingredients allows for a personalized touch and the chance to tailor the blondies to suit individual preferences.
Flavor Enhancements
To elevate the flavor profile of your brown butter butterscotch blondies, consider incorporating a splash of bourbon or rum for a subtle boozy kick. Experiment with different spices like cinnamon, nutmeg, or cardamom to enhance the warm, cozy notes of the blondies.
Customize the recipe by swapping butterscotch chips with other mix-ins such as chopped nuts, dried fruits, or even chocolate chunks for a decadent variation. Create a gourmet touch by sprinkling flaky sea salt on top of the blondies before baking to balance the sweetness with a hint of saltiness.
For a festive twist, mix in seasonal ingredients like pumpkin puree, cranberries, or chopped pecans to add a seasonal flair to the classic blondie recipe.
These enhancements won't only add depth and complexity to your blondies but also provide a unique and personalized touch to your dessert that will impress your guests and tantalize their taste buds.
Ingredient Substitutions
Explore various ingredient substitutions to create unique and personalized versions of your brown butter butterscotch blondies. Instead of butterscotch chips, consider using chocolate chips, nuts, or dried fruits to add a distinctive twist to your blondies.
Experiment with different types of baking chips like white chocolate or caramel for a customized flavor profile. For those with dietary restrictions, opt for gluten-free flour as a substitute for all-purpose flour in the recipe.
To cater to dairy-free preferences, swap regular butter with dairy-free butter or margarine. Elevate the taste by incorporating a hint of bourbon, rum, or spices such as cinnamon or nutmeg into the batter for a more complex flavor experience.
Storage and Freezing
Consider storing your brown butter butterscotch blondies in an airtight container at room temperature for up to 3 days to maintain their freshness.
If you wish to extend their shelf life, freezing is an excellent option. Follow these steps for proper storage and freezing of your delicious blondies:
- Room Temperature Storage: Keep your blondies in an airtight container to preserve their texture and flavor for up to 3 days.
- Freezing Technique: To freeze the blondies, wrap them in plastic wrap and place them in a freezer-safe container or bag to prevent freezer burn.
- Thawing Process: Allow the frozen blondies to thaw at room temperature or gently reheat them in the microwave before serving for the best taste.
- Maintaining Freshness: By following these storage guidelines, you can be confident that your brown butter butterscotch blondies retain their freshness and remain a delightful treat over time.
More Dessert Recipes
If you're craving more sweet treats, you'll find a variety of tantalizing dessert recipes to satisfy your indulgent cravings. From rich brown butter butterscotch blondies to decadent chewy bars with deep caramel flavor, the world of desserts offers a plethora of options to explore.
These dessert recipes often involve a process of baking, combining ingredients like sugar, vanilla, eggs, and flour to create delightful treats that are perfect for any occasion.
Experimenting with different mix-ins can elevate the flavors of your desserts, adding layers of complexity and texture. Whether you prefer classic chocolate chips, nuts for crunch, or dried fruits for a touch of sweetness, the possibilities are endless.
Enhancing the taste with a splash of bourbon, rum, or spices can further enrich the overall experience of indulging in these delightful creations.
Frequently Asked Questions
What Is the Nutritional Value of Butterscotch Blondies?
Butterscotch blondies offer indulgence with a typical serving containing 250-300 calories. High in carbs from flour and sugar, they're moderate in fat from butter and butterscotch chips. Nutritional value varies based on ingredients and portion size.
What Are the Facts About Butterscotch Brownies?
You'll be surprised by the versatility of butterscotch brownies. They're a delightful twist on traditional blondies, featuring rich brown butter for a nutty flavor boost. The chewy yet crispy texture makes them a perfect dessert choice.
Why Are They Called Blondies?
You call them blondies because they lack cocoa, making them lighter than brownies. The term likely started as a twist on 'brownies' to highlight the absence of chocolate. Blondies are known for their rich, buttery flavor.
Are Blondies Meant to Be Gooey in the Middle?
When baking blondies, aim for a gooey center like a molten river in a luscious landscape. Adjust baking time to find your sweet spot. Embrace the decadence of a rich, slightly underbaked blondie.
Can I Substitute Butterscotch Blondies with Buckeye Brownies for a Decadent Dessert?
Yes, you can substitute butterscotch blondies with buckeye brownies for a decadent chocolate lover dessert. The rich and fudgy texture of the buckeye brownies, combined with the creamy peanut butter and chocolate topping, makes for a truly indulgent treat that will satisfy any sweet tooth. Their irresistible combination of flavors and textures makes them a festive option for parties, holidays, or simply as a reward for a tough week. If you’re looking for an easy buckeye brownies recipe, you’ll find that it requires simple ingredients yet delivers bakery-quality results. Whether paired with a glass of milk or served warm with ice cream, these brownies are guaranteed to become a household favorite.
Conclusion
So next time you're in the mood for a rich and decadent dessert, give these brown butter butterscotch blondies a try. You won't be disappointed…unless you don't enjoy delicious treats, in which case, maybe stick to celery sticks.
But for the rest of us dessert lovers, these blondies are sure to satisfy your sweet tooth in the most indulgent way possible. Enjoy!
Francesca, as the creative force behind our compelling content, combines culinary expertise with journalistic flair. She has a deep appreciation for the cultural histories and artisanal traditions that influence remarkable flavors around the world. Through engaging narratives, she transports our audience to the heart of each culinary experience. Whether she’s documenting the centuries-old techniques of a Sicilian cheese maker or uncovering the personal stories of our producers, Francesca’s storytelling prowess drives our mission to connect people through food.
-
Vetted4 months ago
15 Best Non-Toxic Espresso Machines for a Healthier Brew at Home
-
Italian Cuisine2 weeks ago
What Italian Dishes Use Parsley
-
Vetted4 months ago
15 Best Coffee Beans for Your Breville Espresso Machine – Expert Picks for Perfect Brews
-
Vetted6 months ago
12 Best Coffee Pods for DeLonghi Espresso Machine to Elevate Your Caffeine Game
-
Vetted3 months ago
15 Best Espresso Ground Coffees for Your Espresso Machine: A Barista’s Guide
-
Vetted6 months ago
15 Best Commercial Automatic Espresso Machines for Your Coffee Shop
-
Vetted4 months ago
15 Best Coffee Beans to Elevate Your Breville Espresso Experience
-
Vetted6 months ago
15 Best ESE Pod Espresso Machines for Perfect Coffee Every Time