Dessert
Cookies and Cream Oreo Truffles: A Decadent Treat
Melt into the luxurious world of Cookies and Cream Oreo Truffles, where decadence meets delight in a single bite.
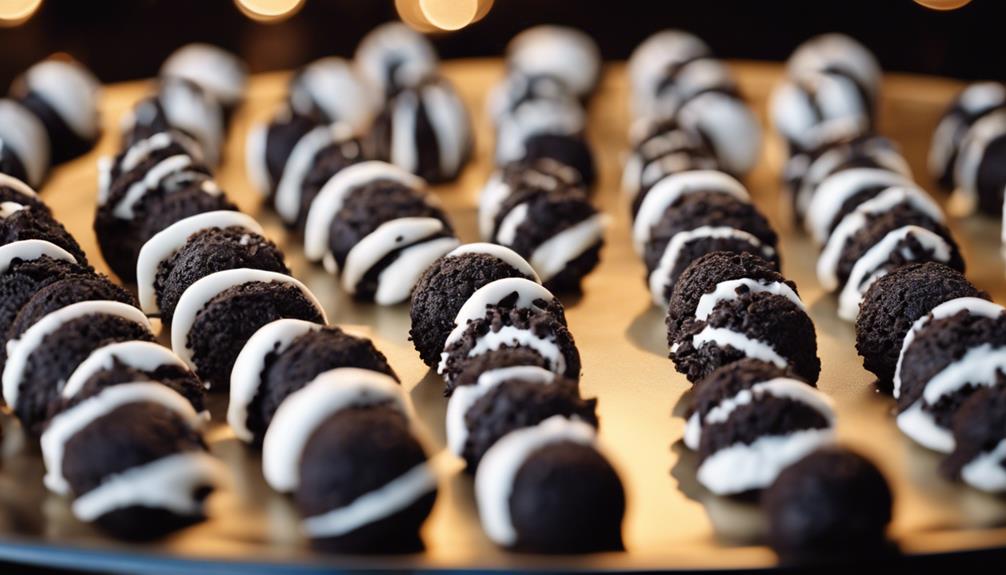
Indulge in the decadence of Cookies and Cream Oreo Truffles, a luxurious fusion of Oreo cookies and cream cheese, enrobed in rich chocolate. A blend of flavors and textures that promises pure satisfaction with each bite. Crafted with precision, these truffles require mixing cream cheese and vanilla, shaping into balls, freezing, and bathing in melted white chocolate. Top with crushed Oreos for an exquisite finish. Explore decorating tips to elevate presentation, garnishing suggestions for added flair, and storage methods for lasting freshness. Uncover the secrets to mastering this delectable treat.
Key Takeaways
- Creamy Oreo truffles with a decadent cookies and cream flavor.
- Indulgent treat made with Oreo cookies and rich cream cheese.
- Elevate presentation with decorative drizzles and sprinkles.
- Store in the fridge for up to 3 weeks or freeze for 2 months.
- Serve chilled for a luxurious and satisfying dessert experience.
Ingredients for Oreo Truffles
To make Oreo truffles, you'll need just four ingredients: Oreo cookies, cream cheese, baking chocolate, and optionally, coconut oil. The Oreo cookies provide that classic cookies and cream flavor, while the cream cheese adds a rich and creamy texture to the truffles.
Baking chocolate is essential for that smooth and decadent chocolate coating that envelops each truffle. Coconut oil can be added to the chocolate for a glossy finish and a bit of extra flavor.
After mixing the crushed Oreo cookies and cream cheese to form the truffle base, the next step involves dipping them in melted baking chocolate. Using toothpicks for this process guarantees an even and professional-looking coating. Refrigerating the truffles after dipping is important as it helps set the chocolate coating and gives the truffles a firmer texture.
Steps to Make Oreo Truffles
For a simple start, mix cream cheese and vanilla until a dough forms when making Oreo truffles. Roll the mixture into approximately 15g balls to guarantee uniform size.
Place the Oreo balls in the freezer for at least 15 minutes to establish. Once chilled, dip the Oreo balls into melted white chocolate combined with coconut oil for a smooth and luscious coating.
To add extra flavor and decoration, drizzle additional melted chocolate on top of the coated truffles and sprinkle crushed Oreos for a delightful crunch.
These steps are crucial in creating the perfect Oreo truffles that will impress your guests and elevate any cookie platter. The combination of creamy filling, decadent white chocolate, and the crunch of crushed Oreos will make these truffles a standout treat at any gathering.
Tips for Perfect Oreo Truffles
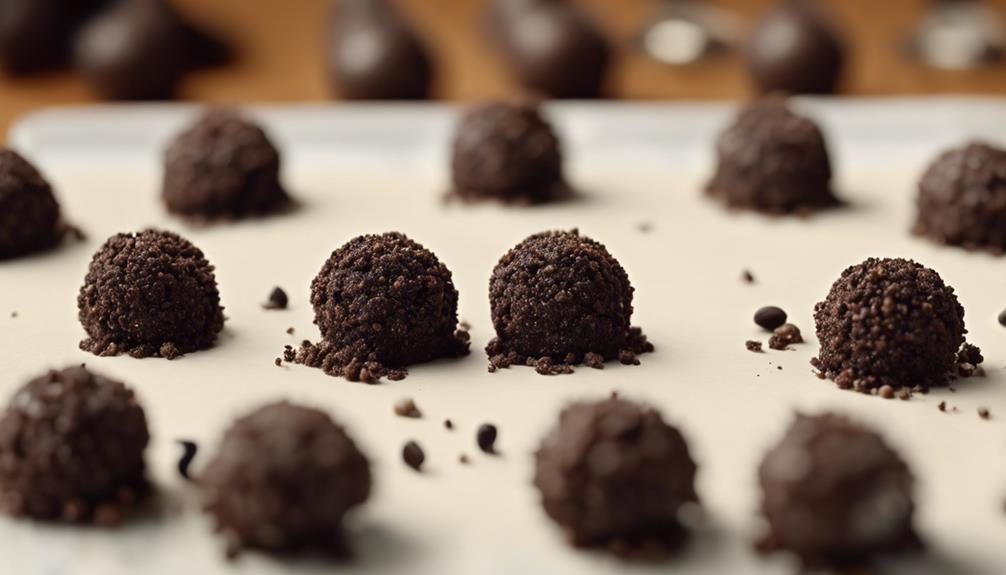
For essential results when making Oreo truffles, make sure that the cream cheese and vanilla are thoroughly mixed to create a creamy truffle dough. This step is key in achieving the right consistency for your truffles.
Once the truffle balls are formed, it's recommended to freeze them for at least 15 minutes. Freezing will make the balls firm, which will help in the dipping process later on.
When it's time to coat the truffles, melting white chocolate with coconut oil creates a smooth and delicious candy coating. After dipping the truffles, consider drizzling extra melted chocolate on top and sprinkling crushed Oreo crumbs for a decorative finish.
To set the coating and allow the flavors to meld, refrigerate the truffles. This step is vital for the flavors to develop fully.
Decorating Oreo Truffles
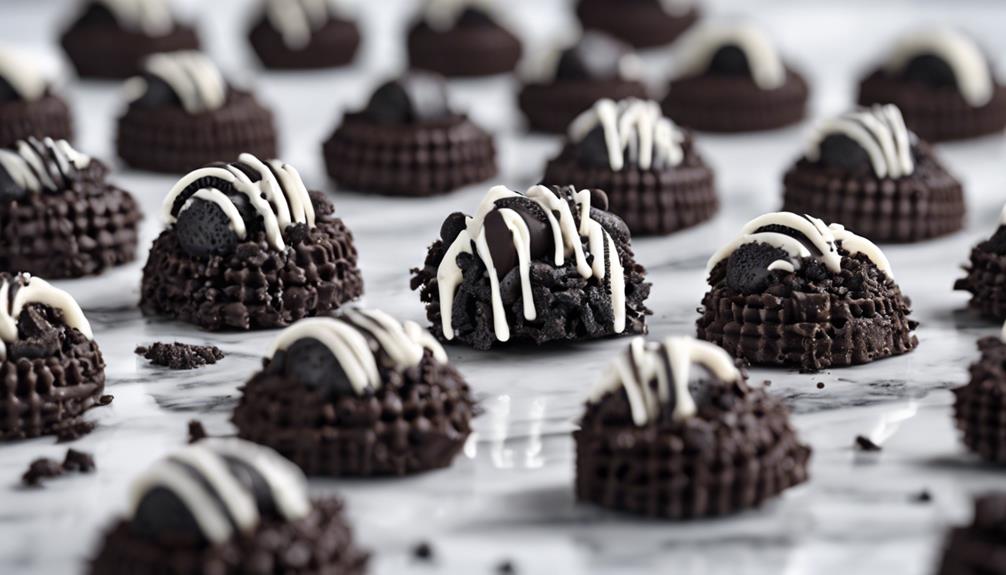
When it comes to decorating Oreo truffles, you can elevate their appearance with the chocolate drizzle technique, adding a touch of elegance.
Experiment with various sprinkle options to introduce a burst of flavor and texture, enhancing the overall experience.
Consider incorporating edible glitter for a glamorous finish that will surely impress your guests.
Chocolate Drizzle Technique
To decorate Oreo truffles with a chocolate drizzle, begin by melting chocolate for a smooth and elegant finish. The chocolate drizzle adds a decorative touch to the truffles, enhancing their visual appeal and providing a contrasting element to the creamy center and Oreo crumbs.
Using melted chocolate guarantees a professional finish, allowing you to create intricate designs or patterns on the surface of the truffles. This technique is a simple yet effective way to elevate the presentation of your Oreo truffles, making them visually appealing and enticing to eat.
The drizzle adds a touch of sophistication and creativity, transforming your homemade treats into a gourmet dessert. Whether you opt for a simple drizzle or more elaborate designs, the chocolate drizzle technique is sure to impress your guests and make your Oreo truffles stand out.
Experiment with different patterns and styles to find the perfect decorative touch for your decadent treats.
Sprinkle Variety Options
Consider incorporating a variety of sprinkles to add a playful and visually appealing element to your Oreo truffles. Sprinkles come in diverse shapes, sizes, and colors, offering a range of options for customizing your treats.
Whether you're aiming to match a specific theme or celebrate a special occasion, sprinkles can enhance the aesthetic appeal of your Oreo truffles.
Before the chocolate coating sets, sprinkle application guarantees they adhere well to the surface, providing a textured and festive look to the truffles.
Edible Glitter Application
Enhance the visual appeal of your Oreo truffles by adding a touch of sparkle and elegance with edible glitter. When applying edible glitter, use a small brush to make sure it is distributed evenly across the truffles. This technique enhances the visual appeal and adds a magical finish to your decadent treat. Experiment with different colors of edible glitter to match the occasion or theme, creating a personalized touch that will impress your guests.
To apply edible glitter effectively, follow these steps:
Step | Instructions |
---|---|
Apply Evenly | Gently brush the edible glitter onto the truffles for even coverage. |
Add Sparkle | Lightly sprinkle the glitter over the truffles to create sparkle. |
Choose Colors Wisely | Experiment with different colors of edible glitter for various occasions or themes. |
Serving Suggestions for Oreo Truffles
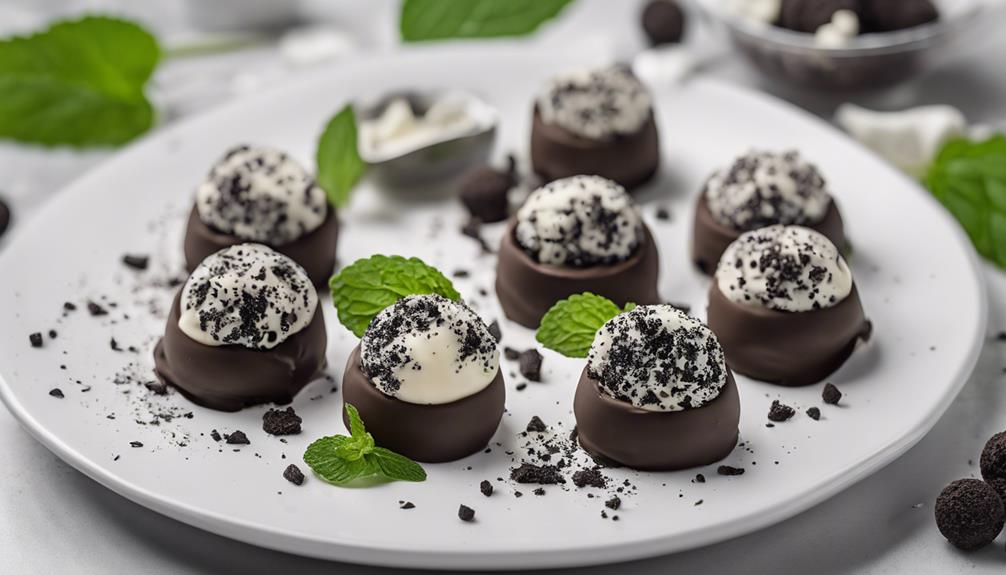
When serving Oreo truffles, consider creative presentation ideas to enhance their visual appeal.
Experiment with different flavors and pairings to elevate the taste experience for your guests.
These suggestions can contribute to a memorable and delightful dessert offering at your next gathering.
Presentation Ideas
To create an appealing display for your Oreo truffles, consider arranging them on a decorative platter or in mini cupcake liners for an elegant touch.
Garnishing the truffles with crushed Oreo crumbs or sprinkles can add a delightful texture and flavor to your presentation.
For special occasions or gatherings, showcasing the Oreo truffles on a tiered dessert stand can elevate the elegance of your dessert spread.
Whether you choose to enjoy them with a glass of milk or a cup of coffee, these truffles are sure to be a hit.
The contrast of the rich, creamy Oreo filling against the crisp chocolate coating makes for a visually enticing dessert option.
By thoughtfully displaying your Oreo truffles, you not only enhance their visual appeal but also invite guests to indulge in a decadent treat.
Flavors and Pairings
Consider experimenting with various flavors and pairings to elevate the experience of enjoying Oreo truffles. These delectable treats can be enhanced with a myriad of options to suit different tastes and occasions.
Here are some suggestions to inspire your next Oreo truffle creation:
- Try incorporating flavors like mint, almond, or different chocolate coatings to add a unique twist to your Oreo truffles.
- Serve Oreo truffles chilled for an invigorating and indulgent treat, perfect for parties or gatherings.
- Get creative with variations such as cake pops, gluten-free options, or stuffed Oreo balls to take your truffle experience to the next level.
- Oreo truffles are a versatile dessert option that can be gifted or enjoyed as a festive treat, making them a crowd-pleaser for any occasion.
- Join the viral trend of Oreo truffles on social media platforms like TikTok, where influencers share easy and delicious recipes that have captivated millions of viewers.
Storing and Freezing Oreo Truffles
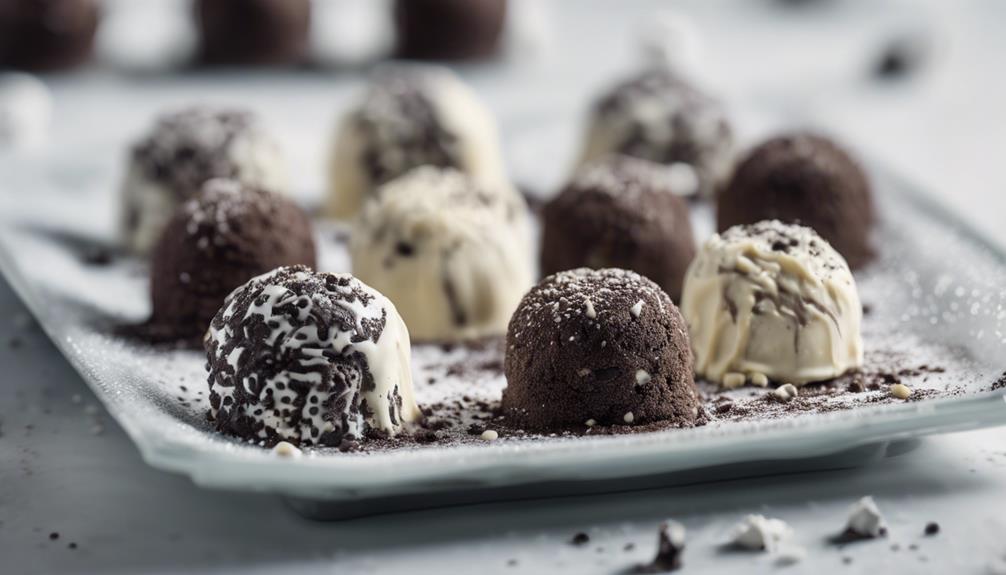
For best freshness and extended shelf life, keep your Oreo truffles stored in an airtight container in the refrigerator. This simple step helps maintain the creamy texture and delicious flavor of your truffles. When stored properly, Oreo truffles can last up to 3 weeks in the refrigerator, giving you plenty of time to enjoy this decadent treat. If you want to extend their shelf life even further, consider freezing your Oreo truffles. To freeze them, place the truffles on a baking sheet before transferring them to a freezer-safe container. Frozen Oreo truffles can be kept for up to 2 months, ensuring you always have a sweet treat on hand. When you're ready to indulge, remember to thaw the frozen Oreo truffles in the refrigerator before serving. This process helps maintain their creamy consistency and delicious taste.
Storage Method | Duration |
---|---|
Refrigerator | Up to 3 weeks |
Freezer | Up to 2 months |
Thawing | In the refrigerator |
Frequently Asked Questions
Do Oreo Truffles Need to Be Refrigerated?
Yes, Oreo truffles need to be refrigerated. Storing them in the fridge helps maintain freshness and prevents them from getting too soft. Keep your Oreo truffles in an airtight container in the refrigerator to guarantee they last longer.
Can You Freeze Oreo Truffles?
Sure, you can freeze Oreo truffles! It's a great way to extend their shelf life and prep ahead. Just pop them in an airtight container with parchment paper between layers and thaw in the fridge before enjoying.
How Many Calories Are in an Oreo Truffle?
An Oreo truffle typically contains around 136 calories per serving. Calorie content may vary based on size and ingredients used. Enjoy them in moderation for a sweet indulgence. Remember to savor each bite!
What Are the Ingredients in Oreo Bites?
You'll find Oreo Bites crafted from the dance of Oreo cookies, cream cheese, and a chocolate embrace. These three musketeers create a symphony of richness, creaminess, and crunch, crowned with optional toppings for a decadent delight.
Can Oreo Truffles and Chocolate Gooey Butter Cake Cookies be served together as a decadent dessert spread?
Yes, Oreo Truffles and Chocolate Gooey Butter Cake Cookies can definitely be served together as a decadent dessert spread. The rich, creamy texture of the truffles pairs perfectly with the decadent chocolate gooey cookies, creating a luscious and indulgent treat for any occasion. Their contrasting textures—soft, melt-in-your-mouth cookies and smooth, bite-sized truffles—create a delightful harmony of flavors and sensations. Whether you’re hosting a party or simply indulging your sweet tooth, showcasing these two desserts together is sure to impress your guests. With the right chocolate gooey butter cookie recipe, you can easily create this heavenly pairing and elevate any dessert table to the next level.
Conclusion
To sum up, these cookies and cream Oreo truffles are a delectable delight that will surely satisfy your sweet tooth.
With a creamy, chocolatey center and a crunchy Oreo coating, they're the perfect treat for any occasion.
So why wait? Indulge in these decadent delights and experience a burst of flavor in every bite.
You won't be disappointed!
Francesca, as the creative force behind our compelling content, combines culinary expertise with journalistic flair. She has a deep appreciation for the cultural histories and artisanal traditions that influence remarkable flavors around the world. Through engaging narratives, she transports our audience to the heart of each culinary experience. Whether she’s documenting the centuries-old techniques of a Sicilian cheese maker or uncovering the personal stories of our producers, Francesca’s storytelling prowess drives our mission to connect people through food.
Dessert
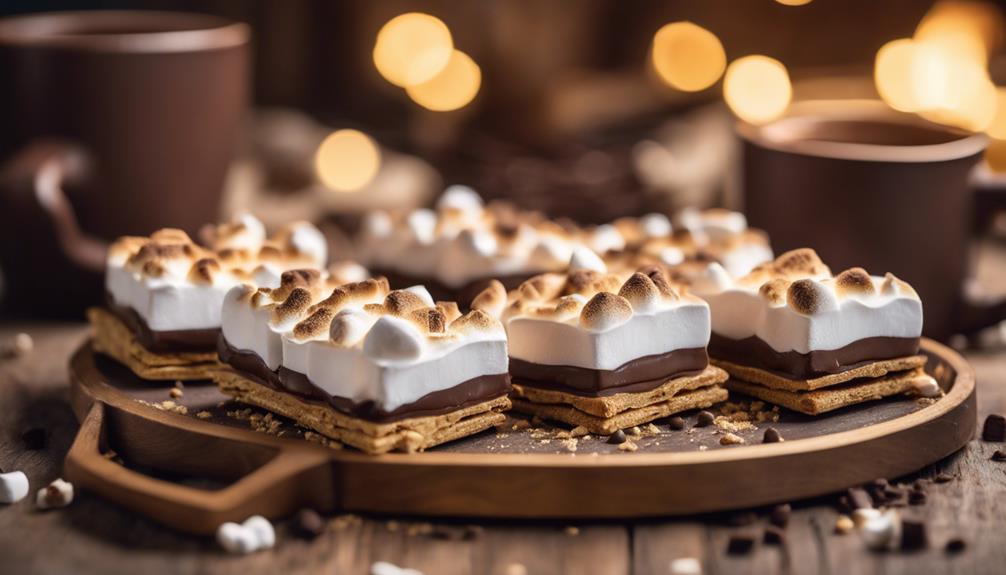
Indulge in Decadence With S'mores Bars: a Perfect Dessert!
Craving a luxurious treat that combines graham crackers, milk chocolate, and marshmallows?
When craving a dessert that combines a delightful crunch of graham crackers, the richness of milk chocolate, and the gooeyness of marshmallows, indulge in the decadence of S’mores Bars. You can easily create this classic s’mores flavor in a convenient bar format by following a few simple steps: preheat the oven, layer the ingredients, and bake for 10 minutes. Elevate your experience with baking tips, such as trying out different flavors or serving suggestions like adding chocolate syrup or fresh fruits. Explore how S’mores Bars can enhance any occasion with their mess-free, customizable design. Embrace the luxury of this perfect dessert.
Key Takeaways
- Decadent s'mores bars offer rich chocolate, gooey marshmallows, and easy preparation.
- Versatile for birthdays, parties, or holidays, with customizable variations like peanut butter or salted caramel.
- Drizzle with chocolate syrup, caramel, or serve with whipped cream for added indulgence.
- Perfect for dessert tables or gatherings, mess-free and portable for special occasions.
- Thaw at room temperature or refrigerate for firmer texture, enjoy within a week for best flavor.
Ingredients for S'mores Bars
To create delicious S'mores Bars, start by gathering graham cracker crumbs, sugar, melted butter, milk chocolate chips, and mini marshmallows. These ingredients form the foundation of the classic s'mores flavor in a convenient bar format.
The graham cracker crumbs provide a crunchy base, while the milk chocolate adds a rich and creamy texture, complemented by the essential and gooey mini marshmallows.
The combination of these key elements encapsulates the essence of a traditional s'more, invoking a sense of nostalgia and delight. Each ingredient plays an important role in achieving the perfect balance of sweetness and crunch in every bite of these delectable bars.
The graham cracker crumbs offer a hint of honeyed flavor, harmonizing with the luscious milk chocolate and the fluffy mini marshmallows.
Step-by-Step Recipe Instructions
Begin by preheating your oven to 350°F and preparing a 9×13 inch baking dish.
To start making these indulgent S'mores Bars, mix graham cracker crumbs, sugar, and melted butter to create a delicious crust. Press this mixture firmly into the bottom of the prepared baking dish.
Next, layer a generous amount of chocolate chips over the graham cracker crust, ensuring they're evenly distributed.
Then, top the chocolate layer with a blanket of mini marshmallows, covering the entire surface.
Place the dish in the preheated oven and bake for approximately 10 minutes or until the marshmallows turn a beautiful golden brown.
Once done, allow the bars to cool to room temperature before cutting them into squares.
These bars are best enjoyed when they're still slightly warm, allowing the gooey chocolate and marshmallow to delight your taste buds.
Get ready to savor the perfect combination of graham, chocolate, and marshmallow in every bite of these irresistible S'mores Bars!
Baking and Cooling Tips
To achieve perfect s'mores bars, make sure you preheat the oven adequately, allowing for even baking.
Once baked, remember to let the bars cool entirely before cutting them into squares for a tidy presentation. Once baked, remember to let the bars cool entirely before cutting them into squares for a tidy presentation. For an extra touch, consider drizzling melted chocolate or a dusting of powdered sugar on top to elevate their look and flavor. These beautifully crafted bars are sure to impress your guests and can easily upgrade your birthday cake table with their delicious charm and eye-catching appeal.
For that ideal golden brown hue on the marshmallows, consider a quick broil post-baking.
Baking Time Suggestions
Consider baking the s'mores bars at 350°F for 10 minutes or until the marshmallows achieve a golden brown hue for optimal results.
This baking time guarantees the perfect balance of flavors in your s'mores bars, allowing the buttery graham cracker crust to crisp up just right, the dark chocolate to melt into decadent goodness, and the marshmallows to caramelize for that classic s'mores taste.
Once baked, let the bars cool before cutting into squares to allow them to set properly. Cooling aids in maintaining the structural integrity of the bars, preventing them from falling apart when sliced.
For easier cutting, refrigerate the bars for about 30 minutes after they've cooled.
Remember, avoid overbaking as it can compromise the gooey texture of the marshmallows and chocolate, leading to a less satisfying dessert experience.
Proper Cooling Techniques
For perfect s'mores bars that maintain their ideal texture, make sure you follow proper cooling techniques after baking.
To achieve the best results, consider the following tips:
- Use a baking dish with parchment: Line your baking dish with parchment paper before adding the s'mores mixture. This not only prevents sticking but also aids in easier removal and cutting once the bars are cooled.
- Allow for room temperature cooling: After baking, resist the urge to cut into the bars immediately. Let them cool at room temperature. This gradual cooling process allows the bars to set properly, ensuring that gooey, chewy consistency s'mores bars are known for.
- Patience is key: Refrigerating the bars after they've cooled at room temperature can further enhance their texture and make them easier to slice neatly. Remember, patience during the cooling process is essential to achieving the perfect s'mores bars for your dessert indulgence.
Variations to Try
Explore the exciting world of s'mores bars variations by experimenting with different flavors and ingredients to create a unique twist on this classic dessert.
Add a touch of indulgence by incorporating ingredients like peanut butter, mint chocolate, Nutella, or salted caramel into your s'mores bars for a delightful burst of flavor.
These variations offer a departure from the traditional s'mores bars, allowing you to customize the recipe to suit your taste preferences.
Additionally, immerse yourself in healthier alternatives by exploring gluten-free, vegan, and reduced-sugar options, catering to various dietary needs while still enjoying the essence of s'mores bars.
For a hassle-free dessert option, consider trying the no-bake s'mores icebox bars, perfect for any season or occasion.
Embrace the versatility of s'mores bars, offering endless possibilities for personalization and creativity in the world of dessert-making.
Serving and Presentation Ideas
To enhance the presentation of your s'mores bars, consider drizzling them with chocolate syrup or caramel for an added touch of decadence.
For a playful twist, serve these delightful treats with a dollop of whipped cream or a scoop of ice cream on the side.
Elevate your dessert platter by arranging the s'mores bars with fresh fruits like strawberries or raspberries for a visually appealing display.
Plating Tips
Consider enhancing the visual appeal of your S'mores Bars by drizzling chocolate syrup over them before serving. This simple addition not only adds a touch of decadence but also creates a luscious chocolatey contrast to the gooey marshmallows and crunchy graham crackers.
To further elevate the presentation of your dessert, try the following plating tips:
- Sprinkle crushed graham crackers on top of the bars to add a decorative and textural element that hints at the classic S'mores flavor profile.
- Serve the bars on a rustic wooden platter to create a charming and inviting display that complements the indulgent nature of the dessert.
- For a sophisticated touch, garnish the bars with a sprinkle of sea salt to provide a subtle contrast that balances out the sweetness of the Chocolate S'mores.
Garnish Suggestions
To complete the visual appeal of your S'mores Bars, consider incorporating creative garnishes that not only enhance the presentation but also add delightful flavors and textures.
Sprinkle crushed graham crackers on top of the bars to create a rustic finish that complements the graham cracker mixture within. Drizzle melted chocolate over the bars for an added richness that will surely satisfy any chocolate lover's cravings.
For a classic s'mores look, garnish with toasted marshmallows, bringing that campfire essence to your dessert. To take it up a notch, consider adding a scoop of whipped cream or a dollop of ice cream for a delightful twist that balances the sweetness of the treat.
Lastly, dusting with cocoa powder or powdered sugar offers a touch of elegance, perfect for special occasions or when you want to impress your guests with a sophisticated presentation. Experiment with these garnish suggestions to find the perfect combination that suits your taste preferences and elevates your S'mores Bars to a whole new level of decadence.
Storing and Freezing Guidelines
For peak freshness, store your s'mores bars in an airtight container at room temperature for up to a week.
Here are some essential guidelines to guarantee your s'mores bars stay delicious:
- Freezing: To extend the shelf life of your s'mores bars, freeze them for up to 3 months in a freezer-safe container or bag. This method helps maintain their taste and texture for longer periods.
- Thawing: When you're ready to enjoy your frozen s'mores bars, simply thaw them at room temperature or reheat them in the microwave for a quick and convenient snack. This process ensures that the bars are ready to eat in no time.
- Refrigeration: For a firmer texture, consider refrigerating your s'mores bars before serving. This step is especially useful if you prefer a less gooey consistency in your dessert. By refrigerating them, you can achieve the desired texture before indulging in this decadent treat.
Remember to consume your s'mores bars within a week for the best flavor experience.
S'mores Bars for Special Occasions
S'mores bars make a delightful addition to any special occasion, offering a convenient and crowd-pleasing dessert option. These bars are the perfect treat for special occasions like birthdays, parties, and holidays. Their versatility allows for easy customization with different toppings, mix-ins, and variations, making them suitable for any event or preference.
Whether served warm or chilled, s'mores bars are a decadent delight that will leave everyone wanting more. Their mess-free and portable nature makes them a popular choice for dessert tables or potluck gatherings. The classic s'mores flavor encapsulated in a convenient bar form is sure to please a wide range of taste buds.
Reviews and Feedback From Fans
Fans have raved about the rich chocolate flavor and gooey marshmallow topping of the s'mores bars. The positive feedback surrounding this indulgent recipe has been overwhelming, with many users commending its simplicity in both preparation and presentation.
Users have found delight in the ease of making and serving these decadent bars, making them a go-to dessert for various occasions. Tieghan's acknowledgment of fans' comments further solidified the bond between creator and consumer, with her expressions of gratitude resonating within the community.
The versatility of the s'mores bars hasn't gone unnoticed, as fans appreciate their suitability for a wide range of events, from casual gatherings to more formal affairs. High ratings from fans have spurred others to try the recipe for themselves, further propelling the popularity of these delectable treats.
Frequently Asked Questions
What Makes S'mores so Good?
You love s'mores for the gooey marshmallows, creamy chocolate, and crispy graham crackers. The mix of textures and flavors hits the spot every time, bringing warmth and nostalgia whether around a campfire or in bar form.
What Popular Campfire Treat Consists of Roasted Marshmallows on Top of a Chocolate Bar Sandwiched Between Two Graham Crackers?
Imagine a campfire scene: you're toasting a marshmallow, melting chocolate, and stacking them between graham crackers. That delightful creation is a s'more, a popular campfire treat loved for its gooey, sweet perfection.
What makes Golden Graham S’mores Bars a perfect dessert, and how do they compare to traditional S’mores Bars?
When it comes to a perfect dessert, it’s hard to beat the indulgent goodness of Golden Graham S’mores Bars. These delectable treats offer the classic flavors of traditional S’mores Bars, but with the added crunch and satisfying sweetness of golden graham bars. It’s a delicious twist on a beloved favorite. The golden graham s’mores bars recipe combines gooey marshmallows, rich chocolate, and crispy golden grahams into a treat that’s both nostalgic and irresistibly tasty. Whether you’re preparing them for a cozy night in or a festive gathering, these bars are sure to be a crowd-pleaser. With their perfect balance of textures and flavors, they capture all the magic of campfire s’mores in a convenient and fuss-free form.
Conclusion
To sum up, indulging in the decadent delight of s'mores bars is a perfect way to satisfy your sweet cravings.
With a gooey marshmallow and chocolatey graham cracker base, these bars are a crowd-pleaser at any gathering.
Whether you're enjoying them as a treat for yourself or sharing them with friends and family, s'mores bars are sure to leave everyone wanting more.
So why wait? Whip up a batch today and experience the deliciousness for yourself!
Francesca, as the creative force behind our compelling content, combines culinary expertise with journalistic flair. She has a deep appreciation for the cultural histories and artisanal traditions that influence remarkable flavors around the world. Through engaging narratives, she transports our audience to the heart of each culinary experience. Whether she’s documenting the centuries-old techniques of a Sicilian cheese maker or uncovering the personal stories of our producers, Francesca’s storytelling prowess drives our mission to connect people through food.
Dessert
Rice Krispie Treat Cookies: A Twist on a Classic Dessert
Bake up a batch of Rice Krispie Treat Cookies for a surprising twist on a classic dessert that will leave you craving more.
Introducing a delightful update to the traditional Rice Krispie Treat – the innovative Rice Krispie Treat Cookies. Made with crispy rice cereal, gooey mini marshmallows, and a hint of vanilla extract, these cookies offer a unique mix of textures and flavors. Developed by food blogger Truly Juli and reviewed by food journalist Maggie Hennessy, these cookies boast a chewy texture, sugary crust, and a toasty essence. Follow the detailed instructions and helpful tips provided to ensure a successful baking adventure. Discover flavor variations such as peanut butter and chocolate chips for added richness. Dive into the world of these delicious cookies for more culinary inspiration.
Key Takeaways
- Crispy cereal base with gooey marshmallows for a unique texture.
- Vanilla extract enhances flavor, adding warmth to the cookies.
- Mini dehydrated marshmallows give a colorful and sweet pop.
- Butter binds ingredients, providing richness and moisture.
- A toasty depth with a molten sugar crust sets these cookies apart.
Recipe Overview
To make Rice Krispie Treat Cookies, begin by preparing a crispy rice cereal base to incorporate into your cookie batter. This recipe offers a delightful fusion of the beloved Rice Krispies Treats with the traditional charm of cookies.
The baking process involves combining butter, Rice Krispies, and Treat ingredients to create a unique twist on a classic dessert. These cookies aren't only perfect for everyday indulgence but also make a special addition to any occasion.
The chewy texture, coupled with a molten sugar crust and toasty depth, brings forth a delicious flavor profile that's sure to please any palate. Originating from food blogger Truly Juli on TikTok and reviewed by food journalist Maggie Hennessy, this recipe has garnered attention for its innovative take on two well-loved treats.
Ingredients Needed
To create the Rice Krispie Treat Cookies, you'll need key ingredients like Rice Krispie cereal, mini marshmallows, vanilla extract, butter, and mini dehydrated marshmallows.
These components come together to provide a delightful mix of flavors and textures in each bite.
Following the preparation steps diligently will guarantee that your cookies turn out just right.
Key Ingredients
Key ingredients required for making Rice Krispie Treat Cookies include crispy rice cereal, mini marshmallows, vanilla extract, butter, and mini dehydrated marshmallows. These elements come together to offer a unique twist on the classic Rice Krispies treat. The crispy rice cereal provides a satisfying crunch, while the mini marshmallows introduce a gooey and chewy texture to the cookies. Vanilla extract enhances the flavor profile by adding a subtle sweetness and warmth to each bite. Butter plays an essential role in binding the ingredients together, contributing richness and moisture to the cookies, resulting in a delicious and indulgent treat. Additionally, the mini dehydrated marshmallows not only bring extra sweetness but also provide a playful pop of color to the cookies.
Key Ingredients | Description |
---|---|
Crispy Rice Cereal | Provides a satisfying crunch to the cookies |
Mini Marshmallows | Adds a gooey and chewy texture |
Vanilla Extract | Enhances flavor with sweetness and warmth |
Butter | Binds ingredients, adds richness and moisture |
Mini Dehydrated Marshmallows | Offers extra sweetness and colorful pop |
Preparation Steps
For preparing the Rice Krispie Treat Cookies, gather the Rice Krispie cereal, mini marshmallows, vanilla extract, butter, and mini dehydrated marshmallows as your main ingredients.
To get started, follow these steps:
- Begin by melting the butter in a large saucepan over low heat.
- Add the mini marshmallows to the melted butter and stir until completely melted.
- Next, mix in the Rice Krispie cereal until well coated with the marshmallow mixture.
These simple ingredients come together to create a delightful twist on the classic Rice Krispie treats.
The addition of mini dehydrated marshmallows adds a burst of flavor and fun to these cookies.
Step-by-Step Instructions
How do you create Rice Krispie Treat Cookies step by step? To make these delightful treats, start by mixing crispy rice cereal with sugar, salt, and optional milk powder. Add melted butter to the cereal mixture, spread it on a baking sheet, and bake for 16-20 minutes to achieve the perfect rice cereal crunch.
Next, prepare the cookie dough by creaming butter with sugars. Then, mix in an egg, vanilla, flour, baking powder, baking soda, and salt to create a delicious base. Fold in the rice cereal crunch and mini marshmallows into the cookie dough, ensuring they are evenly distributed. Chill the dough to let the flavors meld together before shaping it into balls for baking.
To help you visualize the process better, here's a table summarizing the key steps involved in making Rice Krispie Treat Cookies:
Step | Description |
---|---|
Mix Cereal with Ingredients | Combine crispy rice cereal with sugar, salt, and optional milk powder. |
Bake Cereal Mixture | Spread melted butter on the cereal mixture, bake for 16-20 minutes for crunch. |
Prepare Cookie Dough | Cream butter with sugars, then add egg, vanilla, flour, baking powder, baking soda, and salt. |
Fold in Mix-Ins | Mix in the rice cereal crunch and mini marshmallows into the cookie dough. |
Chill and Shape Dough | Chill the dough, shape into balls, and bake for delicious Rice Krispie Treat Cookies. |
Tips for Success
To guarantee your Rice Krispie Treat Cookies turn out perfectly, consider these helpful tips for success:
- Adjust the cookie thickness to achieve a chewy texture and prevent spreading too thin.
- Increase the amount of marshmallows in your recipe for enhanced flavor and texture in the cookies.
- Pay attention to the dough freezing time to make certain the desired cookie consistency is achieved.
When making your own cookie dough recipe, don't forget to add Rice Krispies Treat crumbles for a personalized touch that will elevate the overall taste and appearance of your cookies.
Following these tips will help you create delicious and visually appealing Rice Krispie Treat Cookies that are sure to be a hit with family and friends. By being mindful of these key factors, you can master the art of baking these delightful treats and enjoy the delightful combination of flavors and textures in every bite.
Flavor Variations
Consider incorporating various ingredients to add exciting twists to your Rice Krispie Treat Cookies. By experimenting with flavor variations, you can elevate your cookie game and surprise your taste buds. Check out the table below for some creative ideas to enhance your Rice Krispie Treat Cookies:
Flavor Variations | Description |
---|---|
Peanut Butter | Incorporate creamy peanut butter into your cookie dough for a rich and nutty flavor. |
Chocolate Chips | Add a decadent touch by mixing chocolate chips into the cookie dough for bursts of sweetness. |
Marshmallows | Integrate different types of marshmallows, like flavored or jumbo ones, for unique textures and tastes. |
Extracts | Enhance the cookie flavor profile by adding extracts such as almond or coconut to infuse aromatic notes. |
Nuts | Elevate your cookies by mixing chopped almonds or pecans into the dough for extra crunch and flavor. |
These flavor variations will certainly take your Rice Krispie Treat Cookies to the next level, offering a delightful twist on a classic dessert.
Serving Suggestions
For a delightful presentation, pair your Rice Krispie Treat Cookies with a selection of complementary beverages. Here are some serving suggestions to enhance your dessert experience:
- Enjoy these sweet Rice Krispie Treat Cookies with a cold glass of milk for a classic combination that never disappoints.
- For a more indulgent treat, savor these cookies alongside a warm cup of coffee to balance out the sweetness with a hint of bitterness.
- Elevate your dessert spread at parties or gatherings by serving these cookies with a side of vanilla ice cream for a delicious contrast in textures.
Storage and Freezing Tips
When storing Rice Krispie Treat Cookies, make sure they're kept in an airtight container at room temperature for up to 5 days to maintain freshness.
Avoid refrigeration as it can result in overly hard cookies.
Freezing the cookies isn't recommended as it may cause them to become soggy when thawed.
Storage Guidelines
To maintain the delicious chewiness of Rice Krispie Treat Cookies, store them at room temperature in an airtight container for up to 5 days.
Here are some important storage guidelines to guarantee your cookies stay fresh and tasty:
- Avoid refrigerating the cookies as it can make them lose their chewy texture.
- Freezing Rice Krispie Treat Cookies isn't recommended as it can affect their flavor and consistency.
- To uphold freshness, store the cookies in a single layer with parchment paper between each layer.
Following these storage tips will help preserve the delightful taste and texture of your Rice Krispie Treat Cookies for longer enjoyment.
Proper storage is key to ensuring that every bite is as delicious as the first. Remember, room temperature storage in an airtight container is the way to go for keeping your cookies at their best!
Freezing Instructions
Consider refraining from freezing your Rice Krispie Treat Cookies, as doing so may alter their texture and flavor. While these delightful cookies can be stored at room temperature in an airtight container for up to five days, freezing isn't recommended. Freezing can impact the texture, making them less chewy, and may affect their overall taste.
It's best to enjoy Rice Krispie Treat Cookies fresh to savor their full flavor and delightful texture.
Refrigerating Rice Krispie Treat Cookies is also not advisable, as it can cause them to become hard and lose their chewy consistency. To maintain their freshness and deliciousness, it's recommended to store them properly at room temperature in an airtight container.
Frequently Asked Questions
Exploring various cereal options enables you to create unique variations of Rice Krispie Treat Cookies.
When it comes to frequently asked questions about these delectable treats, here are some key points to keep in mind:
- Storage: Store your Rice Krispie Treat Cookies at room temperature; no need for refrigeration.
- Freezing: It's not recommended to freeze these cookies as it may alter their texture.
- Recipe Variations: Get creative and experiment with different cereals to add a twist to your cookies.
Whether you're making these cookies for personal enjoyment or for catering-sized events, understanding the nutritional information is essential.
Each serving of Rice Krispie Treat Cookies contains approximately 161 calories, 29g of carbohydrates, and 5g of fat.
Frequently Asked Questions
What Was Rice Krispie Treats Originally Called?
You know, Rice Krispie Treats were originally called 'Marshmallow Squares' when they were first created in 1939 by Mildred Day. It wasn't until 1940, when Kellogg's got involved, that they became known as Rice Krispies Treats.
Why Do People Eat Rice Crispy Treats?
You eat Rice Krispie Treats for a burst of nostalgia and a delightful mix of chewy and crunchy textures. The gooey marshmallows melding with crispy cereal create a symphony of flavors that make this classic dessert irresistible.
Why Did Rice Crispy Treats Get Hard?
When Rice Krispie treats get hard, it's often due to overcooking the marshmallow mixture, improper storage, or using stale ingredients. To keep them soft, store in an airtight container at room temperature or in the fridge.
Can You Mess up Rice Krispie Treats?
Yes, you can totally mess up Rice Krispie treats! Overheat the marshmallows for a hard mess. Too much butter equals a greasy disaster. Stale marshmallows make them fall apart. Uneven mixing leads to clumps. Don't overmix; they'll be dense!
What Makes Rice Krispie Treat Cookies a Unique Twist on a Classic Dessert?
Rice Krispie Treat Cookies offer a unique twist on a classic dessert by combining the flavors of traditional rice krispie treats with the chewy texture of cookies. Using the Magnolia Bakery banana pudding recipe adds a subtle hint of sweetness that sets these cookies apart from the rest. These cookies are a delightful mashup, capturing the nostalgia of childhood snacks with a sophisticated upgrade. The incorporation of the Magnolia Bakery banana pudding not only infuses natural banana flavor but also elevates the overall creaminess of the dough. Perfect for parties or an indulgent treat, they’re sure to impress anyone who takes a bite!
Conclusion
To sum up, these rice krispie treat cookies are a delightful twist on a classic dessert. They're easy to make, with a gooey and chewy texture that's sure to please your taste buds.
They're like a warm hug on a cold day, comforting and satisfying. So why not give this recipe a try and enjoy a delicious treat with a unique twist?
Francesca, as the creative force behind our compelling content, combines culinary expertise with journalistic flair. She has a deep appreciation for the cultural histories and artisanal traditions that influence remarkable flavors around the world. Through engaging narratives, she transports our audience to the heart of each culinary experience. Whether she’s documenting the centuries-old techniques of a Sicilian cheese maker or uncovering the personal stories of our producers, Francesca’s storytelling prowess drives our mission to connect people through food.
Dessert
Indulge in Decadence With Golden Graham S'mores Bars: a Perfect Dessert!
Yearning for a luscious treat? Delve into the world of Golden Graham S'mores Bars, a decadent dessert that promises to satisfy all your cravings!
Indulge in luxury with Golden Graham S’mores Bars, a delightful dessert that combines butter for richness, mini marshmallows for gooeyness, and Golden Grahams cereal for crunch, all layered with milk chocolate and a hint of salt for enhanced flavors. This no-bake treat allows for quick snacking options, delivering the classic s’mores textures in an easy-to-make form. Melting butter with marshmallows, mixing in the cereal, and finishing off with melted chocolate before cutting into squares ensures a fantastic outcome. Helpful tips include firmly pressing the mixture for that perfect crunch and customizing with different toppings. Storing in an airtight container at room temperature keeps the bars fresh, making them a delightful accompaniment with a glass of milk.
Key Takeaways
- Easy no-bake dessert with Golden Grahams, marshmallows, and chocolate.
- Kid-friendly and quick to make, ideal for a sweet treat.
- Offers a mix of textures – crispy cereal and gooey marshmallows.
- Customizable with nuts or caramel for added flavor.
- Store in an airtight container for a week for lasting freshness.
Recipe Overview
For a simple and delightful treat, consider trying the Golden Graham S'mores Bars recipe. These no-bake treats combine the delicious flavors of Golden Grahams cereal, chocolate, and marshmallows, resulting in a crunchy and gooey dessert that's sure to satisfy your sweet tooth.
This easy-to-make recipe is a perfect option for a quick snack or a fun activity to involve kids in the kitchen.
The Golden Graham S'mores Bars recipe offers a convenient way to enjoy the classic flavors of s'mores without the need for a campfire. By simply melting chocolate and marshmallows together, then mixing them with Golden Grahams cereal, you can create these delectable bars in no time.
The combination of textures in each bite – from the crispy cereal to the soft marshmallows – provides a delightful contrast that will appeal to both children and adults alike.
Next time you crave a sweet treat, whip up a batch of Golden Graham S'mores Bars for a satisfying and easy-to-make dessert option.
Key Ingredients
Let's get started by identifying the key ingredients required to make these mouthwatering Golden Graham S'mores Bars. To create these delectable bars, you'll need a few essential components:
- butter for richness
- mini marshmallows for that classic s'mores gooeyness
- Golden Grahams cereal to add a delightful crunch
- milk chocolate chips for a luscious chocolatey layer
- a pinch of salt to enhance all the flavors
Combining these ingredients results in a dessert that perfectly captures the essence of traditional s'mores but in a convenient bar form. The simplicity of these components makes the recipe easy to follow while ensuring a delicious outcome.
Step-by-Step Instructions
Begin by melting butter in a large saucepan over low heat. Once the butter is melted, add marshmallows to the saucepan and continue stirring until they're completely melted and combined with the butter.
Next, remove the saucepan from the heat and gently fold in the Golden Grahams cereal, ensuring that the cereal is evenly coated with the marshmallow mixture. Transfer this mixture to a greased baking dish and press it down firmly to create an even layer.
In a separate saucepan, melt the chocolate over low heat, stirring continuously to prevent burning. Once the chocolate is smooth and melted, pour it over the Golden Graham mixture in the baking dish, spreading it out evenly with a spatula.
Allow the bars to cool and set at room temperature before cutting into squares. This simple and delicious no-bake dessert is a perfect treat for any occasion, combining the flavors of s'mores with a decadent twist.
Tips for Success
Pressing the mixture firmly into the pan guarantees even bars with a satisfying crunch.
When making Golden Graham S'mores Bars, it's important to avoid overheating the marshmallows. This guarantees that the bars maintain a gooey texture, perfect for that classic s'mores experience.
To take your bars to the next level, consider customizing them with additional toppings like nuts, sprinkles, or a drizzle of caramel.
Doubling the recipe is a smart move, especially if you're expecting a larger crowd or want some extra bars for later snacking sessions.
Another tip for success is to experiment with different cereals to create unique flavor combinations and textures in your bars. This simple switch can add a whole new dimension to your Golden Graham S'mores Bars.
Storage and Serving Suggestions
For peak freshness and flavor retention, store your Golden Graham S'mores Bars in an airtight container at room temperature. By keeping these delectable treats in an airtight container, you can guarantee that their Graham cracker crust, Golden marshmallows, and rich chocolate flavors are preserved for your enjoyment. Remember to maintain the bars at room temperature to prevent any texture changes that might occur in extreme heat or cold. These bars can last for about a week when stored properly, making them a convenient snack option to have on hand.
Storage Tips | Serving Suggestions |
---|---|
Use airtight container | Serve at room temp |
Store at room temperature | Pair with a glass of milk |
Consume within a week |
Following these storage and serving suggestions will help you make the most of your Golden Graham S'mores Bars, ensuring they are always ready to be enjoyed at their best.
Frequently Asked Questions
Can I Substitute Golden Grahams With Another Cereal?
You can try substituting Golden Grahams with a similar cereal in the recipe. Make sure to choose a cereal that has a similar texture and flavor profile to maintain the integrity of the dish.
How Long Do Golden Graham S'mores Bars Last?
Golden Graham S'mores bars typically last for about 3-4 days when stored in an airtight container at room temperature. For best freshness, consume them within this timeframe to enjoy their delicious flavor.
Can I Freeze Golden Graham S'mores Bars?
You can freeze Golden Graham S'mores bars for up to 3 months. Wrap them tightly in plastic wrap and store in an airtight container. Thaw in the fridge before enjoying. Freezing helps preserve their freshness and flavor.
Can I Use Dark Chocolate Instead of Milk Chocolate?
You can definitely use dark chocolate instead of milk chocolate for a richer flavor in your Golden Graham S'mores Bars. Just swap it out in the recipe and enjoy the decadent twist on this classic treat!
Are Golden Graham S'mores Bars Gluten-Free?
Yes, golden graham s'mores bars are not usually gluten-free due to the graham crackers containing gluten. To make them gluten-free, you can use gluten-free graham crackers as a substitute.
Can MM Mudslide Cookies be a Decadent Dessert Option Like Golden Graham S’mores Bars?
Looking for a decadent dessert option that rivals Golden Graham S’mores Bars? Look no further than the chocolate mudslide cookies recipe. These rich, indulgent treats are sure to satisfy any sweet tooth and are perfect for any special occasion or simply as a delicious indulgence. Packed with intense chocolate flavor and a soft, fudgy texture, these cookies are every chocoholic’s dream come true. The mm mudslide cookies recipe combines the perfect balance of cocoa, chocolate chips, and a hint of espresso for a sophisticated twist on a classic treat. Whether served warm with a glass of milk or as an after-dinner delight, these cookies are guaranteed to leave everyone craving more.
Conclusion
Indulge in the decadent delight of Golden Graham S'mores Bars, a perfect dessert that will satisfy your sweet tooth and leave you craving more.
The combination of gooey marshmallows, rich chocolate, and crunchy graham crackers creates a symphony of flavors that will transport you to a campfire under the stars.
Treat yourself to this delicious treat and experience a taste sensation like no other.
Francesca, as the creative force behind our compelling content, combines culinary expertise with journalistic flair. She has a deep appreciation for the cultural histories and artisanal traditions that influence remarkable flavors around the world. Through engaging narratives, she transports our audience to the heart of each culinary experience. Whether she’s documenting the centuries-old techniques of a Sicilian cheese maker or uncovering the personal stories of our producers, Francesca’s storytelling prowess drives our mission to connect people through food.
-
Vetted3 months ago
15 Best Non-Toxic Espresso Machines for a Healthier Brew at Home
-
Italian Cuisine1 week ago
What Italian Dishes Use Parsley
-
Vetted6 months ago
12 Best Coffee Pods for DeLonghi Espresso Machine to Elevate Your Caffeine Game
-
Vetted4 months ago
15 Best Coffee Beans for Your Breville Espresso Machine – Expert Picks for Perfect Brews
-
Vetted3 months ago
15 Best Espresso Ground Coffees for Your Espresso Machine: A Barista’s Guide
-
Vetted3 months ago
15 Best Coffee Beans to Elevate Your Breville Espresso Experience
-
Vetted6 months ago
15 Best Commercial Automatic Espresso Machines for Your Coffee Shop
-
Vetted6 months ago
15 Best ESE Pod Espresso Machines for Perfect Coffee Every Time