Lunch & Dinner
Homemade Crunchwrap: A Fun and Flavorful Meal
Feast on a homemade Crunchwrap: a fun and flavorful meal with a crispy twist that will leave you craving for more.
Crafted with seasoned ground beef, nacho cheese sauce, and a crispy tostada shell, the homemade Crunchwrap offers a mix of flavors. Guarantee the tostada shell is positioned in the tortilla center for crunch, fold tightly, then cook in a skillet for golden edges. Serve with salsa, guacamole, or customize with vegan options. Cook until golden for a crunchy exterior. Reheat leftovers in the microwave and store in the fridge. Add fresh toppings to revive flavors. Make sure leftovers avoid room temperature. Discover more about assembly, cooking, serving suggestions, and customization for an enhanced Crunchwrap experience.
Key Takeaways
- Create a seasoned ground beef filling with a spice blend for a flavorful Crunchwrap.
- Prepare a creamy nacho cheese sauce to add richness and depth to the dish.
- Assemble the Crunchwrap with a tostada shell for crunch and fold tightly for a compact shape.
- Cook the Crunchwrap in a skillet until golden brown for a crispy texture.
- Serve with fresh salsa, guacamole, or customize with different fillings for a fun twist.
Ingredients for Crunchwrap
What're the key ingredients needed to make a delicious homemade Crunchwrap?
The essential components for crafting a mouthwatering Crunchwrap include seasoned ground beef, flavorful taco seasoning, and a large flour tortilla. These ingredients form the foundation of this beloved dish, providing a savory and satisfying base that's sure to please your taste buds.
Begin by browning the ground beef in a skillet, adding the taco seasoning to infuse it with spicy and aromatic flavors. As the meat simmers, prepare your tortilla by layering it with nacho cheese sauce, a crispy tostada shell, and a dollop of sour cream.
Once your beef is cooked to perfection, spoon it onto the tortilla and carefully fold the edges to create the iconic Crunchwrap shape.
This combination of savory beef, zesty seasoning, and warm tortilla sets the stage for a delightful culinary experience. Experiment with additional fillings like refried beans, avocado, or pickled jalapeños to customize your Crunchwrap to suit your preferences.
The result is a homemade masterpiece that's as delicious as it's satisfying.
Seasoning for Ground Beef

To guarantee your ground beef is seasoned to perfection for the Crunchwrap, consider a spice blend incorporating chili powder, ground paprika, cumin, kosher salt, and black pepper.
Cooking the beef until it's no longer pink is essential for both safety and flavor.
Remember to adjust the seasoning levels according to your taste preferences, adding more or less spice as desired.
Spice Blend Options
Consider blending chili powder, paprika, cumin, salt, and pepper to season your ground beef for a flavorful Crunchwrap. These spices, commonly found in homemade taco seasoning, work together harmoniously to enhance the taste of the beef while adding a touch of heat.
The combination of chili powder and paprika provides a smoky depth, while cumin adds a warm earthiness. Salt and pepper round out the flavors, ensuring a well-balanced seasoning profile.
Experimenting with the ratios of these spices allows you to tailor the blend to your personal preference, whether you prefer a bolder chili flavor or a more subdued cumin undertone. Achieving the right balance is essential for creating a Crunchwrap that's as delicious as the fast-food version.
Cooking Technique Tips
For a flavorful base, season your ground beef with a blend of chili powder, paprika, cumin, kosher salt, and black pepper. This combination of seasonings adds depth and richness to the meat, creating a delicious foundation for your Crunchwrap.
When cooking ground beef, make sure it's cooked thoroughly until no longer pink to guarantee it's safe to eat. Adjust the seasoning levels according to your personal taste preferences to achieve a customized flavor profile that suits your palate.
In addition to the suggested spices, consider incorporating other seasonings like garlic powder, onion powder, or red pepper flakes for an extra burst of flavor. Experimenting with different spice blends or creating your own homemade taco seasoning can offer a unique twist on traditional seasoning, elevating the overall taste of your Crunchwrap.
Making Nacho Cheese Sauce
You can create a delicious homemade nacho cheese sauce by combining butter, flour, milk, and shredded cheese in a saucepan. To elevate the flavor profile, adding spices such as chili powder, paprika, and cumin infuses the sauce with a zesty kick that pairs perfectly with the Crunchwrap Supreme.
The process of making this sauce involves cooking it over low heat, ensuring a smooth and velvety texture that enhances the overall dish. One of the benefits of crafting your own nacho cheese sauce is the ability to customize the spice level and cheese blend according to your preferences, allowing for a personalized touch to your culinary creation.
This homemade sauce offers a creamy richness that elevates the dish, making it a standout component of the Crunchwrap. Experimenting with different spice combinations and cheese varieties can lead to unique flavor profiles, enhancing your dining experience with a touch of creativity and flavor.
Crunchy Tostada Shell Assembly

Positioning a crunchy tostada shell in the center of the large tortilla is vital to add a satisfying texture to your Homemade Crunchwrap. The tostada shell serves as a sturdy foundation for the fillings, preventing sogginess and introducing a crispy element that complements the other ingredients. Placing the tostada strategically within the assembly is essential to achieving a well-balanced bite with each layer of fillings. This step is important in replicating the signature crunch of the Crunchwrap Supreme, a popular fast-food item known for its textural contrast.
Ensuring the proper positioning of the tostada is key to maintaining a structured and stable assembly when folding the tortilla around the fillings. By positioning the tostada carefully, you set the stage for a successful assembly process, allowing for a seamless integration of all components. The tostada not only adds crunch but also acts as a barrier that helps contain the fillings, enhancing the overall eating experience of your Crunchwrap.
Wrapping the Crunchwrap
When wrapping the Crunchwrap, remember to fold the tortilla layers tightly around the fillings, ensuring the edges are sealed securely to prevent any leaks.
Pleating the tortilla as you go will help keep everything inside during cooking.
Cooking the wrapped Crunchwrap in a skillet with a bit of oil will further seal and crisp up the edges, providing a delicious crunch in every bite.
Fold Tortilla Layers
Fold the tortilla edges up and over the fillings, pleating and tucking tightly to create a secure seal. This step is important in making sure that your Crunchwrap holds together beautifully during the cooking process.
Here's how to master the art of folding tortilla layers:
- Layer Ingredients: Begin by placing your seasoned ground beef, nacho cheese, tostada shell, and sour cream on a large flour tortilla. This ensures that each bite is packed with flavor and texture.
- Pleating and Tucking: As you fold the tortilla, make small pleats along the edges to create a secure seal. Tuck the fillings in tightly to prevent any spillage while cooking.
- Maintain Structural Integrity: The folding technique not only keeps the ingredients contained but also helps the Crunchwrap maintain its shape. By pressing down firmly as you fold, you guarantee that all the layers stay intact throughout the cooking process.
Seal Edges Securely
To seal the edges securely when wrapping the Crunchwrap, make sure that you fold and pleat the tortilla tightly around the fillings to prevent any spillage.
Using large flour tortillas is crucial to guarantee that you have ample space to wrap and seal the Crunchwrap effectively.
By avoiding overloading the Crunchwrap with fillings, you can avoid spills and ensure that the edges can be sealed properly.
Remember that microwaving the tortillas with a few drops of water can make them more flexible, facilitating the folding process around the fillings.
Additionally, carefully consider the size and thickness of the ingredients you're adding to make the folding process smoother and more successful.
Cooking the Crunchwrap
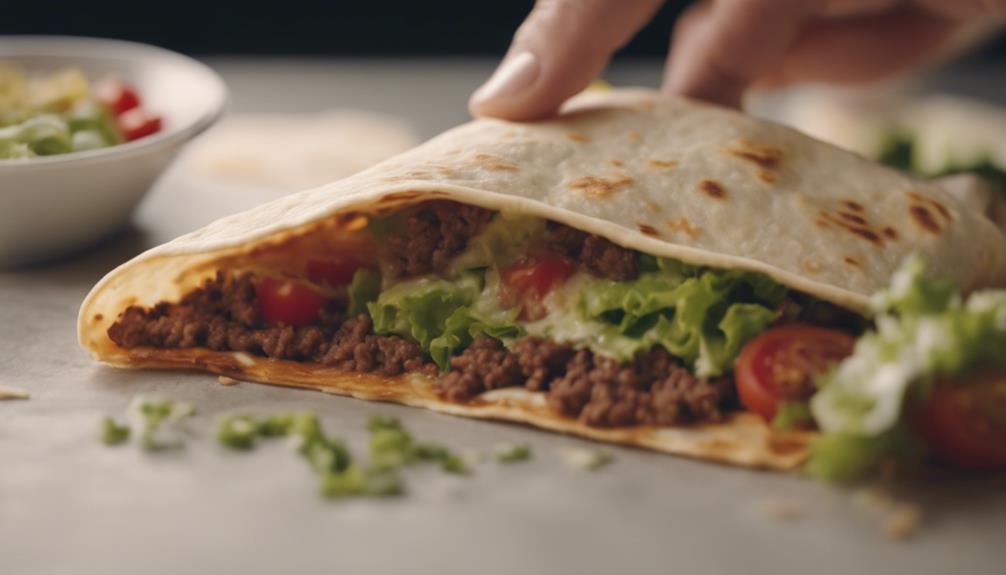
For cooking the Crunchwrap, begin by browning the seasoned ground beef until fully cooked.
Here are three essential steps to guarantee a delicious outcome:
- Prepare the Ingredients:
Gather the seasoned ground beef, large tortillas, and a skillet for cooking.
- Assemble the Crunchwrap:
Cut smaller flour tortilla rounds using a tostada shell as a guide to layer the ingredients on a large tortilla in a specific order.
- Cook to Perfection:
Fold and pleat the tortillas tightly, then cook the assembled Crunchwrap in a skillet until golden brown on both sides for a crispy exterior.
Serving Suggestions
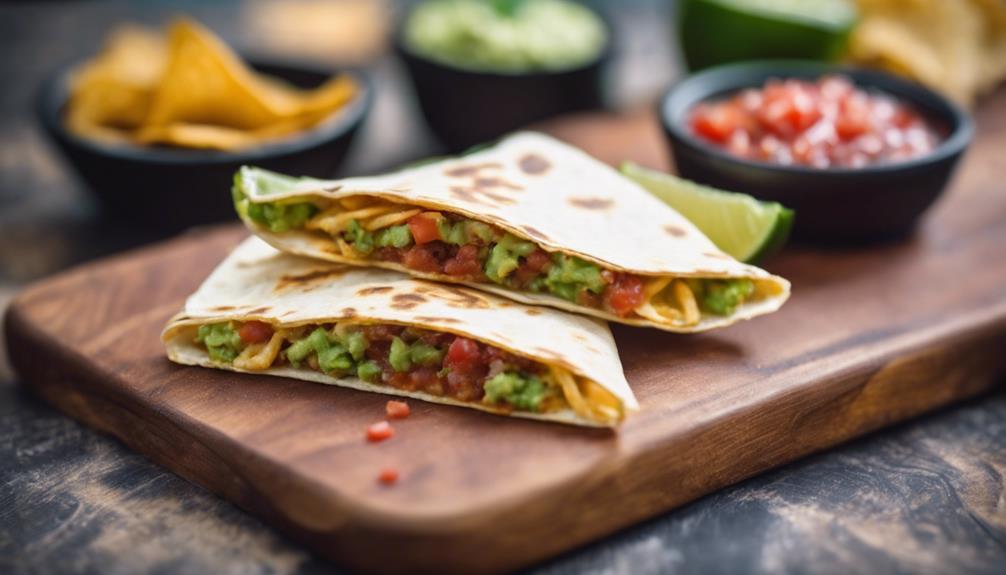
Enhance the flavor and experience of your homemade Crunchwrap by pairing it with complementary side dishes. Consider serving your Crunchwrap with a side of fresh salsa or guacamole for added zest. For a satisfying crunch, accompany your meal with crispy tortilla chips. Dip these chips in leftover nacho cheese sauce or sour cream to elevate your snacking experience. To round out the flavors and create a balanced meal, serve your Crunchwrap with a side salad or coleslaw. You can enjoy your Crunchwrap Supreme as a standalone meal or add additional sides for a complete dining experience.
Side Dishes | Description |
---|---|
Fresh Salsa | Adds a zesty and invigorating flavor to your meal. |
Guacamole | Creamy and rich, perfect for dipping tortilla chips. |
Crispy Tortilla Chips | Provides a satisfying crunch to complement your Crunchwrap. |
Side Salad or Coleslaw | Offers a fresh and crisp contrast to the savory Crunchwrap. |
Customization Ideas
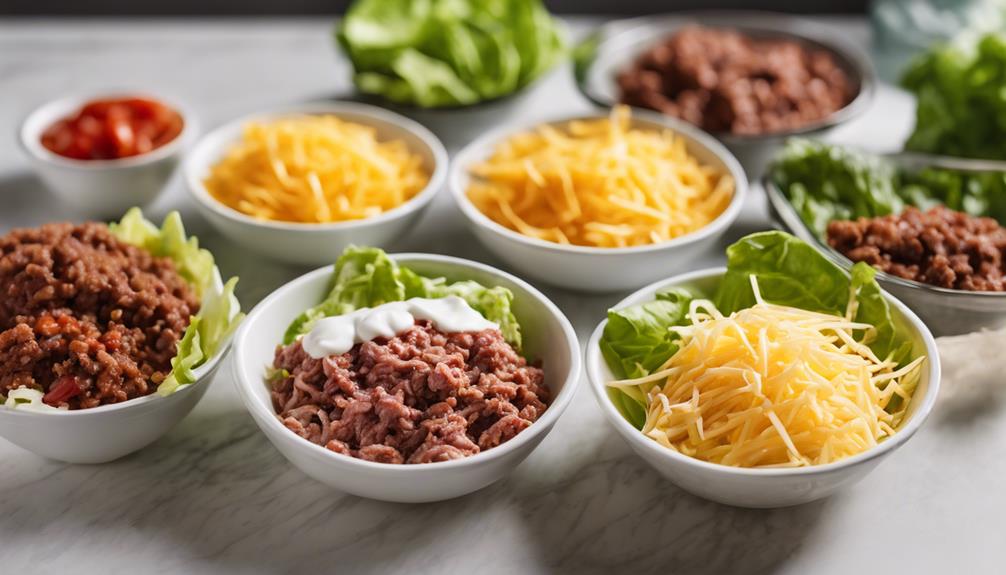
Experiment with various fillings and toppings to create a personalized and unique Crunchwrap that suits your taste preferences. Here are some customization ideas to inspire your homemade version:
- Try a Vegan Crunchwrap: Swap out traditional meat fillings for plant-based options like seasoned tofu, black beans, or meat alternatives. Add a dairy-free cheese or a cashew-based sour cream for a vegan-friendly twist.
- Go Big with a Big Mac Crunchwrap: Channel the flavors of a famous fast-food burger by incorporating special sauce, shredded lettuce, pickles, and onions into your Crunchwrap. It's a fun way to enjoy the essence of a Big Mac in a handheld format.
- Get Adventurous with Toppings: Elevate your Crunchwrap by adding unique toppings such as pineapple salsa, crispy tortilla strips, or even a drizzle of chipotle aioli. These unexpected flavors can take your homemade creation to the next level of deliciousness.
Tips for Leftovers
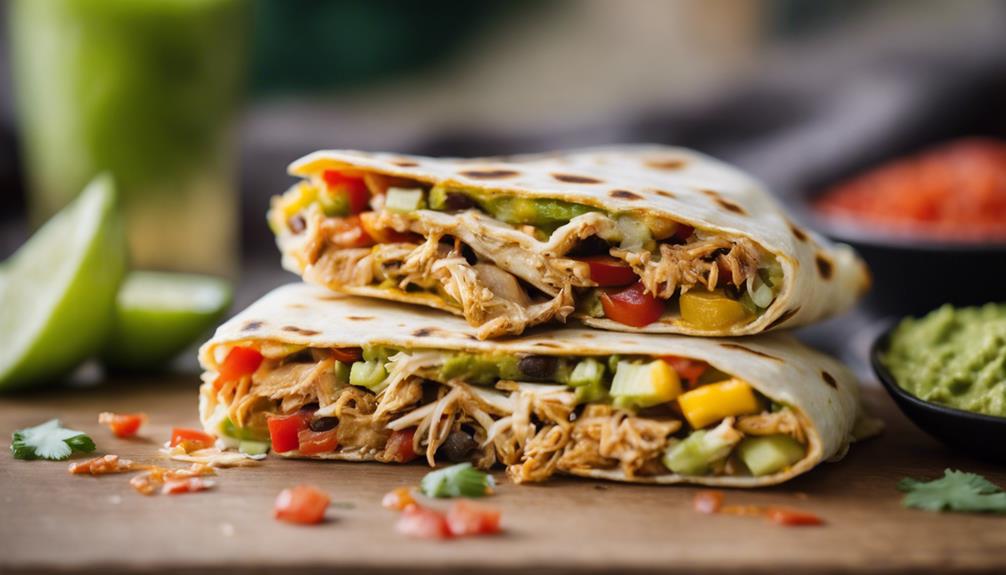
To make the most of your Crunchwrap experience, here are some practical tips for handling any leftovers. Reheating leftover Crunchwraps is simple and convenient; just pop them in the microwave for a top-notch meal option. For peak freshness, store any remaining Crunchwraps in an airtight container in the refrigerator. To enjoy the finest taste and texture, it's recommended to consume leftover Crunchwraps within a few days.
If you find that reheated Crunchwraps need a flavor boost, consider adding fresh toppings like lettuce, tomatoes, or salsa to revive the taste. However, be cautious not to let leftover Crunchwraps sit out at room temperature for too long to avoid the risk of foodborne illnesses.
Frequently Asked Questions
Is Taco Bell Crunchwrap Unhealthy?
Yes, Taco Bell's Crunchwrap is unhealthy with its high calorie, fat, and sodium content. Regular consumption can lead to health issues like high blood pressure. Making a homemade version lets you control ingredients for a healthier option.
How Do You Assemble a Crunchwrap at Home?
To assemble a Crunchwrap at home, start by layering seasoned ground beef, nacho cheese, tostada shell, and toppings like lettuce and tomatoes on a large flour tortilla. Carefully fold and pleat the tortilla tightly around the fillings to create a compact package.
What Comes in a Crunchwrap Meal?
In a Crunchwrap meal, you'll find seasoned ground beef, nacho cheese sauce, lettuce, tomatoes, sour cream, and a crunchy tostada shell all layered on a large flour tortilla, folded, and cooked until crispy.
What Is in the Middle of a Crunchwrap?
Nestled in the heart of a Crunchwrap lies a symphony of flavors – seasoned ground beef, gooey nacho cheese, a crispy tostada shell for that satisfying crunch, and a medley of fresh toppings. Enjoy every bite!
Can Spicy Loaded Japanese Sweet Potatoes be a Fun and Flavorful Addition to Homemade Crunchwrap?
Looking to add a fun and flavorful twist to your homemade Crunchwrap? Why not try stuffing it with spicy loaded sweet potatoes? The combination of the heat from the spices and the creaminess of the sweet potatoes will surely elevate the taste of your Crunchwrap to a whole new level.
Conclusion
So, next time you're in the mood for a fun and flavorful meal, why not try making your own homemade crunchwrap?
It's a simple and delicious dish that's sure to impress your family and friends.
Just remember, the irony of spending time assembling a DIY version of a fast food favorite is all part of the fun!
Give it a try and enjoy the delicious results.

Francesca, as the creative force behind our compelling content, combines culinary expertise with journalistic flair. She has a deep appreciation for the cultural histories and artisanal traditions that influence remarkable flavors around the world. Through engaging narratives, she transports our audience to the heart of each culinary experience. Whether she’s documenting the centuries-old techniques of a Sicilian cheese maker or uncovering the personal stories of our producers, Francesca’s storytelling prowess drives our mission to connect people through food.
Lunch & Dinner
Milk Braised Chicken With Kale and Beans: a Comforting Dinner
Uncover the unexpected richness of Milk Braised Chicken with Kale and Beans, a comforting dinner experience that promises to tantalize your taste buds.
Immerse yourself in the exquisite flavors of Milk Braised Chicken with Kale and Beans, ensuring a truly comforting dinner experience. The dish involves browning chicken in olive oil for added depth, sautéing garlic to enhance taste, then adding milk and broth for a delectably creamy sauce. Simmer this concoction with kale and white beans to achieve rich, tender results. Present with fresh parsley and thyme before serving alongside crusty bread and a side salad. This meal promises a delightful journey for your taste buds, revealing a satisfyingly complex blend of flavors and textures.
Key Takeaways
- Brown chicken in olive oil for a golden crust and enhanced flavor.
- Sauté garlic in olive oil to develop a rich, savory taste.
- Incorporate milk and broth for a creamy, tender chicken base.
- Enhance texture with wilted kale and velvety white beans.
- Store leftovers properly and reheat gently for a delicious meal.
Ingredients
To prepare Milk Braised Chicken with Kale and Beans, you'll need chicken pieces, olive oil, garlic cloves, milk, kale, and white beans.
Add one to start by heating olive oil in a pan and browning the chicken pieces until they achieve a golden color.
Next, pour in the milk and crushed garlic cloves, allowing the chicken to simmer gently in this creamy mixture.
Then, introduce the nutritious kale and white beans into the pan, letting them cook until tender.
Adjust the seasoning to your liking, enhancing the flavors of this hearty dish.
Ensuring a balance of protein, vitamins, minerals, fiber, and healthy fats, Milk Braised Chicken with Kale and Beans offers a wholesome meal option.
The savory and garlic-infused taste profile makes it a comforting choice for a cozy dinner.
Nutrient-rich and low in saturated fats, this dish provides a satisfying and nourishing dining experience.
Prep the Chicken
Prepare the chicken by browning the pieces in olive oil to infuse them with flavor. This initial step is essential in building a rich and savory base for the Braised Chicken With Kale dish.
As the chicken browns, it develops a golden crust that enhances its taste and texture, providing a delicious foundation for the upcoming stages of the recipe.
While there are no specific comments yet on the preparation process, starting the conversation about this essential step in cooking the chicken is necessary.
Sauté the Aromatics
When sautéing the aromatics, such as garlic, you're intensifying their flavors and intertwining them into the dish. This step is essential in adding a rich, savory taste to the milk-braised chicken with kale and beans.
As you sauté the garlic, it releases allicin, a potent compound renowned for both its health benefits and its distinctive aroma when cooked.
Flavorful Aromatic Mixture
Sauté the aromatics, such as garlic, to create a flavorful base that enhances the milk-braised chicken dish. When these aromatics are gently cooked in olive oil, their essence infuses the cooking medium, imparting a deep and rich flavor to the chicken and kale.
The combination of garlic, olive oil, and milk forms a savory and aromatic mixture that heightens the taste profile of the dish, including the beans. Properly sautéing the aromatics is essential as it guarantees they're thoroughly cooked, allowing their flavors to meld seamlessly with the other ingredients.
This aromatic foundation sets the stage for a delicious and comforting meal, where each component contributes to the overall symphony of flavors. By sautéing the aromatics until fragrant, the essential oils are released, intensifying the taste experience and providing a robust depth to the dish.
This meticulous step in the cooking process ensures a well-rounded and satisfying dining experience for you and your guests.
Saute Until Fragrant
Saute the aromatics until their fragrance fills the air, releasing essential oils that enhance the milk-braised chicken dish.
When you saute garlic until it becomes fragrant, it allows the aromatic oils and flavors to bloom, creating a foundation for a rich and flavorful sauce. This step is vital as it sets the stage for building layers of taste complexity in the dish.
It's important to watch the garlic closely to make sure it doesn't burn, as this can impart a bitter taste to your final creation. The sauteed garlic not only adds a delightful aroma but also infuses the milk sauce with a subtle essence of garlic, complementing the other ingredients perfectly.
Properly sauteed garlic is a key element in adding depth and complexity to the overall flavor profile of the milk-braised chicken dish, making it a comforting and satisfying meal that will leave you wanting more.
Add the Milk and Broth
When you add the milk and broth to the braising liquid, you're creating a rich and creamy base for the chicken. This mixture not only adds depth of flavor but also helps tenderize the chicken as it cooks.
Milk and Broth Mixture
To create the creamy and flavorful sauce for the chicken in this recipe, add the milk and broth mixture. This combination not only imparts a rich and slightly sweet undertone to the dish but also helps tenderize the chicken as it simmers.
The milk brings a velvety texture and a touch of sweetness, while the broth adds depth of flavor and contributes to a well-balanced sauce. As the milk and broth mixture simmers with the chicken, it infuses the kale and beans with a delicious savory taste, creating a harmonious blend of flavors.
The slow simmering process allows the ingredients to meld together, enhancing the overall taste profile of the dish. It's important to allow the milk and broth mixture to cook gently, ensuring that all the flavors have time to develop fully. This step is vital in achieving the desired creamy and flavorful sauce that will bring comfort and satisfaction to your dinner table.
Slowly Simmer Ingredients
Add the milk and broth mixture to the chicken to slowly simmer and infuse the dish with rich flavors and create a creamy sauce that enhances the overall taste profile.
This essential cooking process is vital as it helps tenderize the chicken, allowing it to absorb the flavors of the milk and broth deeply.
The combination of milk and broth not only contributes to the tenderness of the meat but also results in a luscious, savory sauce that envelops the chicken, kale, and beans with a velvety texture.
Simmering these ingredients together allows for a harmonious melding of flavors, culminating in a comforting and hearty meal ideal for colder nights.
The milk's subtle sweetness and richness complement the earthy notes of the kale and beans, creating a well-balanced dish.
Through the slow simmer, the chicken becomes succulent, tender, and imbued with the delicious essence of the milk and broth, ensuring a delightful dining experience.
Infuse Flavors Together
Start by pouring the milk and chicken broth mixture into the pot with the chicken to begin infusing the flavors together. The addition of milk brings a velvety texture to the dish, enveloping the chicken in a rich and creamy sauce. As the chicken simmers in the milk and broth, the proteins in the milk help to tenderize the meat, ensuring a moist and succulent result.
This combination not only benefits the chicken but also acts as a unifying element, blending the garlic, kale, and beans harmoniously. The simmering process allows the milk to reduce and thicken gradually, creating a luxurious coating that enhances the overall dish.
The marriage of milk and broth in this recipe results in a comforting and hearty meal, perfect for a cozy night in or a family gathering. The infusion of flavors that takes place as the ingredients simmer together provides a depth of taste that's both satisfying and delicious.
Simmer With Kale and Beans
Simmering the milk-braised chicken with kale and beans guarantees all the ingredients with rich flavors and results in a tender, juicy outcome. As the pot gently bubbles away on the stove, the flavors meld together, creating a comforting and nutritious meal.
Here's how the simmering process enhances this hearty dish:
- The milk-based sauce seeps into the chicken, keeping it moist and flavorful.
- Kale wilts down, absorbing the savory notes of garlic and milk, adding a nutritious punch.
- White beans soak up the creamy sauce, providing a velvety texture and an extra dose of protein.
- The slow simmering allows all the elements to come together harmoniously, ensuring each bite is a delightful blend of tender chicken, earthy kale, and creamy beans.
Through this methodical cooking process, milk-braised chicken with kale and beans transforms into a dish that isn't only delicious but also deeply satisfying.
Garnish and Serve
Enhance the presentation of your milk-braised chicken with kale and beans by garnishing it with fresh herbs like parsley or thyme for added flavor. The vibrant green of these herbs not only adds a pop of color to your dish but also introduces an invigorating taste that complements the creamy, comforting flavors of the chicken and beans. Additionally, consider serving your milk-braised chicken alongside some crusty bread. The bread serves as a perfect vehicle for soaking up the rich and flavorful sauce, ensuring that no drop goes to waste. To round out your meal, a side salad can provide a crisp contrast to the hearty main course, offering a balanced and nutritious dining experience. With these thoughtful additions, your milk-braised chicken with kale and beans transforms into a complete and satisfying dinner option, perfect for enjoying a cozy evening at home with loved ones.
Garnish Options | Serving Suggestions | Meal Pairings |
---|---|---|
Fresh parsley | Crusty bread | Side salad |
Fresh thyme | ||
Storage and Reheating
When storing leftover milk-braised chicken with kale and beans, place it in an airtight container in the refrigerator for up to 3-4 days.
To reheat this comforting dish, follow these steps:
- Gently warm the chicken in a saucepan over low heat, stirring occasionally to prevent burning.
- Add a splash of chicken broth or milk to the pan if the dish appears dry during reheating.
- Avoid overheating the chicken to prevent it from becoming tough or dry.
- Enjoy the reheated milk-braised chicken with kale and beans as a delicious leftover meal option.
Following these guidelines will help maintain the flavors and textures of the dish when you decide to enjoy it again.
Frequently Asked Questions
Can I Substitute Kale With Another Leafy Green in This Recipe?
Yes, you can substitute kale with spinach or Swiss chard in this recipe. Both options will complement the flavors of the dish well and provide a delicious alternative if you're looking to switch up the greens.
Is It Possible to Use a Dairy-Free Alternative to Milk?
Yes, you can use a dairy-free alternative to milk in this recipe. Substitute with a non-dairy milk like almond, oat, or coconut milk for a similar creamy texture and rich flavor. Enjoy your dairy-free version!
Can I Use Boneless Chicken Thighs Instead of Bone-In Chicken?
You'll be pleased to know, boneless chicken thighs are a popular choice. They cook faster and absorb flavors well. Remember to adjust cooking times as needed. Enjoy the tender, flavorful result in your comforting dish.
How Can I Adjust the Seasoning for a Spicier Dish?
To make it spicier, add more crushed red pepper flakes or diced jalapeños. Taste as you go and adjust accordingly. Remember, you can always start with a little spice and gradually increase it until it suits your preference.
Can I Freeze the Leftovers for Later Consumption?
If you find yourself with extra portions, freeze the leftovers of this delicious meal like a culinary time capsule. Guarantee freshness by storing in airtight containers and enjoy the comfort later on.
Can Milk Braised Chicken With Kale and Beans Be a Nutritious Meal Option?
Milk braised chicken with kale and beans is a wholesome and nutritious meal option. This hearty dish combines tender chicken with the rich flavors of sausage kale white bean soup, providing a protein-packed and fiber-filled meal that is both satisfying and nutritious.
Conclusion
To sum up, milk braised chicken with kale and beans offers a comforting and hearty meal option that's both nutritious and delicious.
The combination of tender chicken, hearty beans, and vibrant kale creates a satisfying dish that's sure to please your taste buds.
Whether enjoyed as a weeknight dinner or a weekend treat, this recipe is a versatile and flavorful option for any occasion.
Give it a try and experience the comfort and warmth it brings to your table.
Francesca, as the creative force behind our compelling content, combines culinary expertise with journalistic flair. She has a deep appreciation for the cultural histories and artisanal traditions that influence remarkable flavors around the world. Through engaging narratives, she transports our audience to the heart of each culinary experience. Whether she’s documenting the centuries-old techniques of a Sicilian cheese maker or uncovering the personal stories of our producers, Francesca’s storytelling prowess drives our mission to connect people through food.
Lunch & Dinner
Honeynut and Koginut Squash Soup: A Comforting Fall Recipe
Amp up your autumn with the rich and creamy Honeynut and Koginut Squash Soup recipe – a must-try for cozy fall evenings!
Experience the cozy warmth of autumn with Honeynut and Koginut Squash Soup, a delicious blend rich in Vitamin A and C that supports eye health, immunity, and digestive wellness. Made with essential ingredients such as onions, garlic, thyme, and broth, this soup is bursting with savory flavors. Simply follow these steps: sauté, simmer, blend, and enjoy the creamy goodness. Add a dollop of sour cream and serve with crusty bread for a satisfying meal. Keep refrigerated for up to 5 days to enhance the taste. Get creative by adding roasted sweet potatoes or a splash of apple cider vinegar. Delight in the tastes of autumn.
Key Takeaways
- Creamy texture from Koginut squash
- Sweet, nutty flavor of Honeynut squash
- Savory depth from onions and garlic
- Fragrant thyme for a cozy aroma
- Richness from vegetable or chicken broth
Benefits of Honeynut and Koginut Squash
Exploring the benefits of including Honeynut and Koginut squash in your diet reveals a wealth of essential nutrients and versatile culinary options. These squashes are powerhouses of Vitamin A, Vitamin C, and fiber, making them excellent additions to your meals. In particular, Vitamin A supports healthy vision and immune function, while Vitamin C acts as an antioxidant, protecting your cells from damage. The fiber content in these squashes aids digestion and helps you feel full longer, promoting overall gut health.
Not only are Honeynut and Koginut squash nutritious, but they're also incredibly versatile ingredients. Their rich flavors add depth to dishes like soups, stews, and salads, making them perfect for experimenting in the kitchen. Whether roasted, pureed, or grilled, these squashes elevate the taste of any recipe they're included in.
Essential Ingredients for the Soup
To create a flavorful Honeynut and Koginut squash soup, gather essential ingredients like Honeynut squash, Koginut squash, onions, garlic, thyme, vegetable broth, and chicken broth. These ingredients are essential for crafting a savory and creamy soup recipe perfect for the fall season. The Honeynut squash, known for its sweet and nutty undertones, adds a unique depth of flavor to the soup, distinguishing it from traditional butternut squash-based recipes. Onions and garlic bring savory elements to the dish, enhancing its aromatic profile. Thyme, a fragrant herb, complements the squash's sweetness and adds a subtle earthy note. Vegetable or chicken broth forms the base of the soup, providing richness and depth to the overall taste. Below is a table emphasizing the importance of each ingredient in creating this comforting fall soup.
Ingredient | Role | Flavor Profile |
---|---|---|
Honeynut Squash | Sweet, nutty flavor enhancer | Rich and unique |
Koginut Squash | Creamy texture and depth | Savory richness |
Onions | Aromatic base | Savory |
Garlic | Additional savory notes | Pungent |
Thyme | Fragrant herb | Earthy |
Step-by-Step Cooking Instructions
Begin by sautéing onions, garlic, and sage in a mixture of butter and olive oil until they become fragrant and translucent.
Next, add the honeynut squash, a drizzle of maple syrup, a pinch of salt, ground pepper, and vegetable broth. Let the ingredients simmer together until the squash is tender and easily pierced with a fork.
Once the squash is cooked, it's time to blend the soup. You can achieve a velvety, creamy texture by using an immersion blender or a standard blender. Remember to taste the soup and adjust the seasoning with more salt and pepper if needed.
Finally, ladle the soup into bowls and garnish with your preferred toppings, such as a dollop of sour cream, fresh herbs, or some roasted pumpkin seeds.
This step-by-step process will help you create a comforting and delicious bowl of honeynut squash soup to savor during the fall season.
Serving Suggestions and Storage Tips
Enhance your dining experience with these serving suggestions and storage tips for your delightful Honeynut and Koginut squash soup.
To add richness and depth of flavor, top your soup with a dollop of sour cream or a drizzle of cream. For a more substantial meal, consider pairing the soup with crusty bread or a classic grilled cheese sandwich. These combinations will elevate your fall meal into a cozy, satisfying experience.
When it comes to storing your leftover soup, make sure it's placed in airtight containers before storing in the refrigerator. The soup can be kept fresh for 4-5 days, allowing you to enjoy it over multiple meals. Surprisingly, the flavors of the soup tend to meld and improve with time, making it even more delicious the next day.
Creative Variations to Try
Consider elevating the flavor profile of your Honeynut and Koginut squash soup by experimenting with creative variations such as adding roasted sweet potatoes or carrots.
To enhance the depth of your soup, try incorporating a splash of apple cider vinegar for a tangy kick. For added richness, a drizzle of truffle oil or a sprinkle of crispy bacon can take your dish to the next level.
If you enjoy a spicy twist, mix in some diced jalapeños or a pinch of red pepper flakes for a kick of heat. Additionally, balancing out the flavors with a touch of sweetness can be achieved by adding a dollop of honey or a sprinkle of brown sugar.
These creative variations offer a spectrum of flavors that can transform your squash soup into a culinary delight, perfect for cozy fall evenings.
Frequently Asked Questions
What Is the Difference Between Honeynut Squash and Butternut Squash?
Honeynut squash, a hybrid of butternut and buttercup varieties, is smaller, sweeter, and richer in nutrients compared to butternut squash. It's easier to handle due to its size and intense flavor, offering versatility in recipes.
Can You Use Honeynut Squash Instead of Butternut Squash?
Yes, you can absolutely use honeynut squash instead of butternut squash. It offers a richer, nuttier flavor and is easier to work with due to its smaller size. The sweetness of honeynut squash enhances fall soup recipes beautifully.
Do You Eat the Skin of Honeynut Squash?
Eating the skin of honeynut squash is not only safe but also nutritious and delicious. It adds fiber, nutrients, and texture to your dishes. So go ahead, savor every bite!
How Do You Soften Honeynut Squash?
To soften honeynut squash, roast it at 400°F for 30-40 minutes until tender. If roasting isn't your style, try steaming cubes for 10-15 minutes or boiling for a quick fix. Microwaving or sautéing in a pan are also speedy options.
Can Honeynut and Koginut Squash be used in the Butternut Squash Brussel Sprout Hash recipe?
Yes, you can use Honeynut and Koginut squash in the butternut squash brussel sprout hash recipe. These smaller, sweeter squash varieties can add a unique flavor and texture to the dish. Experiment with different squash types to create a personalized twist on the classic recipe.
Conclusion
To sum up, this recipe for honeynut and koginut squash soup offers a delicious and comforting dish that's perfect for the fall season. With the benefits of these nutritious squash varieties and the simple cooking instructions provided, you can easily enjoy a warm and satisfying meal.
Don't hesitate to try out different variations and make this soup your own. Happy cooking!
Francesca, as the creative force behind our compelling content, combines culinary expertise with journalistic flair. She has a deep appreciation for the cultural histories and artisanal traditions that influence remarkable flavors around the world. Through engaging narratives, she transports our audience to the heart of each culinary experience. Whether she’s documenting the centuries-old techniques of a Sicilian cheese maker or uncovering the personal stories of our producers, Francesca’s storytelling prowess drives our mission to connect people through food.
Lunch & Dinner
Italian Pulled Pork: A Hearty and Delicious Dinner
Wander into the world of Italian pulled pork, where succulent flavors and aromatic herbs converge in a tantalizing fusion that promises a culinary adventure.
Discover the alluring realm of Italian pulled pork, where juicy pork shoulder combines with flavorful Italian herbs such as garlic, rosemary, and fennel, resulting in a distinctive and tasty dinner treat. Cooked slowly to perfection, the meat soaks up a medley of flavors, providing a moist and tender consistency that delights the taste buds. From essential components like San Marzano tomatoes to pivotal seasoning ingredients like balsamic vinegar and aromatic herbs, every aspect blends together to create a dish that distinguishes itself from traditional pulled pork variations. Unveil the enchantment of this fusion cuisine, promising a culinary journey through Italian culinary mastery with each bite.
Key Takeaways
- Italian pulled pork blends tender pork shoulder with aromatic Italian herbs for a flavorful twist.
- Slow-cooking in white wine and tomatoes creates a succulent, juicy texture.
- Customizable with spices like rosemary, thyme, and balsamic vinegar for depth.
- Versatile dish allowing for creative variations with herbs and seasonings.
- Offers a fusion of traditional pulled pork tenderness with vibrant Italian flavors.
Why Italian Pulled Pork?
Discover why Italian pulled pork is a delicious and unique twist on traditional pulled pork recipes. The infusion of Italian flavors such as garlic, rosemary, and fennel gives this dish a Mediterranean flair that sets it apart from the classic version.
By cooking the pork shoulder low and slow, the meat becomes tender and juicy, allowing it to absorb all the rich and savory tastes of the seasonings. The versatility of Italian pulled pork is another reason why it has become a favorite dish for many.
In addition, its customizable nature makes it an excellent choice for feeding a crowd, as you can adjust the flavors and serving styles to suit different tastes. Italian pulled pork offers a delightful fusion of traditional slow-cooked meat with the vibrant and robust essence of Italian cuisine.
Ingredients Needed
To guarantee the Italian Pulled Pork, you'll need a list of essential ingredients such as boneless pork shoulder, garlic, rosemary, white wine, onions, and a blend of Italian spices.
The preparation steps overview will guide you through marinating the pork, slow-cooking it until tender, and shredding it for serving.
Following the cooking time guidelines guarantees that your Italian Pulled Pork turns out perfectly succulent and flavorful.
Essential Ingredients List
Consider including boneless pork shoulder or pork butt as the main ingredient for making Italian Pulled Pork. These cuts of pork are ideal for creating the tender, flavorful meat needed for this traditional Italian recipe.
Alongside the pork, essential ingredients include a blend of aromatic spices such as garlic, rosemary, fennel, and Italian seasoning. Additionally, onions, San Marzano tomatoes, red wine vinegar, and peperoncini are key components that contribute to the rich and savory flavor profile of the dish.
To enhance the taste even further, Girards Olde Venice Italian Dressing can be used in the preparation process. Through slow-cooking the pork to perfection, the flavors meld together, resulting in a mouthwatering dish that can be enjoyed in various ways, making it a versatile and satisfying meal option for any occasion.
Preparation Steps Overview
Start by gathering the necessary ingredients for preparing Italian Pulled Pork, including pork shoulder, garlic, rosemary, white wine, and onions to guarantee a flavorful and aromatic dish.
To begin, you'll need a pork shoulder, ideally bone-in, for the richness it adds to the dish. The garlic and rosemary will infuse the meat with a fragrant taste, while the white wine will contribute acidity and depth to the flavors. Onions will provide a sweet undertone to balance the savory elements.
For the dry rub, consider using a blend of herbs and spices that complement the Italian Pulled Pork recipe you're following.
Once you have all the ingredients assembled, you can proceed to cook the pork shoulder using a Dutch oven or slow cooker, ensuring a tender and juicy result.
This versatile dish can be enjoyed in various ways, such as on pulled pork sandwiches or as the main course for a satisfying meal.
Cooking Time Guidelines
For best results, make sure you have on hand the main ingredients for Italian Pulled Pork, including pork shoulder, San Marzano tomatoes, red wine vinegar, peperoncini, garlic, and onion.
To achieve the authentic Italian flavors and guarantee the pork shoulder turns out tender and fall-apart, utilizing a slow cooker is crucial. The cooking time guidelines for Italian Pulled Pork typically range from 3-4 hours on high or 6-8 hours on low in a slow cooker.
This extended cooking time allows the flavors to meld together, resulting in a dish that isn't only flavorful but also incredibly tender. By cooking the whole pork shoulder slowly, you make sure that the meat becomes so tender it practically falls apart, creating a delightful eating experience.
Additionally, the beauty of this dish lies in its customizability—feel free to add your favorite herbs and spices to tailor the flavors to your liking and make this Italian Pulled Pork recipe your own.
Step-by-Step Cooking Instructions
Begin by seasoning the pork shoulder with Italian herbs and spices before browning it in a hot skillet. Once the pork butt is well seasoned and browned on all sides, transfer it to a slow cooker to continue the cooking process.
Pour a flavorful liquid, such as broth or a mixture of tomatoes and herbs, over the pork to enhance its taste as it simmers. Set the slow cooker to a low setting and let the pork shoulder cook slowly until it becomes tender and easy to shred.
The slow cooker method allows the pork to absorb the seasonings and develop a rich flavor profile characteristic of this traditional Italian dish. After the pork is done cooking, use two forks to shred it into succulent pieces, making sure that each strand is coated in the delicious juices and seasonings.
This step-by-step process guarantees that your Italian pulled pork turns out moist, flavorful, and perfect for any occasion.
Cooking Methods
Consider browning the pork shoulder in a hot skillet before transferring it to the slow cooker for a flavorful Italian Pulled Pork dish.
When preparing Italian Pulled Pork, the braising method is key to achieving a tender and richly flavored result. Here are essential points to keep in mind for the cooking process:
- Choice of Pork Cuts: Opt for pork shoulder or pork butt for their ideal marbling and toughness, which break down beautifully during the braising process.
- Braising Technique: Start by searing the pork in a hot skillet to develop a deep flavor profile, then slow-cook it in liquid to guarantee tenderness and juiciness.
- Interchangeable Cuts: Both pork shoulder and pork butt, originating from the pig's shoulder, work interchangeably in Italian Pulled Pork, offering versatility in your cooking.
Serving Suggestions
Enhance the dining experience by pairing Italian Pulled Pork with a variety of complementary sides and accompaniments. Italian Pulled Pork can be served over pasta, spaghetti squash, or spiralized noodles for a hearty meal.
To elevate the dish, consider serving it alongside sautéed spinach, vinegar coleslaw, garlic mashed potatoes, roasted zucchini, or German potato salad. The versatility of Italian Pulled Pork allows for various serving options, catering to different tastes and occasions.
Leftover Italian Pulled Pork can be transformed into a flavorful pork ragu, offering a new twist to the meal. For those seeking a classic and satisfying meal, try serving the pulled pork on sandwiches or wraps, reminiscent of the beloved Philadelphia-style preparation.
Whether you opt for traditional sides or innovative serving ideas, Italian Pulled Pork proves to be a flexible and delicious dish that can be enjoyed in multiple ways.
Storage Tips
To guarantee the longevity and freshness of your Italian Pulled Pork, here are some practical storage tips:
- Refrigerated for Meal Prepping: Italian Pulled Pork can be refrigerated for 3-4 days, making it an excellent option for meal prepping. Store it in airtight containers to maintain its flavor and moisture.
- Stored in the Freezer for Future Enjoyment: Leftover Italian Pulled Pork can be stored in the freezer for up to 3 months. Divide it into individual portions and freeze them in freezer-safe bags or containers for convenient future use.
- Reheating for Retaining Flavor: When reheating Italian Pulled Pork, warm it in the oven at 250°F for 20-30 minutes. This method helps retain the dish's flavors and textures, ensuring a delicious meal every time.
These storage tips not only help in preserving your Italian Pulled Pork but also enhance its convenience and versatility for your culinary needs.
Additionally, this dish can be easily scaled up for large gatherings, making it a perfect choice for various occasions.
Pro-Tips for Perfect Pulled Pork
When perfecting your Italian Pulled Pork, keep in mind that cooking time is essential for achieving that melt-in-your-mouth texture; low and slow is the way to go.
Seasoning secrets can elevate your pulled pork to the next level; consider experimenting with a blend of herbs, spices, and other flavor enhancers for a unique taste profile.
Mastering these pro-tips will guarantee your Italian Pulled Pork stands out with exceptional tenderness and flavor.
Cooking Time
For best tenderness, slow-cook your Italian Pulled Pork for 3-4 hours on high or 6-8 hours on low. When it comes to preparing this delectable dish, the cooking time is important to achieve that mouthwatering tenderness that defines a perfect pork ragu.
Here are some pro-tips to guarantee your Italian Pulled Pork turns out just right:
- Choose the right cooking vessel: Whether you opt for a slow cooker or Dutch oven, make sure that your boneless pork is cooked in a way that allows it to simmer gently, enhancing the flavors and textures.
- Monitor the cooking time: Check on your pork regularly to make sure it's cooking at the desired pace. Adjust the heat settings if necessary to maintain the ideal cooking temperature.
- Let it rest: Once the cooking time is complete, allow your Italian Pulled Pork to rest for a few minutes before shredding it. This step helps the flavors meld together, resulting in a more flavorful dish.
Seasoning Secrets
Enhance the flavors of your Italian Pulled Pork with these expert seasoning tips. When preparing your pulled pork, remember that seasoning plays an important role in creating a delicious dish. Incorporating classic Italian herbs such as rosemary, thyme, and fennel seeds can elevate the flavor profile of your pork to new heights.
The combination of salt, pepper, and aromatic herbs not only adds depth but also guarantees a well-balanced seasoning profile that will tantalize your taste buds.
Proper seasoning is essential as it helps tenderize the meat and infuse it with rich flavors during the slow cooking process. Italian seasoning secrets involve layering flavors by adding garlic, onions, and a splash of white wine for added complexity.
Flavor Variations to Try
Experiment with different herb and spice combinations like adding basil, oregano, or thyme to the Italian pulled pork for unique flavors.
For a tangy twist, consider incorporating a splash of balsamic vinegar or red wine vinegar.
If you enjoy a bit of heat, try adding crushed red pepper flakes or diced hot peppers to your pulled pork recipe.
These additions can elevate the overall taste profile and provide a delightful kick to your dish.
Add a splash of balsamic vinegar or red wine vinegar for a tangy flavor.
Incorporate crushed red pepper flakes or diced hot peppers for a spicy kick.
Mix in a tablespoon of tomato paste or a dollop of pesto for added richness and complexity.
Italian Pulled Pork Vs Traditional Pulled Pork
Consider how the flavor profiles and cooking methods of Italian Pulled Pork and Traditional Pulled Pork differ to understand the unique characteristics of each dish.
Italian Pulled Pork is distinguished by the infusion of Italian herbs like rosemary, garlic, and fennel seeds, resulting in a savory and aromatic taste. On the other hand, traditional pulled pork, often associated with Southern BBQ, embraces a smoky and sweet flavor achieved through dry rubs or BBQ sauces.
Italian Pulled Pork incorporates ingredients such as white wine, tomatoes, and peperoncini to enhance its taste, while traditional pulled pork leans towards vinegar-based or sweet BBQ sauces for flavor enhancement.
The cooking technique for Italian Pulled Pork involves braising in liquid for tenderness, while traditional pulled pork is typically smoked or slow-cooked over wood for a distinctive taste.
Italian Pulled Pork's versatility allows for incorporation into various Italian-inspired dishes, whereas traditional pulled pork is commonly enjoyed in sandwiches or as a standalone meat dish.
Frequently Asked Questions
What to Serve With Pulled Pork for Dinner?
Looking to serve pulled pork for dinner? Pair it with classic sides like coleslaw, cornbread, or try grilled vegetables for a lighter option. Italian-inspired sides such as garlic bread or roasted veggies enhance the flavors. Explore global flavors too!
How Does Jamie Oliver Make Pulled Pork?
To make pulled pork, Jamie Oliver slow-cooks pork shoulder with a dry rub and liquid in the oven. He sears the meat, then braises it for hours with garlic, rosemary, and white wine, resulting in juicy, tender meat.
What Is Traditionally Served With Pulled Pork?
When you enjoy pulled pork, it's like a flavorful dance party where the main dish busts a move with classic sides like coleslaw, baked beans, and cornbread for a Southern-style meal that'll make your taste buds groove.
What Compliments Pulled Pork?
When it comes to pulled pork, tangy and acidic flavors like tomatoes, vinegar, and peperoncini make great compliments. These flavors enhance the richness of the pork and add a zesty kick to every bite.
What is the Connection Between Italian Pulled Pork and Officina del Gusto Lastra a Signa Dining?
The connection between Italian pulled pork and Officina del Gusto Lastra a Signa dining experience is the expert preparation and flavorsome combination. At Officina del Gusto, the traditional Tuscan cuisine meets modern culinary techniques, resulting in a delightful dining experience. The Italian pulled pork showcases the authentic flavors and quality of this renowned dining establishment.
Conclusion
To sum up, Italian pulled pork is a hearty and delicious dinner option that's sure to satisfy your taste buds.
With its tender meat infused with flavorful Italian seasonings, this dish is a culinary delight that will leave you wanting more.
So why not give it a try and experience the perfect blend of savory and succulent flavors that will surely elevate your dining experience to new heights.
Bon appétit!
Francesca, as the creative force behind our compelling content, combines culinary expertise with journalistic flair. She has a deep appreciation for the cultural histories and artisanal traditions that influence remarkable flavors around the world. Through engaging narratives, she transports our audience to the heart of each culinary experience. Whether she’s documenting the centuries-old techniques of a Sicilian cheese maker or uncovering the personal stories of our producers, Francesca’s storytelling prowess drives our mission to connect people through food.
-
Vetted3 months ago
15 Best Non-Toxic Espresso Machines for a Healthier Brew at Home
-
Italian Cuisine2 weeks ago
What Italian Dishes Use Parsley
-
Vetted4 months ago
15 Best Coffee Beans for Your Breville Espresso Machine – Expert Picks for Perfect Brews
-
Vetted6 months ago
12 Best Coffee Pods for DeLonghi Espresso Machine to Elevate Your Caffeine Game
-
Vetted3 months ago
15 Best Espresso Ground Coffees for Your Espresso Machine: A Barista’s Guide
-
Vetted6 months ago
15 Best Commercial Automatic Espresso Machines for Your Coffee Shop
-
Vetted4 months ago
15 Best Coffee Beans to Elevate Your Breville Espresso Experience
-
Vetted6 months ago
15 Best ESE Pod Espresso Machines for Perfect Coffee Every Time