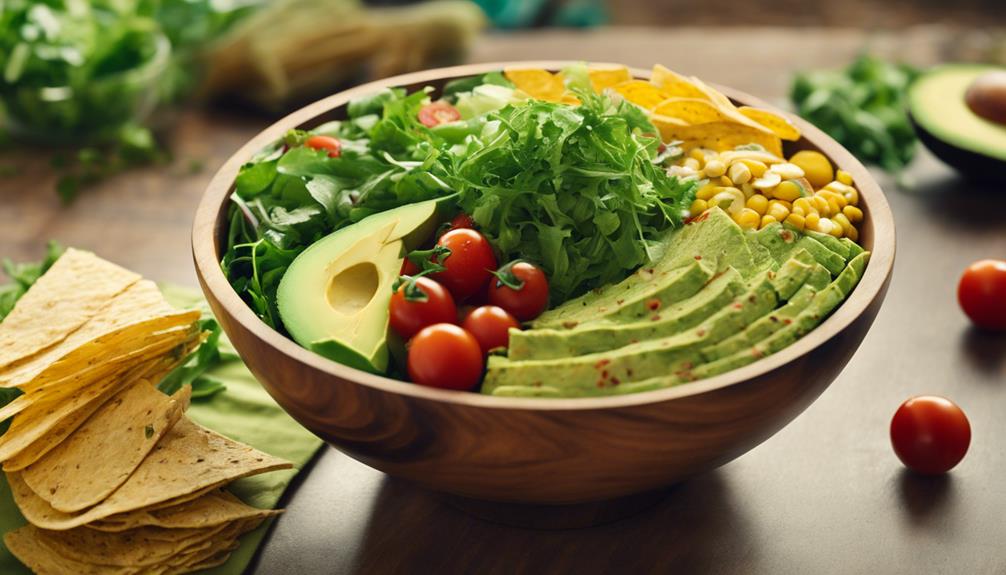
Connect with us

Snacks

Recreate Sweetgreen's Famous Guacamole Greens Salad at Home

Bring the vibrant flavors of Sweetgreen's Guacamole Greens salad to your kitchen with this simple at-home recipe – a delicious twist awaits!

Published

on

homemade guacamole greens recipe

To recreate Sweetgreen's famous Guacamole Greens salad at home, gather mixed greens, chicken, tomatoes, red onion, avocado, and tortilla chips. Begin by selecting crisp and flavorful greens like romaine or mixed greens for a vibrant base. Mash ripe avocados with lime juice, salt, and cilantro for the guacamole. Prepare a cilantro lime vinaigrette with fresh cilantro, lime juice, jalapenos, garlic, and olive oil. Toss the greens with the vinaigrette, add chicken, tomatoes, avocado, red onion, and tortilla chips. Garnish with lime wedges, avocado slices, tortilla chips, and cilantro. These steps capture the essence of Sweetgreen's delightful salad.

Key Takeaways

  • Gather mixed greens, chicken, tomatoes, red onion, avocado, and tortilla chips for the salad.
  • Make a creamy avocado guacamole with lime, salt, and cilantro.
  • Prepare a cilantro lime vinaigrette for a zesty dressing.
  • Include quick pickled red onions for a tangy crunch.
  • Top the salad with crushed tortilla chips for texture.
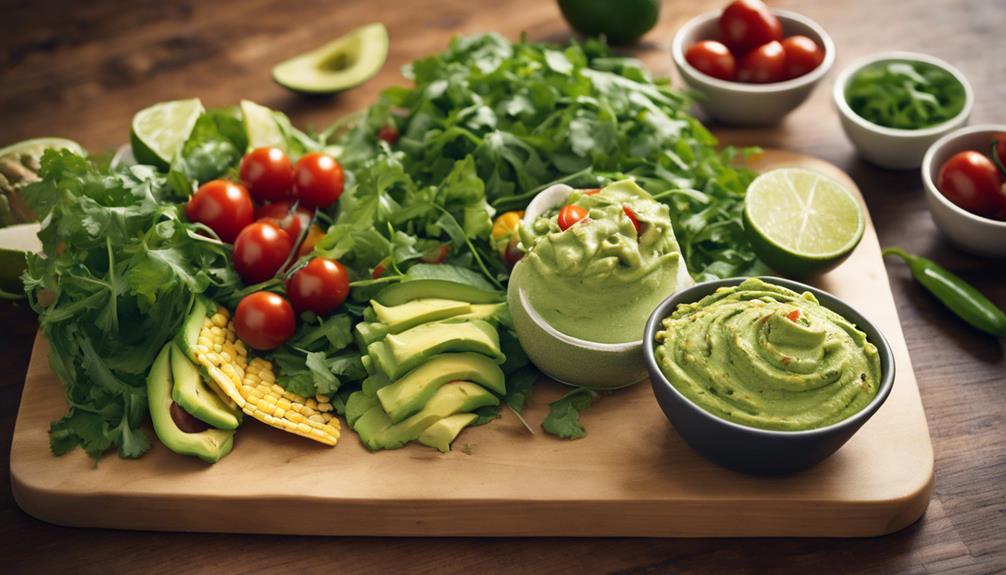
Salad Ingredients

To recreate Sweetgreen's famous Guacamole Greens Salad, gather mixed greens, chicken, tomatoes, red onion, avocado, and tortilla chips as the key ingredients.

This salad embodies the essence of guacamole, with its vibrant colors and fresh flavors. The star of this dish is the creamy avocado, which adds a luscious texture and richness. When combined with the succulent chicken, juicy tomatoes, and zesty red onion, each bite bursts with a harmonious blend of flavors.

To elevate the taste profile, a cilantro lime vinaigrette is drizzled over the salad, infusing it with an invigorating and tangy kick. The final touch of crushed tortilla chips not only replicates the essence of guacamole but also adds a delightful crunch.

Additionally, quick pickled red onions are included to provide a tangy and crunchy element that complements the overall composition of the salad. This combination of ingredients creates a salad that isn't only visually appealing but also a symphony of flavors that dance on your taste buds.

Fresh Greens Selection

healthy food options available

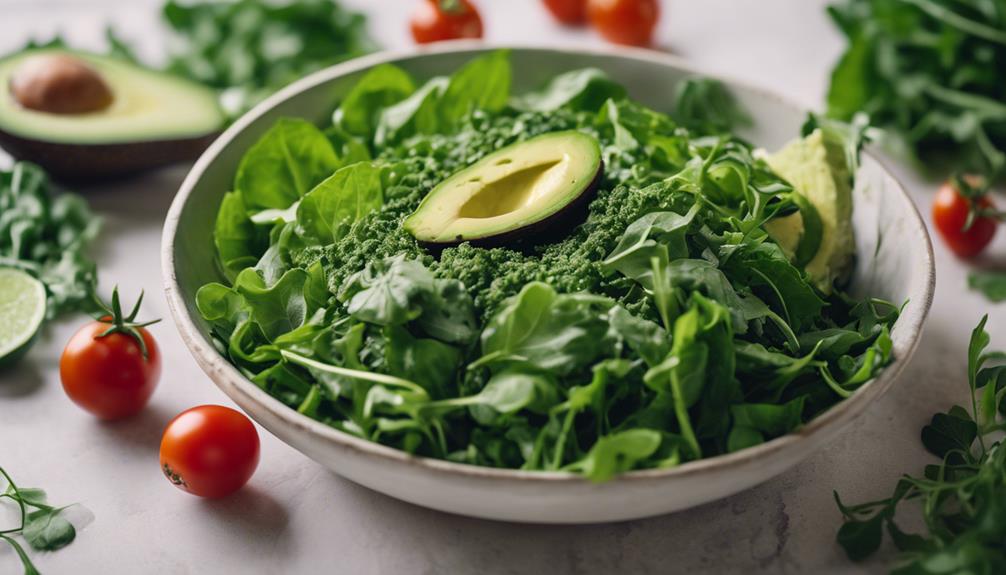
When selecting fresh greens for your Guacamole Greens Salad, consider a variety of options such as romaine, arugula, or mixed greens to create a vibrant base.

Opt for greens that are crisp and flavorful to enhance the overall taste and nutritional value of the dish.

Advertisement

Mixing and matching different greens, including the addition of red cabbage, not only adds texture and color but also elevates the visual appeal of your salad.

Green Veggie Options

Consider incorporating a mix of fresh greens such as romaine, arugula, and red cabbage to elevate the flavors in your Guacamole Greens Salad. These greens not only provide a vibrant color palette but also offer a variety of textures and flavors that enhance the overall dining experience.

By combining romaine for its crispness, arugula for its peppery bite, and red cabbage for its crunch and vibrant hue, you create a balanced and nutritious base for your salad. Customizing your green veggie options allows you to tailor the salad to your preferences while adding valuable nutrients to your meal.

Seasonal Salad Mixes

For a vibrant and varied flavor profile in your Guacamole Greens Salad, start by selecting a mix of seasonal greens like romaine, arugula, and red cabbage. When crafting your salad base, consider the following:

  • Textural Variety: Combining different greens provides a mix of textures, from the crispness of romaine to the peppery bite of arugula.
  • Flavor Complexity: The blend of greens offers a balance of bitterness and sweetness, enhancing the overall taste of your Guacamole Salad.
  • Nutrient-Rich Additions: Pairing the mixed greens with fresh cherry tomatoes and creamy avocado not only adds bursts of color but also boosts the nutritional value of your salad.
  • Authenticity: Opting for high-quality, seasonal greens guarantees that your Guacamole Greens Salad stays true to its original flavors and presentation.

Custom Topping Ideas

To elevate the freshness and vibrancy of your Guacamole Greens Salad, start by selecting a diverse mix of fresh greens as the foundation for your toppings. Opt for a combination of romaine, arugula, or mixed greens to create a bed of crisp and flavorful leaves.

Including red cabbage in your salad adds a delightful crunch and a pop of color, enhancing both the texture and visual appeal of the dish. Don't forget to incorporate creamy avocado, a quintessential ingredient in any guacamole salad, to provide richness and a velvety mouthfeel.

Advertisement

For an extra burst of sweetness and acidity that complements the creamy avocado, consider adding cherry tomatoes to your salad mix. Experiment with different greens and vegetables to personalize your Guacamole Greens Salad, allowing you to tailor the flavors to your liking and create a unique culinary experience.

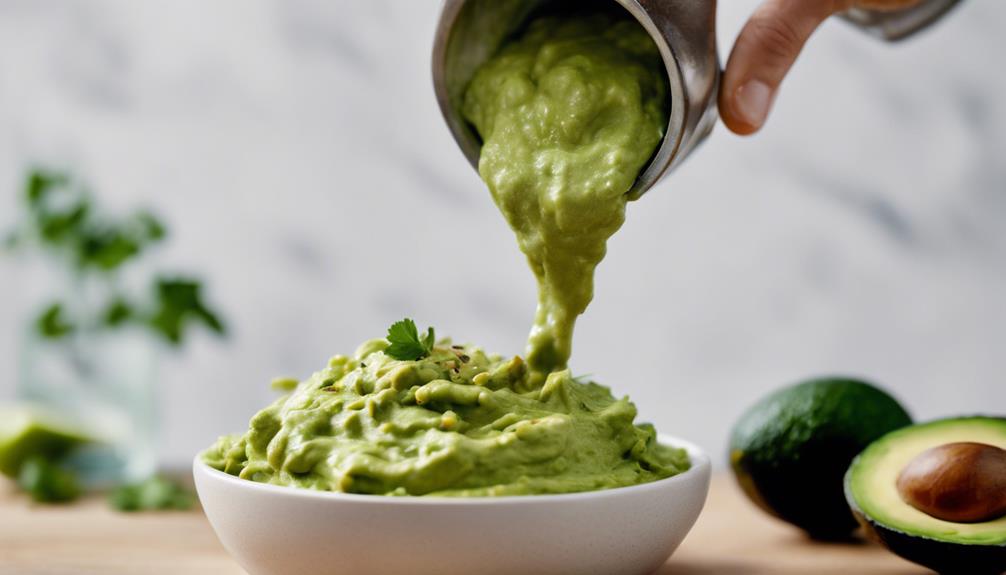
Guacamole Preparation

avocado lime salt

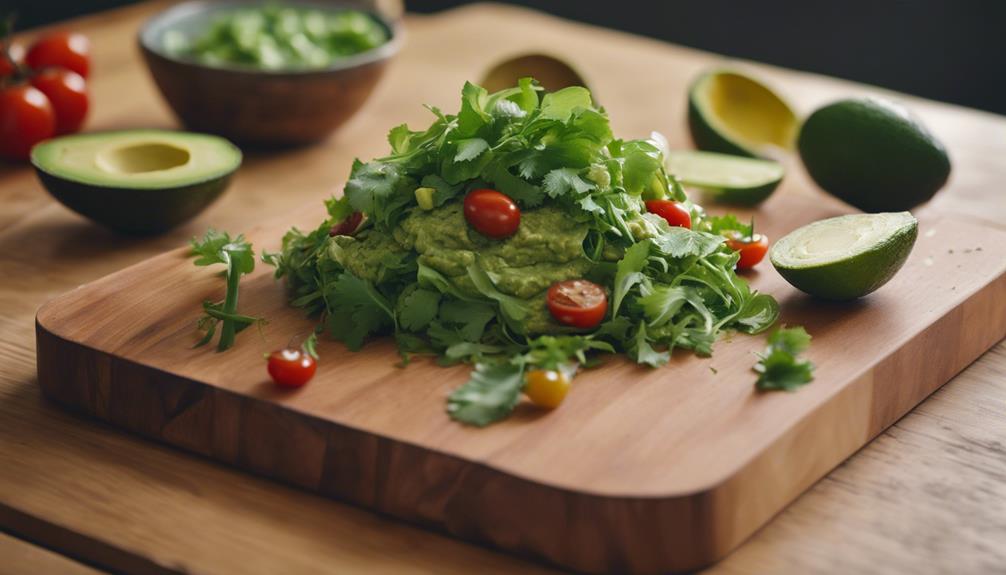
Make sure to start by selecting ripe avocados when preparing the guacamole for Sweetgreen's Guacamole Greens salad. To guarantee a creamy and flavorful base, follow these steps:

  • Mash the avocados: Achieve your desired consistency, keeping it chunky for texture in the salad.
  • Add lime juice: Enhance the flavor profile with a citrusy kick that complements the richness of the avocados.
  • Incorporate salt: Balance the flavors by seasoning the guacamole to your taste preference.
  • Include cilantro: Add a fresh and herby note to the guacamole for a vibrant finish.

Making the Vinaigrette

whisking together oil and vinegar

Craft a vibrant and flavorful cilantro lime vinaigrette for the Guacamole Greens Salad by combining fresh cilantro, jalapenos, lime juice, garlic, and olive oil. This zesty dressing can be prepared in advance and stored in the refrigerator for up to two days, allowing the flavors to meld together for an enhanced taste experience.

The combination of tangy lime juice, aromatic cilantro, spicy jalapenos, pungent garlic, and smooth olive oil creates a pivotal vinaigrette that complements the freshness of the greens in the salad.

Readers have praised this vinaigrette for its crisp and delicious flavor profile, closely resembling the dressing used in Sweetgreen's famous salad. Some have even made subtle tweaks to the recipe, like using different types of oil or adjusting the salt levels to suit individual preferences.

Ultimately, the vinaigrette plays a pivotal role in elevating the overall taste of the salad, making each bite a delightful and satisfying experience.

Assembling the Salad

fresh ingredients tossed together

When assembling the salad, toss mixed greens with the vibrant cilantro lime vinaigrette for a fresh and flavorful base.

In a large bowl, combine the greens with the dressing to guarantee an even distribution of flavors throughout the salad.

Advertisement

Next, add in the cooked chicken for a protein boost and the cherry tomatoes for a burst of sweetness.

Include diced avocado for a creamy texture that complements the crispness of the greens.

Finally, sprinkle thinly sliced red onion on top to add a mild sharpness to the mix.

Once all the ingredients are combined, top the salad with crushed tortilla chips for a guacamole-like crunch and texture.

Serve the salad immediately with a lime wedge on the side for an extra burst of citrus flavor.

Advertisement

This well-balanced combination of ingredients creates a satisfying main course salad that's both delicious and nutritious.

Garnishing and Serving

perfecting food presentation skills

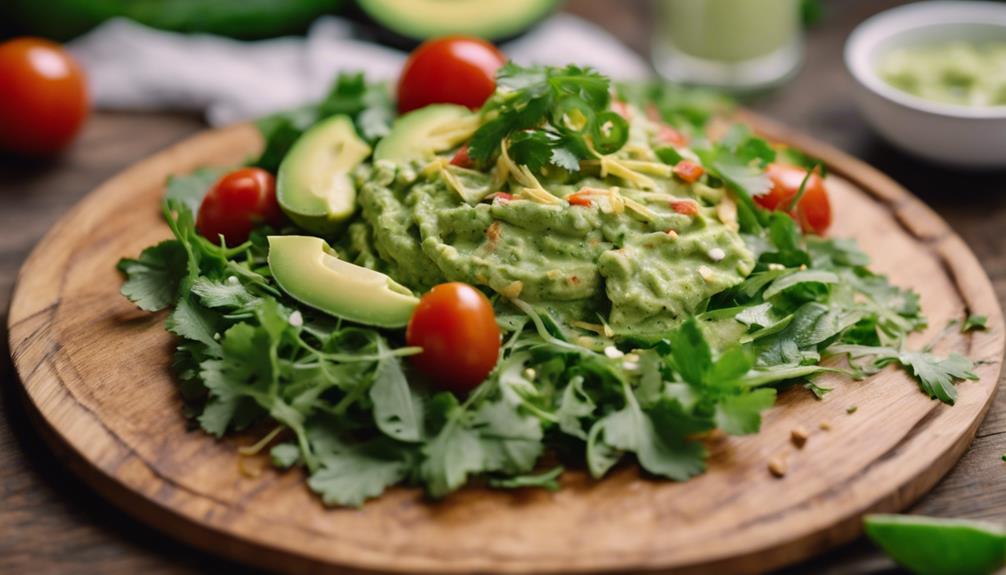
When you're ready to plate your salad, remember to add a squeeze of fresh lime for that zesty kick.

Enhance the presentation by sprinkling crushed tortilla chips for a delightful crunch.

These finishing touches will elevate your Guacamole Greens Salad and impress your guests.

Plating Your Salad

To elevate the presentation of your recreated Sweetgreen's Guacamole Greens salad, consider garnishing it with lime wedges and a sprinkle of crushed tortilla chips for added texture and flavor.

When plating your salad, keep in mind the following tips:

Advertisement
  • Lime Wedges: Adding lime wedges not only enhances the visual appeal of the dish but also provides a zesty burst of citrus flavor that complements the creamy avocado and fresh greens.
  • Crushed Tortilla Chips: Sprinkling crushed tortilla chips on top adds a delightful crunch reminiscent of traditional guacamole, enhancing the salad's texture and taste.
  • Avocado Slices: Strategically placing avocado slices on the salad not only enhances its visual appeal but also guarantees that each bite is filled with the rich, buttery goodness of ripe avocados.
  • Serving Style: Opt for a large, shallow bowl to allow for easy mixing of ingredients and even distribution of the dressing, ensuring that every bite offers a harmonious blend of flavors and textures.

Adding Finishing Touches

For the ultimate finishing touches on your recreated Sweetgreen's Guacamole Greens salad, consider garnishing it with fresh lime wedges to enhance the citrusy flavor profile. The addition of lime not only adds a zesty kick but also complements the creamy avocado and tangy vinaigrette, creating a well-balanced taste experience.

Sprinkling chopped cilantro on top of your salad not only adds a vibrant pop of color but also infuses each bite with a burst of fresh herbaceous flavor.

Drizzling a bit more vinaigrette right before serving can intensify the dressing's zesty and tangy notes, tying all the elements of the salad together for a cohesive taste.

Moreover, placing a few slices of ripe avocado on top of the salad adds a luxurious creaminess and richness that elevates the overall texture and mouthfeel.
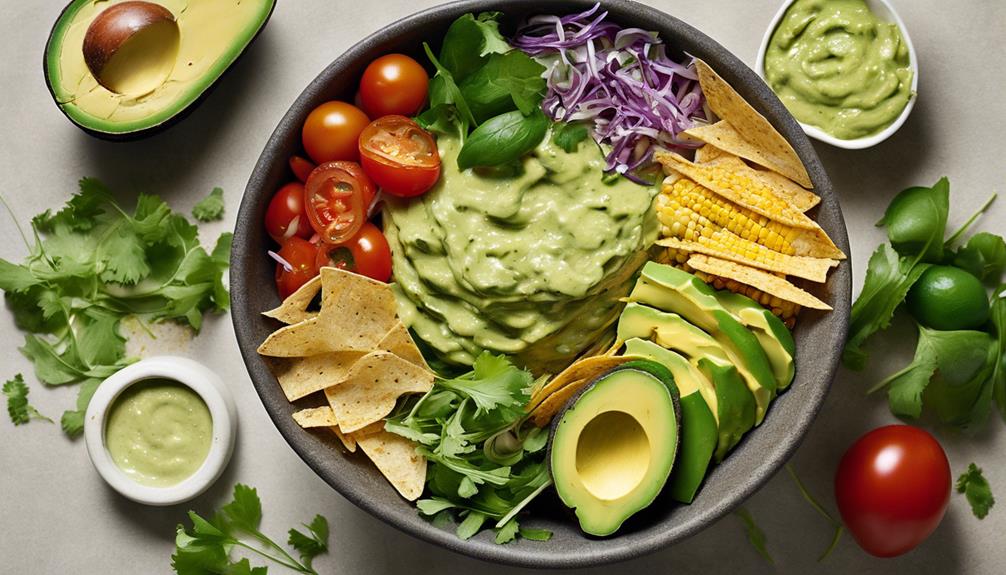
Presentation Tips

Enhance the visual appeal of your recreated Sweetgreen's Guacamole Greens salad by incorporating creative garnishing and serving techniques.

To make your salad visually appealing, consider the following tips:

Advertisement
  • Squeeze a fresh lime over the salad for a burst of citrus flavor.
  • Serve the salad in a large bowl or on a platter to create an appealing presentation.
  • Top the salad with crushed tortilla chips to add texture and a guacamole-inspired touch.
  • Arrange the salad ingredients in a visually appealing way to enhance the dining experience.

Nutritional Benefits

healthy diet food choices

Packed with a variety of essential nutrients, Sweetgreen's Guacamole Greens Salad offers a wholesome combination of fiber, healthy fats, and protein. The avocado in the salad provides heart-healthy monounsaturated fats, along with crucial vitamins such as vitamin K and folate.

Additionally, the mixed greens supply a range of vitamins and minerals, while the chicken contributes lean protein to the dish. Tomatoes, another component of this salad, are rich in antioxidants like lycopene, which may aid in reducing the risk of chronic diseases.

Moreover, the inclusion of red onion adds a dose of flavonoids and antioxidants, enhancing the overall health benefits of the salad. By enjoying this nutrient-packed salad, you're providing your body with a well-rounded array of essential nutrients that support overall health and well-being.

Healthier Homemade Alternative

great suggestion for cooking

To create a healthier homemade version of Sweetgreen's Guacamole Greens Salad, consider the benefits of using fresh, nutrient-rich ingredients in your own kitchen. When making this salad at home, you have the opportunity to enhance its nutritional value and taste.

Here are some key points to keep in mind:

  • Opt for a homemade salad dressing using fresh lime juice instead of store-bought options, which can be high in added sugars and preservatives.
  • Incorporate protein-rich black beans into your salad to increase its fiber content and help you feel full longer.
  • Choose organic greens and vegetables to make sure you're receiving the highest quality produce without harmful pesticides.
  • Experiment with different herbs and spices to add flavor without relying on excessive salt or unhealthy condiments.

Meal Prep Tips

prepping meals in advance

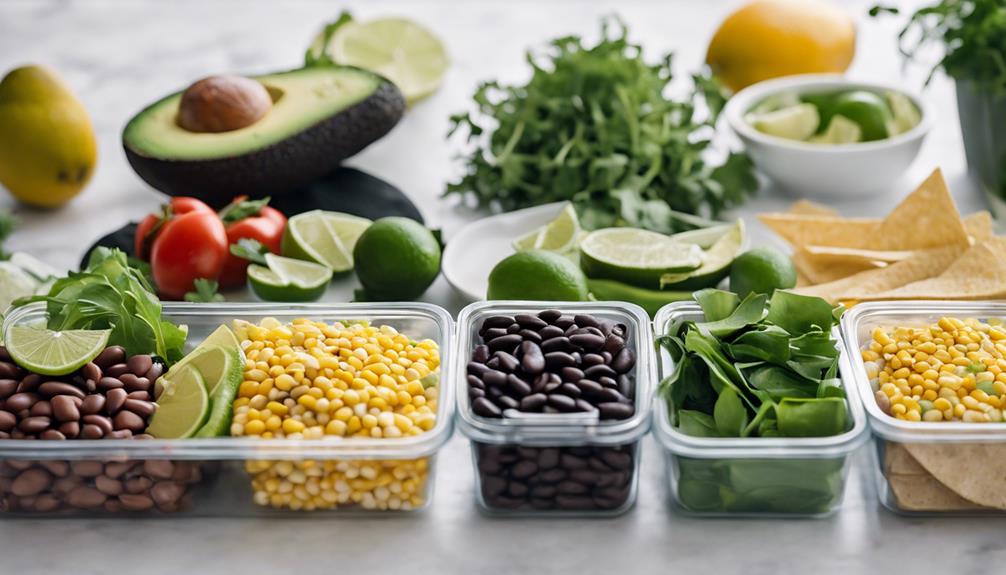
When prepping your meals, remember to:

  • Plan your weekly ingredients.
  • Prep in advance.
  • Use proper storage techniques to maintain freshness and flavor.

This will help you streamline your cooking process and guarantee that your salad ingredients stay crisp and delicious throughout the week.

Plan Weekly Ingredients

For efficient meal prep when planning your weekly ingredients for the Sweetgreen's Guacamole Greens Salad, consider prepping components like the cilantro lime vinaigrette, quick pickled red onions, and roasted chicken in advance.

  • Store ingredients like greens in a ziplock bag with a paper towel.
  • Keep tomatoes fresh daily to maintain their flavor.
  • Store the dressing in an airtight jar for up to 3 days for best freshness.
  • Assemble the salad as needed throughout the week by storing components like roasted chicken and tortilla chips separately.

Planning your meal prep ahead of time allows you to enjoy the convenience and variety of flavors in your weekly meal plan.

Prep in Advance

Consider preparing components like the cilantro lime vinaigrette, quick pickled red onions, and roasted chicken in advance for efficient meal prep when recreating Sweetgreen's Guacamole Greens Salad.

Advertisement

Making the cilantro lime vinaigrette a few days ahead can save you valuable time when assembling your salad. To maintain freshness, store unassembled salads in the fridge for up to four days. Keep your greens crisp by storing them in a ziplock bag along with a paper towel to absorb excess moisture.

It's advisable to prep cherry tomatoes daily to guarantee they remain fresh and flavorful in your salad. Additionally, store the red cabbage separately from the other salad ingredients for longer-lasting freshness.

Use Proper Storage

Proper storage is key to maintaining the freshness and quality of your meal prepped components for Sweetgreen's Guacamole Greens Salad. To guarantee your ingredients stay fresh and flavorful, follow these storage tips:

  • Store greens in a ziplock bag with a paper towel to absorb moisture and keep them fresh for longer.
  • Keep cherry tomatoes fresh by storing them separately from the salad mix and adding them in daily.
  • Store red cabbage in a separate container to maintain its crispness and prevent it from wilting.
  • Roast chicken separately from the salad ingredients and assemble the salad when ready to eat.

Additionally, don't forget about the cilantro lime vinaigrette. Store it in an airtight jar to maintain its freshness and flavors until you're ready to dress your salad.

Enjoying Your Homemade Creation

creating a delicious homemade meal

To fully savor the delicious flavors of your homemade Guacamole Greens Salad, make sure you pair it with the zesty cilantro lime vinaigrette. This tangy dressing adds a burst of freshness that complements the creamy avocado, crisp red onion, and juicy tomatoes in your salad. The hint of lime in the vinaigrette enhances the overall taste, creating a harmonious blend of flavors with every bite.

As you enjoy your salad, take note of the vibrant colors and textures that come together to make this dish not only delicious but visually appealing as well.

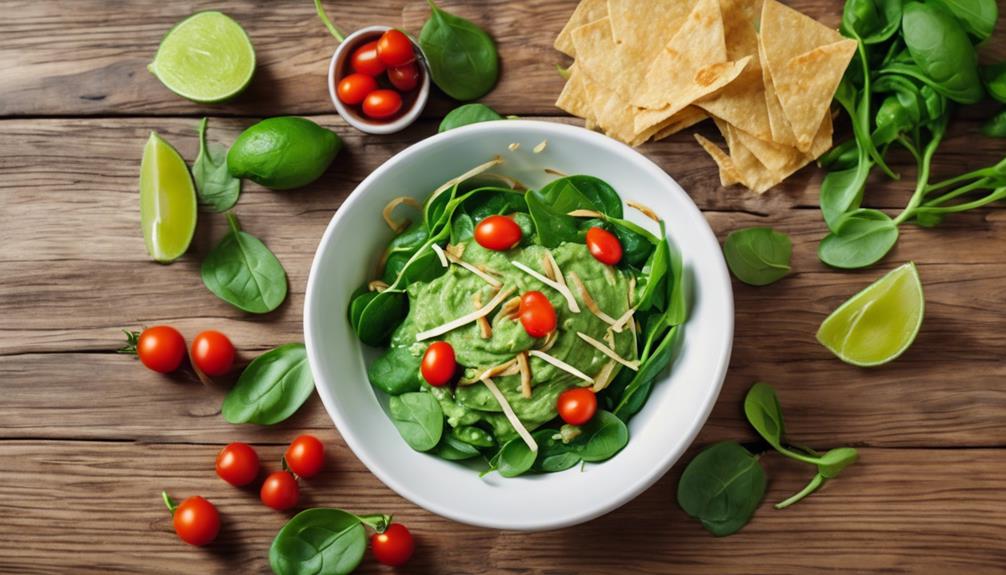
To elevate your dining experience further, consider customizing your Guacamole Greens Salad with additional ingredients like black beans, corn, or spicy broccoli. These personalized additions can add extra depth and variety to your salad, making each bite a unique and satisfying experience.

Advertisement

Remember to store the dressing separately for on-the-go convenience and toss the salad just before eating to maintain its freshness. After preparing and relishing your homemade creation, share your culinary masterpiece on Instagram and tag the recipe creator for a chance to inspire others with your creativity.

Frequently Asked Questions

Why Is Sweetgreen so Expensive?

Sweetgreen is expensive due to its commitment to high-quality, locally-sourced ingredients, sustainability efforts, and eco-friendly practices. Customizable, fresh options come at a premium. The convenience, consistency, and innovative menu justify the prices for many customers.

What Is Guacamole Salad Made Of?

Guacamole salad is made of mixed greens, chicken, tomatoes, red onion, and a cilantro lime vinaigrette. It offers a satisfying main course option with a balance of textures and flavors. Customize it with black beans, corn, jalapenos, or goat cheese for a personal touch.

Is a Guacamole Greens Salad Healthy?

Yes, a guacamole greens salad is healthy. Packed with nutrients like vitamins, minerals, protein, and healthy fats, it offers a balanced mix of macronutrients. Making it at home lets you control ingredients and portions for your goals.

How Many Calories in a Sweetgreen Guacamole Greens Salad?

You can find around 390 calories in a Sweetgreen Guacamole Greens Salad. It's a nutritious choice with 28g of total fat and 3.5g of saturated fat. Enjoy a satisfying meal providing 10mg of cholesterol and 240mg of sodium.

Advertisement

How Can I Make My Guacamole Greens Salad Healthier with the Addition of Three Bean Salad?

By incorporating a classic three bean salad recipe into your guacamole greens salad, you can significantly boost its nutritional value. The addition of protein-rich beans will increase the salad’s filling power and provide a satisfying meal. Plus, the combination of flavors will create a delicious and nutritious dish.

Conclusion

To sum up, recreating sweetgreen's famous Guacamole Greens salad at home is a simple and rewarding process. By carefully selecting fresh greens, preparing a delicious guacamole, and making a flavorful vinaigrette, you can enjoy a nutritious and satisfying meal.

With a healthier homemade alternative, meal prep tips, and a focus on nutritional benefits, you can easily enjoy this delicious salad in the comfort of your own home.

So why not give it a try and elevate your salad game today?

Advertisement
Continue Reading
Advertisement

Snacks

Savor Easy Homemade Flautas Tonight!

Indulge in the deliciousness of homemade-flautas with this simple recipe! Perfect for a family dinner or a festive gathering.

Published

on

homemade-flautas

Imagine the delicious smell of sizzling chicken with tangy salsa and melting cheese in your kitchen. Picture yourself getting ready to bake these tasty treats. Wait for them to come out golden and crispy. That’s the happiness homemade flautas bring!

Flautas are a big deal at my home. They’re perfect for family dinners, parties with friends, or watching the game. They’re always a hit. With their yummy filling and crunchy outside, everyone loves them.

Making flautas at home is simple. You need just a few ingredients and easy steps. You’ll make flautas that are way better than store-bought ones.

Homemade flautas are not only more delicious but also healthier. Baking them cuts down on oil, making them a treat you can enjoy guilt-free. Plus, you’ll save money and tailor them to your taste.

Key Takeaways:

  • Chicken Flautas are a flavorful and crispy delight that can be enjoyed for various occasions.
  • Making homemade flautas is easy and economical compared to store-bought versions.
  • Baking flautas in the oven instead of deep frying them is a healthier option.
  • You can customize the filling of flautas to suit your preferences.
  • Savor the joy of homemade flautas tonight and discover a delicious new addition to your repertoire!

What are Flautas?

Flautas are a tasty Mexican food with savory fillings wrapped in a flour tortilla. Instead of deep frying, this recipe uses baking for a healthier option. They look like small pipes or flutes, which is how they got their name.

The fillings inside are usually chicken or beef, cooked and seasoned just right. They are then rolled tightly in a tortilla and cooked. This mix of flavors is incredibly satisfying.

Advertisement

“Flautas are an amazing Mexican dish. They combine crispy tortillas with delicious fillings for a great taste!”

What is Inside a Flauta?

A flauta’s filling usually includes shredded meat like chicken or beef, melted cheese, and a flavorful sauce. We use shredded chicken, cream cheese, Monterey Jack, salsa, and spices for this recipe. These ingredients blend together perfectly to make a tasty filling.shredded meat, melted cheese, flavorful sauce

Flautas are all about the harmonious blend of tender shredded meat, ooey-gooey melted cheese, and a tangy flavorful sauce. These ingredients work together to create a symphony of flavors with every bite.

The chicken is cooked until it’s tender and flavorful. Cream cheese makes the filling creamy and rich. Monterey Jack cheese adds a gooey touch. Salsa gives a tangy, spicy flavor, lifting the flautas’ taste. Balanced seasonings turn the filling into something you’ll want more of.

Experimenting with Flavors

You’re not limited to chicken. Try beef or pork for different tastes. Each meat adds a unique flavor. You can also change up the cheese for new cheesy flavors. The choice is all yours, from mild and creamy to sharp and tangy.

Want more flavor? Add spices like cumin or smoked paprika. For a smoky, spicy taste, use chipotle. Prefer something milder? Try a cilantro lime crema or honey mustard sauce. They make your flautas even tastier.

Advertisement
Ingredient Taste
Shredded Chicken Savory
Cream Cheese Creamy
Monterey Jack Cheese Melty
Salsa Tangy
Seasonings Well-balanced

The Difference Between Flautas and Taquitos

Flautas and taquitos are both tasty Mexican meals, great for when you want something quick. They may look alike, but they are different in a key way: the tortilla. This difference changes the taste and experience of each dish.

Flautas are made with flour tortillas, giving them a soft, slightly chewy feel. The tortillas are big and flute-shaped, which is why they’re called “flautas.” Flour tortillas make the dish uniquely flavorful, making it a favorite for many.

On the other hand, taquitos use corn tortillas. These tortillas are smaller and roll up easily, perfect for stuffing with fillings. Corn tortillas bring a crispiness that flour tortillas can’t, adding a nice crunch with every bite.

Both flautas and taquitos can hold similar fillings, like shredded meat, cheese, and tasty sauces. This makes both great for a variety of flavors.

Understanding the tortilla difference helps you pick. Choose flautas with flour tortillas for softness or taquitos with corn tortillas for crunch. It’s all about what you enjoy in texture and taste.

Advertisement
Flautas Taquitos
Flour tortillas Corn tortillas
Larger and shaped like a flute Smaller and cylindrical shape
Soft and slightly chewy texture Crunchy texture

Now you know the key differences between flautas and taquitos. Why not try making both at home? Whether you’re into the softness of flour tortillas or the crisp of corn, you’ll find both to be delicious. Enjoy making and eating!Flautas and Taquitos

Source:

https://www.example.com/flautas-taquitos-difference

Serving and Dipping Options for Flautas

There are many ways to enjoy chicken flautas. Meal options and tasty sides can make your dining special. Whether for a main dish or a party snack, here are some ideas to make your flauta meal better.

Serving Flautas as a Meal

Want a fulfilling meal? Have chicken flautas on their own. Pair them with a green salad or rice and beans. It’s a blend of tastes and textures that highlight the flautas’ crunch.meal options

Delectable Dipping Sauces

To make your chicken flautas tastier, try some dipping sauces. Sour cream and guacamole add creamy, tangy flavors. Salsa offers zestiness, and Mexican crema brings richness. For something mild, ranch dressing is perfect.

Presentation is Key

How you serve flautas matters. Arrange them on fresh lettuce to make them look appealing. The lettuce’s green boosts the flautas’ golden brown. Add onion, avocado, pico de gallo, and cheddar cheese for more taste and color.

Explore Your Creativity

Feel free to mix things up with your meal and sauces. Try new salads like a citrus or corn and black bean salad. Create unique dipping sauces. There are endless options!

Summary

Serving chicken flautas gives you many choices. Serve them with salads or rice and beans for meals or snacks. Adding different sauces will make them even better. Enjoy these tasty flautas and be creative!

Advertisement

Tips for Making Chicken Flautas

You can choose either leftover chicken or cook your own for Chicken Flautas. Using leftover chicken is easy. But, if you start from scratch, try cooking chicken breasts in an Instant Pot. Add chicken broth and your favorite seasonings for flavor.

To make the chicken tastier, use spices. Cumin, chili powder, garlic powder, or paprika work well. They add great flavor to your flautas.

We suggest baking the flautas for a healthier option. Yet, for more crunch, try air frying or pan-frying them. Air frying gives a crisp texture similar to baking. Pan-frying, however, requires a lot of oil for a golden finish.

Feel free to experiment with cooking methods and spices. This will help you make Chicken Flautas that match your taste. It’s fun to get creative and personalize your dish!

Benefits of Homemade Shredded Chicken

Using leftover chicken or making your own lets you save money. Plus, you can choose the flavors and seasonings. It’s perfect for turning leftovers into a tasty meal.
shredded chicken options

Keep these tips in mind as you start your Chicken Flautas journey. Have fun cooking and enjoy your delicious creation!

Feedback from Readers

Hear what our readers say about their experience with these Chicken Flautas!

Advertisement

“A Big Hit at Dinner Parties”

“I made these flautas for a dinner party, and they were a huge hit! Everyone loved the crispy, flavorful taste. They really pleased the crowd!” – Sarah

“Easy and Delicious”

“I needed an easy dinner recipe and found this one. The flautas were simple to make and delicious. Even my picky eaters liked them.” – Emily

“Perfect for Leftovers”

“I made extra flautas for dinner. They were incredible that night, and great for snacks and lunches the next day. This dish is versatile and satisfying!” – Mark

“A New Family Favorite”

“I tried this recipe last week for the first time. It’s already a new favorite in our family. We loved the crispy outside and flavorful filling. Can’t wait to make them again!” – Jennifer

These are just a few of the many good reviews we’ve gotten on our Chicken Flautas recipe. Try it out and see why it’s so popular!

Variations and Substitutions for Chicken Flautas

This recipe uses shredded chicken and pepper jack cheese. But, you have other choices. You can pick beef, pork, beans, or tofu instead of chicken. Try different cheeses like cheddar or Oaxaca. This way, you make the flautas just how you like them.

Protein Options

Looking for something other than chicken? No problem. Shredded beef makes the flautas hearty and tasty. Or use pulled pork for a smoky flavor. Vegetarians can go for black beans or tofu. Each choice brings its own special taste and texture.

Cheese Options

Pepper jack is great, but there’s more. Cheddar brings a rich, sharp taste. For something milder, try Oaxaca cheese. It’s smooth and creamy. Feel free to mix and match cheeses to find your perfect flauta.

Vegetarian Options

Vegetarian flautas? Easy. Fill them with seasoned black beans for a hearty option. Or use tofu, which you can crumble, sauté, and spice up. Both are great ways to enjoy flautas without meat, packed with flavor.

Advertisement

There are many ways to make flautas your own. Pick from beef, pork, beans, or tofu. Choose cheddar, Oaxaca, or pepper jack cheese. Mix it up and find what you love. The adventure in cooking is all about trying new things!

Protein Options Cheese Options
Shredded beef Cheddar cheese
Pulled pork Oaxaca cheese
Black beans (vegetarian) Pepper jack cheese
Tofu (vegetarian)

Freezing Chicken Flautas

For those who want to have Chicken Flautas ready for later, freezing them is a smart choice. It’s perfect for meal planning or getting ready for hectic days. To freeze and reheat your Chicken Flautas, follow these instructions:

Freezing Baked Chicken Flautas:

  1. Let the baked flautas cool down completely.
  2. Put the cooled flautas in a container that seals well, keeping them separate.
  3. Write what’s inside the container and the date on it.
  4. Keep the container in the freezer and use within 3 months.

Freezing Unbaked Chicken Flautas:

  1. Get the flautas ready as the recipe suggests.
  2. Arrange the unbaked flautas on a sheet that has been lined.
  3. Freeze them on the sheet until they’re completely solid.
  4. Move the frozen flautas into a bag that can be sealed. Take out all extra air.
  5. Put the date and what’s in the bag.
  6. The bag can stay in the freezer for up to 3 months.

Reheating Chicken Flautas:

When you want to eat your frozen Chicken Flautas, you can warm them up in two ways:

  • Oven: Heat your oven to 375°F (190°C). Spread the flautas on a sheet and bake for about 15-20 minutes. They should be hot and crispy.
  • Microwave: Place the flautas on a plate that’s safe for the microwave. Use high power for 2-3 minutes until they’re warm.

After heating, enjoy your Chicken Flautas with your best-loved dips, sides, or toppings. It makes having a tasty homemade meal easy and fast!

Freezing Chicken Flautas

Conclusion

Homemade Chicken Flautas are versatile and perfect for any occasion. They’re great for family dinners, snacks, or parties. This easy recipe lets you whip up a flavorful meal. Best of all, you can pick your filling, like the classic chicken and cheese, or mix it up.

Making Chicken Flautas is not only simple, but it’s also a quick choice for weeknights. With a few ingredients, you’ll have a tasty dinner ready fast. Plus, leftovers are excellent for snacks or lunch the next day.

Ready to try this do-it-all dish? Whether baked, air fried or pan-fried, your flautas will be a hit. Homemade beats store-bought every time. So get creative, enjoy the process, and savor the deliciousness of your homemade chicken flautas!

Advertisement

FAQ

What are flautas?

Flautas are a tasty Mexican dish. They have a savory filling like chicken or beef. This filling is wrapped in a flour tortilla and can be deep-fried or baked.

What is inside a flauta?

Inside a flauta, you’ll find shredded meat, like chicken or beef. There’s also melted cheese and a flavorful sauce.

What is the difference between flautas and taquitos?

Flautas use flour tortillas, but taquitos use corn tortillas. That’s the main difference between them.

How should flautas be served?

Serve flautas as a complete meal or with sides. Good choices include a green salad or rice and beans. Don’t forget the dipping sauces!

What are the tips for making chicken flautas?

For chicken flautas, use leftover or freshly cooked shredded chicken. Spice up the chicken for extra flavor.Advertisement

What have readers said about this chicken flautas recipe?

Those who tried the chicken flautas recipe loved it. They said it was easy to make and tasted great.

Can I make variations and substitutions for chicken flautas?

Definitely! Feel free to use beef, pork, or vegetarian proteins instead of chicken. Try different cheeses too.

Can chicken flautas be frozen?

Yes, you can freeze chicken flautas before or after baking. Use an airtight container or freeze them on a baking sheet.

How can I reheat frozen chicken flautas?

To reheat, use the oven or microwave. Both work well for frozen chicken flautas.

Can I Use Garlic Herb Butter in My Homemade Flautas Recipe?

Yes, you can absolutely use homemade garlic herb butter recipe in your flautas. The rich and aromatic flavors of the garlic and herbs will add a delicious twist to your traditional flautas recipe. Simply spread a thin layer of the butter on the tortillas before filling and rolling them up. Enjoy!

Advertisement

Source Links

Continue Reading

Snacks

Easy Homemade Garlic Herb Butter Recipe

Elevate your cooking with this easy homemade-garlic-herb-butter recipe, perfect for adding a flavorful touch to any dish!

Published

on

homemade-garlic-herb-butter

Imagine this scene: you’re throwing a dinner party. Your friends are eager for the meal you prepared. The smell of sizzling steaks fills the room, boosting your excitement. But what can turn a great meal into an unforgettable one? The secret is homemade garlic herb butter.

Making this flavorful butter is simple and quick. You can use it to enhance almost any dish on your menu. Spread it on warm bread, put it on top of grilled steaks, or stir it into pasta. This butter will impress your guests. And it only needs 10 minutes to prepare!

Key Takeaways:

  • Making homemade garlic herb butter is not hard and makes your food taste amazing.
  • You only need a few ingredients and 10 minutes to prepare this recipe.
  • You can use garlic herb butter in many dishes to make them taste better.
  • Keep your garlic herb butter in a tight container in the fridge for a week, or freeze it for three months.(pkg>
  • Try different herbs and spices with your garlic herb butter for new tastes.

Ingredients for Homemade Garlic Herb Butter

To make your own delicious homemade garlic herb butter, you’ll need these ingredients:

  • 1 cup unsalted butter, softened
  • 1 tablespoon minced garlic
  • 1/4 cup grated Parmesan cheese
  • 1 teaspoon garlic salt
  • 1 teaspoon Italian seasoning
  • 1/2 teaspoon ground black pepper
  • 1/4 teaspoon ground paprika

You can find these ingredients at most grocery stores. Adjust the seasonings to suit your taste. If you love garlic, add more. If you’re watching your salt intake, use less.

Now you have everything you need. Let’s move on to learn how to make your delicious garlic herb butter!

Ingredients for Homemade Garlic Herb Butter

Ingredients Measurement
Unsalted butter, softened 1 cup
Minced garlic 1 tablespoon
Grated Parmesan cheese 1/4 cup
Garlic salt 1 teaspoon
Italian seasoning 1 teaspoon
Ground black pepper 1/2 teaspoon
Ground paprika 1/4 teaspoon

How to Make Homemade Garlic Herb Butter

Follow these simple steps to make your own homemade garlic herb butter:

Advertisement
  1. In a bowl, combine the softened butter, minced garlic, grated Parmesan cheese, garlic salt, Italian seasoning, black pepper, and paprika.
  2. Mix all the ingredients together until they are well-combined and smooth.
  3. Taste and adjust the seasonings if necessary.
  4. Transfer the garlic herb butter to a shallow airtight container for storage.

By doing this, you’ll have a delicious and tasty homemade garlic herb butter.homemade garlic herb butter recipe

Homemade garlic herb butter is a simple and versatile condiment that you can make in just a few steps. The mix of butter, garlic, herbs, and Parmesan cheese makes a flavorful spread. It can be used in garlic bread, sautéed vegetables, or grilled meats. This butter adds a special garlic flavor to your meals.

Uses for Homemade Garlic Herb Butter

Homemade garlic herb butter is very flexible. You can use it in many ways to bring extra taste to your meals. Here are some great ways to use this yummy butter:

  1. Spreading on bread or toast to make garlic bread
  2. Topping grilled or roasted steaks, chicken, or seafood
  3. Mixing into cooked pasta or rice for added flavor
  4. Incorporating into mashed potatoes or roasted vegetables
  5. Using as a dipping sauce for vegetables or breadsticks

You can start with these ideas and then try it in other recipes. This butter makes your meals special and tasty. It brings a fun twist to any dish, making your food unforgettable.

garlic herb butter uses

Storing Homemade Garlic Herb Butter

After making your tasty homemade garlic herb butter, storing it right is key. You want it to stay fresh and flavorful. Here’s how to keep your garlic herb butter just perfect:

  1. Transfer to an airtight container: Move the garlic herb butter to a shallow airtight container. This stops outside smells or tastes from getting in. It keeps the butter fresh.
  2. Refrigerate for up to one week: Put the container in the fridge and keep the garlic herb butter for up to one week. This keeps it safe to eat and tasty.
  3. Freeze for long-term storage: For keeping your garlic herb butter longer, freeze it. When frozen, it keeps its flavor and quality for three months.
  4. Divide into smaller portions: For easy use, split the garlic herb butter into smaller pieces. You can freeze it in ice cube trays by tablespoon. Or, use freezer-safe containers for individual servings.

By storing your homemade garlic herb butter correctly, you can enjoy its great flavors anytime. It doesn’t matter if it’s a week or months later. You’ll have a tasty and useful ingredient for your cooking.storing garlic herb butter

The photo shows why keeping your garlic herb butter in an airtight container is smart. It stays fresh and keeps its great flavors.

Tips for Making Homemade Garlic HerbLo Butter

Making your own garlic herb butter is both fun and tasty. Here are some useful tips to get great results:

  1. Use softened butter: Soft butter blends easily. This gives your butter a smooth, creamy texture.
  2. Adjust the seasonings: Change the seasonings to fit what you like. You can add more or less garlic, salt, or others for the right flavor.
  3. Consider vegan or dairy-free alternatives: For those on a vegan or dairy-free diet, try margarine or plant-based butter. This way, you can still enjoy this tasty butter.
  4. Use minced garlic from a jar: No fresh garlic? No problem. Jarred minced garlic works well too. It gives a similar taste.
  5. Get creative with herbs and seasonings: Feel free to experiment with different herbs and spices. Adding rosemary, thyme, or even some heat with red pepper flakes can be fun.

Following these tips will help you make a delicious garlic herb butter. It’ll enhance the taste of your meals perfectly.tips for making homemade garlic herb butter

Nutrition Facts of Homemade Garlic Herb Butter

The nutrition info for homemade garlic herb butter can change a bit with different ingredients and amounts. Generally, a tablespoon of this butter has around:

  • Calories: 109
  • Fat: 12g
  • Carbs: 0g
  • Protein: 1g
  • Sodium: 214mg
  • Cholesterol: 32mg

These numbers come from the recipe’s suggested items. However, what you use and its brand can cause slight changes.garlic herb butter

“The nutrition information for homemade garlic herb butter may vary slightly depending on the specific ingredients and quantities used.”

Elevating Your Cooking with Homemade Garlic Herb Butter

Homemade garlic herb butter can make your cooking special. It turns simple dishes, like garlic bread or grilled steaks, into something amazing. Garlic, herbs, and Parmesan cheese mix together, creating a tasty ingredient. This takes meals to a new level.elevate cooking with garlic herb butter

Using it in recipes boosts flavor and adds elegance. It gives your food a lovely smell and exciting taste. The butter’s creaminess makes every bite better.

It’s great because you can use it in many dishes. Spread it on bread for awesome garlic bread. It makes steaks taste like they’re from a fancy restaurant. Vegetables cooked in it become a delicious side dish.

“Garlic herb butter adds a burst of savory goodness and elegance to your dishes.”

Be creative with this butter. You can mix in different herbs like rosemary or basil. Use it on chicken or pork for a tasty main course. Or melt it on potatoes for extra flavor. It makes food delicious.

Advertisement

Experience the Magic of Homemade Garlic Herb Butter

Once you try it, you won’t go back to store-bought. It makes your cooking better and impresses everyone. It’s a secret weapon in the kitchen.

So, start making your garlic herb butter. Explore new flavors in your cooking!

Garlic Herb Butter for Steak and Prime Rib

Garlic herb butter is the best when you’re making steak or prime rib. It makes the meat taste rich and flavorful. This combo creates a delightful meal.

Just melt a pat of garlic herb butter over your cooked meat. It mixes in with the juicy flavors. You’ll get a taste that feels like it’s from a top restaurant.

Steak lovers have always loved garlic herb butter. It makes the beef taste better and richer. Whether you love tenderloin or a ribeye, garlic herb butter is a game-changer.

Advertisement

Prime rib also goes great with garlic herb butter. It’s already tender and tasty. Garlic herb butter makes it unforgettable.

To make this section look better, here’s a steak with garlic herb butter:garlic herb butter for steak and prime rib

If you’re having a barbecue or a special dinner, try adding garlic herb butter. It will wow your guests and show off your cooking skills.

Creative Uses for Homemade Garlic Herb Butter

Garlic herb butter is not just for bread, steaks, and veggies. There are endless fun ways to use this tasty mix. Here are some unique ideas to try:

  1. Spread it on corn on the cob for a savory twist instead of regular butter.

  2. Toss cooked pasta with it plus grated Parmesan. This makes a simple, tasty pasta dish.

  3. Use it to season roasted potatoes or sweet potatoes. This adds extra flavor.

  4. Melt it over grilled or roasted seafood, like shrimp or scallops. It gives a burst of garlic herb taste.

  5. Mix it into mashed cauliflower or carrots. It creates a flavorful side dish.

Be creative and try mixing it in different ways to find your own favorite garlic herb butter uses.

Conclusion

Homemade garlic herb butter is simple to make and changes your meals for the better. You decide the flavors, making it perfect for your taste. It’s great on bread, meat, or mixed in dishes.

Advertisement

Making your own garlic herb butter is easy with just a few ingredients. Garlic, herbs, and Parmesan cheese mix to make a tasty blend. Feel free to try different herbs to make it your own.

Why go for the usual when you can make something special? Upgrade your meals with homemade garlic herb butter. It’s fun to create and delicious to eat.

FAQ

What is garlic herb butter?

Garlic herb butter is made from softened butter, garlic, Parmesan cheese, and seasonings. These seasonings include garlic salt, Italian seasoning, pepper, and paprika. It’s flavorful and can be used in many dishes.

How do I make homemade garlic herb butter?

Start with softened butter, garlic, Parmesan cheese, garlic salt, Italian seasoning, pepper, and paprika. Mix them until they’re smooth. Add more seasonings if you like. Then, put the butter in a container for storage.

What can I use garlic herb butter for?

Use it on bread for garlic bread, or on meats and seafood. It’s great in pasta, rice, potatoes, and veggies. You can also use it as a dip for vegetables or breadsticks.Advertisement

How should I store homemade garlic herb can be stored?

Put it in a shallow airtight container in the fridge for a week. For longer storage, freeze it for up to three months. Freeze in a single block or in ice cube trays for easy use.

Do you have any tips for making homemade garlic herb butter?

Use softened butter and adjust seasonings as you like. Try margarine or vegan butter if needed. Use jarred garlic if fresh isn’t available. Feel free to experiment with different herbs and spices.

What are the nutrition facts of homemade garlic herb butter?

Nutritional values can change based on ingredients. But, a tablespoon typically has 109 calories, 12g fat, 0g carbs, 1g protein, 214mg sodium, and 32mg cholesterol.

How can homemade garlic herb butter elevate my cooking?

It adds rich flavor to many recipes. It can turn simple dishes like bread, grilled steaks, or sautéed vegetables into something special.

What is a popular use for garlic herb butter?

It’s great on steak or prime rib. The butter’s flavors make the meat even tastier. Just melt it on top of your steak or rib to enjoy.Advertisement

Are there any creative uses for homemade garlic herb butter?

Yes. Try it on corn, with pasta and Parmesan, or on potatoes. It’s also good on seafood and in mashed veggies like cauliflower and carrots.

What are some key takeaways from this article about homemade garlic herb butter?

It’s simple to make and very versatile. Use it in breads, meats, and veggies for extra flavor. Experiment with herbs and seasonings to make it unique to your taste.

Can I Use Rosemary and Garlic Infused Olive Oil in Place of Garlic Herb Butter in Recipes?

Yes, you can absolutely use rosemary and garlic infused olive oil in place of garlic herb butter in recipes. The rosemary and garlic olive oil will add a unique flavor to your dishes and can be a healthier alternative to butter. It will infuse your dishes with rich, aromatic flavors.

Source Links

Continue Reading

Snacks

Caprese Endive Boats: A Fresh, Elegant Appetizer

Delight in the simplicity of caprese-endive-boats, the perfect blend of crisp endive leaves with classic Caprese flavors for an elegant appetizer.

Published

on

caprese-endive-boats

Imagine this: a summer dinner party in your beautiful backyard. The setting sun creates a soothing glow, and a soft breeze moves through the trees. Your friends chat and laugh, enjoying cool glasses of wine. They look excited as you serve the first course. Then, they see the Caprese Endive Boats on the serving platter. Their expressions change to delight.

Caprese Endive Boats are a top choice for fresh and elegant starters. They combine the tasty flavors of a Caprese salad with the crunch of endive leaves. This mix creates a perfect balance of easy-going and chic. Every bite is a mix of sweet cherry tomatoes, soft mozzarella, aromatic basil, and crisp, slightly bitter endive.

These appetizers fit any event, fancy dinners or laid-back hangouts. They’re also quick to put together. This means more fun time with your guests and less time cooking. And the biggest perk? Caprese Endive Boats will wow even the pickiest eaters.

Want to make your appetizers the talk of the party? Let’s get started on a simple, delicious recipe for Caprese Endive Boats. They’ll have everyone asking for seconds.

Key Takeaways:

  • Caprese Endive Boats are an elegant and fresh appetizer that combines the flavors of a Caprese salad with crisp endive leaves.
  • They are perfect for any occasion, from formal dinner parties to casual backyard gatherings.
  • Capresse Endive Boats are easy to assemble, allowing you to spend more time with your guests.
  • This recipe combines juicy cherry tomatoes, creamy mozzarella, fragrant basil, and the subtle bitterness of endive.
  • Impress your guests with these delightful and sophisticated appetizers.

Ingredients for Caprese Endive Boats

Gather the ingredients below to whip up the tasty Caprese Endive Boats recipe:

  • Endive leaves
  • Tiny pearl mozzarella balls
  • Cherry tomatoes
  • Fresh basil
  • Olive oil
  • Grated Parmesan
  • Red pepper flakes
  • Kosher salt
  • Freshly cracked black pepper

These ingredients mix together to give every bite of Caprese Endive Boats a perfect harmony of flavors, textures, and colors.

Advertisement

Benefits of Each Ingredient

Ingredient Health Benefits
Endive leaves Low in calories and high in fiber, aiding in weight management and promoting digestive health.
Mozzarella balls Provide protein and calcium for bone health and muscle repair.
Cherry tomatoes Packed with antioxidants and vitamins, supporting overall health and boosting the immune system.
Fresh basil Contains anti-inflammatory properties and adds a refreshing herbaceous flavor.
Olive oil Offers heart-healthy monounsaturated fats and antioxidants.
Grated Parmesan Enhances the dish with a nutty flavor and provides a good source of calcium and protein.
Red pepper flakes Adds a touch of heat and can boost metabolism due to the compound capsaicin.
Kosher salt Enhances the flavors of the other ingredients and provides essential minerals.
Freshly cracked black pepper Brings a subtle spicy and aromatic taste to the dish.

Instructions for Making Caprese Endive Boats

To make the delicious Caprese Endive Boats, follow these simple steps:

  1. Start by separating the endive leaves and arranging them on a serving platter.
  2. In a medium bowl, mix the mozzarella, tomatoes, basil, olive oil, Parmesan, red pepper flakes, salt, and pepper together.
  3. Toss the ingredients until they are well combined. This will mix the flavors of mozzarella, tomatoes, and basil perfectly with olive oil and Parmesan.
  4. Fill each endive leaf with a heaping tablespoon of the mixture. The crispness of endive mixed with the delicious filling is amazing.

Your Caprese Endive Boats are now ready to enjoy. These elegant appetizers combine fresh and vibrant flavors for a great taste.

“The combination of the crisp endive and flavorful filling will create the perfect balance.”

Here is an image of the finished Caprese Endive Boats for a visual guide:Caprese Endive Boats

Ingredients Quantity
Endive leaves Bunch
Mozzarella 1 cup
Tomatoes 1 cup, cherry or grape
Basil ¼ cup, fresh
Olive oil 2 tablespoons
Parmesan ¼ cup, grated
Red pepper flakes ½ teaspoon
Salt to taste
Pepper to taste

Serving and Variations for Caprese Endive Boats

Caprese Endive Boats are great for different events. You can tailor them to match your taste and the setting. They’re perfect for fancy dinners or casual gatherings. Impress your guests with these tasty starters. Here are tips on how to serve them, along with ideas for variations, toppings, and garnishes:

Serving Suggestions

These boats can be the main appetizer or part of a bigger selection. They fit well with many dishes. Here’s how to serve them:

  • Put the Caprese Endive Boats on a dish with other starters for a vibrant mix.
  • Combine them with a salad or grilled veggies for a light meal.
  • Have them as a side dish with grilled meats or seafood.

Variations

The classic version is great, but trying new variations can spice things up. Here are some ideas:

Switch cherry tomatoes for sun-dried ones for stronger flavor.

Use creamy burrata instead of mozzarella for a luxurious twist.

Add slices of prosciutto or bacon for extra savory taste.

Toppings and Garnish

Enhance your Caprese Endive Boats with toppings and garnishes. Here are some ideas:

Advertisement
  • A balsamic glaze adds a tangy, sweet touch.
  • Fresh chopped herbs like basil or parsley offer freshness.
  • Extra mozzarella balls or grated Parmesan add creaminess.

Be bold and try different mixes to find your favorite. There are so many ways to enjoy Caprese Endive Boats!Caprese Endive Boats

Health Benefits of Caprese Endive Boats

Caprese Endive Boats taste great and are good for you. They have healthy ingredients like endive, tomatoes, basil, olive oil, and mozzarella. These make the appetizer a smart choice for your health.

Endive is a vegetable that doesn’t have many calories but is full of fiber. It helps you manage your weight and keeps your digestion moving smoothly.

Tomatoes shine with their bright red color. This color means they have antioxidants like lycopene that protect your cells. They’re also packed with vitamins A and C, which keep your immune system strong.

Basil brings a fresh taste and smell, plus it fights inflammation. This helps your body stay healthy and comfortable.

Adding olive oil to Caprice Endive Boats boosts their health benefits. Olive oil is full of good fats that help your heart. It also helps your body absorb vitamins better, especially from tomatoes and basil.

Mozzarella adds protein, which is important for your body’s repair and growth. It also helps you feel full for a longer time.

Advertisement

By choosing Caprese Endive Boats, you get a delicious snack that’s also packed with nutrients. It’s not just food; it’s also a way to take care of yourself.Health Benefits of Caprese Endive Boats

Give this tasty and healthy appetizer a try. It will impress your friends and be good for your body too.

Caprese Endive Boats as a Party Appetizer

Are you planning a party and need the perfect appetizer? Caprese Endive Boats are a fantastic choice. They’re easy to make and are a hit with guests. Plus, they pack a punch of fresh flavors.

For party appetizers, how they look is super important. Caprese Endive Boats score big here. They have juicy tomatoes, creamy mozzarella, and bright basil in crisp endive leaves. This mix is not only pretty but tastes amazing, too.party appetizer

It’s simple to put these appetizers together. Start by spreading out the endive leaves on a dish. Then mix mozzarella, tomatoes, basil, olive oil, salt, and pepper in a bowl. Scoop this mix into the leaves, and you’re done.

You can tweak Caprese Endive Boats to your liking. Try adding extra toppings or some garnish. A little balsamic glaze or some chopped herbs can make them even better.

Caprese Endive Boats are perfect for any kind of party. They’re impressive and delicious appetizers that everyone loves. So, make sure to include them in your next party menu!

Advertisement

Caprese Endive Boats for Special Diets

Caprese Endive Boats cater to different dietary needs. They’re great for vegetarians or anyone on a gluten-free diet. These boats make a tasty addition to your dishes.

These dishes are gluten-free, offering a great option for those with gluten sensitivities. With endive leaves, mozzarella balls, cherry tomatoes, and more, they’re delicious without gluten.

Vegetarians will love Caprese Endive Boats too. They combine crisp endive, creamy mozzarella, juicy tomatoes, and basil. This blend is both flavorful and satisfying.

Remember, while they’re vegetarian and gluten-free, always check product labels. It’s key to ensure they meet your dietary needs. Ingredients can vary, so checking is important. special diets

Caprese Endive Boats – Vegetarian & Gluten-Free Recipe

Here’s a simple vegetarian and gluten-free Caprese Endive Boat recipe:

Ingredients Instructions
  • Endive leaves
  • Mozzarella balls
  • Cherry tomatoes
  • Fresh basil
  • Olive oil
  • Grated Parmesan
  • Red pepper flakes
  • Kosher salt
  • Freshly cracked black pepper
  1. Separate the endive leaves and arrange them on a serving platter.
  2. In a medium bowl, combine the mozzarella balls, cherry tomatoes, fresh basil, olive oil, grated Parmesan, red pepper flakes, kosher salt, and freshly cracked black a href=”pepper.com”>pepper. Mix them well.
  3. Spoon the mixture into each endive leaf.
  4. Serve and enjoy!

Caprese Endive Boats are elegant and perfect for anyone looking for a fresh, special diet appetizer. They’re ideal for gatherings or a quick, tasty snack. These boats will impress your guests.

Caprese Endive Boats: A Versatile Dish

Caprese Endive Boats are perfect for any event. Not just an appetizer, they can be a side or a refreshing salad. This dish is surprisingly versatile and always a hit.

Advertisement

As an appetizer, they are a classy choice. The mix of crunchy endive, soft mozzarella, ripe tomatoes, and basil is fantastic. The look of the dish is just as inviting as its taste.

Serving them as a side dish works great too. They pair nicely with grilled meats, seafood, or vegetarian options. The unique flavors and textures enhance any main dish.

Want a fresh salad? Just chop the endive and mix it with the other ingredients. You now have a Caprese Endive Salad. It’s perfect by itself or alongside other dishes.

So, whether it’s an appetizer, side dish, or salad, Caprese Endive Boats can be adapted. They meet your tastes and impress your guests every time.

Conclusion

Caprese Endive Boats mix the classic Caprese salad’s flavors with crisp endive leaves. They are a fresh and stylish snack. This dish is also very versatile. You can add lots of tasty toppings and garnishes. It’s perfect for a fancy dinner or a light appetizer.

Advertisement

These boats shine with their lively colors, nice textures, and blend of tastes. They strike a balance between being simple and fancy. They are eye-catching and simple to make. This makes them great for both beginners and seasoned cooks.

Why not try making this recipe today? It’s simple and full of flavor, a hit with everyone. Serve them at a fancy event or as a tasty snack. Caprese Endive Boats will make any moment special with their Italian flair. Enjoy making and eating this delightful dish!

FAQ

What are Caprese Endive Boats?

Caprese Endive Boats are a tasty and fancy snack. They mix Caprese salad’s fresh tastes with crunchy endive leaves.

What ingredients do I need to make Caprese Endive Boats?

You need endive leaves, tiny mozzarella balls, cherry tomatoes, and fresh basil. Also gather olive oil, Parmesan, red pepper flakes, kosher salt, and pepper.

How do I make Caprese Endive Boats?

Begin by separating the endive leaves and placing them on a platter. AdvertisementIn a bowl, mix mozzarella, tomatoes, basil, olive oil, Parmesan, red pepper, salt, and pepper. Mix them well. Next, fill each leaf with a heaping spoonful of the mix.

How can I serve Caprese Endive Boats?

You can serve them alone as a snack or with other dishes. Feel free to add more toppings or garnishes to match your taste.

What are the health benefits of Caprese Endive Boats?

These boats are tasty and healthy. Endive is low in calories and high in fiber, which is good for your weight and digestion. Tomatoes add antioxidants and vitamins. Basil provides anti-inflammatory benefits. Plus, olive oil and mozzarella add healthy fats and protein.

Are Caprese Endive Boats a good choice for party appetizers?

Indeed, they’re great for parties. They’re easy to make, look good, and give a fresh flavor burst.

Are Caprese Endive Boats suitable for special diets?

They’re gluten-free and vegetarian, so they fit many special diets. But, if you have dietary restrictions or allergies, check the ingredients first.Advertisement

How can Caprese Endive Boats be enjoyed?

Enjoy them as an appetizer, or as a side. Or, make a Caprese Endive Salad by chopping the leaves and mixing them with the filling.

How Can I Use Endive in Other Appetizer Dishes Like Caprese Grilled Cheese?

Endive can add a fresh and crunchy element to your flavorful caprese grilled cheese. Try using endive leaves as a bed for your grilled cheese bites, or add chopped endive to your caprese salad for a unique twist. The slightly bitter flavor of endive complements the richness of the grilled cheese.

Source Links

Continue Reading

Trending