Snacks
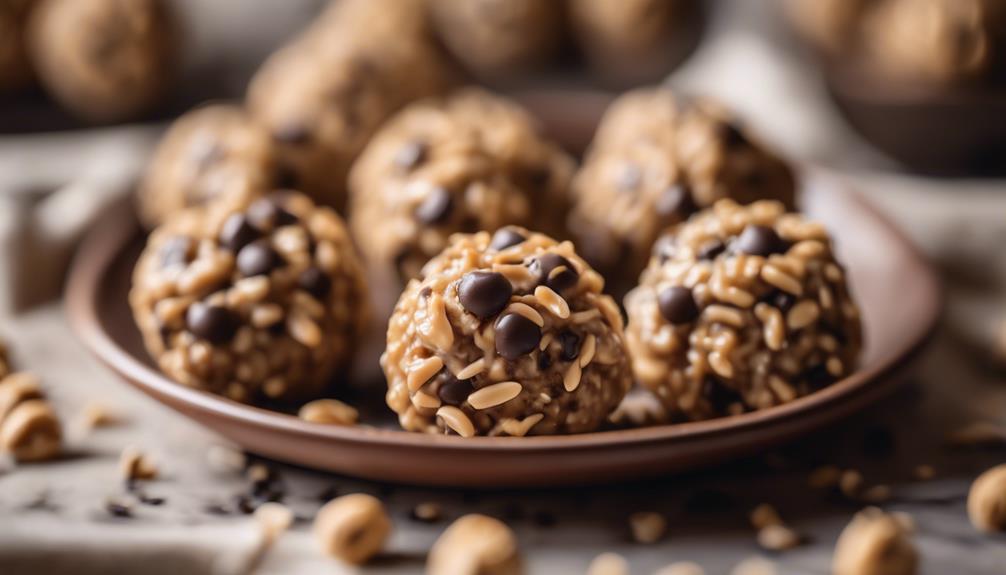
Energy Bites to Satisfy Your Sweet Tooth: Peanut Butter Chocolate Chip Oat Balls
Uncover a guilt-free indulgence with Peanut Butter Chocolate Chip Oat Balls that promises to satisfy your cravings and fuel your day with wholesome goodness.
Experience the delightful combination of Peanut Butter Chocolate Chip Oat Balls – a perfect mix of sweetness and nutrition. These energy bites are rich in fiber, **protein**, and healthy fats, offering a harmonious blend of flavors and essential nutrients. By mixing rolled oats, peanut butter, honey, chocolate chips, and ground flax seed, you can create a snack that delivers the necessary energy and **protein**. Rolling the mixture into balls and freezing them ensures convenient storage without sacrificing flavor or consistency. Uncover a tasty method to fulfill your snack cravings while boosting your day with these scrumptious treats that strike a perfect balance between health and deliciousness. Embrace this mouthwatering snack today for a delicious and nutritious boost!
Key Takeaways
- Packed with fiber, protein, and healthy fats for energy and nutrition.
- Easy to make by combining oats, peanut butter, honey, chocolate chips, and flax seed.
- Perfect balance of flavors with sweet chocolate chips and creamy peanut butter.
- Convenient snack option that can be stored in the fridge or freezer.
- Versatile recipe with optional add-ins like chia seeds or almond meal for variety.
Energy Bite Benefits
Energy bites offer a convenient and nutritious snack choice, packed with fiber, protein, and healthy fats. Among the array of flavors available, Peanut Butter Chocolate Chip Oat Balls stand out as a delectable option. These no-bake energy bites are quick to make, requiring simple ingredients mixed and rolled into bite-sized balls.
The combination of peanut butter, chocolate chips, oats, and other wholesome components creates a satisfying snack that not only provides energy but also delivers a dose of protein. This recipe caters to those seeking a healthy snack alternative, offering a balance of flavors and nutrients.
Whether you need a quick pick-me-up during the day or a pre-workout boost, these energy bites present a great solution. With their sweet taste and nutrient-rich profile, these Peanut Butter Chocolate Chip Oat Balls are a delightful way to incorporate a healthy snack into your routine.
Essential Ingredients
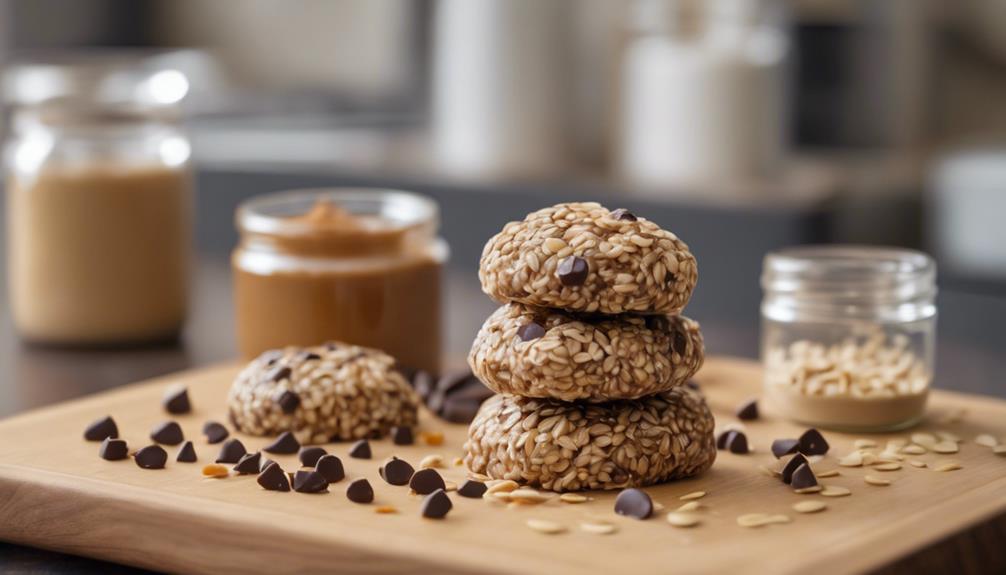
To create these Peanut Butter Chocolate Chip Oat Balls, gather the essential ingredients like rolled oats, peanut butter, honey, mini chocolate chips, and ground flax seed. Peanut butter provides a creamy texture and a source of protein, while the mini chocolate chips add a touch of sweetness and decadence.
Rolled oats offer a hearty base rich in fiber, promoting a feeling of fullness and sustained energy. Ground flax seed introduces a nutty flavor and boosts the fiber content, contributing to digestive health.
The inclusion of honey adds natural sweetness and acts as a binding agent, holding the ingredients together. Together, these components create a balanced snack option, combining protein, healthy fats, and fiber for a nutritious treat.
The simplicity of these ingredients allows for easy customization, enabling you to tailor the recipe to your preferences by adding nuts, dried fruits, or even a sprinkle of sea salt for a personalized twist on these delightful Peanut Butter Chocolate Chip Oat Balls.
Recipe Instructions
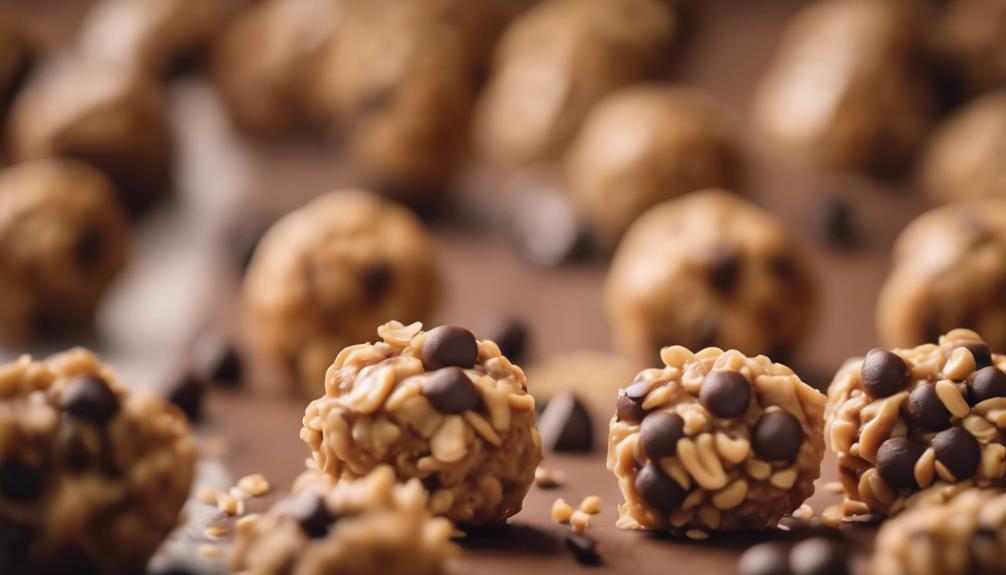
Start by combining the rolled oats, chocolate chips, flax seed, peanut butter, honey, and vanilla extract in a mixing bowl. Once all the ingredients are well mixed, proceed to roll the mixture into 24 equal-sized balls using your hands. Place these energy bites on a baking sheet and transfer them to the freezer until they are firm, which typically takes around 1 hour. After the energy bites have set, you can store them by transferring them to a zip-top bag or an airtight container. These no-bake peanut butter chocolate chip oat balls can be a convenient and delicious snack for a quick energy boost. Consider freezing some for later consumption; they can last for a good amount of time in the freezer without losing their taste or texture. Enjoy these delightful treats whenever you need a tasty pick-me-up!
Ingredients | Instructions |
---|---|
Rolled Oats | Combine in mixing bowl |
Chocolate Chips | Mix with other ingredients |
Flax Seed | Add for extra nutrition |
Mixing and Rolling
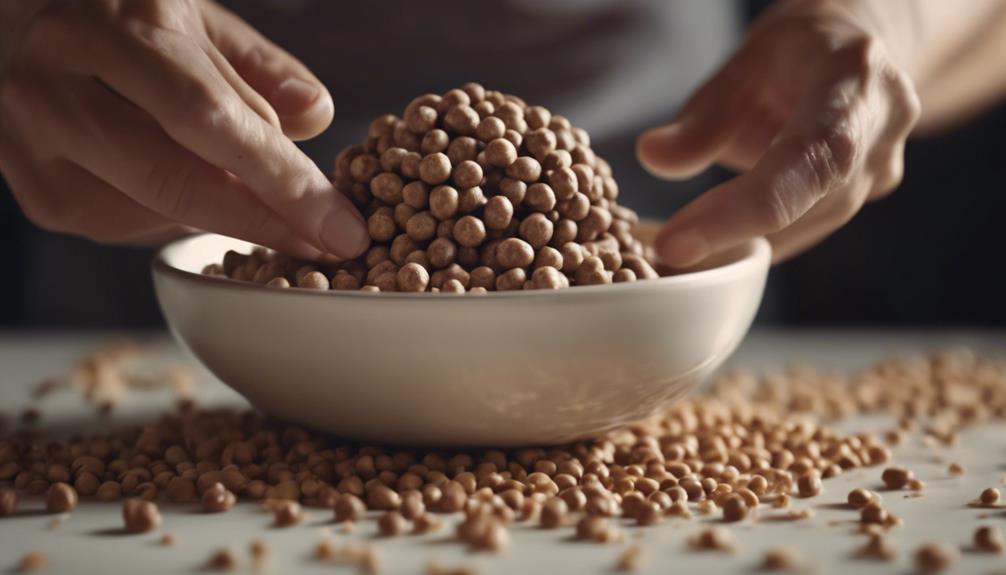
Combine the oats, chocolate chips, flax seed, peanut butter, honey, and vanilla extract in a mixing bowl to create the base mixture for the energy bites. Stir these ingredients thoroughly until they're well combined, forming a sticky dough that will be the foundation of your delicious treats.
Now, using your hands, roll the sticky dough into 24 small balls, ensuring each one is of uniform shape and size for consistent portion control. Place these small balls on a baking sheet, then transfer them to the freezer to set for approximately 1 hour. This step is important as freezing helps the energy bites maintain their shape.
Once the energy bites have hardened and set, they're ready to serve. Enjoy these nutritious snacks knowing that the rolling process hasn't only set them in a uniform shape but also allows for easy portion control when serving.
Optional Add-Ins
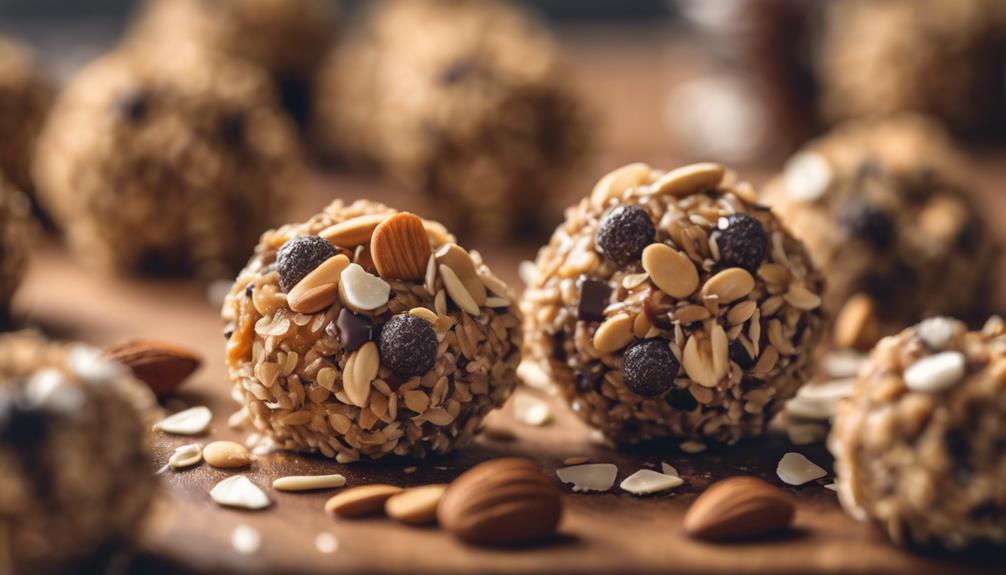
After mixing and rolling the base ingredients for the energy bites, consider incorporating optional add-ins to enhance the flavor and nutritional value of your peanut butter chocolate chip oat balls. Chia seeds are a fantastic choice to boost the nutritional content, providing omega-3 fatty acids and fiber to your snack.
If you're looking to switch things up, almond meal can be a great substitute for ground flax seeds, offering a nutty taste and a different texture. Maple syrup is a viable alternative to honey as a sweetener, contributing a unique flavor profile to your oat balls.
For those who enjoy a bit of texture and sweetness, sweetened coconut can be a delightful addition. If you're feeling adventurous, try using almond butter instead of peanut butter for a twist on the classic energy bites recipe.
These optional add-ins can add depth and variety to your peanut butter chocolate chip oat balls, making them even more enjoyable and nutritious.
Storage Tips
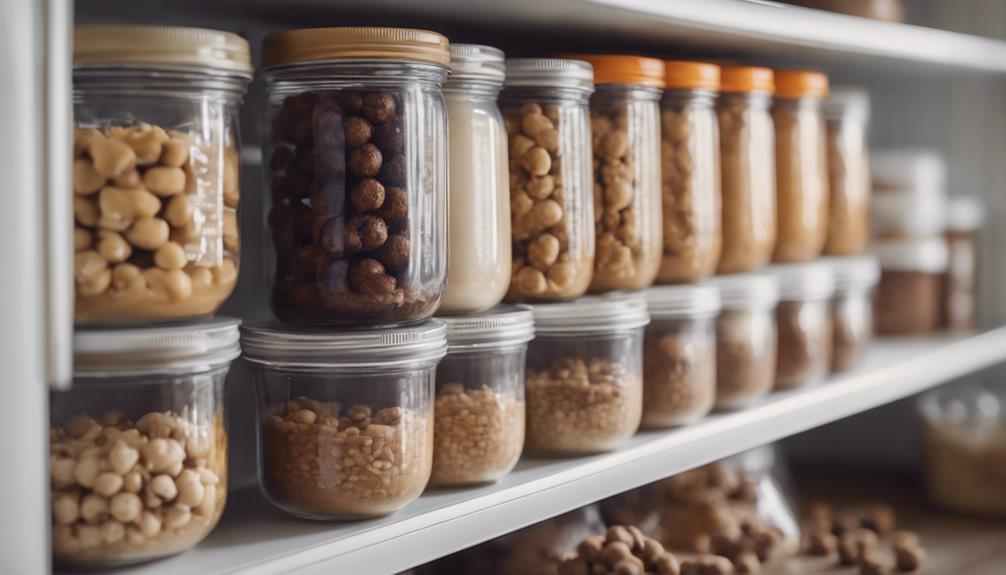
To maintain the freshness and quality of your energy bites, consider storing them in the fridge for up to one week in an airtight container. Important storage is necessary to preserve the taste and texture of these delectable peanut butter chocolate chip oat balls.
If you wish to extend their shelf life, freezing the energy bites is a viable option. Simply place them in a freezer-safe container, and they can last for up to six months. When you're ready to enjoy your frozen energy bites, allow them to thaw at room temperature for approximately 30 minutes or in the fridge overnight.
Whether you opt for refrigeration or freezing, using a zip-top bag or airtight container is vital in maintaining their freshness. Refrigeration not only keeps the energy bites fresh but also makes them convenient for quick on-the-go snacking.
Serving Suggestions
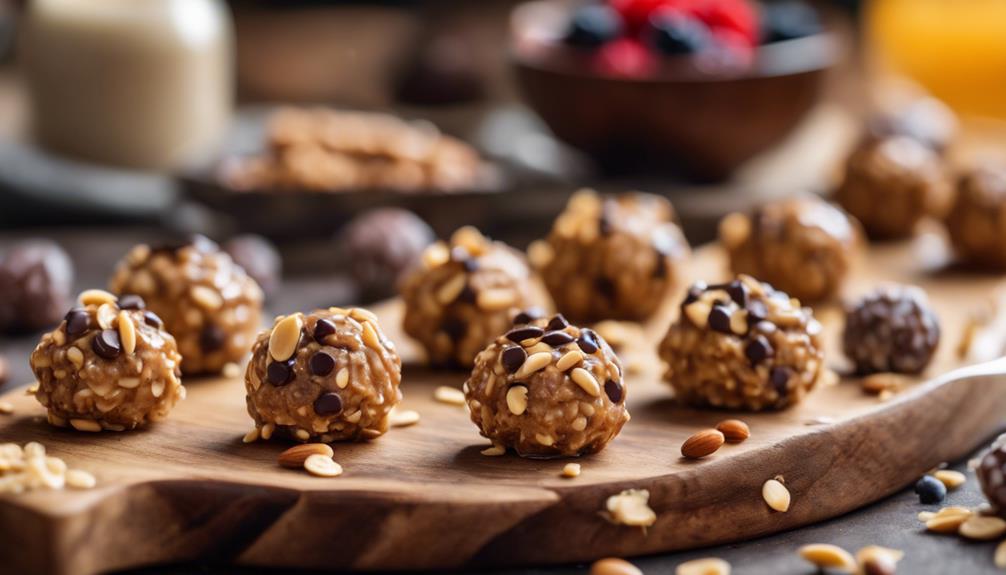
When serving your peanut butter chocolate chip oat balls, consider pairing them with a steaming cup of coffee to enhance the flavors.
Remember to practice portion control to savor each bite slowly and enjoy the energy boost.
To maintain freshness, follow the storage tips provided and store any uneaten energy bites properly.
Pairing With Coffee
For an enhanced snacking experience, consider pairing your peanut butter chocolate chip oat balls with a steaming cup of coffee. The sweet and nutty flavors of the energy bites perfectly complement the rich aroma of the coffee, creating a delightful combination.
Here are three ways this pairing can elevate your snack time:
- Indulge in the contrasting flavors: The sweetness of the peanut butter, chocolate chips, and oats in the energy bites harmonizes with the bitterness of the coffee, offering a balanced and satisfying flavor profile.
- Enjoy the comforting textures: The chewy texture of the oat balls pairs well with the warmth of your favorite coffee, providing a cozy and enjoyable snacking experience.
- Enhance your coffee break: The energy bites not only serve as a delicious snack but also add an extra layer of enjoyment to your coffee break, making it a moment to savor.
Pairing your peanut butter chocolate chip oat balls with coffee is a simple yet effective way to elevate your snacking routine.
Portion Control Tips
Maintaining portion control is essential for effectively managing calorie intake while enjoying energy bites. When it comes to peanut butter chocolate chip oat balls, being mindful of portion sizes is important. Each energy bite typically contains around 70-100 calories, so sticking to recommended serving sizes can help you avoid overeating and maintain a balanced diet.
Enjoying one or two energy bites as a snack can satisfy your sweet tooth and curb cravings without consuming excess calories. By paying attention to portion control, you can support your overall health and weight management goals.
Storage and Freshness
To maintain your peanut butter chocolate chip oat balls fresh and flavorful, store them in the fridge for up to two weeks in an airtight container. Here are some tips to guarantee your energy bites stay delicious:
- Refrigeration: By keeping your energy bites chilled, you can uphold their texture and prevent them from becoming too soft or sticky.
- Freezing: For longer storage, consider freezing your energy bites for up to three months. Make sure to thaw them before enjoying to preserve their taste.
- On-the-Go Snacks: Properly stored energy bites are perfect for meal prep or as convenient snacks when you're on the move.
Frequently Asked Questions
How Many Energy Balls Can You Eat a Day?
You can eat one to two energy balls a day for a quick energy boost. Be mindful of portion sizes to balance calorie intake. These balls are great for pre/post-workout snacks but remember to mix them with other nutritious foods.
Are Energy Balls Good for You?
Are energy balls good for you? Yes, they are a nutritious snack packed with fiber, protein, and healthy fats. Ideal for on-the-go snacking, these customizable treats satisfy sweet cravings while providing a convenient source of energy.
Why Are My Energy Balls Not Sticking Together?
Having trouble with your energy balls sticking together? Add more peanut butter, honey, or dates for binding. Adjust consistency by gradually adding wet ingredients. Refrigerate before rolling for better cohesion. Blend thoroughly in a food processor. Experiment with alternative binders like bananas or applesauce.
What Is a Substitute for Honey in Protein Balls?
Looking to switch up the sweetness in your protein balls? Try agave nectar, maple syrup, date syrup, brown rice syrup, or molasses as substitutes for honey. Each offers a unique flavor twist to your snacks.
Can I Substitute Bananas in the Peanut Butter Chocolate Chip Oat Balls Recipe?
Yes, you can substitute bananas in the peanut butter chocolate chip oat balls recipe to create nutritious banana peanut butter bites. Mash ripe bananas and mix with peanut butter, oats, and chocolate chips. Roll into balls and chill. Enjoy these delicious and healthy treats as a snack or dessert. These banana peanut butter oat bites are a perfect option for meal prepping, as they can be stored in the fridge for up to a week or frozen for longer-lasting freshness. Packed with natural sweetness from the bananas and a boost of protein from the peanut butter, they make a satisfying treat any time of day. Whether you’re looking for an energy-boosting snack or a guilt-free dessert, these bites are both delicious and convenient to have on hand.
Conclusion
To sum up, these Peanut Butter Chocolate Chip Oat Balls are a delightful and nourishing snack to fulfill your cravings while giving you a surge of energy.
By using wholesome ingredients and following the straightforward recipe directions, you can relish a guilt-free snack that will keep you content all day long.
So why not give these energy bites a chance and enjoy a delicious treat that's both fulfilling and beneficial for your body?
Francesca, as the creative force behind our compelling content, combines culinary expertise with journalistic flair. She has a deep appreciation for the cultural histories and artisanal traditions that influence remarkable flavors around the world. Through engaging narratives, she transports our audience to the heart of each culinary experience. Whether she’s documenting the centuries-old techniques of a Sicilian cheese maker or uncovering the personal stories of our producers, Francesca’s storytelling prowess drives our mission to connect people through food.
Snacks
Tofu Lettuce Wraps With Peanut Dipping Sauce: a Healthy Snack
Uncover the ultimate healthy snack with Tofu Lettuce Wraps and Peanut Dipping Sauce – a tantalizing treat that will revolutionize your snacking game.
Craft a nutritious snack with tofu lettuce wraps and a luscious peanut dipping sauce. Use tofu, lettuce, brown rice, and a flavorful peanut sauce. Press tofu to boost flavor absorption and texture. Create the sauce with peanut butter, lime juice, and spices for a creamy blend. Cook tofu with mushrooms, veggies, and seasonings for a savory filling. Construct wraps by layering tofu mix on lettuce, drizzling with sauce, and adding crunch with peanuts. Customize with diverse veggies and enjoy warm or cold. Store leftovers in the fridge for later enjoyment. Discover more about these delectable wraps for a wholesome culinary journey.
Key Takeaways
- Protein-rich tofu and fresh lettuce provide a nutritious base.
- Nutty brown rice adds wholesomeness to the snack.
- Tangy peanut sauce enhances flavor without compromising health.
- Customizable with additional veggies and herbs for variety.
- Stored leftovers refrigerated for convenient, healthy snacking.
Ingredients for Tofu Lettuce Wraps
For making Tofu Lettuce Wraps, you'll need a few key ingredients to create a delicious and nutritious snack option. The primary components include tofu, lettuce, peanut sauce, and brown rice.
Tofu serves as the protein base for these vegan lettuce wraps, offering a satisfying and wholesome alternative.
The lettuce acts as a fresh and crunchy wrapper, enhancing the overall texture of the dish.
The peanut sauce provides a rich and flavorful addition, complementing the earthy tones of the tofu and rice.
Additionally, incorporating brown rice into the wraps introduces a nutty and wholesome element, adding complexity to the flavor profile.
To enhance the experience, consider preparing extra peanut sauce for dipping purposes, allowing for a more indulgent snack.
How to Prepare Tofu
To achieve ideal texture and flavor absorption, start by pressing the tofu for at least 15-30 minutes before incorporating it into your tofu lettuce wraps. Pressing tofu helps remove excess moisture, allowing it to absorb flavors better and cook up crispier.
Follow these steps to prepare your tofu effectively:
- Use a tofu press or heavy objects like plates to press tofu effectively.
- Pat tofu dry after pressing to enhance browning and seasoning absorption.
- Pressed tofu is ideal for absorbing the flavors of the peanut dipping sauce in tofu lettuce wraps.
Making the Peanut Dipping Sauce
When preparing the peanut dipping sauce for your tofu lettuce wraps, it's essential to gather ingredients like peanut butter, lime juice, coconut aminos, maple syrup, and sriracha.
These components work together to create a harmonious blend of flavors, balancing the richness of the peanut butter with the tanginess of lime and the heat of sriracha.
Adjusting the spiciness level with sriracha or chili paste allows you to tailor the sauce to your taste preferences, enhancing the overall dining experience.
Sauce Ingredients and Prep
Whisk together the peanut butter, lime or lemon juice, coconut aminos or soy sauce, maple syrup, and sriracha to create a creamy and tangy dipping sauce for the tofu lettuce wraps.
Here are some key points to keep in mind while preparing the sauce:
- Combine Ingredients: Mix peanut butter, lime or lemon juice, coconut aminos or soy sauce, maple syrup, and sriracha in a bowl until smooth and well combined.
- Adjust Spiciness: Control the level of spiciness by adding more or less sriracha or chili paste based on your taste preferences.
- Enhance Flavor: The rich and nutty flavor of the peanut dipping sauce complements the tofu filling and lettuce leaves, enhancing the overall taste of the wraps.
- Make Ahead: Prepare the sauce in advance and store it in the fridge for convenience when assembling the lettuce wraps later.
- Taste and Adjust: If the sauce is too thick, you can thin it out by adding a little water or more citrus juice until you reach the desired consistency.
Flavor Balance Tips
For a well-rounded flavor profile in your peanut dipping sauce, carefully balance the sweet, salty, and tangy elements to enhance the overall taste of your tofu lettuce wraps. To achieve this balance, consider incorporating ingredients such as coconut aminos for depth and umami, a touch of maple syrup to enhance without overwhelming sweetness, sriracha to adjust spiciness, and lime juice for acidity that brightens the flavors. Here's a breakdown of how each ingredient contributes to the flavor balance of your peanut dipping sauce:
Ingredient | Flavor Contribution |
---|---|
Coconut Aminos | Adds depth and umami |
Maple Syrup | Enhances without excess sweetness |
Sriracha | Controls spiciness level |
Lime Juice | Brightens and complements richness of peanut butter |
Cooking the Tofu Filling
To start cooking the tofu filling, make sure the pressed tofu is ready for the next steps in the recipe. Once the tofu is pressed and excess moisture is removed, you can begin preparing a delicious and savory mixture.
Here are the steps to cook the tofu filling:
- Slice the soaked dried shiitake mushrooms for added umami flavor.
- Combine the pressed tofu with a variety of vegetables such as bell peppers, carrots, and onions.
- Season the mixture with a blend of spices like garlic, ginger, and soy sauce for a flavorful kick.
- Add cooked brown rice to the tofu filling for a hearty texture.
- Enhance the taste profile with a drizzle of teriyaki sauce to elevate the overall savory experience.
Assembling the Lettuce Wraps
When assembling the lettuce wraps, make sure to evenly distribute the tofu and vegetables for consistent flavor in every bite.
Remember to drizzle the peanut dipping sauce strategically over the filling to enhance the overall taste profile.
Don't forget to add a touch of crunch by sprinkling chopped peanuts or sesame seeds before rolling up the wrap for a satisfying texture contrast.
Wrap Assembly Techniques
Begin the assembly process by filling clean lettuce leaves with the flavorful tofu mixture. Once you have assembled the tofu and lettuce leaves, it's time to add the finishing touches to create delicious Tofu Lettuce Wraps with Peanut Dipping Sauce.
Here are some techniques to help you assemble the wraps:
- Drizzle Peanut Dipping Sauce: Add a generous drizzle of the flavorful peanut dipping sauce on top of the tofu filling for an extra burst of taste.
- Sprinkle Chopped Peanuts: Enhance the wraps with a sprinkle of chopped peanuts to introduce a delightful crunchy texture.
- Garnish with Lime Juice: Give your wraps a zesty kick by garnishing them with a squeeze of fresh lime juice.
- Roll Up the Wraps: After adding all the elements, carefully roll up the lettuce wraps to secure the fillings and create a neat package.
- Enjoy Your Snack: Once rolled up, savor the combination of flavors and textures for a healthy and satisfying snack or meal.
Filling Preparation Tips
For best texture and flavor in your tofu lettuce wraps, make sure to thoroughly drain and press the tofu for at least 15-30 minutes before assembling the filling. By removing excess moisture, the tofu can better absorb the flavors of the seasonings and sauces, resulting in a more satisfying bite.
When preparing the filling, soak dried shiitake mushrooms until tender, then slice them to add a chewy and flavorful element to the protein-packed mixture. Combine the cooked tofu with a variety of vegetables, such as bell peppers, carrots, and water chestnuts, to enhance the overall texture and taste of the filling.
As you assemble the lettuce wraps, place a generous amount of the tofu and vegetable mixture onto individual lettuce leaves, creating a balanced blend of savory ingredients. Drizzle the wraps with the creamy and spicy peanut sauce, made from a mixture of peanut butter, lime juice, soy sauce, and sriracha, to elevate the overall taste experience of this healthy snack.
Sauce Drizzling Method
To enhance the flavor of your tofu lettuce wraps, generously drizzle the creamy and spicy peanut sauce over the tofu filling before assembling the lettuce wraps. The sauce not only adds a nutty and creamy element but also provides healthy fats and protein, making this snack option nutritious and satisfying.
Follow these steps for the perfect drizzling method:
- Start by spooning a generous amount of peanut sauce over the tofu filling.
- Guarantee the sauce covers the tofu evenly to make sure each bite is packed with flavor.
- Use a back-and-forth motion while drizzling to distribute the sauce effectively.
- Pay attention to the edges of the lettuce wraps to avoid spillage during assembly.
- Finish with a final drizzle over the top to create a visually appealing presentation and enhance the overall taste of the dish.
The combination of fresh vegetables, tofu, and peanut sauce results in a delightful snack that's both wholesome and delicious.
Customizing Your Wraps
Enhance the flavor and texture of your lettuce wraps by incorporating additional veggies like bell peppers, cucumber, or julienned carrots for added crunch and flavor. Experiment with different herbs such as fresh mint, Thai basil, green onions, or cilantro to elevate the taste of your wraps.
You can also adjust the spiciness of your peanut sauce by adding more or less Sriracha to suit your personal preference. If you prefer a non-spicy version, simply omit the chili paste in the sauce and skip the Sriracha in the peanut sauce.
To create a balanced meal, consider pairing your lettuce wraps with brown rice, stir-fried veggies, or noodles for added variety. These additions not only increase the nutritional value of your meal but also offer a range of textures and flavors to make your dining experience more enjoyable and satisfying.
Experiment with different combinations to find what suits your taste buds best.
Serving Suggestions
Consider various ways to present and enjoy your Tofu Lettuce Wraps with Peanut Dipping Sauce to enhance your dining experience. These versatile and healthy snacks can be served in different ways to suit your preferences:
- Platter Style: Arrange the Tofu Lettuce Wraps on a decorative platter, garnished with fresh herbs and a side of Peanut Dipping Sauce for a visually appealing presentation.
- DIY Wraps: Set up a make-your-own wrap station with separate bowls of tofu, veggies, lettuce leaves, and sauce, allowing your guests to customize their wraps to their liking.
- Mini Appetizers: Create bite-sized versions of the wraps by rolling smaller portions and securing them with toothpicks for a light appetizer option at parties or gatherings.
- Warm Wraps: Heat the tofu filling before assembling the wraps to enjoy a warm and comforting snack, perfect for cooler days.
- Salad Upgrade: Chop the lettuce and toss it with the tofu filling and Peanut Dipping Sauce to transform the wraps into a invigorating and protein-packed salad.
Storing Leftovers
For peak freshness, store any leftover tofu lettuce wrap filling in the refrigerator for 3-5 days.
To maintain the flavors and textures of the dish, it's recommended to store the lettuce leaves separately from the tofu filling.
When reheating the tofu filling, consider combining it with the peanut sauce for a quick and delicious snack.
Cold leftovers can be conveniently enjoyed straight from the fridge without the need for additional preparation.
However, if reheating is desired, make sure to add extra peanut sauce to keep the flavors fresh and vibrant.
The refrigerator provides a convenient storage option, allowing you to keep the tofu filling readily available for future consumption.
When reheating the tofu filling, pay close attention to the temperature to ensure it's thoroughly heated while preserving its original taste.
Frequently Asked Questions
Is Eating Lettuce Wraps Healthy?
Eating lettuce wraps is healthy. They are low in calories, high in vitamins, and offer a good way to boost vegetable intake and fiber. Opt for lettuce wraps with tofu and peanut sauce for a balanced snack.
How Many Calories Are in Tofu Lettuce Wraps?
When you eat tofu lettuce wraps, you consume about 419 calories per serving. The calorie count can vary based on ingredients and portions. Tofu provides plant-based protein, and the peanut sauce adds healthy fats and protein.
What Pairs Well With Lettuce Wraps?
When you're serving lettuce wraps, consider pairing them with steamed rice or noodles like rice noodles. Add stir-fried veggies for texture and fresh herbs for flavor. For a complete meal, include kimchi or pickled veggies for a tangy crunch.
What Is the Best Lettuce for Lettuce Wraps?
For lettuce wraps, the best choice is butter lettuce, prized for its size and durability. Green leaf lettuce or romaine can also work. Avoid using kale due to its overpowering flavor. Lettuce impacts texture and taste.
Can Cilantro Jalapeno Ranch Dip be a Healthy Accompaniment to Tofu Lettuce Wraps?
Looking for a flavorful and healthy accompaniment to your tofu lettuce wraps? Try pairing them with a homemade cilantro jalapeno ranch dip recipe. This zesty dip adds a kick of flavor without sacrificing healthiness, making it the perfect complement to your light and tasty lettuce wraps. The zesty cilantro jalapeno ranch dip combines the bright, herbaceous notes of fresh cilantro with the subtle heat of jalapenos, creating a perfectly balanced flavor profile. It’s not only a great dipping sauce for tofu lettuce wraps but can also double as a drizzle or dressing for salads and grain bowls. Whip up a batch ahead of time, and you’ll have a versatile, crowd-pleasing condiment ready to elevate any meal.
Conclusion
In summary, these tofu lettuce wraps with peanut dipping sauce are a vital and satisfying snack option.
With the combination of flavors and textures, they offer a rejuvenating twist on traditional wraps.
Just like a well-oiled machine, each ingredient plays an essential role in creating a harmonious culinary experience.
So next time you're looking for a healthy and flavorful snack, consider giving these tofu lettuce wraps a try. Your taste buds will thank you.
Francesca, as the creative force behind our compelling content, combines culinary expertise with journalistic flair. She has a deep appreciation for the cultural histories and artisanal traditions that influence remarkable flavors around the world. Through engaging narratives, she transports our audience to the heart of each culinary experience. Whether she’s documenting the centuries-old techniques of a Sicilian cheese maker or uncovering the personal stories of our producers, Francesca’s storytelling prowess drives our mission to connect people through food.
Snacks
Sour Cream Chocolate Chip Banana Bread: A Sweet Treat for Any Time
Open the door to a tantalizing world of flavors with Sour Cream Chocolate Chip Banana Bread, a sweet treat that promises to delight your taste buds.
Get ready to savor the ideal blend of flavors in a slice of sour cream chocolate chip banana bread. This delectable treat is a versatile option that can be enjoyed at any time of the day. With a base of overripe bananas, sour cream, and generous amounts of semi-sweet chocolate chips, this bread guarantees a moist, tangy, and sweet experience. Explore various serving suggestions like adding whipped cream, trying different mix-ins, or enhancing with a simple glaze. To discover more about preparation, storage tips, and nutritional insights, the path ahead holds a wealth of knowledge on perfecting this delightful treat.
Key Takeaways
- Moist and flavorful banana bread with a tangy twist from sour cream.
- Rich and indulgent with a generous amount of semi-sweet chocolate chips.
- Perfect balance of sweetness and tanginess in every bite.
- Versatile treat suitable for breakfast, snack, or dessert.
- Easy to make and guaranteed to be a family favorite.
Ingredients Needed
To prepare the Sour Cream Chocolate Chip Banana Bread, gather your overripe bananas, sour cream, unsalted butter, eggs, granulated sugar, brown sugar, vanilla extract, all-purpose flour, and chocolate chips.
The combination of these ingredients is essential for creating the best banana bread with a moist and rich texture. The sour cream plays a vital role in making the banana bread moist and tender, while also contributing to its creamy consistency.
Chocolate chips add sweetness and a delightful contrast to the banana flavor, making this recipe a favorite among many. By incorporating these key elements into the recipe, you can enjoy a delicious treat that's perfect for any time of day.
Make sure you have all the ingredients ready before starting the baking process to achieve the perfect balance of flavors in this delectable banana bread recipe.
Preparation Instructions
When preparing the Sour Cream Chocolate Chip Banana Bread, you'll need to pay attention to three key points: the essential ingredients list, detailed baking instructions, and serving suggestions.
By following these steps carefully, you can guarantee that your banana bread turns out moist, flavorful, and perfectly baked.
These points will guide you through the process of creating a delicious treat that your family and friends will love.
Key Ingredients List
Mix the overripe bananas with sour cream, butter, eggs, sugars, and vanilla extract to create a moist base for the Sour Cream Chocolate Chip Banana Bread. Here is a breakdown of the key ingredients you will need for this delightful treat:
Ingredient | Quantity |
---|---|
Overripe Bananas | 3 large |
Sour Cream | 1 cup |
Unsalted Butter | 1/2 cup |
Eggs | 2 large |
Granulated Sugar | 1/2 cup |
Brown Sugar | 1/2 cup |
Vanilla Extract | 1 tsp |
All-Purpose Flour | 2 cups |
Salt | 1/2 tsp |
Baking Powder | 1 tsp |
Semi-Sweet Chocolate Chips | 1 cup |
These ingredients come together to form a delicious blend of flavors and textures in the Sour Cream Chocolate Chip Banana Bread. Make sure to gather all these items before you start preparing this scrumptious treat.
Baking Instructions
Preheat your oven to 350°F and grease a loaf pan in preparation for baking the Sour Cream Chocolate Chip Banana Bread.
To start, mash overripe bananas separately for a smoother texture.
In one bowl, combine the wet ingredients – sour cream, eggs, and vanilla extract.
In another bowl, mix the dry ingredients – flour, baking soda, and salt.
Slowly fold the dry ingredients into the wet mixture until just combined. Be cautious not to overmix, as it can result in a dense loaf.
Gently fold in the chocolate chips into the batter, distributing them evenly for a sweet surprise in every bite.
Pour the batter into the greased loaf pan, spreading it out evenly.
Place the pan in the preheated oven and bake for about 50-60 minutes, or until a toothpick inserted into the center comes out clean.
Once baked, allow the banana bread to cool in the pan for 10 minutes before transferring it to a wire rack to cool completely.
Enjoy this delightful treat!
Serving Suggestions
Enhance the enjoyment of your Sour Cream Chocolate Chip Banana Bread by serving it with a dollop of whipped cream or a scoop of vanilla ice cream for a decadent treat.
The combination of warm banana bread with the cool creaminess of whipped cream or vanilla ice cream creates a delightful contrast in textures and temperatures.
To further elevate the presentation, consider drizzling a simple glaze made with powdered sugar and milk over the top before serving.
For special occasions or brunch, adding a sprinkle of cinnamon sugar or a handful of toasted nuts on top of the banana bread can provide extra texture and flavor. For an even more indulgent twist, consider drizzling a simple glaze or melted chocolate over the top to enhance its sweetness. Pairing this with a warm beverage can truly elevate the experience, making it perfect for entertaining guests or treating yourself. Using a brown butter banana bread recipe ensures a rich, nutty flavor that perfectly complements these added toppings.
If you're feeling adventurous, experiment with different mix-ins like shredded coconut, chopped dried fruit, or a swirl of peanut butter to put a unique twist on this classic recipe.
These serving suggestions are sure to make your Sour Cream Chocolate Chip Banana Bread a memorable and enjoyable treat for any time of day.
How to Store
When storing your sour cream chocolate chip banana bread, it's important to use an airtight container to maintain freshness.
Proper storage techniques, such as wrapping the bread in paper towels, can help prevent moisture and odors from affecting its taste.
Choosing the right container and location for storing your banana bread can greatly impact its longevity and deliciousness.
Proper Storage Techniques
For best freshness and moisture retention, store your sour cream chocolate chip banana bread in an airtight container. This will help preserve the delicious flavors and texture of your baked treat. You can keep the banana bread at room temperature for up to 2 days, in the refrigerator for up to 6 days, or freeze it for up to 3 months. When freezing, it's important to tightly wrap the bread in plastic wrap before placing it in a freezer-safe container. To prevent sogginess, consider adding a layer of paper towels in the container to absorb any excess moisture. When you're ready to indulge in your banana bread, make sure to thaw it properly by leaving it in the refrigerator overnight or at room temperature for a few hours. By following these storage techniques, you can ensure that your sour cream chocolate chip banana bread stays fresh and delightful for longer periods.
Storage Location | Duration | Special Instructions |
---|---|---|
Room Temperature | Up to 2 days | Store in airtight container |
Refrigerator | Up to 6 days | Keep in airtight container |
Freezer | Up to 3 months | Wrap in plastic, use container with paper towels |
Best Containers to Use
Consider using a sturdy, airtight container to store your sour cream chocolate chip banana bread and maintain its freshness.
Here are some tips to help you store your delicious bread properly:
- Use paper towels: Place a layer of paper towels at the bottom of the container and between the slices of banana bread to absorb excess moisture and prevent sogginess.
- Room temperature: Keep the banana bread at room temperature for up to 2 days to enjoy its best taste and texture.
- Refrigerate: If you don't finish the bread within the first 2 days, store it in the refrigerator for up to 6 days to prolong its freshness.
- Airtight container: Make sure the container you choose has a tight seal to prevent air from entering and to maintain the bread's moisture.
- Freeze for long-term storage: To preserve your banana bread for up to 3 months, tightly wrap it in plastic wrap before placing it in the freezer.
Avoiding Moisture and Odors
To guarantee the freshness and flavor of your sour cream chocolate chip banana bread, proper storage techniques are crucial to avoid moisture and odors.
When storing your delectable creation, opt for an airtight container to prevent moisture loss. For added protection, place a paper towel in the container to absorb any excess moisture and help maintain the bread's delightful moistness.
Avoid the temptation to store your banana bread in the refrigerator for extended periods, as this can lead to quick drying out. Instead, keep it at room temperature for up to 2 days to enjoy its full flavor and texture.
If you need to store it for a longer period, freezing is the way to go. By following these storage tips, you can make sure that your sour cream chocolate chip banana bread retains its delicious taste and remains a delightful treat for whenever cravings strike.
Tips and Tricks
Lower the baking temperature to 350°F for a moist banana bread.
To guarantee your banana bread turns out perfectly, here are some helpful tips and tricks:
- Checking Doneness: Use a toothpick to check for doneness in multiple places. If the toothpick comes out clean, your banana bread is ready.
- Lower Baking Temperature: Baking at 350°F helps retain moisture, resulting in a moist and delicious banana bread.
- Baking Adjustments: Adjust the baking time based on your oven's performance to avoid under or overcooking the bread.
- Prevent Over-Browning: Lightly cover the bread with foil towards the end of baking to prevent the top from becoming too dark.
- Chocolate Chip Variations: Feel free to experiment with different types of chocolate chips or add-ins like walnuts to customize your banana bread to your liking.
Recipe Variations
For a delightful twist on the classic banana bread recipe, consider incorporating sour cream and chocolate chips. The addition of sour cream brings a tangy flavor and moist texture to the bread, while the chocolate chips provide bursts of sweetness throughout each bite. By combining these two ingredients, you create a unique and flavorful variation of banana bread that's sure to impress your taste buds.
The sour cream adds a subtle tanginess that complements the natural sweetness of the bananas, resulting in a well-balanced and rich flavor profile. The chocolate chips, on the other hand, melt slightly during baking, creating pockets of gooey chocolate that elevate the bread to a whole new level of decadence.
This recipe variation is perfect for those who enjoy the combination of sweet and tangy flavors in their baked goods. Whether you're looking for a special treat for breakfast, a snack, or dessert, this sour cream chocolate chip banana bread is a delightful option that will satisfy your cravings for something both sweet and tangy.
Nutritional Information
Exploring the nutritional content of sour cream chocolate chip banana bread reveals key details about its calorie and macronutrient composition. A serving of this delectable banana bread contains approximately 375 calories, making it a satisfying treat.
It also provides 51g of carbohydrates, 4g of protein, and 17g of fat per serving, offering a good balance of macronutrients. Each slice of this delightful bread contributes around 272mg of sodium to your daily intake.
The combination of overripe bananas, rich sour cream, unsalted butter, eggs, granulated sugar, brown sugar, vanilla extract, all-purpose flour, and chocolate chips results in a flavorful and moist bread that's sure to please your taste buds. Indulge in this sweet creation with a hint of chocolate chips for a delightful treat any time of the day.
Storage Suggestions
To keep your sour cream chocolate chip banana bread fresh and flavorful, follow these storage suggestions. After baking, allow the bread to cool completely before storing it.
To maintain freshness, place the banana bread in an airtight container with a layer of paper towels. This will help absorb any excess moisture and prevent the bread from becoming soggy.
If you plan to consume the bread within 2 days, storing it at room temperature is suitable. However, for longer storage, refrigerating it for up to 6 days is recommended.
If you wish to extend the shelf life further, freezing the banana bread is an option. Simply tightly wrap the bread in plastic wrap before placing it in the freezer; this can keep the bread in good condition for up to 3 months.
Proper storage is essential to preserve the delightful flavor and texture of the sour cream chocolate chip banana bread, ensuring that each slice remains a delicious treat.
Serving Suggestions
Consider enhancing your enjoyment of the sour cream chocolate chip banana bread by exploring various serving suggestions that complement its rich flavors and moist texture. Here are some ideas to help you savor this delightful treat:
- Top a warm slice of banana bread with a dollop of whipped cream or a scoop of vanilla ice cream for a decadent dessert experience.
- Enjoy a cozy afternoon by pairing a slice of this delicious bread with a cup of coffee or tea.
- Pack a slice in your lunchbox for a sweet midday snack at work or school, providing a delightful treat during your busy day.
- Elevate the taste by spreading creamy peanut butter or Nutella on top for a delicious twist that adds extra richness.
- Indulge in a classic combination by enjoying a slice of this chocolate chip banana bread with a glass of cold milk, creating a comforting and satisfying snack.
Frequently Asked Questions (FAQs)
To address common queries that may arise while making and enjoying Sour Cream Chocolate Chip Banana Bread, explore the Frequently Asked Questions (FAQs) for helpful insights and tips.
When it comes to the banana bread recipe, utilizing sour cream adds moisture and richness to the final product, while chocolate chips provide a delightful burst of sweetness in each bite. For those looking to enhance the flavor profile, consider adding a sprinkle of cinnamon or a handful of chopped nuts to the batter.
To guarantee your banana bread stays fresh, store it in an airtight container at room temperature for up to 3 days. If you wish to extend its shelf life, freezing the bread is a great option. Simply wrap it tightly in plastic wrap and aluminum foil before placing it in the freezer for up to 3 months.
When ready to enjoy, thaw the bread overnight in the refrigerator or on the countertop for a few hours. These tips will help you savor your Sour Cream Chocolate Chip Banana Bread for an extended period.
Frequently Asked Questions
What to Use Instead of Sour Cream in Banana Bread?
If you're out of sour cream for banana bread, try these substitutes: Greek yogurt for tangy moistness, buttermilk for a tender texture, coconut cream for dairy-free coconut flavor, mashed avocado for creaminess and healthy fats, or silken tofu for a vegan-friendly moist option.
Why Does My Banana Bread Not Taste Sweet?
If your banana bread isn't sweet, it could be due to using underripe bananas. Riper bananas have more natural sugars. Adjusting sugar or trying sweet add-ins like chocolate chips can also enhance the sweetness level to your liking.
Why Is My Banana Bread Gummy?
If your banana bread turns out gummy, you might be underbaking it, using too much banana, overmixing the batter, or adding excessive liquid like sour cream. Adjust baking time and ingredients for a better texture.
What to Do With Old Bananas?
When wondering what to do with old bananas, bake them into moist and sweet banana bread. Don't toss those ripe bananas; instead, turn them into a delicious treat like sour cream chocolate chip banana bread.
Can I Use Sour Cream in the Brown Butter Banana Bread Recipe for a Different Twist?
Yes, you can definitely use sour cream in the brown butter banana bread recipe for a different twist. The addition of sour cream will make the bread more moist and add a tangy flavor to complement the richness of the brown butter. It’s a great way to switch up the traditional recipe.
Conclusion
To sum up, sour cream chocolate chip banana bread is a delectable treat that's sure to satisfy any sweet tooth.
Did you know that banana bread is one of the most searched-for recipes online?
With its moist texture, rich flavor, and irresistible combination of ingredients, this dessert is perfect for any occasion.
So why not give it a try and enjoy a slice of this delicious treat today!
Francesca, as the creative force behind our compelling content, combines culinary expertise with journalistic flair. She has a deep appreciation for the cultural histories and artisanal traditions that influence remarkable flavors around the world. Through engaging narratives, she transports our audience to the heart of each culinary experience. Whether she’s documenting the centuries-old techniques of a Sicilian cheese maker or uncovering the personal stories of our producers, Francesca’s storytelling prowess drives our mission to connect people through food.
Snacks
Potato Chip Krispie Treats: A Crunchy Twist on a Classic Snack
Open up a world of delectable flavors with Potato Chip Krispie Treats, a crunchy twist on a classic snack that will leave you craving more.
Elevate your snack time with Potato Chip Krispie Treats, a delightful combination of sweet marshmallows and salty potato chips that creates a unique flavor profile. The sticky texture of marshmallows complements the satisfying crunch of crushed potato chips. Try out different chip varieties for a more enhanced taste experience. Follow the detailed recipe using a family-size bag of Ruffles potato chips, miniature marshmallows, butter, and vanilla extract. Make these crispy treats by melting butter and marshmallows, mixing in crushed chips, and pressing the mixture into a baking pan. Add flavor options like melted chocolate or nuts for a personalized touch that elevates the overall taste.
Key Takeaways
- Sweet marshmallows and salty potato chips create a unique flavor profile.
- Experiment with different potato chip types for enhanced taste and texture.
- Add crushed nuts for extra crunch and depth of flavor.
- Drizzle melted chocolate over the top for a decadent touch.
- Package treats as party favors for a delightful and convenient snack.
Ingredients
To create delicious Potato Chip Krispie Treats, gather butter, marshmallows, vanilla extract, and crushed potato chips. The juxtaposition of the sweet marshmallows and the salty potato chips in this recipe creates a unique and delightful flavor combination. The marshmallows provide a gooey texture that binds the ingredients together, while the crushed potato chips add a satisfying crunch to every bite.
Potato chips and marshmallows might seem like an unlikely pair, but when combined, they elevate the traditional krispie treat to a whole new level. The saltiness of the potato chips balances out the sweetness of the marshmallows, resulting in a harmonious blend of flavors. This unexpected twist on a classic snack is sure to surprise and delight your taste buds.
Experimenting with different types of potato chips or adding a chocolate drizzle can further enhance the taste of these treats. Whether you're snacking solo or sharing with friends, these Potato Chip Krispie Treats are a simple yet indulgent treat that's bound to please.
Instructions
To begin making Potato Chip Krispie Treats, you should gather your recipe ingredients and prepare the necessary tools for the task ahead.
The preparation steps involve melting butter and marshmallows together, mixing in crushed potato chips, and pressing the mixture into the baking pan evenly.
Following these points will guide you in creating delicious and crunchy treats for your enjoyment.
Recipe Ingredients
You'll require a family-size bag of Ruffles potato chips and 10 cups of miniature marshmallows for the Potato Chip Krispie Treats recipe. These ingredients form the base of this unique and flavorful treat.
The potato chips, known for their savory crunch, are crushed to blend perfectly with the sweet miniature marshmallows, creating a delightful combination of flavors and textures.
To bind these elements together, you'll also need 5 tablespoons of butter and 1 teaspoon of vanilla extract. The butter adds richness to the mixture, while the vanilla extract enhances the overall taste profile.
By carefully measuring and combining these ingredients, you'll create a delicious and satisfying snack that offers a twist on the classic Krispie Treat recipe.
The contrast between the sweet marshmallows and the salty potato chips brings a new dimension to this beloved treat, making it a favorite among those who enjoy a balance of flavors in their snacks.
Preparation Steps
Begin by greasing a 9-inch square baking pan to guarantee easy removal of the Potato Chip Krispie Treats once they're ready.
In a saucepan over medium-low heat, melt butter to form a smooth base for the treats. Stir in mini marshmallows until fully melted, ensuring a gooey consistency. Add a touch of vanilla extract to balance the sweetness of the marshmallows.
Next, mix in crushed potato chips evenly to incorporate the savory crunch into the treats. Once the mixture is well combined, press it firmly into the greased baking pan, creating an even layer.
Allow the treats to cool and set for about an hour before cutting them into squares. For an extra indulgent touch, drizzle melted chocolate over the top of the treats before serving.
These Potato Chip Krispie Treats offer a delightful blend of sweetness and crunch that's sure to satisfy any snack craving.
Flavor Variations
Experiment with a variety of unique flavored potato chips to create exciting twists in your Potato Chip Krispie Treats. Incorporating flavors like BBQ, sour cream and onion, or salt and vinegar can add a distinctive taste to your treats.
To elevate the richness, consider drizzling melted chocolate over the top using dark, milk, or white chocolate options. For added texture and flavor, mix in crushed nuts such as peanuts, almonds, or cashews.
To enhance the visual appeal and fun factor, top your treats with colorful sprinkles like rainbow jimmies or chocolate shavings. Additionally, you can amp up the sweetness by mixing in additional ingredients like mini marshmallows or chocolate chips.
These flavor variations offer a creative way to customize your Potato Chip Krispie Treats, providing a unique and delicious snacking experience that's sure to impress your taste buds.
Tips for Making
To guarantee successful preparation of Potato Chip Krispie Treats, make sure you have all the necessary ingredients and equipment ready before starting the mixing process.
Begin by crushing your favorite flavored potato chips, such as BBQ, sour cream and onion, or salt and vinegar, to add a crunchy twist to the classic treat.
For an extra decadent touch, drizzle melted chocolate over the treats using dark, milk, or white chocolate for a variety of flavors.
If you desire more texture, consider adding crushed nuts like peanuts, almonds, or cashews to the mixture.
To customize your Potato Chip Krispie Treats further, experiment with colorful sprinkles, chocolate shavings, or crumbled cookies for decoration.
Additionally, you can incorporate mini marshmallows, chocolate chips, caramel, or peanut butter for added sweetness and gooeyness.
Storage Suggestions
To maintain the freshness and texture of your potato chip krispie treats, store them in an airtight container at room temperature. This practice helps retain their crunchiness and gooey consistency for up to three days.
Proper Storage Tips
For peak freshness and texture retention, store your potato chip krispie treats in an airtight container at room temperature for up to three days. Proper storage is crucial to maintain the delectable crunchiness and gooey texture of these irresistible treats.
Here are some tips to guarantee your treats stay fresh and delicious:
- Seal Well: Make sure the airtight container is properly sealed to prevent the treats from becoming stale or losing their flavor.
- Individual Servings: Consider storing the potato chip krispie treats in individual servings. This not only makes them convenient for grab-and-go snacking but also helps in portion control, ensuring they last longer.
- Snack Wisely: Although the treats are so delicious that they might disappear quickly, resist the temptation to finish them all at once to enjoy their freshness over the recommended storage period.
Longevity and Freshness
Consider the following storage suggestions to preserve the longevity and freshness of your potato chip krispie treats. Store these delightful sweet and salty treats in an airtight container at room temperature to maintain their best texture and taste.
By ensuring they're well-covered, you can prevent them from becoming stale and losing their delightful crunchiness. Proper storage can help these potato chip rice treats retain their gooey consistency and delicious flavor for up to three days, although it's highly likely they'll be devoured before that time elapses.
Embrace the perfect balance of sweet and salty flavors by storing them correctly and savoring every bite. Remember, the key to enjoying these delectable treats lies in keeping them fresh and crunchy through proper storage techniques.
Serving Ideas
Enhance the presentation of your potato chip krispie treats by offering them alongside a variety of toppings for guests to enjoy. Here are some serving ideas to make your treats stand out at your next gathering:
- Create a Toppings Bar: Set up a toppings bar with options like melted chocolate, caramel drizzle, crushed nuts, and colorful sprinkles. This will allow your guests to customize their treats to their liking and add extra flair to the classic Rice Krispies and chocolate chips combo.
- Serve with a Side of Ice Cream: Pair your potato chip krispie treats with a scoop of vanilla ice cream for a decadent dessert experience. The combination of the crunchy treats with the creamy ice cream creates a delightful contrast in both texture and flavor.
- Package for Party Favors: Cut the treats into small squares and package them in individual bags or boxes as party favors or gifts for your guests. This thoughtful gesture allows them to take a piece of the deliciousness home with them and enjoy it later.
Feedback and Comments
Explore the feedback and comments gathered from testers to gain insights into the reception and potential improvements for the potato chip krispie treats recipe.
Testers have expressed positive reviews regarding the unique sweet-salty flavor combination present in the treats.
However, some comments suggest that adjusting the marshmallow quantity could enhance the overall texture and consistency of the dish.
Additionally, there have been recommendations to experiment with incorporating toppings such as peanut butter or chocolate chips to further elevate the flavor profile.
Frequently Asked Questions
Why Are Rice Krispie Treats a Healthy Snack?
Rice Krispie treats can be a healthy snack because when made with whole-grain cereal and minimal sugar, they offer low fat, quick energy, fiber, portion control benefits, and can be made with lower-sugar marshmallows for a healthier option.
Why Do People Eat Rice Krispie Treats Before Lifting?
You eat Rice Krispie treats before lifting because they offer quick carbs for energy. The sugars are easily digested and aid in your workout. They're convenient, portable, and provide a mix of carbs and protein to support your muscles.
What Was Rice Krispie Treats Originally Called?
Originally, Rice Krispie Treats were called 'marshmallow squares' when first introduced in 1939. The name was changed to 'Rice Krispies Treats' in 1941 to highlight the use of Rice Krispies cereal in the recipe.
Why Did My Crispy Treats Get Hard?
If your crispy treats got hard, it could be due to overcooking the marshmallow mixture, not enough marshmallows or butter, letting them cool too long before cutting, using stale marshmallows, or adding too many extra ingredients.
How Can I Make a Healthy Twist on Classic Potato Chip Snacks?
Looking to add a healthy twist to the classic potato chip? Try making kale chips with cashew queso! Simply bake kale leaves with your favorite seasonings for a crispy alternative. Pair it with a creamy cashew queso dip for a guilt-free snacking experience. Enjoy the crunch without the guilt! Not only are kale chips with cashew queso a delicious option, but they’re also packed with nutrients to keep you energized throughout the day. Customize the seasonings on your kale chips to match your taste, whether you prefer spicy, tangy, or savory flavors. With the rich and velvety cashew queso as the perfect complement, kale chips with cashew queso might just become your new go-to snack.
Conclusion
To sum up, potato chip krispie treats offer a unique twist on a classic snack, combining the crispy texture of potato chips with the sweet and gooey goodness of traditional rice krispie treats.
With just a few simple ingredients and easy-to-follow instructions, you can whip up a batch of these tasty treats in no time.
So next time you're craving a delicious and satisfying snack, give these potato chip krispie treats a try for a delightful and crunchy experience.
Francesca, as the creative force behind our compelling content, combines culinary expertise with journalistic flair. She has a deep appreciation for the cultural histories and artisanal traditions that influence remarkable flavors around the world. Through engaging narratives, she transports our audience to the heart of each culinary experience. Whether she’s documenting the centuries-old techniques of a Sicilian cheese maker or uncovering the personal stories of our producers, Francesca’s storytelling prowess drives our mission to connect people through food.
-
Vetted3 months ago
15 Best Non-Toxic Espresso Machines for a Healthier Brew at Home
-
Italian Cuisine2 weeks ago
What Italian Dishes Use Parsley
-
Vetted6 months ago
12 Best Coffee Pods for DeLonghi Espresso Machine to Elevate Your Caffeine Game
-
Vetted4 months ago
15 Best Coffee Beans for Your Breville Espresso Machine – Expert Picks for Perfect Brews
-
Vetted3 months ago
15 Best Espresso Ground Coffees for Your Espresso Machine: A Barista’s Guide
-
Vetted4 months ago
15 Best Coffee Beans to Elevate Your Breville Espresso Experience
-
Vetted6 months ago
15 Best Commercial Automatic Espresso Machines for Your Coffee Shop
-
Vetted6 months ago
15 Best ESE Pod Espresso Machines for Perfect Coffee Every Time