Recipes
Make Authentic Sushi at Home
Greatness awaits as you uncover the secrets to crafting mouthwatering sushi right in your own kitchen, transforming your home into a sushi haven. Continue reading to discover the full culinary journey.
![homemade authentic sushi recipe](https://madtasting.com/wp-content/uploads/2024/11/homemade_authentic_sushi_recipe.jpg)
Unlock the secrets of authentic Japanese sushi-making right in your own kitchen! Explore sushi's rich history, from its ancient origins as a fish preservation method to its modern popularity. Master the key ingredients – sushi rice, nori seaweed, and the freshest fish – to craft nigiri, maki rolls, and temaki hand rolls. Hone your skills with precise cutting techniques and proper rolling methods using a bamboo mat. Elevate your creations with the perfect condiments like soy sauce and wasabi. Whether you're a sushi aficionado or a curious home cook, this comprehensive guide will have you rolling, slicing, and savoring homemade sushi that rivals the best restaurants. Continue reading to discover the full culinary journey.
Key Takeaways
- Source high-quality, fresh sushi-grade ingredients, including short-grain Japanese rice, premium nori seaweed sheets, and fresh, sustainable seafood.
- Master the proper sushi rice preparation techniques, including seasoning with rice vinegar, sugar, and salt for optimal texture and taste.
- Utilize a bamboo mat to skillfully roll sushi, ensuring uniform shape and structural integrity of the rolls.
- Slice fish fillets into thin, uniform pieces against the grain for a tender, melt-in-your-mouth texture.
- Serve sushi with traditional accompaniments like soy sauce, wasabi, and pickled ginger to complement the flavors and enhance the overall dining experience.
History
![understanding our past events](https://madtasting.com/wp-content/uploads/2025/11/understanding_our_past_events-2.jpg)
The origins of sushi can be traced back to ancient Japan, where it emerged as a preservation method for fresh fish. This centuries-old tradition involved fermenting fish with rice and salt, creating a nutritious and long-lasting food source.
Over time, the fermentation process was shortened, and the rice vinegar was introduced to add a tangy flavor.
Sushi's popularity grew in the 18th century, as it became a street food enjoyed by the masses. The iconic nigiri-style sushi, featuring hand-pressed rice topped with fresh fish, was popularized by Hanaya Yohei, a skilled sushi chef who opened his famous shop in Tokyo.
This innovation paved the way for the diverse sushi styles we know and love today, from maki rolls to temaki hand rolls.
As sushi's global popularity has soared, the art of crafting authentic, high-quality sushi has become increasingly valued. Mastering sushi-making at home allows you to recreate the flavors and traditions of this beloved Japanese cuisine.
Recipe
![culinary instructions for preparation](https://madtasting.com/wp-content/uploads/2025/11/culinary_instructions_for_preparation-13.jpg)
Sushi is a delicate and intricate Japanese dish that has captivated the culinary world. While traditionally prepared by skilled sushi chefs, it's possible to recreate authentic sushi at home with the right techniques and ingredients. This recipe will guide you through the process of making delectable sushi that will impress your family and friends.
The key to successful sushi-making lies in the preparation of the rice. Sushi rice is a specific type of short-grain rice that's seasoned with a mixture of rice vinegar, sugar, and salt. Achieving the perfect texture and flavor of the rice is crucial to the overall success of your sushi.
- Sushi rice
- Nori seaweed sheets
- Assorted fresh fish (such as tuna, salmon, or yellowtail)
- Avocado
- Cucumber
- Wasabi
- Soy sauce
- Rice vinegar
- Sugar
- Salt
Begin by cooking the sushi rice according to the package instructions. Once cooked, transfer the rice to a large bowl and gently fold in the seasoning mixture of rice vinegar, sugar, and salt. Allow the rice to cool to room temperature, stirring occasionally to prevent sticking.
Lay a sheet of nori on a sushi mat. Spread a thin layer of the seasoned sushi rice over the nori, leaving a small gap at the top. Arrange your desired fillings, such as sliced fish, avocado, and cucumber, in a line near the bottom of the rice.
Carefully roll the sushi using the sushi mat, making sure to tighten it as you go. Slice the roll into bite-sized pieces and serve with wasabi and soy sauce.
Cooking Steps
![step by step cooking guide](https://madtasting.com/wp-content/uploads/2025/11/step_by_step_cooking_guide-8.jpg)
To make authentic sushi at home, you'll first need to gather fresh sushi-grade ingredients.
Then, you'll perfectly roll the sushi using a bamboo mat, ensuring a tight and uniform shape.
Next, you'll slice the fish into thin pieces, creating the perfect bite-sized portions.
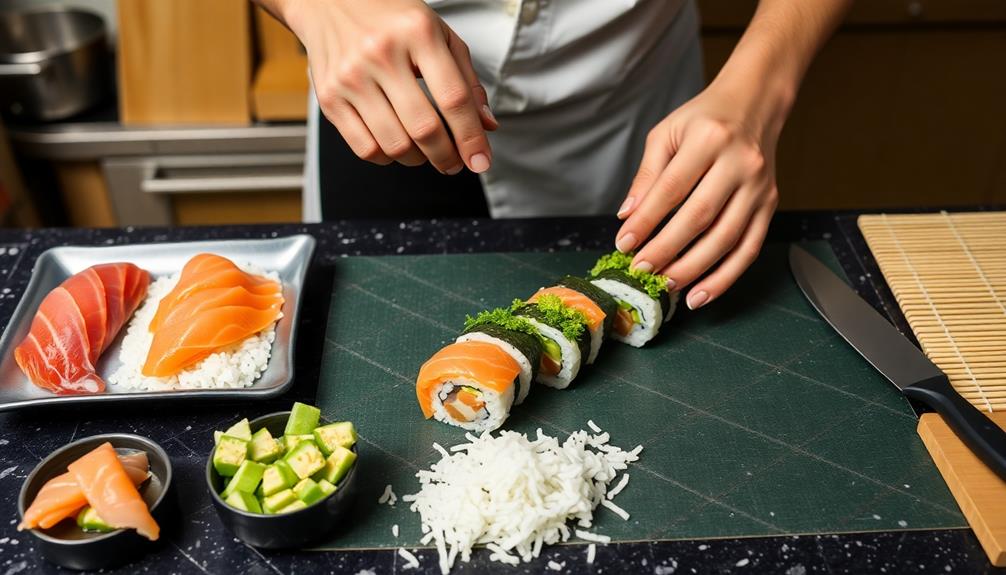
Step 1. Gather Fresh Sushi-Grade Ingredients
![collect premium sushi ingredients](https://madtasting.com/wp-content/uploads/2025/11/collect_premium_sushi_ingredients.jpg)
Obtaining fresh, sushi-grade ingredients is pivotal to crafting authentic sushi at home. Seek out a reputable local fishmonger or Asian grocery store to source the highest quality, sushi-grade fish.
Look for tuna, salmon, yellowtail, and other popular sushi varieties that are bright in color, firm to the touch, and free of any discoloration or strong odors.
In addition to fish, you'll need short-grain Japanese rice, rice vinegar, sugar, and salt to prepare the sushi rice.
Opt for nori seaweed sheets, a bamboo sushi mat, a sharp knife, and other essential tools. Consider adding avocado, cucumber, and other fresh produce to complement your sushi fillings.
Carefully inspect all ingredients, verifying their freshness and suitability for sushi preparation.
Handling sushi-grade foods with care is crucial to ensuring food safety and preserving the delicate flavors.
With the right ingredients on hand, you're well on your way to crafting restaurant-quality sushi at home. All it takes is a bit of preparation and attention to detail to roll up sushi that looks and tastes just like your favorite eatery’s. While sushi may seem intimidating at first, following a step-by-step guide can make the entire process enjoyable and rewarding. And if you’re feeling extra ambitious, why not explore an authentic tortillas recipe to complement your culinary adventure with another homemade delight?
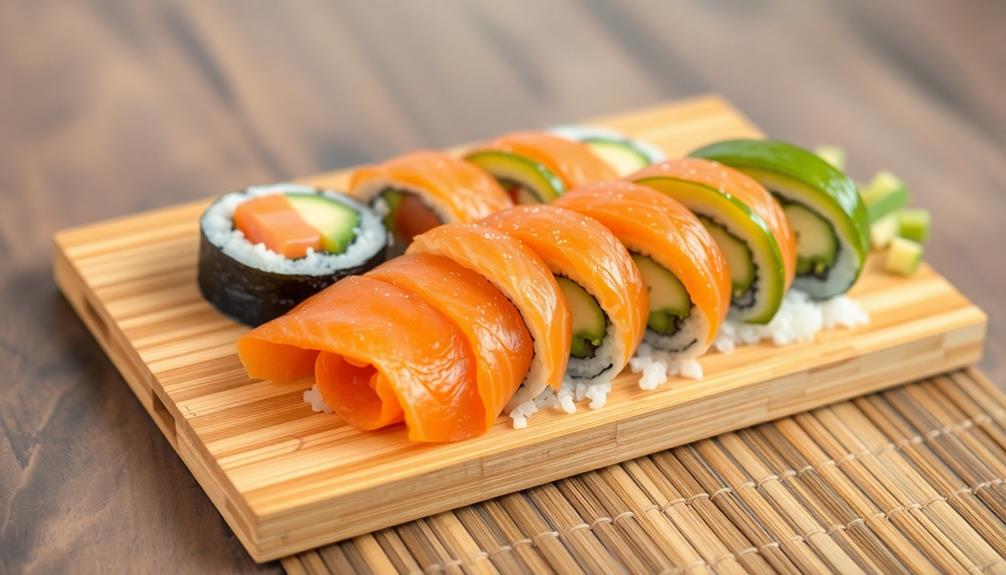
Step 2. Perfectly Roll Sushi Using a Bamboo Mat
![roll sushi with bamboo](https://madtasting.com/wp-content/uploads/2025/11/roll_sushi_with_bamboo.jpg)
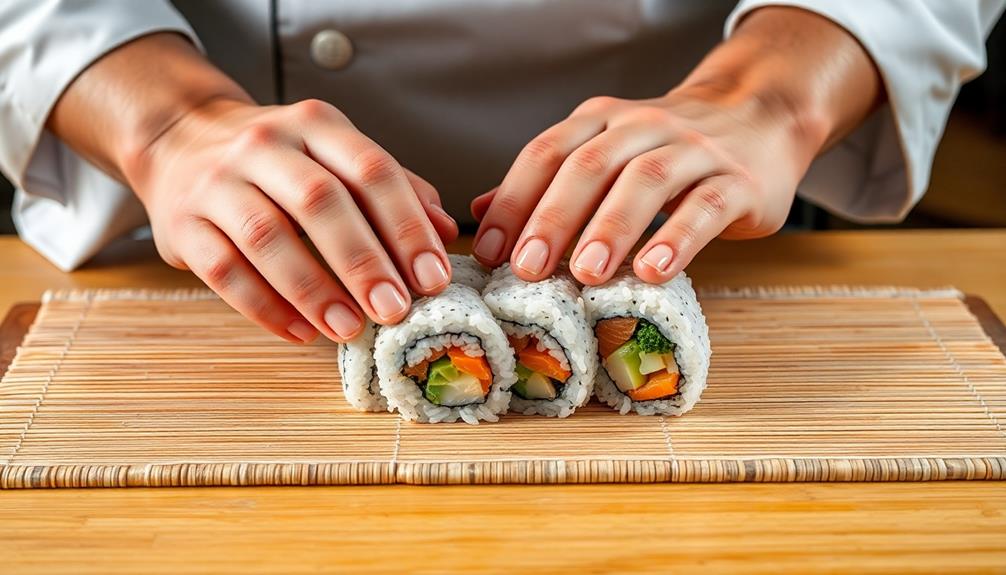
Carefully place the bamboo sushi mat on a clean, flat surface. Lightly moisten the mat with a damp cloth to prevent the rice from sticking.
Take a portion of sushi rice and spread it evenly over the center of the mat, leaving a 1-inch border at the top. Gently press the rice into the mat, shaping it into a flat, rectangular layer.
Next, place your choice of sushi fillings, such as thinly sliced fish, vegetables, or cooked shrimp, in a line across the rice. Be mindful not to overstuff the roll.
Grasping the bottom edge of the mat, slowly roll it up and over the fillings, applying gentle pressure to shape the roll. Continue rolling until the sushi is fully wrapped. Moisten the exposed rice with a little water to help seal the roll.
Using a sharp, wet knife, slice the sushi roll into 6-8 even pieces. Serve with soy sauce, wasabi, and pickled ginger for the authentic sushi experience.
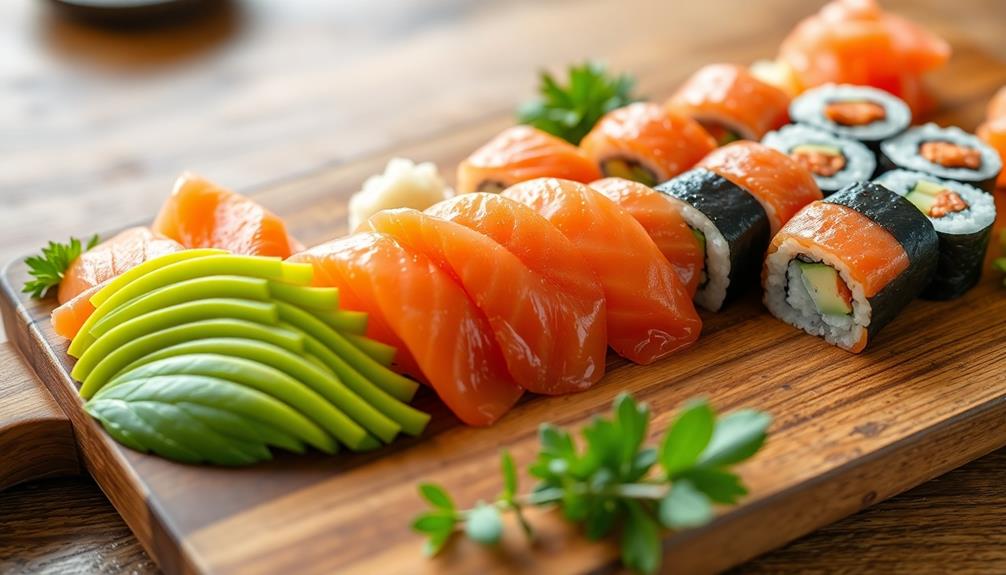
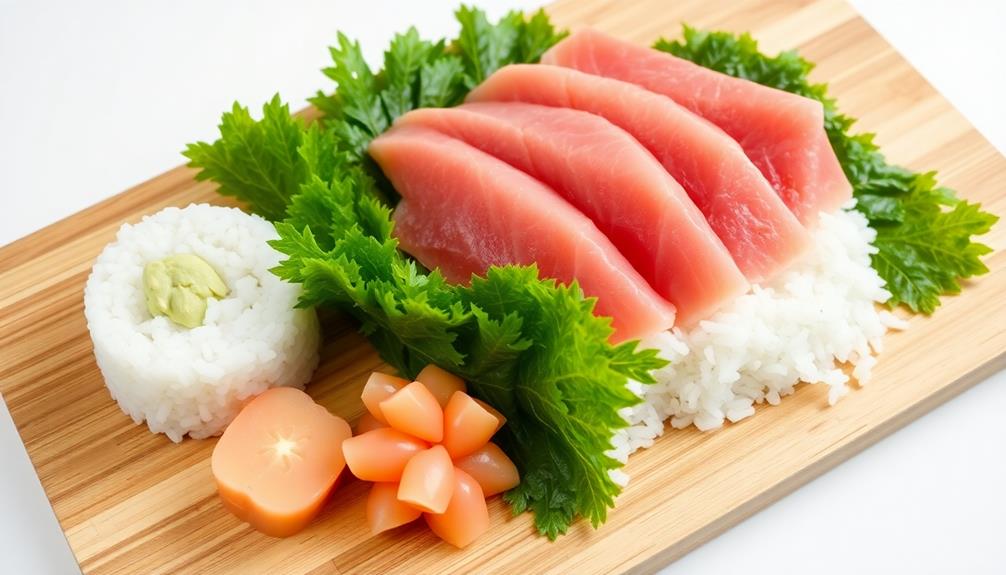
Step 3. Slice Fish Into Thin Pieces
![slice fish into pieces](https://madtasting.com/wp-content/uploads/2025/11/slice_fish_into_pieces.jpg)
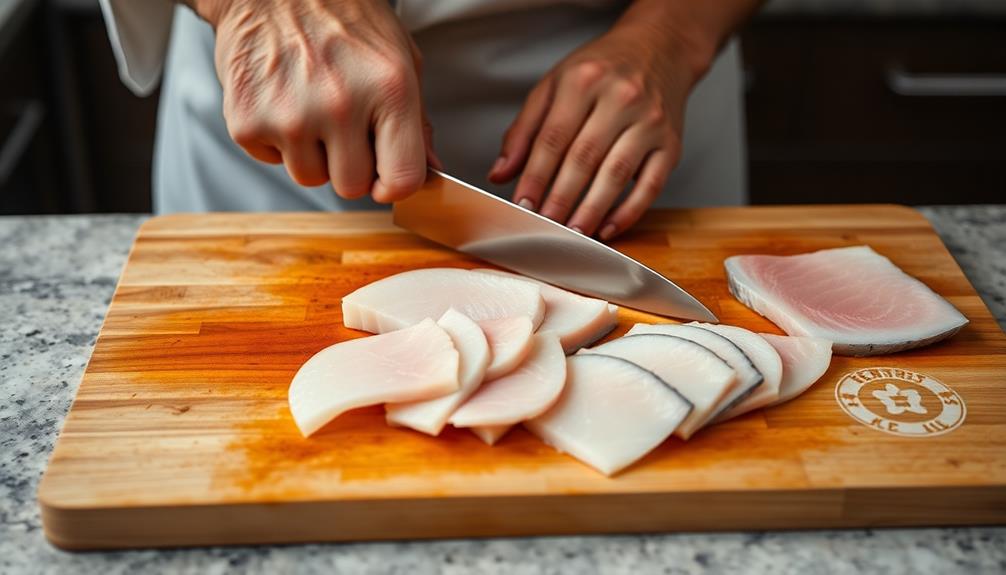
Across a clean cutting board, position the fresh fish fillet. Using a sharp, high-quality knife, begin slicing the fish into thin, uniform pieces.
Gently press down on the blade as you slice, maintaining a steady, controlled motion. Aim for slices that are approximately 1/4-inch thick, ensuring they're thin enough to melt in your mouth but not so delicate that they fall apart.
As you slice, keep the knife angled slightly to achieve that classic sashimi-style shape. Periodically check the thickness, adjusting your technique as needed.
Slice against the grain of the fish for the most tender texture. Once you've portioned the entire fillet, arrange the sashimi slices neatly on a serving platter.
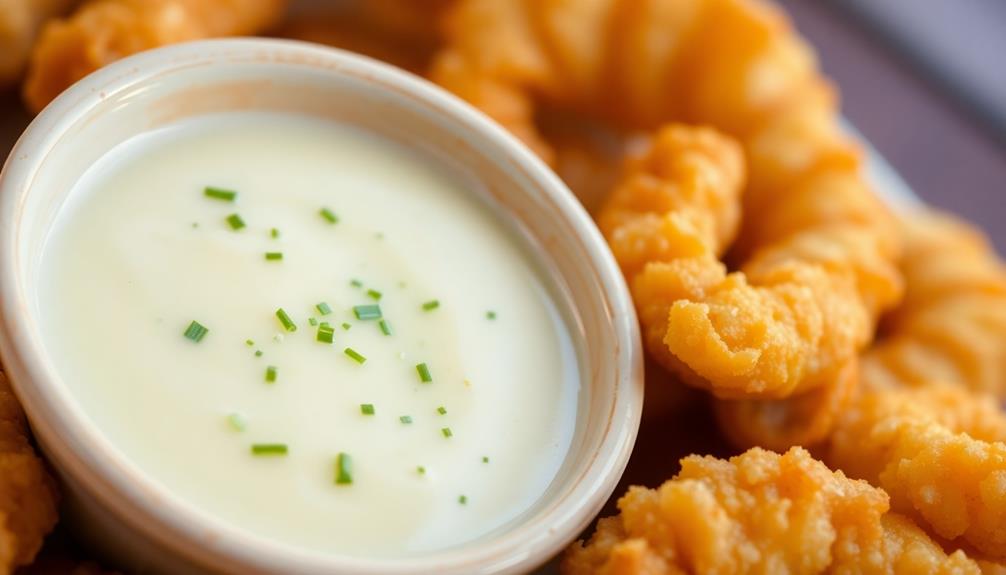
Step 4. Serve Sushi With Soy Sauce
![serve sushi with soy](https://madtasting.com/wp-content/uploads/2025/11/serve_sushi_with_soy.jpg)
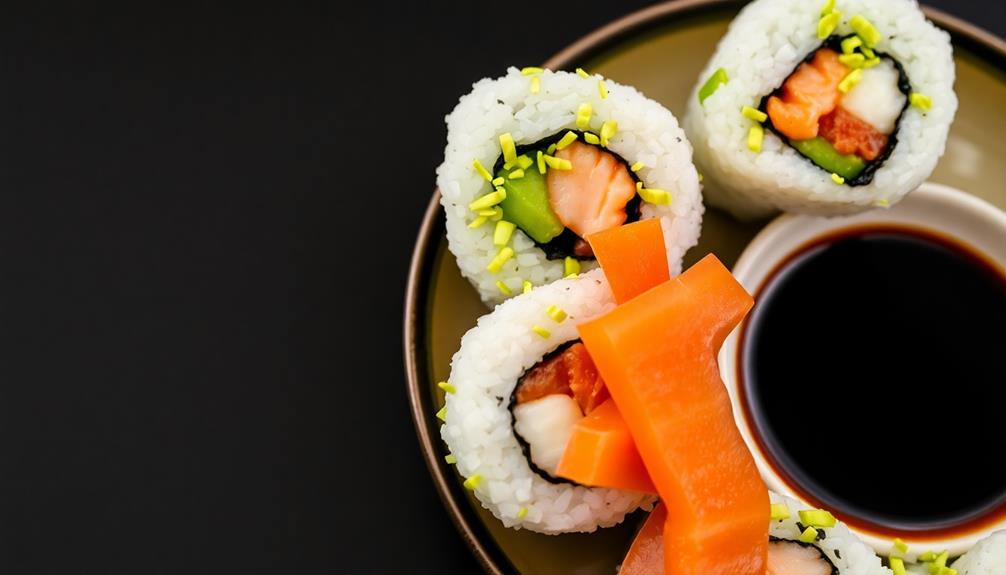
With the sashimi beautifully presented, it's time to enhance the flavors. Soy sauce is the classic accompaniment for sushi, adding a savory depth that complements the fresh fish.
Encourage your guests to drizzle a small amount of soy sauce directly onto the sashimi, using the sauce sparingly to avoid overpowering the delicate flavors.
For a more traditional experience, serve the soy sauce in a small dipping dish, or ramekin, alongside the sushi plate. This allows your guests to control the amount of sauce they use, dipping each piece individually.
You may also wish to provide:
- Wasabi – The fiery green paste that can be mixed with a bit of soy sauce for a bolder flavor.
- Pickled ginger – The pale pink slices cleanse the palate between bites, preparing the taste buds for the next piece of sushi.
With these classic accompaniments, your guests can customize their sushi experience to their personal preferences, enhancing the authentic flavors of your homemade sushi.
Step 5. Garnish Sushi With Pickled Ginger
![garnish sushi with ginger](https://madtasting.com/wp-content/uploads/2025/11/garnish_sushi_with_ginger.jpg)
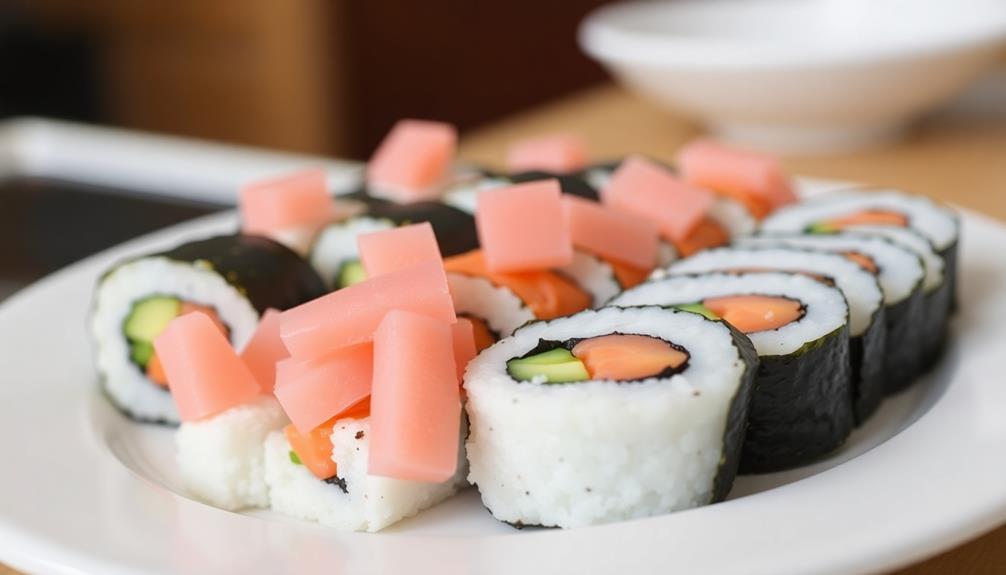
Pickled ginger, with its pale pink hue and tangy-sweet flavor, complements the fresh sushi beautifully. It's a common garnish that adds a refreshing contrast to the rich, umami-packed sushi.
To prepare pickled ginger, start by thinly slicing fresh ginger root. Soak the sliced ginger in a mixture of rice vinegar, sugar, and salt. The acidic vinegar softens the ginger's spiciness, while the sugar balances it with sweetness.
Let the mixture sit for at least 30 minutes, stirring occasionally, until the ginger has a translucent, vibrant pink appearance.
Drain the pickled ginger and place it in a small dish on the side of your sushi plate. Encourage your guests to take a bite of the ginger between sushi pieces to cleanse their palates and prepare for the next flavor-packed bite.
The ginger's zesty kick will help stimulate the senses and enhance the overall sushi experience.
Final Thoughts
![concluding reflections and insights](https://madtasting.com/wp-content/uploads/2025/11/concluding_reflections_and_insights-73.jpg)
Mastering the art of authentic sushi at home may seem daunting, but with the right techniques and guidance, you can elevate your culinary skills and impress your guests.
While the journey of crafting sushi from scratch may seem intimidating, the rewards of savoring the fresh, flavorful results are well worth the effort.
Remember, sushi-making is a delicate balance of precision and artistry. Pay close attention to the quality of your ingredients, the sharpness of your knives, and the temperature of your rice. The rice should be seasoned just right, striking the perfect balance between sweet, salty, and tangy. By consistently monitoring the heat and moisture levels, you can achieve perfect sushi rice every time. Finally, be patient and deliberate in your technique; rushing the process can compromise both flavor and presentation. Additionally, practice makes perfect, so don’t be discouraged if your first attempts aren’t exactly what you envisioned. Follow a *perfect sushi rice recipe* and adjust it based on your taste and the specific ingredients you’re working with. Over time, you’ll develop a personal rhythm that allows you to craft sushi that is as visually stunning as it is delicious.
Experiment with different flavor combinations, and don't be afraid to get creative.
As you continue to hone your sushi-making skills, take pride in the dishes you create. Sharing authentic sushi with loved ones is a truly special experience that celebrates the rich culinary traditions of Japan.
Embrace the process, enjoy the journey, and savor every bite. With practice and passion, you'll be crafting sushi masterpieces in no time.
Frequently Asked Questions
What Type of Rice Is Best for Making Sushi?
The best type of rice for making sushi is short-grain Japanese rice. It's sticky, tender, and has the perfect texture to hold the shape of the sushi roll. You'll want to use a high-quality, sushi-grade rice for the most authentic taste.
How Long Can Homemade Sushi Be Stored?
Homemade sushi can be stored for up to 24 hours in the refrigerator. However, it's best to consume it within the first 12 hours for optimal freshness and flavor. Storing it any longer may compromise the texture and taste.
Do I Need Special Equipment to Make Sushi at Home?
You don't need any special equipment to make sushi at home. A sharp knife, bamboo mat, and a few other basic tools are all you need to create delicious sushi right in your own kitchen.
How Do I Achieve the Perfect Sushi Rice Texture?
To achieve the perfect sushi rice texture, you'll need to rinse the rice thoroughly, cook it with the right water-to-rice ratio, and season it with rice vinegar, sugar, and salt while it's still hot.
What Are Some Common Mistakes to Avoid When Making Sushi?
When making sushi, avoid common mistakes like overpacking the rice, using the wrong type of rice, not seasoning the rice properly, and cutting the fish sloppily. Pay attention to detail, and you'll create delicious sushi at home.
Giovanni is our Chief Tasting Evangelist and the charismatic face of Mad Tasting. He inspires a sense of culinary wonder in all who encounter our brand. With boundless enthusiasm for the art of tasting and a gift for captivating audiences, Giovanni leads our immersive tasting experiences and workshops. He empowers food enthusiasts to discover the true depth and complexity of the flavors we celebrate. Whether he’s guiding a private group through a blind tasting or hosting a masterclass on the art of pairing, Giovanni’s infectious passion for the culinary world is the driving force behind our mission to share the extraordinary.
Appetizers
Romesco: A Flavorful Spanish Sauce for Any Dish
Nourish your taste buds with Romesco sauce, a Spanish culinary treasure that adds a burst of flavor to every dish—discover the secret behind its irresistible allure.
![delicious spanish sauce recipe](https://madtasting.com/wp-content/uploads/2024/06/delicious_spanish_sauce_recipe.jpg)
Experience the true essence of Spanish culinary expertise with Romesco sauce—an exquisite blend of roasted red peppers, garlic, almonds, paprika, and vinegar that hails from Catalonia. This delicious sauce is a prized staple in Spanish cooking, enriching meats, vegetables, and seafood with its flavorful, smoky notes. Enhance your dishes with the rich nuttiness of almonds, the bold flavor of garlic, the tangy bite of vinegar, and the intricate depth of paprika, resulting in a mouthwatering, smoky sauce that will excite your taste buds. Embark on a journey into the world of Romesco flavors, promising an adventure in authentic Spanish cuisine and sensational aromas.
Key Takeaways
- Romesco sauce is a versatile Spanish sauce enhancing meats, veggies, and seafood.
- Key ingredients include almonds, garlic, vinegar, and paprika for depth and flavor.
- Roast red peppers for sweetness and smoky essence in the sauce.
- Pair with grilled veggies, seafood, or use as a pizza topping.
- Store in a sealed container in the fridge for up to 10 days or freeze for later use.
Romesco Sauce Overview
Romesco sauce, a flavorful Spanish condiment hailing from Catalonia, is known for its rich blend of roasted red peppers, garlic, almonds, paprika, and vinegar. This versatile sauce, originating from the Catalan region, is a staple in Spanish cuisine, offering a unique combination of smoky, nutty, and tangy flavors. With its base of roasted red bell peppers, Romesco sauce provides a vibrant color and robust taste that complements a variety of dishes. Whether used as a dip, spread, or condiment, this Spanish sauce enhances the flavor profile of meats, vegetables, and seafood.
Romesco sauce's popularity stems from its easy preparation. By combining ingredients like roasted red peppers, garlic, almonds, paprika, and vinegar in a food processor, you can create a delectable sauce in under 5 minutes. Its versatility extends to storage, as Romesco sauce can be refrigerated for 5-7 days in an airtight container and frozen for up to 6 months, allowing for convenient meal planning and preparation.
Key Ingredients for Romesco Sauce
![romesco sauce recipe essentials](https://madtasting.com/wp-content/uploads/2025/06/romesco_sauce_recipe_essentials.jpg)
Almonds, garlic, vinegar, and paprika are essential components in crafting the rich and versatile Romesco sauce. These key ingredients, along with roasted red peppers, form the foundation of this flavorful Spanish sauce. The almonds contribute a nutty depth, while the garlic adds a pungent kick. Vinegar provides a tangy acidity that balances the sweetness of the roasted red peppers. Paprika, with its smoky and earthy notes, enhances the overall complexity of the sauce.
The combination of these ingredients results in a sauce that isn't only delicious but also incredibly adaptable. Romesco sauce can be paired with a variety of dishes, from grilled meats and seafood to roasted vegetables and even pasta. The use of roasted red peppers and almonds gives Romesco its signature taste and texture, making it a versatile condiment that can elevate any meal.
Simple Romesco Sauce Recipe
![delicious romesco sauce recipe](https://madtasting.com/wp-content/uploads/2025/06/delicious_romesco_sauce_recipe.jpg)
Crafting a flavorful Romesco sauce at home requires just a few simple ingredients and minimal effort. To create this delectable sauce, follow these steps:
- Roast the Red Peppers and Tomatoes: Start by roasting red peppers and tomatoes in the oven until they're charred and tender. This process enhances their sweetness and adds a smoky flavor to the sauce.
- Toast the Almonds: Toast almonds in a dry skillet until they're golden brown and fragrant. This step brings out the nuttiness of the almonds, which will contribute to the rich texture of the Romesco sauce.
- Blend the Ingredients: In a food processor, combine the roasted red peppers, tomatoes, toasted almonds, garlic, paprika, and olive oil. Blend until smooth and creamy, adding salt and pepper to taste. This mixture will result in a luscious Romesco sauce with a perfect balance of flavors and a delightful smoky undertone.
Tips for Perfecting Romesco Sauce
![perfecting romesco sauce tips](https://madtasting.com/wp-content/uploads/2025/06/perfecting_romesco_sauce_tips.jpg)
For a foolproof Romesco sauce, make sure to select high-quality ingredients to elevate the flavors of your dish.
When following a Romesco sauce recipe, make certain you have excellent components like roasted red peppers, smoked paprika, olive oil, and almonds. These ingredients are essential for achieving that authentic Spanish taste that will enhance your dishes.
To perfect your Romesco sauce, control the consistency by adjusting the amount of olive oil added during the blending process in a food processor. This step allows you to tailor the sauce to your desired thickness, whether you prefer it smooth or with a bit more texture.
Roasting Red Peppers for Romesco
![perfecting romesco sauce recipe](https://madtasting.com/wp-content/uploads/2025/06/perfecting_romesco_sauce_recipe.jpg)
To prepare Romesco sauce, start by roasting red peppers to enhance their sweetness and deepen their flavor profile. Here's how to get the best results:
- Char the Skin: When roasting red peppers, make sure the skin is charred to make peeling them easier and to impart a smoky flavor to the peppers.
- Roasting Methods: You can roast red peppers in the oven under the broiler or directly over a gas flame. Both methods work well; choose the one that suits you best.
- Steam for Easy Peeling: After roasting, place the peppers in a sealed container to steam. This helps loosen the skin, making it easier to remove and revealing the tender, roasted flesh underneath.
Pairing Romesco Sauce With Dishes
![enhancing dishes with romesco](https://madtasting.com/wp-content/uploads/2025/06/enhancing_dishes_with_romesco.jpg)
Enhance your next meal with the delectable touch of Romesco sauce, a versatile condiment that enhances a variety of dishes with its nutty and slightly smoky flavors.
When deciding on dishes to use Romesco sauce with, consider pairing it with grilled veggies. The sauce complements the charred flavors of grilled vegetables, enriching their natural taste with its rich profile.
Additionally, Romesco sauce is a perfect match for roasted vegetables, adding depth and complexity to dishes like roasted potatoes, carrots, or cauliflower.
For seafood enthusiasts, incorporating Romesco sauce into seafood dishes can be a game-changer. It pairs exceptionally well with grilled fish or shrimp, infusing the seafood with a robust and savory essence.
Whether you're grilling a piece of salmon or savoring some shrimp skewers, Romesco sauce is there to enhance the flavors.
Looking for new recipe ideas? Try using Romesco sauce in pasta dishes or as a topping for pizzas to introduce a unique Mediterranean twist to your meals.
The possibilities are endless when it comes to the culinary adventures you can partake in with this flavorful Spanish sauce.
Storing Romesco Sauce
![preserving homemade romesco sauce](https://madtasting.com/wp-content/uploads/2025/06/preserving_homemade_romesco_sauce.jpg)
Storing Romesco sauce properly is essential to maintain its freshness and flavor profile. Here are some key tips for storing your Romesco sauce:
- Use a sealed container: After preparing your Romesco sauce, transfer it into a sealed container to prevent air exposure that can lead to oxidation and spoilage.
- Refrigerate promptly: Place the sealed container of Romesco sauce in the fridge for best storage. The sauce can last in the refrigerator for about 7 to 10 days, ensuring its flavors remain intact.
- Mind the olive oil: Given that Romesco sauce contains olive oil, refrigeration helps maintain its quality. Olive oil can solidify in the fridge, so allow the sauce to come to room temperature and stir well before serving to maintain a consistent texture and flavor.
Freezing Romesco Sauce
![chilled romesco for summer](https://madtasting.com/wp-content/uploads/2025/06/chilled_romesco_for_summer.jpg)
For longer-term storage options, consider freezing your Romesco sauce in freezer-safe containers. Freezing Romesco sauce is a crucial method to extend its shelf life for up to 6 months. When freezing your sauce, it is important to use airtight, freezer-safe containers to maintain its flavor and texture. To make the thawing process easier, store the Romesco sauce in portioned containers for individual use without the need to defrost the entire batch.
Below is a table outlining the process of freezing and thawing Romesco sauce:
Task | Instructions |
---|---|
Freezing Romesco Sauce | Transfer the sauce into freezer-safe containers. |
Leave some space at the top to account for expansion. | |
Seal the containers tightly to prevent freezer burn. | |
Thawing Instructions | Thaw the sauce in the refrigerator overnight before use. |
Stir well post-thawing to guarantee proper consistency. | |
Use the sauce within 3 days after thawing for best quality. |
More Sauce Recipes to Try
![explore new sauce varieties](https://madtasting.com/wp-content/uploads/2025/06/explore_new_sauce_varieties.jpg)
If you're looking to expand your culinary repertoire, consider exploring a tangy citrus infusion sauce to add a fresh zing to your dishes.
Experimenting with a spicy heat variation can bring a whole new level of excitement to your meals, perfect for those who enjoy a kick of flavor.
For a luxurious twist, venture into creating a creamy texture experiment that will elevate the richness of your favorite recipes.
Tangy Citrus Infusion
Consider exploring more sauce recipes that feature a tangy citrus infusion to elevate your culinary creations with a burst of invigorating freshness.
Here are three citrus-infused sauce options to try:
- Mojo Sauce: Originating from the Canary Islands, Mojo sauce is a vibrant blend of olive oil, garlic cloves, citrus juice, and spices. Its tangy citrus flavor pairs exceptionally well with grilled meats and seafood, adding a revitalizing kick to your dishes.
- Chimichurri Sauce: Hailing from Argentina, Chimichurri sauce is a mix of parsley, garlic, vinegar, oil, and a hint of citrus. This sauce offers a rejuvenating and tangy twist to your grilled dishes, making it a versatile condiment for various meats.
- Orange-Ginger Sauce: Create a unique citrus-infused sauce by combining fresh orange juice, grated ginger, soy sauce, and a touch of honey. This sauce provides a sweet and tangy flavor profile, perfect for drizzling over roasted vegetables or grilled chicken. Experiment with this sauce to add a delightful citrusy note to your meals.
Spicy Heat Variation
Wondering how to elevate the heat level of your Romesco sauce? Experiment with different types of spicy peppers to add a fiery kick to your sauce. Consider incorporating roasted red peppers for a subtle heat, or intensify the spiciness by adding cayenne or chili flakes. For a smoky flavor, try using chipotle peppers or adobo sauce, providing a unique twist to the traditional Romesco recipe. To achieve a milder spicy kick, include a touch of hot paprika or a dash of Tabasco sauce. For those seeking a complex and fiery flavor profile, explore the use of harissa paste, a North African chili paste known for its bold taste. Adjust the quantity of spicy ingredients in your Romesco sauce to tailor the heat level to your liking, ranging from mild to extra spicy.
Spicy Ingredients | Heat Level | Flavor Profile |
---|---|---|
Roasted Red Peppers | Mild | Subtle heat |
Spicy Peppers | Medium | Intense spiciness |
Chipotle Peppers | High | Smoky twist |
Hot Paprika | Mild to Med | Smoky, mild heat |
Harissa Paste | High | Bold and complex flavor |
Creamy Texture Experiment
Enhance the velvety texture of your Romesco sauce by experimenting with creamy additions like soaked cashews or Greek yogurt. These elements can introduce a rich and nutty flavor from the cashews while incorporating tanginess and creaminess from the Greek yogurt.
To elevate your Romesco sauce, consider the following:
- Soaked Cashews: By blending soaked cashews into your Romesco sauce, you can achieve a smooth and creamy texture that complements the robust flavors of the traditional ingredients. The cashews provide a luxurious mouthfeel and a subtle nuttiness to the sauce.
- Greek Yogurt: Incorporating Greek yogurt into your Romesco sauce can add a delightful tanginess and creaminess. This addition not only enhances the texture but also balances the flavors of the sauce, creating a harmonious blend of tastes.
- Personalization: Experiment with the amount of soaked cashews or Greek yogurt based on your preferences to achieve the desired consistency and flavor profile. Adjusting these creamy elements allows you to tailor the sauce to your liking, creating a unique variation that suits your palate.
Frequently Asked Questions
What Does Romesco Sauce Taste Like?
Romesco sauce has a rich, smoky, and slightly sweet flavor profile. It offers a creamy texture with a nutty undertone from almonds, along with a tangy and slightly acidic kick from vinegar. It's versatile and adds depth to dishes.
What Is the Most Popular Sauce in Spain?
When in Spain, the most popular sauce you'll find is Romesco. Its rich flavors and versatility have won over many hearts. Made with roasted red peppers, nuts, garlic, and more, Romesco adds a delicious touch to any dish.
What Is Romesco Made Of?
Romesco is made of roasted red peppers, almonds, garlic, olive oil, vinegar, tomatoes, paprika, and seasonings for a flavorful Spanish twist. Nuts like almonds or hazelnuts give it a unique texture and taste.
What Is Spanish Sauce Made Of?
You make Spanish sauce with roasted red peppers, garlic, nuts like almonds, olive oil, and vinegar. It's a rich, smoky, tangy blend perfect for dips, spreads, or sauces on grilled meats, veggies, or seafood.
Can Castelvetrano Olive Salsa Verde be used as a substitute for Romesco sauce in Spanish dishes?
Yes, castelvetrano olive salsa verde can be used as a substitute for Romesco sauce in Spanish dishes. The unique blend of flavors in castelvetrano olive salsa verde adds a rich and tangy taste to the dish, similar to the nutty and smoky flavors of Romesco sauce. However, castelvetrano olive salsa verde brings a fresher, herbaceous profile that can brighten up grilled vegetables, seafood, or roasted meats. Its vibrant green hue and smooth texture also make it an appealing visual substitute for Romesco sauce. Whether paired with traditional Spanish dishes or creative fusion recipes, castelvetrano olive salsa verde offers a versatile and flavorful twist. Additionally, making your own castelvetrano olive salsa recipe allows you to tailor the flavors to suit your personal taste, whether by adding extra herbs, garlic, or a touch of citrus. This customization opens up endless possibilities for pairing, making it a delightful addition to everything from classic tapas to modern culinary creations. Its ability to complement a wide variety of ingredients ensures that the castelvetrano olive salsa recipe will quickly become a go-to option in your kitchen.
Conclusion
You've now discovered the secret to creating a delectable romesco sauce that will elevate any dish to new heights. Like a burst of flavor cascading over your taste buds, this Spanish sauce will add a touch of Mediterranean magic to your meals.
So go forth and whip up a batch of romesco sauce, and watch as your culinary creations are transformed into gourmet delights. Your taste buds will thank you!
Francesca, as the creative force behind our compelling content, combines culinary expertise with journalistic flair. She has a deep appreciation for the cultural histories and artisanal traditions that influence remarkable flavors around the world. Through engaging narratives, she transports our audience to the heart of each culinary experience. Whether she’s documenting the centuries-old techniques of a Sicilian cheese maker or uncovering the personal stories of our producers, Francesca’s storytelling prowess drives our mission to connect people through food.
Snacks
Cheesy Bread: A Gooey and Delicious Side
Warm, gooey, and irresistible, cheesy bread is the perfect side that will elevate your meals to a whole new level.
![tasty cheese filled bread option](https://madtasting.com/wp-content/uploads/2024/06/tasty_cheese_filled_bread_option.jpg)
Make the irresistible cheesy bread by combining French or artisan bread with a mix of mozzarella, cheddar, and Parmesan. Enhance the flavor by infusing butter with herbs. Carefully knead the dough for 8-10 minutes, allowing it to proof properly to improve the texture. Get creative with ingredients like rosemary, garlic butter, or jalapeños for a unique twist. Layer the cheeses between slices and bake until golden and bubbly. This versatile treat is perfect to accompany any dish and can be customized with various toppings. Store any leftovers in the refrigerator for 3-4 days or freeze for up to 1-2 months. Elevate your meals with this gooey delight, savoring every bite.
Key Takeaways
- Gooey cheese melts between bread layers.
- Versatile side dish for various meals.
- Customizable with different cheeses and toppings.
- Comforting treat with warm, flavorful elements.
- Enjoy warm and bubbly for ultimate satisfaction.
Ingredients
You'll need a soft loaf like French bread or artisan bread for making cheesy bread. This bread serves as the perfect base to hold the gooey cheese filling.
When selecting your bread, make sure it's fresh and slightly crusty on the outside, yet soft and fluffy on the inside to create a delightful texture contrast.
The combination of bread, cheese, garlic, and butter forms the foundation of this delectable dish. The butter, infused with aromatic herbs, is generously drizzled over the bread before baking, enriching the flavors and adding a subtle richness to each bite.
As for the cheese, options abound, with popular choices including mozzarella, cheddar, or Parmesan. These cheeses melt beautifully, creating a luscious and indulgent filling that oozes out when the bread is sliced.
Together, these ingredients harmonize to produce a savory treat that's versatile and pairs exceptionally well with various dishes or as a standalone appetizer.
Mixing the Dough
![baking bread from scratch](https://madtasting.com/wp-content/uploads/2025/06/baking_bread_from_scratch.jpg)
When making cheesy bread, it's essential to gather the necessary dough ingredients like flour, yeast, sugar, and salt.
After combining these ingredients in a mixing bowl, gradually add warm water until a sticky dough forms.
Remember to knead the dough for about 8-10 minutes until it becomes smooth and elastic.
Dough Ingredients Needed
Combining flour, yeast, salt, and water is vital for creating the base dough for cheesy bread. These dough ingredients serve as the foundation for a delicious cheesy bread recipe.
When these components are mixed together, they form the structure that will hold the gooey and savory shredded cheese during baking. The correct proportions and thorough mixing are essential for the success of the bread.
Ensuring that the dough rises properly, doubling in size during fermentation, is a key step in achieving the desired light and airy texture in the final product. The baking process relies heavily on the quality of the dough, and proper proofing times are necessary for developing the flavor and structure of the bread.
Kneading and Rising
To achieve the desired smooth and elastic texture in your homemade cheesy garlic bread, the process of kneading the dough is crucial. Here are some key points to keep in mind while kneading and allowing the dough to rise:
- Kneading the dough involves combining ingredients like flour, water, yeast, and salt to form a smooth and elastic texture.
- The process of kneading helps develop gluten in the dough, giving it structure and elasticity.
- Proper kneading guarantees even distribution of ingredients and helps create a uniform texture in the finished bread.
- Allowing the dough to rise after kneading gives the yeast time to ferment and produce carbon dioxide, causing the dough to expand and become light and airy.
Adding Flavorful Twists
![incorporating unique culinary ideas](https://madtasting.com/wp-content/uploads/2025/06/incorporating_unique_culinary_ideas.jpg)
Consider infusing your cheesy bread with a burst of unique flavors by experimenting with different herbs like rosemary, thyme, or basil. These herbs can complement the richness of the cheeses like shredded mozzarella, cheddar cheese, or a blend of sharp cheddar, Gruyère, and fontina.
To further enhance the taste profile, incorporate garlic butter for a savory kick and sprinkle chopped fresh parsley for a fresh herbal note.
For a more adventurous twist, try adding ingredients like caramelized onions, roasted garlic, or sun-dried tomatoes to your cheesy bread. If you prefer a hint of heat, consider sliced jalapeños, red pepper flakes, or a touch of chipotle powder to spice things up.
To elevate the overall presentation, enhance the toppings with toasted breadcrumbs, chopped nuts, or a sprinkle of additional fresh herbs before baking. These flavorful twists will surely take your cheesy bread to the next level, offering a delicious experience for your taste buds.
Spreading and Topping
![cookie dough ice cream](https://madtasting.com/wp-content/uploads/2025/06/cookie_dough_ice_cream.jpg)
When it comes to spreading and topping your cheesy bread, the possibilities are endless. Experiment with different cheeses, herbs, and spreads to create unique flavor profiles.
Topping Choices
Spread a layer of garlic butter on the cut sides of the French bread for enhanced flavor before adding your choice of cheese toppings.
When it comes to topping choices for your cheesy bread, consider these options:
- Mozzarella Cheese: A classic choice that melts beautifully and adds a gooey texture to your bread.
- Parmesan Cheese: Known for its sharp and savory flavor, Parmesan cheese can elevate the taste of your cheesy bread.
- Swiss Cheese: Experiment with Swiss cheese for a unique and slightly nutty flavor profile that complements the other cheeses.
- Olive Oil: Brushing the bread with olive oil before baking not only enhances the crispiness but also adds a hint of richness to the overall dish.
Spreading Techniques
To achieve a delectably gooey and flavorful cheesy bread, master the art of spreading the garlic butter and topping the French bread with a generous mix of cheeses. Begin by using a butter knife or offset spatula to evenly spread the softened butter infused with garlic on the cut sides of the French bread. This step is vital as it guarantees that each bite delivers a burst of garlic flavor that complements the cheesy goodness.
Next, sprinkle a generous amount of mozzarella and Parmesan cheese over the buttered bread, making sure to cover the entire surface evenly. This secures that every cheesy bite is packed with a harmonious blend of flavors. Experiment with additional cheeses like Swiss cheese or try brushing the bread with olive oil to elevate the taste profile further.
Baking to Perfection
![perfecting the baking process](https://madtasting.com/wp-content/uploads/2025/06/perfecting_the_baking_process.jpg)
To bake cheesy bread to perfection, make sure that the cheese is evenly layered between the slices of bread before drizzling with herb-infused butter. Here are some essential steps to guarantee your cheesy bread turns out delicious every time:
- Place the assembled cheesy bread on a baking sheet lined with parchment paper to prevent sticking.
- Sprinkle a generous amount of shredded cheese on top of the bread loaf, ensuring even coverage for gooey, melted cheese throughout.
- Bake the cheesy bread in a preheated oven until the cheese is fully melted and bubbly, creating a golden crust on the edges.
- Remove the cheesy bread from the oven and let it cool slightly before slicing and serving alongside your favorite dishes.
Following these steps will result in a mouthwatering cheesy bread that's sure to be a hit at any gathering or meal.
Serving Suggestions
![perfect pairings for brunch](https://madtasting.com/wp-content/uploads/2025/06/perfect_pairings_for_brunch.jpg)
Consider pairing your cheesy bread with a variety of dishes to enhance its delicious flavor and versatility. Whether you're serving it as an appetizer or side, the gooey goodness of melted cheese on freshly baked bread is a crowd-pleaser.
Try serving the cheesy bread warm, straight out of the oven or at room temperature for the best texture and taste. To elevate your cheesy bread experience, serve it alongside a fresh salad, a comforting bowl of soup, a hearty Italian main course, or even some BBQ for a delightful meal combination. For a more indulgent experience, dip the cheesy bread in marinara sauce or garlic butter to add an extra burst of flavor.
When preparing your cheesy bread, consider wrapping the bread in foil to keep it warm and moist. You can also bake the bread in halves on a baking sheet for easy serving and sharing. The shredded cheese will melt beautifully, creating a gooey and irresistible treat for all to enjoy.
Storing Leftovers
![properly storing food leftovers](https://madtasting.com/wp-content/uploads/2025/06/properly_storing_food_leftovers.jpg)
Properly store any leftover cheesy bread in an airtight container in the refrigerator to maintain its freshness.
When dealing with leftover storage, follow these guidelines:
- For longer storage, consider freezing leftover cheesy bread in a freezer-safe bag or container.
- Reheat leftover cheesy bread in the oven for the best results, ensuring it retains its gooey texture.
- Cheesy bread can last in the refrigerator for 3-4 days when stored correctly.
- In the freezer, properly stored cheesy bread can maintain its quality for up to 1-2 months.
Enjoying the Delight
![savoring the sweet treats](https://madtasting.com/wp-content/uploads/2025/06/savoring_the_sweet_treats.jpg)
Indulge in the gooey delight of cheesy bread, a versatile and comforting treat that pairs perfectly with various dishes. Cheese bread is one of those favorite things that bring a smile to your face with every bite. Picture yourself pulling apart a warm, cheesy slice, the melted cheese stretching as you savor the combination of flavors. It's the simple pleasures in life, like enjoying a small bowl of cheesy bread, that can truly elevate a meal.
Whether as a side dish to a hearty soup or salad, or on its own as a satisfying snack, cheesy bread has a place on everyone's table.
The beauty of cheesy bread lies in its customizability. Add your favorite cheeses, sprinkle some herbs, or experiment with different toppings to create a cheesy bread that suits your taste preferences. The warmth and gooey texture of cheesy bread make it a delightful indulgence enjoyed by many.
Frequently Asked Questions
What Do You Eat Cheese Bread With?
When you're wondering what to pair with cheesy bread, think of delicious options like soups, salads, Italian mains, or BBQ spreads. Its gooey goodness can elevate your meal, making it a versatile and satisfying side.
What Is Cheesy Pull Apart Bread Made Of?
To make cheesy pull apart bread, you'll need a soft Belge or artisan loaf, sliced and stuffed with cheese. Drizzle butter and herbs, add pepper jack for spice. Bake for a gooey delight in just 25 minutes.
How Many Carbs Are in Domino's Cheesy Bread?
When you're wondering about the carb count in Domino's Cheesy Bread, it's important to check the nutritional information. The carb content can vary, so make sure to factor it in if you're watching your carbohydrate intake.
How Many Calories Are in Bread With Cheese?
When you savor bread with cheese, expect around 250-300 calories per serving. The calorie count can shift with cheese type and quantity. To trim down, pick lighter cheeses or smaller portions. Indulge moderately for balance.
Can Cheesy Bread and Saltine Cracker Toffee be Served Together as a Snack or Side?
Yes, cheesy bread and saltine cracker toffee can be served together as a sweet and salty toffee snack. The combination of the savory cheese with the sweet and crunchy toffee makes for a delicious and satisfying snack or side dish. Give it a try for a delightful flavor contrast. This pairing is perfect for casual gatherings, movie nights, or even as a quick treat to satisfy both sweet and savory cravings. If you’re feeling adventurous, you can customize the dish by experimenting with different cheeses or toppings to complement the saltine cracker toffee recipe. The balance of flavors will leave your guests impressed and reaching for seconds.
Conclusion
To sum up, cheesy bread is a delectable side dish that combines the satisfying crunch of bread with the rich creaminess of melted cheese.
It's a crowd-pleaser and can be easily customized to suit different tastes and preferences.
So, next time you're looking for a flavorful and indulgent treat, why not whip up a batch of cheesy bread and enjoy the gooey goodness that comes with each bite.
As they say, 'cheese makes everything better.'
Francesca, as the creative force behind our compelling content, combines culinary expertise with journalistic flair. She has a deep appreciation for the cultural histories and artisanal traditions that influence remarkable flavors around the world. Through engaging narratives, she transports our audience to the heart of each culinary experience. Whether she’s documenting the centuries-old techniques of a Sicilian cheese maker or uncovering the personal stories of our producers, Francesca’s storytelling prowess drives our mission to connect people through food.
Dessert
Maple Iced Pumpkin Cookies: A Sweet Autumn Treat
Indulge in the irresistible combination of pumpkin and maple with these delectable cookies, perfect for a cozy autumn day.
![autumn sweetness in cookies](https://madtasting.com/wp-content/uploads/2024/06/autumn_sweetness_in_cookies.jpg)
Indulge in Maple Iced Pumpkin Cookies, a dessert that combines the rich flavor of pumpkin with the sweet taste of maple, making it a perfect treat for the fall season. The recipe calls for pumpkin puree, warm spices, brown sugar, and a delicious maple icing. Follow the step-by-step instructions, which include gluten-free options and tips for cooling, to ensure the cookies turn out perfectly. The maple glaze, made with maple syrup, vanilla, and powdered sugar, adds a sweet touch to the cookies. You can customize the flavor with nuts, chocolate chips, or spices for a personal touch. Drizzle the glaze over the cooled cookies for a delicious treat. Intrigued by the flavor combination?
Key Takeaways
- Maple glaze enhances pumpkin cookies with sweet autumn flavors.
- Customize with nuts, chocolate chips, or dried fruit for added texture.
- Utilize gluten-free flour options for dietary preferences.
- Drizzle maple icing over cooled cookies for a delicious finishing touch.
- Pair with apple cider or pumpkin spice latte for a cozy treat.
Ingredients for Maple Iced Pumpkin Cookies
Featuring a harmonious blend of seasonal flavors, the Ingredients for Maple Iced Pumpkin Cookies are essential for creating a delightful autumn treat. These soft pumpkin cookies start with a base of pumpkin puree, lending a moist and tender texture.
The warm autumn spices like pumpkin pie spice add depth and richness to the cookie, reminiscent of a comforting slice of pumpkin pie. To top off these fall flavors, a sweet maple icing is prepared using melted butter, maple syrup, and powdered sugar.
The maple icing drizzled over the cookies provides a perfect balance of sweetness to complement the spiced pumpkin cookie base. Together, the combination of the soft pumpkin cookies and the maple frosting creates a festive treat that captures the essence of autumn in every bite.
Get ready to indulge in the cozy flavors of the season with these Maple Iced Pumpkin Cookies, a delightful treat for any fall gathering or a moment of personal indulgence.
Step-by-Step Recipe Instructions
![detailed cooking instructions provided](https://madtasting.com/wp-content/uploads/2025/06/detailed_cooking_instructions_provided-2.jpg)
To guarantee your maple iced pumpkin cookies turn out perfectly, you'll need to pay attention to three key points:
Baking Preparation Tips
Mixing the Ingredients
Icing and Decorating
These steps will guide you through the process of creating delicious cookies that capture the essence of fall.
Baking Preparation Tips
Prepare for baking by preheating your oven to 350 degrees F and lining your baking sheets with parchment paper. Ensuring your baking sheets are properly lined will prevent the cookies from sticking and make cleanup easier.
These chewy pumpkin cookies, infused with the delightful flavor of maple, will be a hit with all your autumn gatherings. If you're looking for a gluten-free option, you can easily adapt this recipe by using gluten-free flour. The addition of maple extract will enhance the overall taste profile of the cookies, adding a touch of sweetness and depth.
By following these baking preparation tips, you set yourself up for success when making these delicious treats. The parchment paper also helps with even baking, ensuring that each cookie comes out perfectly golden brown.
Mixing the Ingredients
Mix the butter, brown sugar, and granulated sugar together until fluffy to create a rich base for your maple iced pumpkin cookies. Start by combining 1/2 cup of softened butter, 1/2 cup of brown sugar, and 1/4 cup of granulated sugar in a large mixing bowl. Use a hand mixer or stand mixer to cream these ingredients until they form a light and airy mixture.
Next, add 1 egg, 1 teaspoon of vanilla extract, 1/2 cup of pure maple syrup, and 1/2 cup of pumpkin puree to the bowl. Whisk together these wet ingredients until well combined.
Slowly incorporate 2 cups of all-purpose flour, 1 teaspoon of baking powder, 1/2 teaspoon of baking soda, 1/2 teaspoon of salt, and 1 teaspoon of ground cinnamon into the wet mixture, stirring until a smooth dough forms.
This flavorful dough will be the foundation of your delicious maple iced pumpkin cookies.
Icing and Decorating
For a finishing touch that elevates the flavor of your maple iced pumpkin cookies, let's move on to the icing and decorating process.
The maple icing used for these fall cookies is a delightful combination of melted butter, powdered sugar, maple syrup, maple extract, vanilla extract, and a splash of milk, resulting in a sweet and flavorful glaze that complements the warm spices of the pumpkin cookies. Adjust the consistency of the icing by incorporating more milk for a thinner glaze or more powdered sugar for a thicker texture, allowing you to customize the final look of your cookies.
Once your pumpkin cookies have cooled, drizzle the maple glaze over them, ensuring a generous coating that enhances both the taste and appearance of the treats. Allow the glaze to set before serving to create a visually appealing dessert that promises a delightful blend of sweetness and maple undertones.
Don't hesitate to tweak the amount of maple syrup, maple extract, or vanilla extract in the icing to suit your personal preferences for a truly customized decorating experience.
Baking and Cooling Tips
![baking and cooling strategies](https://madtasting.com/wp-content/uploads/2025/06/baking_and_cooling_strategies.jpg)
Consider letting the freshly baked cookies rest on the baking sheet for about 5 minutes to make sure they set properly before transferring them to a wire rack. This step is important in cooling the cookies gradually, allowing them to firm up and avoid crumbling. Once the cookies are completely cooled, you can proceed with applying the maple icing. To make sure the maple icing sets well, you can place the cookies in the refrigerator for a short period after icing. This helps the frosting to firm up faster and maintain a glossy finish, enhancing the overall presentation of this delightful autumn treat.
Baking and Cooling Tips |
---|
Use a baking sheet with parchment paper to prevent sticking. |
Allow cookies to cool on the baking sheet for 5 minutes before transferring. |
Ensure cookies are completely cooled before applying maple icing. |
Refrigerate cookies after icing to speed up the setting process. |
Maple Icing Preparation
![sweet maple icing recipe](https://madtasting.com/wp-content/uploads/2025/06/sweet_maple_icing_recipe.jpg)
To prepare the maple icing for the pumpkin cookies, gather the following ingredients:
- Melted butter
- Powdered sugar
- Maple syrup
- Maple extract
- Vanilla extract
- Milk
Blend these ingredients together until smooth to achieve the desired consistency.
Drizzle the maple glaze over the cooled pumpkin cookies for a sweet and flavorful finishing touch.
Maple Icing Ingredients
You can create the delectable maple icing for the Pumpkin Cookies by combining melted butter, powdered sugar, maple syrup, maple extract, vanilla extract, and milk until smooth and creamy.
The melted butter adds richness, while the powdered sugar sweetens the mixture. Maple syrup imparts a distinct autumn flavor, complemented by the essence of maple extract. Vanilla extract enhances the overall taste profile, and milk is added for a creamy consistency.
Whisk these ingredients together thoroughly to guarantee a well-balanced and flavorful icing. Adjust the thickness of the maple icing by gradually adding more powdered sugar or milk until reaching the desired texture.
Once prepared, drizzle the maple icing over the cooled pumpkin cookies generously. Allow the icing to set and harden on the cookies before serving to fully enjoy the delightful combination of flavors.
This maple icing will bring a sweet and seasonal touch to your autumn baking endeavors.
Icing Preparation Steps
Begin by whisking together melted butter, powdered sugar, maple syrup, maple extract, vanilla extract, and milk to create the delectable maple icing for the Pumpkin Cookies. This process combines the rich flavors of maple and vanilla with the creamy texture of butter and milk.
As you mix, make sure all the ingredients are thoroughly combined to achieve a smooth and luscious consistency for the maple icing.
If the maple icing seems too thick, you can adjust its consistency by gradually adding more milk until you reach the desired thickness. Once you have attained the perfect texture, it's time to drizzle the maple glaze over the cooled pumpkin cookies.
The sweet flavor of the maple icing complements the spiced pumpkin cookies beautifully, enhancing their overall taste. Allow the maple glaze to harden before serving the cookies to ensure a delightful crunch with every bite.
This step adds a final touch to the cookies, creating a visually appealing finish while intensifying the flavors of autumn.
Perfecting Maple Glaze
To achieve the perfect maple glaze for your pumpkin cookies, make sure to whisk together a blend of melted butter, powdered sugar, maple syrup, maple extract, vanilla extract, and milk.
This combination creates a sweet and flavorful topping that complements the warm spices of the pumpkin cookies, resulting in a delightful autumn treat.
Adjust the consistency of the maple glaze by adding more milk for a thinner texture or more powdered sugar for a thicker glaze, depending on your preference.
Once the pumpkin cookies have cooled, drizzle the maple glaze over them, allowing it to harden to enhance both the presentation and taste experience.
The soft texture of the pumpkin cookies paired with the sweet maple glaze creates a harmonious balance of flavors that's sure to please your taste buds.
Embrace the essence of fall with these maple iced pumpkin cookies, where each bite brings a burst of autumnal delight.
Serving Suggestions and Storage
![serving and storing tips](https://madtasting.com/wp-content/uploads/2025/06/serving_and_storing_tips.jpg)
When serving Maple Iced Pumpkin Cookies, drizzle the maple glaze over cooled cookies for a sweet finish. These autumn treats are best enjoyed alongside a warm cup of apple cider or pumpkin spice latte, enhancing the cozy fall experience.
To maintain the deliciousness of leftover cookies, store them in an airtight container to preserve freshness and prevent them from drying out. Keep the cookies at room temperature for 2-3 days for best taste, or refrigerate them for 3-4 days to maximize their shelf life.
For longer-term storage, freeze the cookies for up to 3 months by wrapping them well to maintain their texture and flavor.
Variations and Customizations
![customizable options for products](https://madtasting.com/wp-content/uploads/2025/06/customizable_options_for_products.jpg)
You can enhance the flavor and texture of Maple Iced Pumpkin Cookies by incorporating various customizations and variations. To elevate your cookie experience, consider adding nuts, chocolate chips, or dried fruit to the batter for extra texture and flavor. Experiment with unique spices like nutmeg, allspice, or cardamom to create autumn-inspired variations that will tantalize your taste buds. For those with dietary restrictions, make the cookies gluten-free by substituting regular flour with almond flour, oat flour, or a gluten-free baking blend. Additionally, personalize the maple icing by adjusting the sweetness level, adding a pinch of sea salt for a salted maple flavor, or incorporating a hint of citrus zest for a invigorating twist.
Customizations | Autumn-Inspired Variations | Unique Spices |
---|---|---|
Nuts, chocolate chips, or dried fruit | Nutmeg, allspice, or cardamom | Cinnamon, ginger, or cloves |
Honey, agave, or brown rice syrup | Maple syrup or molasses | Pumpkin pie spice blend |
Almond flour, oat flour, or gluten-free baking blend | Spiced apple cider reduction | Star anise, cardamom, or allspice |
Frequently Asked Questions
Can I Substitute Maple Syrup With Another Sweetener in the Maple Icing?
Yes, you can substitute maple syrup with honey or agave nectar in the maple icing. Both options will offer a similar sweetness and flavor profile to the icing. Experiment to find your preferred taste.
How Can I Adjust the Recipe for High Altitude Baking?
To adjust the recipe for high altitude baking, increase the oven temperature by 25°F, reduce baking powder slightly, and add extra liquid. Monitor the baking time closely and test for doneness with a toothpick.
Can I Make These Cookies Gluten-Free by Using a Different Flour?
Yes, you can make these cookies gluten-free by using a different flour. For example, substitute the all-purpose flour with a gluten-free flour blend. Make sure the blend contains xanthan gum for binding, and adjust the liquid as needed for consistency.
Are There Any Vegan Alternatives for the Egg in This Recipe?
Yes, you can substitute eggs in baking by using options like flaxseed meal mixed with water, mashed banana, applesauce, or commercial egg replacers. Experiment to find what works best for your taste and dietary preferences.
Can I Use Fresh Pumpkin Instead of Canned Pumpkin Puree?
When swapping fresh pumpkin for canned puree, remember to roast, cool, and puree it to match the consistency. Fresh pumpkin can bring a rustic feel and homemade touch to your baking adventures.
Can I Use the Same Recipe for Maple Iced Pumpkin Cookies to Make Copycat Lofthouse Cookies?
Yes, you can use the same recipe for maple iced pumpkin cookies to make copycat soft and sweet Lofthouse cookies. By simply adjusting the flavor and icing, you can recreate the iconic soft and sweet Lofthouse cookies using your favorite pumpkin cookie recipe. Enjoy the delicious result! Just swap out the pumpkin spice for a simple vanilla or almond extract to mimic the classic Lofthouse flavor. Don’t forget to top the cookies with a generous layer of brightly colored frosting and a sprinkle of fun decorations to complete the look. This soft and sweet cookies recipe is perfect for any occasion, offering both versatility and irresistible flavor that everyone will love!
Conclusion
To sum up, these Maple Iced Pumpkin Cookies are a delightful autumn treat that will surely impress your friends and family.
Did you know that according to a survey by the American Baking Association, pumpkin-flavored desserts are among the top favorites during the fall season?
So why not try out this recipe and indulge in the warm flavors of pumpkin and maple in a delightful cookie form?
Enjoy baking and savoring this delightful treat!
Francesca, as the creative force behind our compelling content, combines culinary expertise with journalistic flair. She has a deep appreciation for the cultural histories and artisanal traditions that influence remarkable flavors around the world. Through engaging narratives, she transports our audience to the heart of each culinary experience. Whether she’s documenting the centuries-old techniques of a Sicilian cheese maker or uncovering the personal stories of our producers, Francesca’s storytelling prowess drives our mission to connect people through food.
-
Vetted4 months ago
15 Best Non-Toxic Espresso Machines for a Healthier Brew at Home
-
Italian Cuisine2 weeks ago
What Italian Dishes Use Parsley
-
Vetted4 months ago
15 Best Coffee Beans for Your Breville Espresso Machine – Expert Picks for Perfect Brews
-
Vetted6 months ago
12 Best Coffee Pods for DeLonghi Espresso Machine to Elevate Your Caffeine Game
-
Vetted3 months ago
15 Best Espresso Ground Coffees for Your Espresso Machine: A Barista’s Guide
-
Vetted6 months ago
15 Best Commercial Automatic Espresso Machines for Your Coffee Shop
-
Vetted4 months ago
15 Best Coffee Beans to Elevate Your Breville Espresso Experience
-
Vetted6 months ago
15 Best ESE Pod Espresso Machines for Perfect Coffee Every Time