
To make crispy fried chicken, start by brining the chicken in a saltwater solution for added moisture. Thoroughly pat it dry, then double-dredge the pieces in a seasoned flour mixture. Heat the oil to 350°F, maintaining between 325-350°F as you fry the chicken in batches for 12-15 minutes until golden brown. Let it rest for 5-10 minutes after cooking to lock in the juices. For extra crunch, you can even double fry the chicken. Serve the piping hot, crispy fried chicken with a sweet honey drizzle or your choice of dipping sauces. Keep reading to discover more secrets for perfectly crispy fried chicken every time.
Key Takeaways
- Thoroughly dry and dredge the chicken pieces twice in seasoned flour to achieve a super-crispy outer layer.
- Maintain the oil temperature between 325-350°F while frying in batches to ensure even cooking.
- Consider brining the chicken in a saltwater solution beforehand to retain moisture during the frying process.
- Allow the fried chicken to rest for 5-10 minutes after cooking to lock in the juices and enhance texture.
- Serve the crispy fried chicken hot, with a drizzle of honey or various dipping sauces for added flavor and contrast.

CRAFT911 Candy Thermometer with Pot Clip – Deep Fry Oil Thermometer for Frying and Candle Making
ACCURATE FAST READINGS (No More Burned Candy) — Our candy deep fry thermometer provides instant and accurate temperature…
As an affiliate, we earn on qualifying purchases.
As an affiliate, we earn on qualifying purchases.
History
Fried chicken has a long and storied history, dating back to the early 18th century in the American South. The origins of this beloved dish can be traced to Scottish and West African culinary traditions, where frying chicken in oil was a common cooking method.
As enslaved Africans were brought to the American colonies, they combined their frying techniques with the locally available ingredients, creating the foundation for what would become known as Southern-style fried chicken.
In the decades following the Civil War, fried chicken became a staple of Southern cuisine, often served at family gatherings, church picnics, and community celebrations. The dish's popularity spread across the country, and by the early 20th century, fried chicken had become a beloved part of American culinary culture.
Today, it remains a cherished comfort food, with countless variations and recipes that showcase the versatility and enduring appeal of this iconic dish.

EDGING CASTING 2-in-1 Pre-Seasoned Cast Iron Dutch Oven Pot with Skillet Lid Cooking Pan, Cast Iron Skillet Cookware Pan Set with Dual Handles, Indoor Outdoor for Bread/Frying/Baking/Camping/BBQ, 5 Qt
Pre-seasoned 2-in-1 cast iron dutch oven: The 2-In-1 cast iron dutch oven pot with skillet lid has been…
As an affiliate, we earn on qualifying purchases.
As an affiliate, we earn on qualifying purchases.
Recipe
Crispy fried chicken is a classic comfort food that never fails to satisfy. The key to achieving that perfect crunch lies in the right preparation and cooking technique. This recipe will guide you through the steps to create a golden, delectable fried chicken that will have your taste buds dancing.
The secret to crispy fried chicken lies in the double-dredging method. By coating the chicken in seasoned flour not once, but twice, you create a super-crispy outer layer that seals in the juicy, flavorful meat within. This technique, combined with the right oil temperature and frying time, ensures that every bite is a harmonious blend of crunch and tenderness.
Ingredients:
- 8 pieces of chicken (a mix of drumsticks, thighs, and wings)
- 2 cups all-purpose flour
- 1 tablespoon paprika
- 1 teaspoon garlic powder
- 1 teaspoon onion powder
- 1 teaspoon cayenne pepper
- 1 teaspoon salt
- 1/2 teaspoon black pepper
- 1 cup buttermilk
- Vegetable oil for frying (enough to reach 3-4 inches in your pan)
Instructions:
In a large bowl, whisk together the flour, paprika, garlic powder, onion powder, cayenne pepper, salt, and black pepper.
Dip the chicken pieces in the buttermilk, allowing any excess to drip off, then dredge them in the seasoned flour, pressing to help the coating adhere.
Repeat the dredging process to create a double coating.
Heat the vegetable oil in a large, heavy-bottomed pot or Dutch oven to 350°F.
Carefully add the coated chicken pieces, working in batches if necessary, and fry for 12-15 minutes, turning occasionally, until the chicken is golden brown and cooked through.
Drain the fried chicken on a paper towel-lined plate, and serve hot.
To ensure your fried chicken achieves the perfect crispness, it's crucial to maintain the oil temperature throughout the cooking process.
Adjust the heat as needed to keep the oil at the optimal temperature.
Additionally, let the chicken rest for a few minutes before serving, as this helps the crust set and lock in the juices.

Kraft Oven Fry Extra Crispy Chicken Coating Mix, 4.2 oz
One 4.2 oz. box of Kraft Oven Fry Extra Crispy Seasoned Coating for Chicken
As an affiliate, we earn on qualifying purchases.
As an affiliate, we earn on qualifying purchases.
Cooking Steps
To get that crispy, golden-brown fried chicken you crave, start by brining the chicken in a saltwater solution.
Next, thoroughly dredge the chicken pieces in a seasoned flour mixture.
Then, fry the chicken in hot oil until it's perfectly cooked through.
Let the chicken rest for a few minutes before serving, and don't forget the honey for drizzling over the top.
Step 1. Brine Chicken in Saltwater Solution

Brining the chicken is a crucial step in achieving that coveted crispy exterior and juicy interior. This simple process involves submerging the chicken in a saltwater solution for at least 30 minutes, though you can brine it for up to 12 hours. The brine helps the chicken retain moisture during frying, resulting in a moist, tender texture.
To create the brine, simply combine 1/4 cup of salt with 4 cups of water in a large bowl or resealable bag. Submerge the chicken pieces, ensuring they're fully covered by the solution. Refrigerate the brining chicken for at least 30 minutes, up to 12 hours.
The longer you brine, the more flavorful and juicy the final result will be.
When ready to fry, remove the chicken from the brine, pat it dry with paper towels, and proceed with your dredging and frying steps. Brining is an essential technique that will elevate your fried chicken to new heights of crispy, juicy perfection.
Step 2. Dredge Chicken in Seasoned Flour
After brining the chicken, the next step is to dredge it in a seasoned flour mixture. This process creates the signature crispy crust on the outside of the fried chicken.
To dredge the chicken, start by setting up a dredging station. You'll need a shallow dish or plate filled with all-purpose flour that has been seasoned with salt, pepper, paprika, garlic powder, and any other desired spices.
Working with one piece of chicken at a time, thoroughly coat each side in the seasoned flour. Gently shake off any excess flour before transferring the chicken to your hot oil for frying.
The key is to create an even, adherent coating that will fry up into a delightfully crispy shell. Be sure to dredge the chicken just before frying, as the flour will absorb moisture and become soggy over time.
With the chicken properly dredged, you're now ready to fry it to golden-brown perfection.
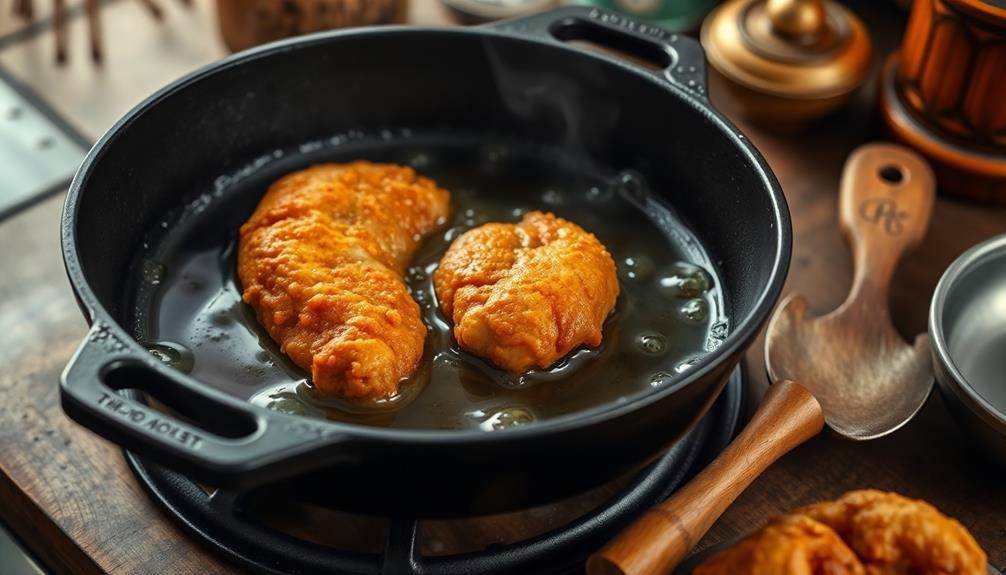
Step 3. Fry Chicken in Hot Oil
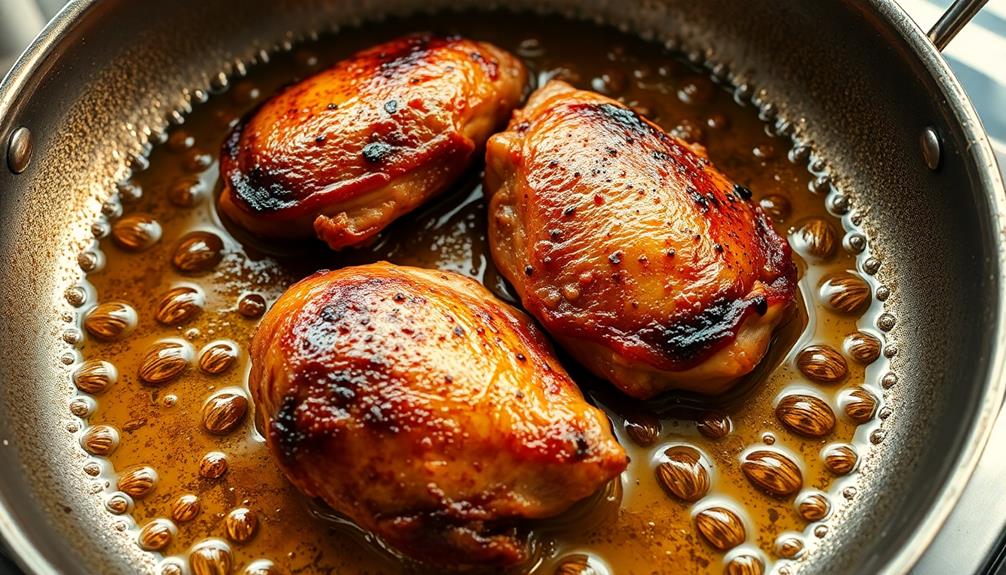
With the chicken properly dredged, you're now ready to fry it to golden-brown perfection. Gather a large, heavy-bottomed pot or Dutch oven and fill it with 2-3 inches of neutral oil, like vegetable or canola oil.
Heat the oil to 350°F, using a deep-fry or candy thermometer to monitor the temperature.
Once the oil is hot, gently lower the dredged chicken pieces into the oil, being careful not to overcrowd the pot. Fry the chicken in batches if necessary, maintaining the oil temperature between 325-350°F.
Fry the chicken for 12-15 minutes, flipping occasionally, until it's golden brown and the juices run clear when pierced with a fork.
Drain the fried chicken on a wire rack or paper towel-lined plate to allow any excess oil to drip off.
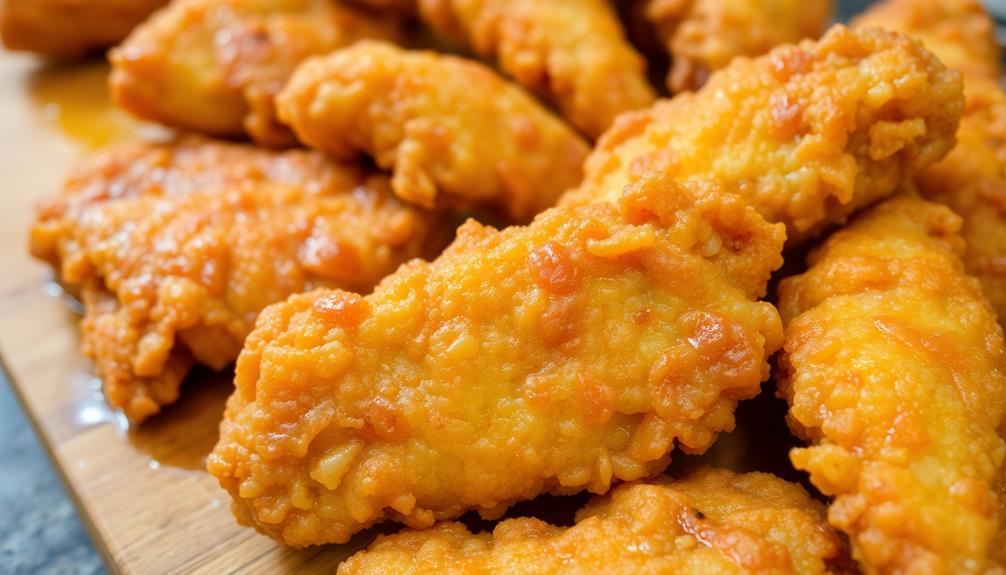
Season the hot chicken immediately with salt, pepper, or any other desired spices. Serve the crispy fried chicken hot, and enjoy the satisfying crunch and juicy interior in every bite. Pair it with your favorite dipping sauces or sides like coleslaw and biscuits to enhance the meal. With just a little practice, you too can make chefstyle fried chicken at home, impressing family and friends with the perfect blend of flavors. Remember, the key is frying the chicken until golden brown while ensuring it’s cooked through for that ultimate, professional-grade experience.
Step 4. Let Chicken Rest Before Serving
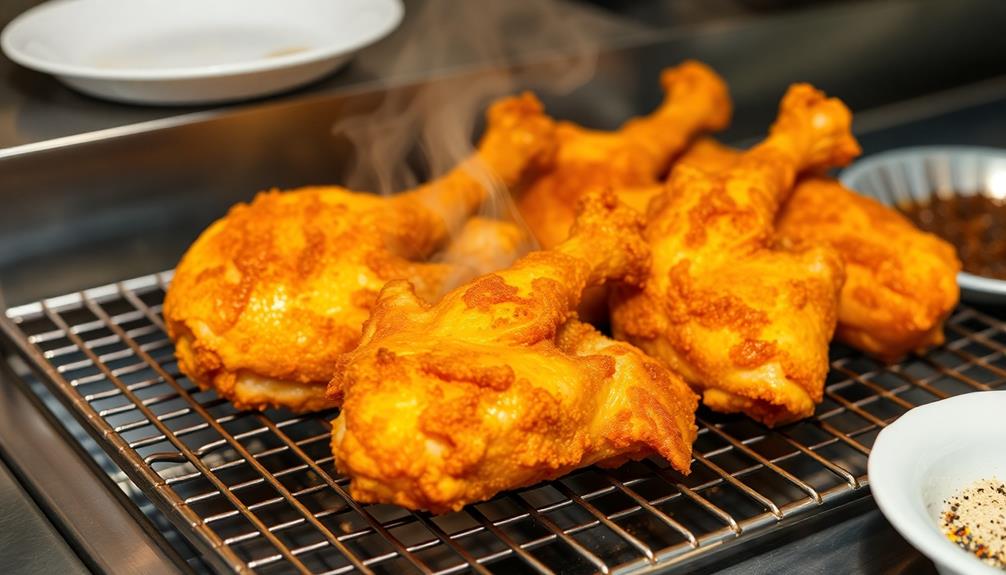
Once the chicken has been fried to perfection, don't rush to serve it. Instead, let the chicken rest for 5-10 minutes before plating. This resting period is crucial for locking in the juices and allowing the crispy crust to set.
During this time, the hot oil will continue to penetrate the meat, ensuring it's cooked all the way through. Additionally, the resting period allows the crust to firm up, preventing it from becoming soggy when you bite into the chicken.
To let the chicken rest properly:
- Transfer the fried chicken to a wire rack or paper towel-lined plate.
- Avoid stacking the pieces, as this can cause the crust to become soft.
- If serving a crowd, you can keep the chicken warm in a 200°F oven while it rests.
Once the resting time is up, your perfectly crispy fried chicken is ready to be enjoyed. The extra few minutes of patience will result in a superior texture and flavor.
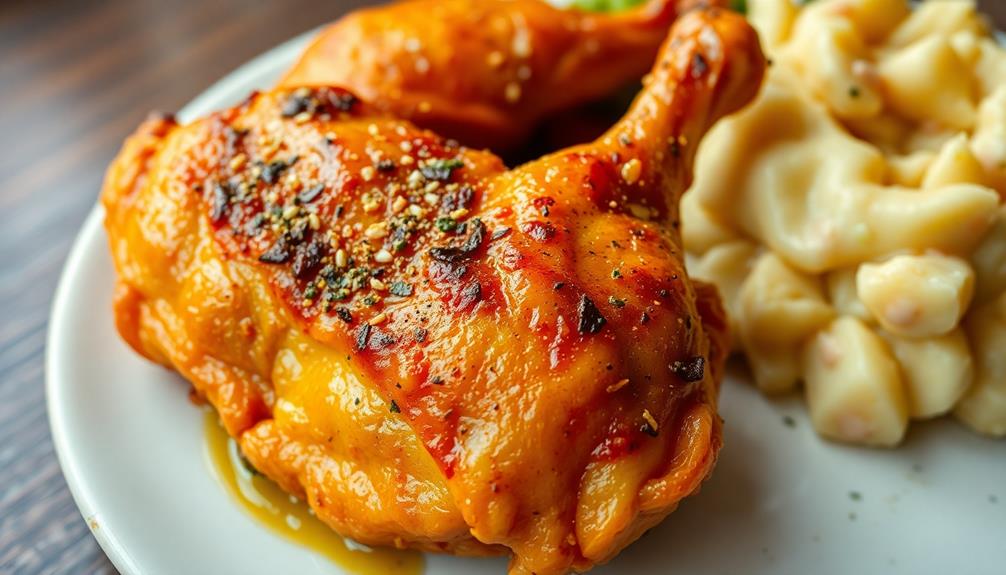
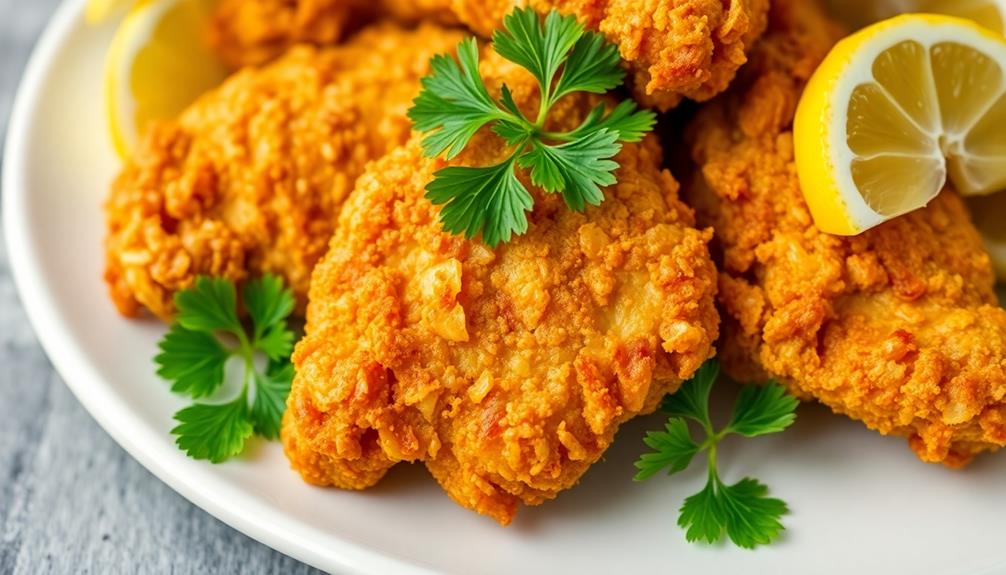
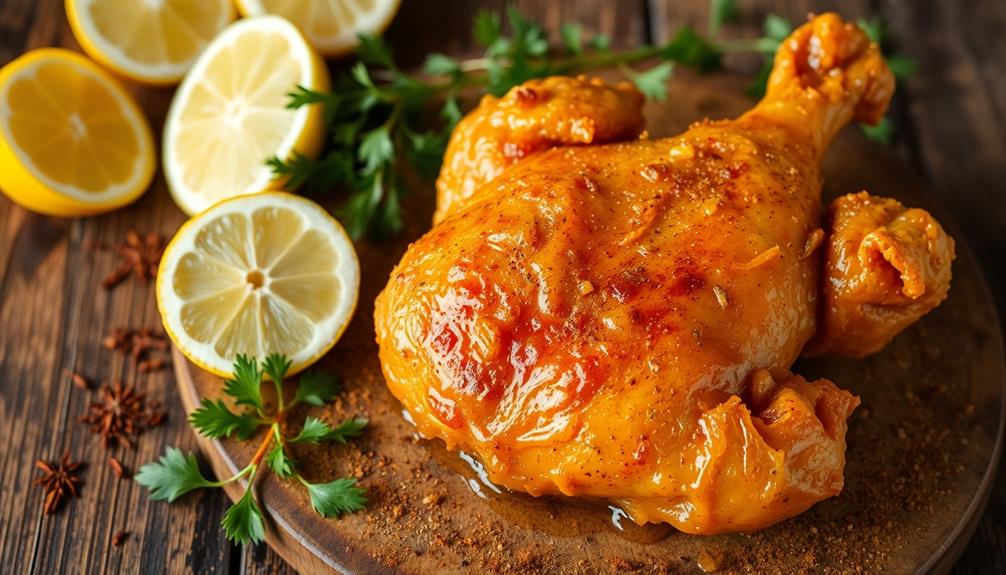
Step 5. Serve With Honey for Drizzling
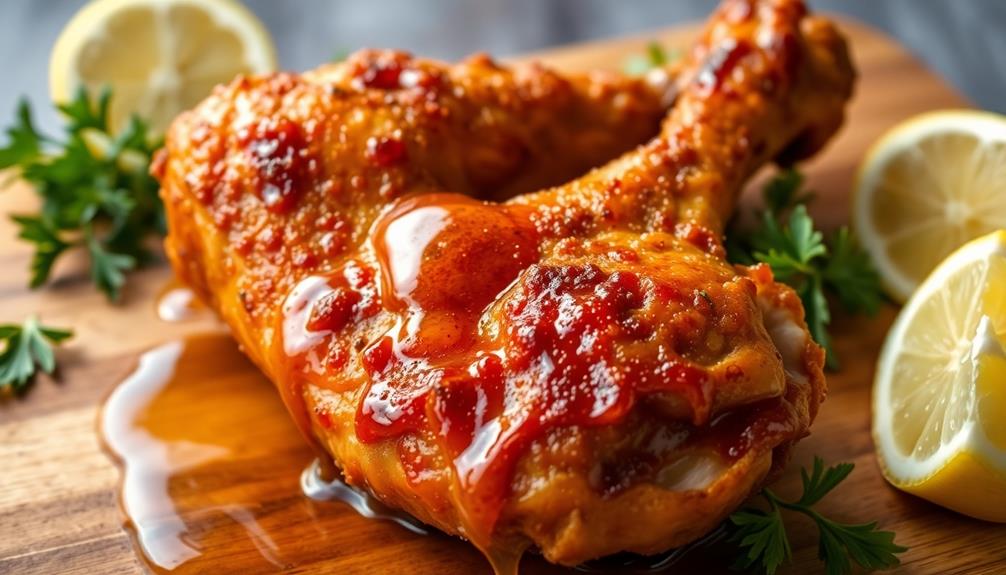
A drizzle of honey is the perfect finishing touch for your crispy fried chicken. The sweetness of the honey complements the savory and crunchy exterior of the chicken, creating a delightful flavor contrast.
To serve, simply place your freshly fried chicken on a serving platter. Grab a small bowl or pitcher of high-quality, runny honey. Using a spoon or small drizzle bottle, slowly drizzle the honey over the top of the chicken in a back-and-forth motion.
The honey will create a beautiful, glistening effect and add a touch of elegance to your dish. Encourage your guests to dip or dunk their chicken bites directly into the honey for an extra burst of sweetness with each bite.
The combination of crispy fried chicken and sweet honey is a classic pairing that's sure to delight your family and friends. Serve and enjoy this delicious, crowd-pleasing meal.
CRAFT911 Candy Thermometer with Pot Clip – Deep Fry Oil Thermometer for Frying and Candle Making
ACCURATE FAST READINGS (No More Burned Candy) — Our candy deep fry thermometer provides instant and accurate temperature…
As an affiliate, we earn on qualifying purchases.
As an affiliate, we earn on qualifying purchases.
Final Thoughts
Achieving the perfect crispy fried chicken is a culinary triumph that rewards your efforts. As you've now mastered the techniques for creating that irresistible golden-brown crust and juicy interior, don't forget the final touch – serving it with a drizzle of honey. This sweet, sticky glaze perfectly complements the savory flavors of the chicken, creating a harmonious balance that will delight your taste buds.
When it comes to fried chicken, the little details make all the difference. Remember to thoroughly pat the chicken dry before breading, use the right oil temperature, and resist the urge to overcrowd the pan.
Frequently Asked Questions
Can I Use Boneless Chicken for Fried Chicken?
Yes, you can use boneless chicken for fried chicken. Boneless chicken will cook faster and may result in a crispier texture compared to bone-in chicken. However, the flavor may not be as robust without the bone.
How Do I Ensure the Chicken Stays Crispy?
To ensure the chicken stays crispy, first thoroughly pat it dry, then bread it in a crisp, dry coating. When frying, maintain the oil temperature and don't overcrowd the pan. Let the chicken rest on a wire rack after cooking.
What Type of Oil Is Best for Frying Chicken?
The best oil for frying chicken is one with a high smoke point, like peanut, vegetable, or canola oil. These oils can withstand the high heat needed to achieve that perfect crispy golden crust.
Can I Bake the Chicken Instead of Frying?
Yes, you can bake the chicken instead of frying. Baking is a healthier alternative that can still result in crispy, flavorful chicken. Adjust the temperature and cooking time to achieve the desired crispiness and doneness.
How Do I Reheat Fried Chicken Without Losing Crispiness?
To reheat fried chicken without losing crispiness, place it on a baking sheet in a preheated 400°F oven for 10-15 minutes, flipping halfway through. This will help restore the crunch without drying out the meat.