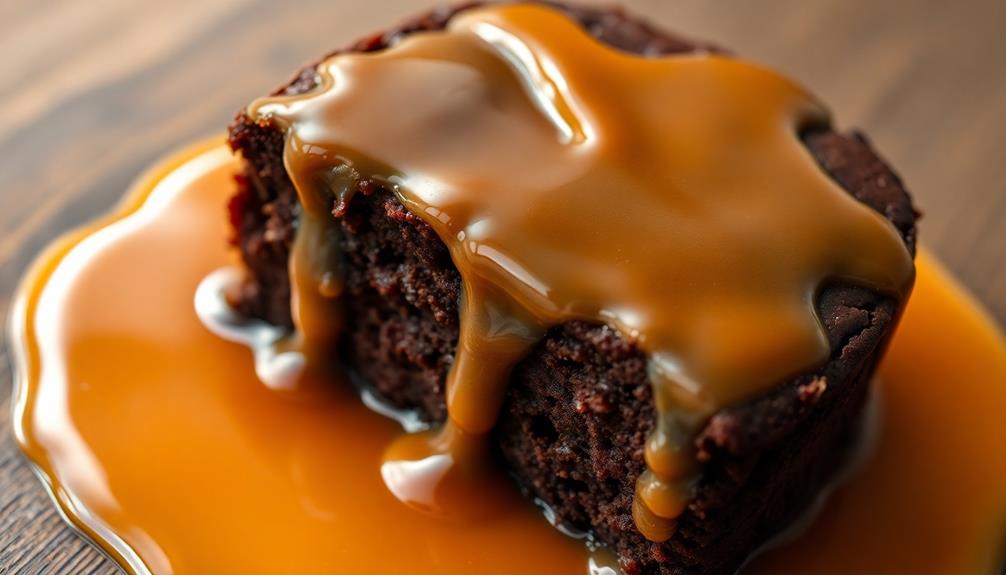
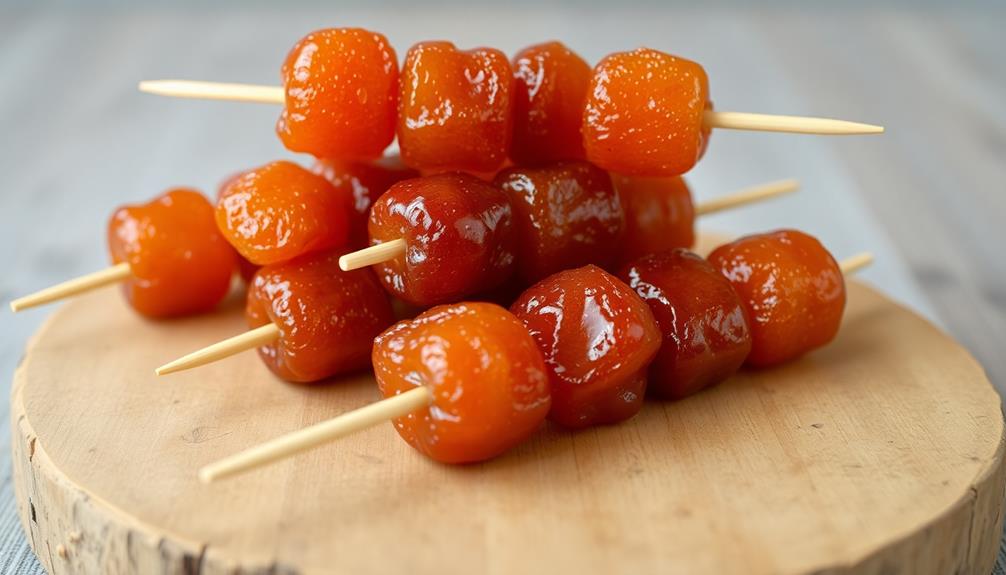
Homemade caramel sauce can elevate your desserts with its rich, decadent flavor. It's easier to make than you might think – just a few simple ingredients like sugar, cream, and butter. The caramelization process transforms the sugar into a deep amber liquid with a slightly bitter taste. While it requires patience and careful monitoring to prevent burning, the end result is well worth it. You can store the sauce in the fridge for up to 2 weeks, drizzling it over ice cream, dipping fruit, or topping cakes and pies. This versatile sauce is a staple for any home baker looking to impress.
Key Takeaways
- Homemade caramel sauce offers a rich, decadent flavor compared to store-bought options, making it a versatile topping for desserts like ice cream and cakes.
- The caramelization process transforms sugar into a deep amber liquid with a slightly bitter taste, requiring patience and careful monitoring to prevent burning.
- Key ingredients include sugar, heavy cream, butter, and salt, with the final product stored in the refrigerator for up to 2 weeks.
- Proper technique, such as using a heavy-bottomed saucepan and continuously stirring, ensures a smooth, glossy texture and the desired consistency of the caramel sauce.
- Homemade caramel sauce can enhance the flavors of various desserts, be used for dipping fruits, or serve as a topping for cakes and pies.

BestOffice Bar Stools Set of 2, Adjustable PU Leather Swivel Barstools, Modern Counter Stools with Back and Footrest, Counter Height Barstools for Bar, Kitchen and Dining Room
✔【STURDY AND COMFORTABLE BAR STOOLS】: BestOffice bar stools are made of high duty chrome, padded with foam and...
As an affiliate, we earn on qualifying purchases.
History
Although caramel has been around for centuries, the modern version of caramel sauce emerged in the 19th century. During this time, chefs and confectioners began experimenting with new techniques to create a smooth, creamy sauce perfect for topping desserts.
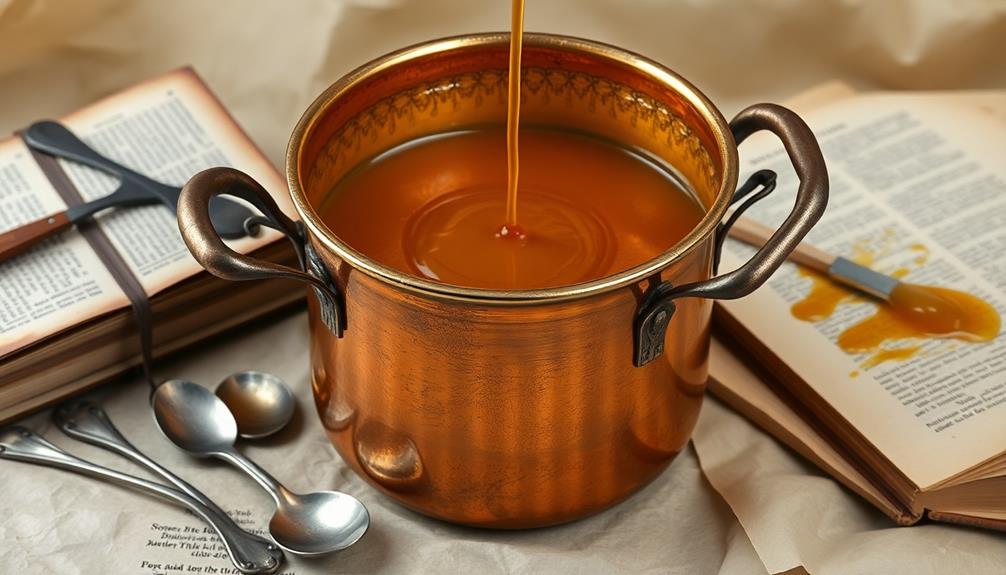
The key to making caramel sauce is the careful caramelization of sugar. As the sugar heats, it undergoes a complex series of chemical reactions that transform its structure and flavor. The end result is a rich, deeply flavored syrup that can range in color from light golden to dark mahogany, depending on the degree of caramelization.
Early caramel sauces were often made by slowly cooking sugar until it reached the desired color and consistency. However, as the 19th century progressed, innovations like the double boiler allowed for more controlled and consistent caramelization, resulting in a smoother, creamier final product.
These advancements paved the way for caramel sauce to become a beloved topping for ice cream, cakes, and a wide variety of desserts.

HOOBRO Bar Stools, Set of 2 Bar Stools with PU Upholstered, Bar Chairs with Footrest and Back, 26" Bar Stools for Kitchen Island, Dining Room, Easy to Assemble, Black BK31BY01G2
Carefully Designed to Create Comfort: The backrest of each counter height bar stools conforms to ergonomics, giving good...
As an affiliate, we earn on qualifying purchases.
Recipe
Caramel sauce is a rich, decadent treat that can elevate everything from ice cream to apple pie. While store-bought caramel may be convenient, nothing quite compares to the deep, complex flavor of homemade. With just a few simple ingredients and a little patience, you can create a silky, glossy caramel sauce in the comfort of your own kitchen.
The key to successful caramel is understanding the caramelization process. As sugar heats, it goes through a series of chemical reactions that transform it into a deep amber-colored liquid with a distinct, slightly bitter flavor. It's important to watch the sugar closely and adjust the heat as needed to prevent burning.
- 1 cup (200g) granulated sugar
- 1/2 cup (120ml) heavy cream
- 1/4 cup (60ml) unsalted butter
- 1/4 teaspoon salt
In a medium saucepan, cook the sugar over medium heat, stirring constantly with a heatproof spatula or wooden spoon. The sugar will begin to melt and caramelize, changing from white to golden to amber in color.
Be patient and resist the urge to stir too vigorously, as this can cause the sugar to crystallize. Once the sugar has reached a deep amber color, remove the pan from the heat and carefully pour in the heavy cream. The mixture will bubble and steam, so stand back.
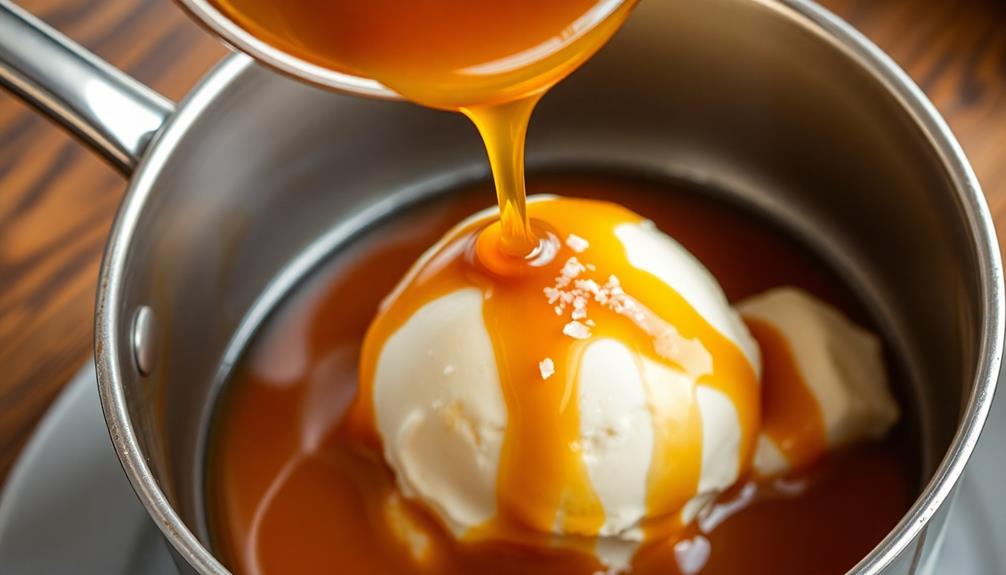
Whisk the mixture until smooth, then return to low heat and add the butter and salt. Continue cooking, whisking constantly, until the sauce is smooth and glossy, about 2-3 minutes. Remove the sauce from the heat and let it cool slightly before using it as a base for your favorite dishes. For an extra burst of flavor, consider pairing it with an easy homemade pesto recipe to create a vibrant and delicious combination. The creamy sauce and the fresh, herby pesto complement each other perfectly, making it an irresistible addition to any meal.
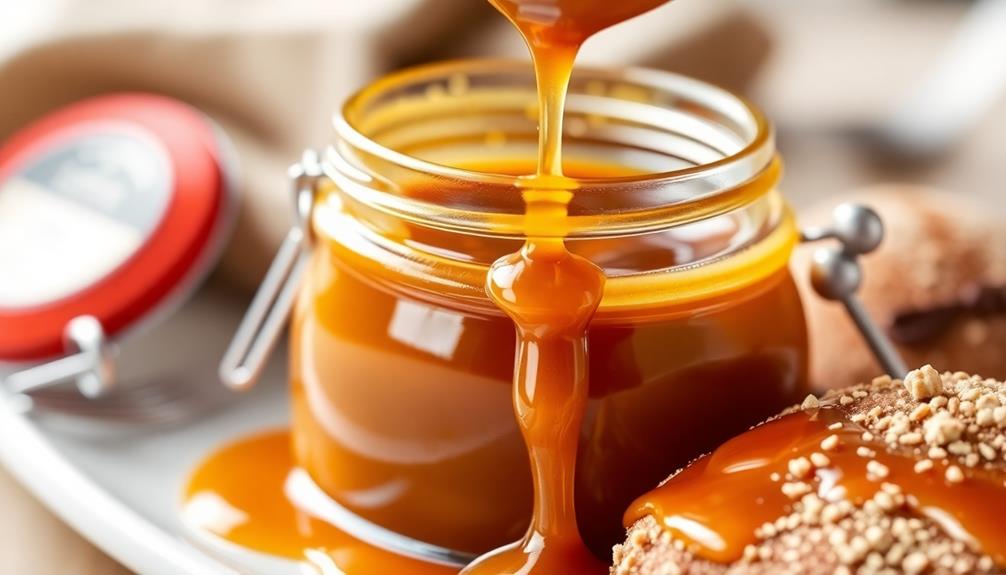
Allow the caramel sauce to cool slightly before transferring it to a clean jar or container. The sauce will continue to thicken as it cools.
Store the caramel sauce in the refrigerator for up to 2 weeks. When ready to use, simply reheat the sauce in the microwave or a saucepan over low heat, stirring occasionally, until it reaches the desired consistency.
Signature Design by Ashley Valebeck Bar Stool, Rustic Industrial Swivel Barstool With Cushioned Upholstery, Wood & Metal Construction, Kitchen Island Seating, Counter Height, Black
RUSTIC‑INDUSTRIAL BUILD: Made with wood, engineered wood and metal, this sturdy stool blends modern and vintage appeal for...
As an affiliate, we earn on qualifying purchases.
Cooking Steps
To begin, you'll need to gather your ingredients and equipment.
Melt the butter in a saucepan over medium heat, then add the sugar, stirring frequently.
Slowly pour in the heavy cream and let the mixture simmer until it's thickened, about 5 minutes.
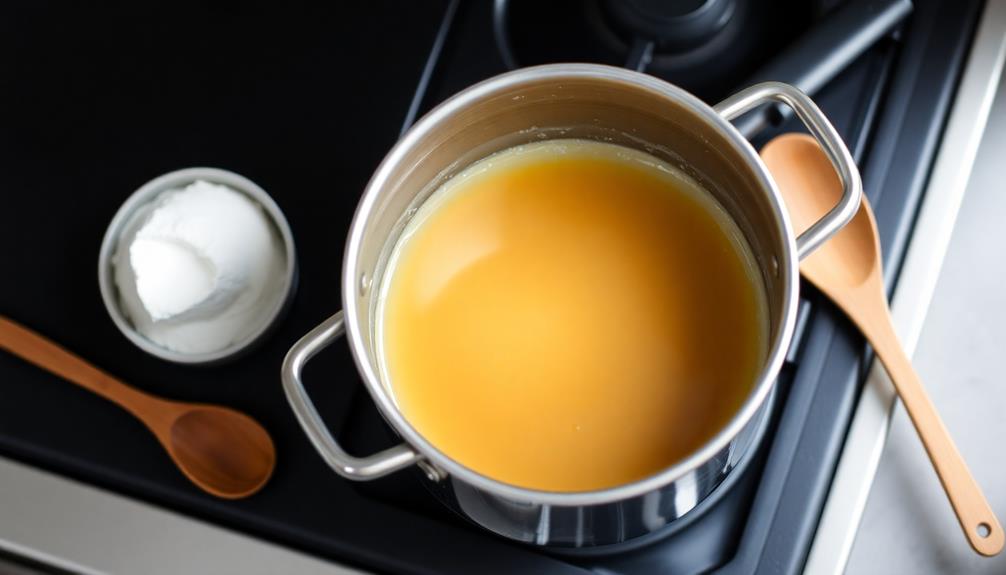
Step 1. Gather Ingredients and Equipment
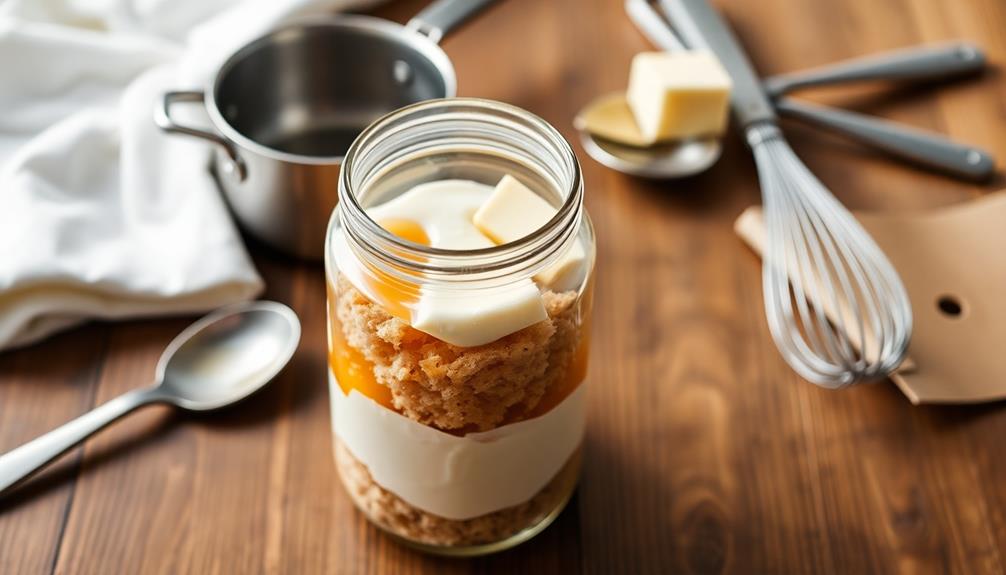
With just a few basic ingredients and a bit of equipment, you can easily make your own homemade caramel sauce. For this recipe, you'll need white granulated sugar, heavy cream, unsalted butter, and a pinch of salt.
To start, gather a heavy-bottomed saucepan, a whisk, a rubber spatula, and a heatproof jar or bowl for storing the finished sauce. The saucepan should be large enough to allow the sugar to melt and caramelize without bubbling over.
Next, measure out the sugar, cream, butter, and salt. Having all your ingredients prepped and ready to go will make the cooking process smoother.
Once you begin, the caramel comes together quickly, so it's important to have everything on hand.
With your equipment and ingredients ready, you're set to start cooking. The key to perfect caramel is patience and attention, as you'll need to carefully monitor the sugar as it transforms from crystals to a rich, golden-brown liquid. As the sugar melts, avoid stirring it, as this can cause unwanted crystallization. Instead, gently swirl the pan to ensure even melting. One of the most useful homemade caramel recipe tips is to use a candy thermometer to better control the temperature, ensuring your caramel doesn’t burn or become too bitter.
Stay focused, and you'll be rewarded with a silky, homemade caramel sauce.
Step 2. Melt Butter in Saucepan Over Medium Heat
First, melt the butter in a heavy-bottomed saucepan over medium heat.
Be sure to use a saucepan with a thick bottom, as this will help distribute the heat evenly and prevent burning. As the butter melts, you'll notice it start to foam and bubble. This is normal – it's just the water in the butter evaporating.
Stir the butter occasionally with a wooden spoon or heat-safe spatula to ensure even melting. Keep a close eye on it, as butter can go from perfectly melted to burnt quite quickly.
You'll know it's ready when the butter has turned a golden, nutty brown color and has a slightly toasted aroma. This should take around 5-7 minutes.
Once the butter is melted and browned, you're ready to move on to the next step in making your homemade caramel sauce.
Just be sure to work quickly, as the butter can continue to cook and burn if left unattended.
Step 3. Add Sugar, Stir Frequently
Once the butter has reached the desired nutty brown color, it's time to add the sugar. Slowly pour in the granulated sugar, stirring constantly with a whisk or wooden spoon. The sugar will begin to melt and caramelize, changing from a grainy texture to a smooth, liquid consistency.
Continuous stirring is crucial during this stage to prevent the sugar from burning. Caramel can go from perfectly golden to bitter and acrid in a matter of seconds if the heat is too high or the sugar is left unattended. Keep a close eye on the mixture, adjusting the heat as needed to maintain a steady, gentle simmer.
As the sugar dissolves, you'll notice the color of the caramel deepen from pale yellow to rich amber. This process can take 5-10 minutes, so be patient and resist the urge to rush.
Stirring frequently ensures even cooking and prevents hot spots that could scorch the caramel.
Step 4. Slowly Pour in Heavy Cream
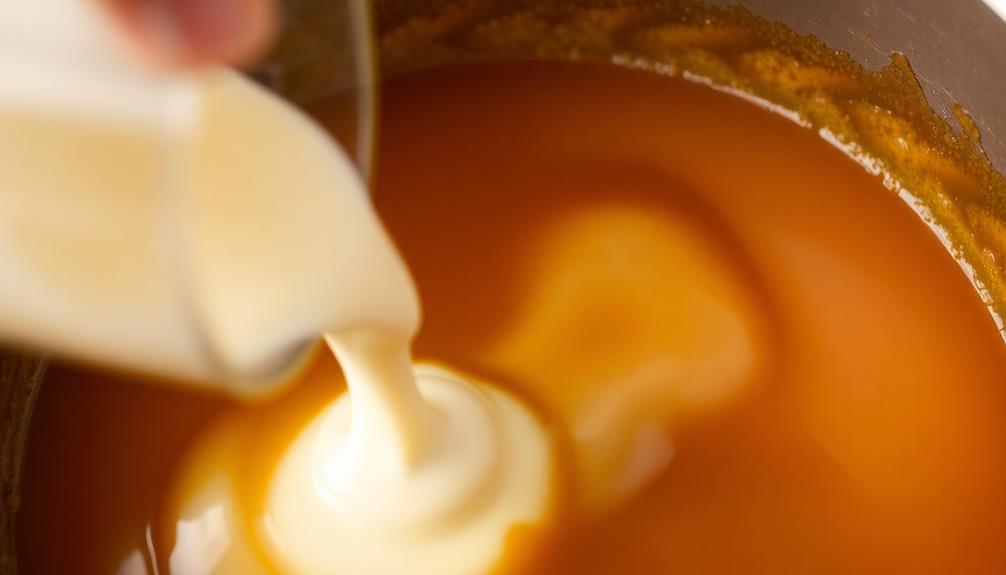
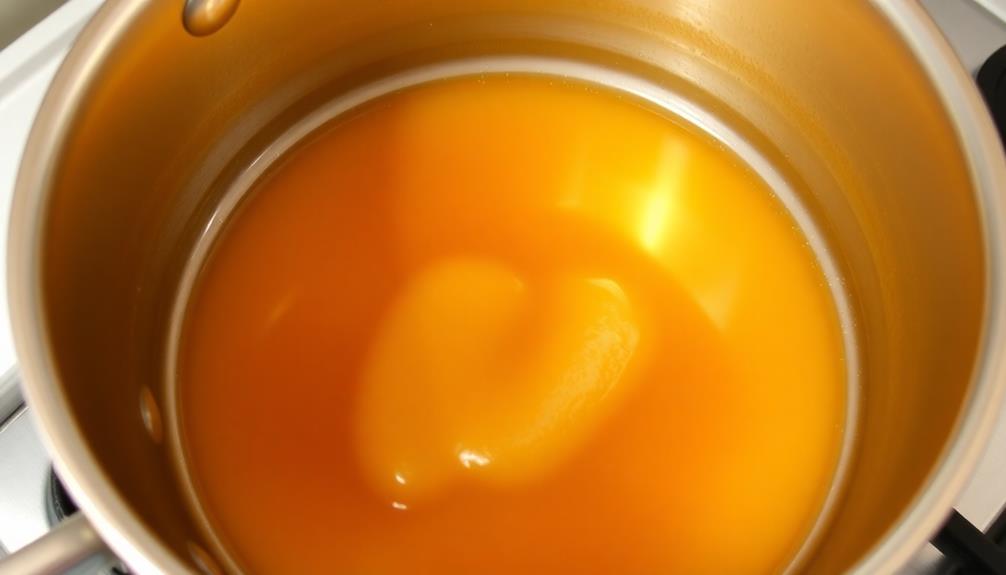
After the sugar has dissolved into a smooth, amber-colored caramel, slowly pour in the heavy cream. Be cautious, as the mixture will bubble and steam intensely. Gently pour the cream in a steady stream, stirring constantly with a whisk to incorporate it fully.
The caramel will seize up at first, but keep stirring patiently, and it will eventually smooth out into a silky, glossy sauce.
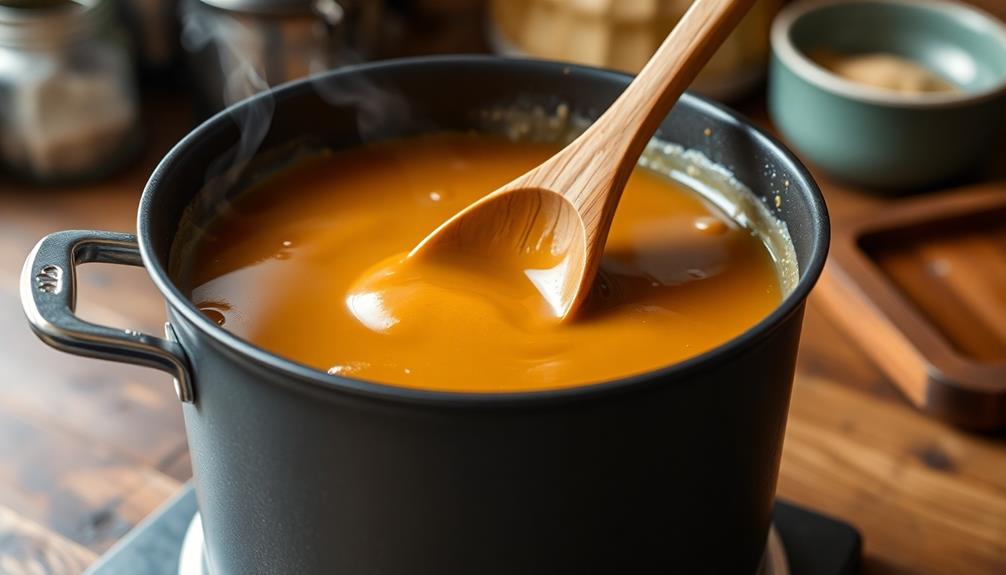
Continue cooking the caramel-cream mixture over medium heat, stirring frequently, until it thickens to your desired consistency, about 5-7 minutes. Resist the urge to rush this process, as allowing the sauce to simmer ensures the flavors develop fully and the texture becomes luxuriously smooth.
Once the caramel has reached the perfect thickness, remove it from the heat. It will continue to thicken as it cools. At this point, you can stir in a pinch of salt to balance the sweetness, if desired.
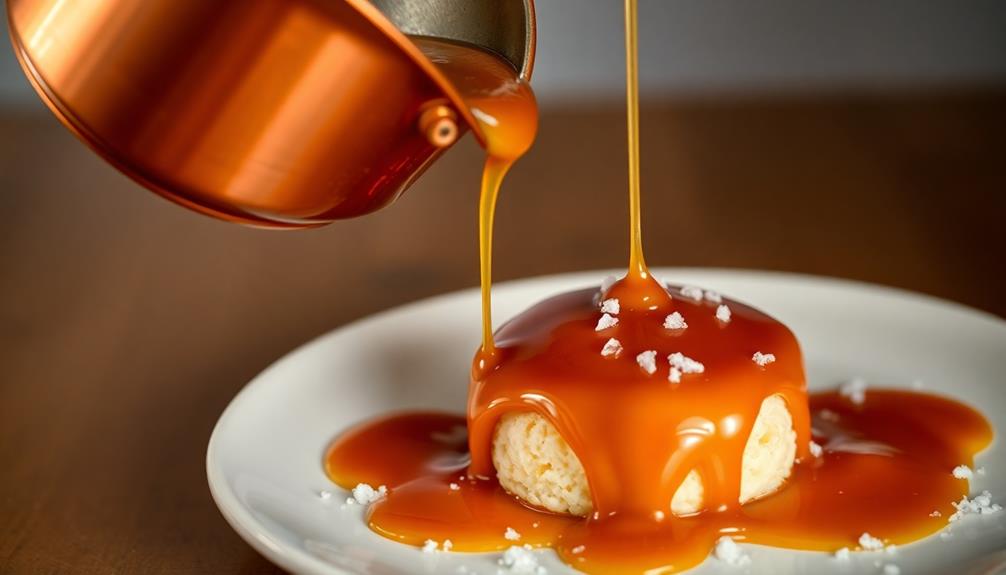
Your homemade caramel sauce is now ready to drizzle over ice cream, apple pie, or any other dessert that could use a decadent touch.
Step 5. Simmer Until Thickened, About 5 Minutes
Continuing to stir the caramel-cream mixture, simmer it over medium heat until it thickens to your desired consistency, about 5 to 7 minutes.
Keep a close eye on the pot, as the mixture can go from perfectly thickened to burnt in a matter of seconds at this stage. Stir constantly with a heat-resistant spatula or wooden spoon, scraping the bottom of the pot to prevent burning.
You'll know the caramel is ready when it coats the back of a spoon and leaves a visible trail when you run your finger through it. The texture should be smooth and velvety, not too thin or too thick.
If it seems to be taking longer than 7 minutes, feel free to increase the heat slightly, but be careful not to let it boil rapidly, as that can cause the caramel to seize up.
Once it's reached the perfect consistency, remove the pot from the heat and let the caramel cool slightly before using it in your favorite desserts.

SUPERJARE Drafting Chair with Back, Adjustable Foot Rest Rolling Stool, Multi-Purpose Office Desk Chair, Thick Seat Cushion for Home Bar Kitchen Shop - Black
【Adjustable Height】Superjare Drafting Chair is equipped with a simple lifting lever. Sitting height can be adjusted from 23.6"...
As an affiliate, we earn on qualifying purchases.
Final Thoughts
Caramel sauce is a versatile and delightful treat that can elevate a variety of desserts.
Whether you're drizzling it over ice cream, dipping apple slices into it, or using it as a topping for cakes and pies, this homemade caramel sauce is sure to impress.
The process of making it from scratch may seem daunting at first, but with a little patience and attention to detail, you'll be rewarded with a rich, smooth, and perfectly balanced caramel flavor.
Frequently Asked Questions
Can I Use a Different Type of Sugar?
You can certainly use a different type of sugar, but the flavor and texture may vary. Different sugars have distinct characteristics, so experiment to see which one works best for your desired outcome.
How Long Does Homemade Caramel Sauce Last?
Your homemade caramel sauce will keep in the refrigerator for up to 2 weeks if stored in an airtight container. It's a great make-ahead topping that can elevate many desserts with its rich, sweet flavor.
Can I Add Any Flavorings to the Caramel?
Absolutely, you can add flavorings to your homemade caramel sauce. Try experimenting with vanilla extract, cinnamon, or even a splash of bourbon or coffee to add unique flavors that'll take your desserts to the next level.
Is Caramel Sauce Gluten-Free?
Yes, caramel sauce is typically gluten-free as it's made from simple ingredients like sugar, butter, and cream. As long as you don't add any gluten-containing ingredients, your homemade caramel should be safe for those following a gluten-free diet.
Can I Reheat the Caramel Sauce?
Yes, you can reheat the caramel sauce. Simply place it in a microwave-safe bowl and heat it in short bursts, stirring frequently, until it's warm and pourable again. Be careful not to overheat it, as that can cause the sauce to separate.