Crafting chocolate from scratch takes you on a rewarding journey through history. Start by obtaining high-quality cocoa beans, then roast and grind them into a smooth chocolate liquor. Temper the liquor to achieve the perfect texture and sheen. Pour the tempered chocolate into molds and allow it to cool for a delectable homemade treat. Customize the flavor by adjusting sweetness or adding spices and flavorings. With patience and attention to detail, you'll unlock the satisfying art of crafting chocolate from the bean to the bar. There's so much more to explore in the world of homemade chocolate.
Key Takeaways
- Obtain high-quality, ethically sourced cocoa beans and roast them at 300°F (150°C) for 15-25 minutes to develop flavor.
- Separate the roasted cocoa nibs from the shells and grind them into a smooth chocolate liquor using a powerful grinder.
- Temper the chocolate liquor to create the right crystal structure for a glossy and smooth texture.
- Pour the tempered chocolate into molds and allow it to cool and harden before removing the finished chocolate.
- Experiment with various flavorings, such as vanilla, sea salt, and spices, to customize the chocolate's taste and complexity.

Organic Cacao Powder, Unsweetened, 1 lb (454 g) – Rich Dark Chocolate Flavor, Perfect for Baking, Smoothies & Hot Chocolate – Vegan, Keto, Paleo, Non-GMO & Gluten-Free Cocoa Powder
ORGANIC CACAO POWDER – Experience decadent, rich, dark chocolatey goodness with our pure, organic cacao powder. The aroma…
As an affiliate, we earn on qualifying purchases.
As an affiliate, we earn on qualifying purchases.
History
Chocolate's origins date back centuries, tracing its roots to the ancient Mesoamerican civilizations. The Mayans and Aztecs were the first to cultivate the cacao tree, revering its beans as a precious commodity and using them as currency.
These early cultures prepared a bitter, frothy drink from the fermented, roasted, and ground cacao beans, often flavored with spices like chili and vanilla.
The Spanish conquistadors encountered this ancient chocolate tradition when they arrived in the Americas, and they quickly adopted it, adding sugar to create a sweeter confection.
From there, the popularity of chocolate spread throughout Europe, leading to the development of modern chocolate-making techniques and the rise of renowned chocolate-producing regions like Switzerland and Belgium.
Today, chocolate remains a beloved treat worldwide, with countless variations in flavor, texture, and production methods.
Its rich history continues to captivate and inspire chocolate enthusiasts around the globe.

Etekcity Infrared Thermometer Laser Temperature Gun 774, Meat Food Candy Oven Thermometer for Griddle Accessories, Heat Gun for Cooking Refrigerator Tools, Adjustable Emissivity & Max Measure, Yellow
𝐕𝐞𝐫𝐬𝐚𝐭𝐢𝐥𝐞 𝐓𝐨𝐨𝐥𝐬: Infrared technology allows you to measure various objects at home and outdoors; Use it for 𝒎𝒆𝒂𝒕,…
As an affiliate, we earn on qualifying purchases.
As an affiliate, we earn on qualifying purchases.
Recipe
Crafting chocolate from scratch is a delightful and rewarding endeavor. This process allows you to control the quality and flavors, resulting in a truly unique and satisfying treat. Whether you're looking to create a rich, dark chocolate or a creamy milk chocolate, the fundamentals remain the same.
The key to successful homemade chocolate lies in the proper selection and preparation of the ingredients. By understanding the science behind chocolate-making, you can unlock a world of creativity and customization to suit your personal preferences.
- Cocoa beans
- Cocoa butter
- Sugar
- Milk powder (for milk chocolate)
- Vanilla extract
- Salt (optional)
Begin by roasting the cocoa beans to develop their rich, complex flavors. Next, separate the cocoa nibs from the husks and grind them into a smooth paste, known as cocoa liquor or cocoa mass.
Melt the cocoa butter and combine it with the cocoa liquor, sugar, and any additional flavorings, such as vanilla or salt. For milk chocolate, incorporate milk powder at this stage.
Refine the mixture by conching, a process that aerates and smooths the texture. Finally, temper the chocolate to ensure a glossy, snap-worthy finish, and let it cool and set before enjoying.

Fimary Chocolate Bar Mold – Non-Stick Chocolate Molds, Food Grade Silicone Deep Mold for Dubai Pistachio, Candy, Snacks
High-Quality Material – Crafted from premium food-grade silicone, our chocolate bar molds ensure durability and ease of use…
As an affiliate, we earn on qualifying purchases.
As an affiliate, we earn on qualifying purchases.
Cooking Steps
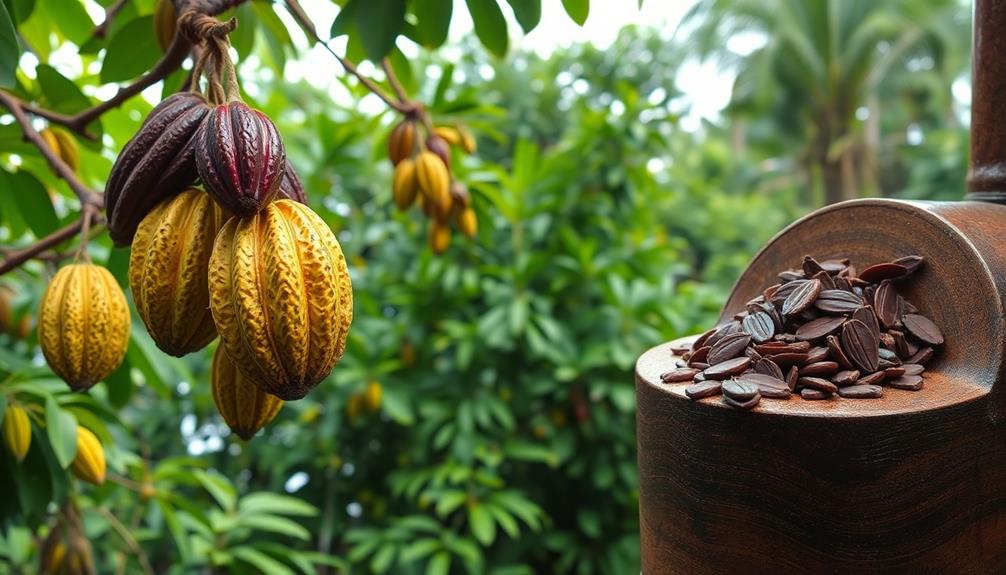
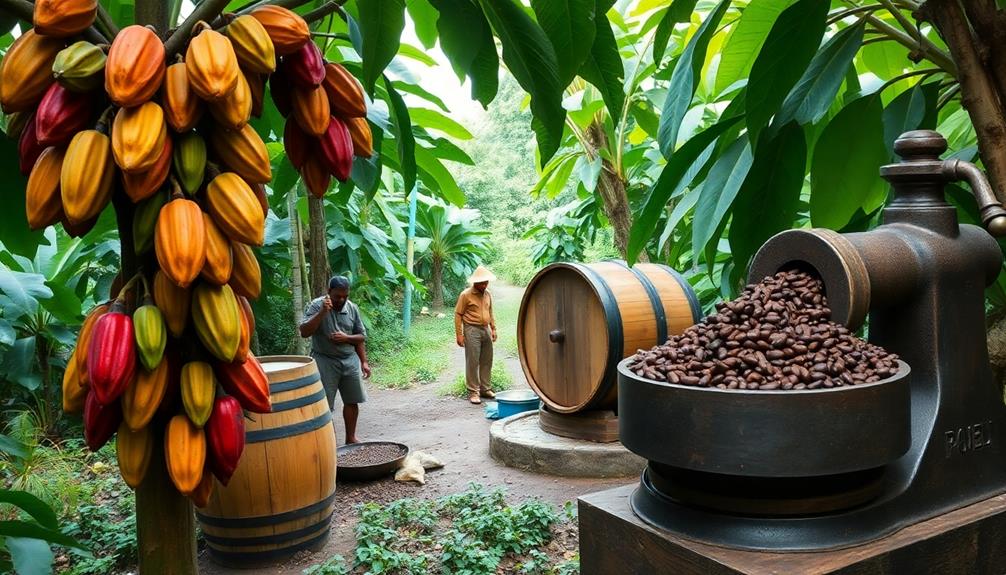
Procuring cocoa beans and roasting them is the first step.
Next, you'll need to remove the shells to reveal the nibs inside.
Once you've got the nibs, you'll grind them into a chocolate liquor.
Step 1. Procure Cocoa Beans and Roast
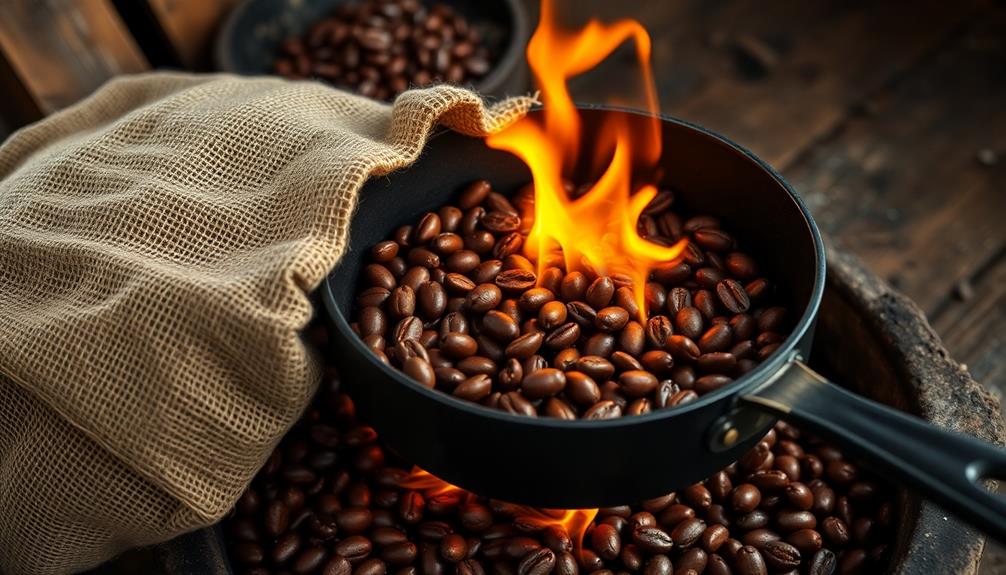
Obtaining the cocoa beans is the first crucial step in your homemade chocolate journey. These precious beans are the key ingredient that will transform into the rich, velvety chocolate you crave.
Look for high-quality, ethically sourced cocoa beans from reputable suppliers. Whole, unroasted beans are preferable, as they'll provide the best flavor and aroma.
Once you have your cocoa beans, it's time to roast them. Preheat your oven to 300°F (150°C). Spread the beans out in a single layer on a baking sheet.
Roast for 15-25 minutes, stirring occasionally, until the beans are fragrant and their skins begin to crack. Be careful not to over-roast, as this can result in a bitter taste.
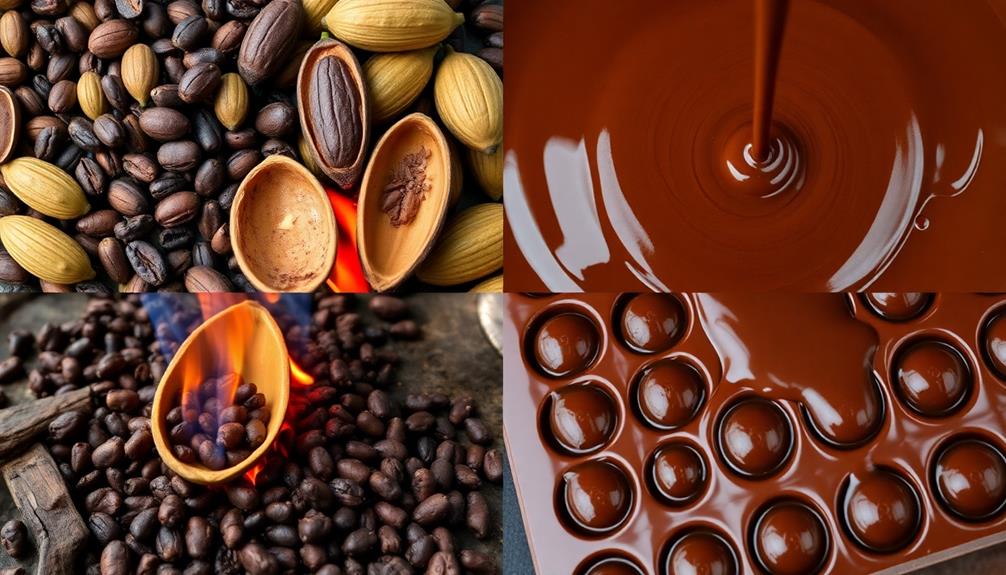
After roasting, allow the beans to cool completely. Then, use a nutcracker or your hands to crack open the beans and remove the nibs, the inner part of the bean.
These nibs are the base of your homemade chocolate, so treat them with care.
Step 2. Remove the Shell
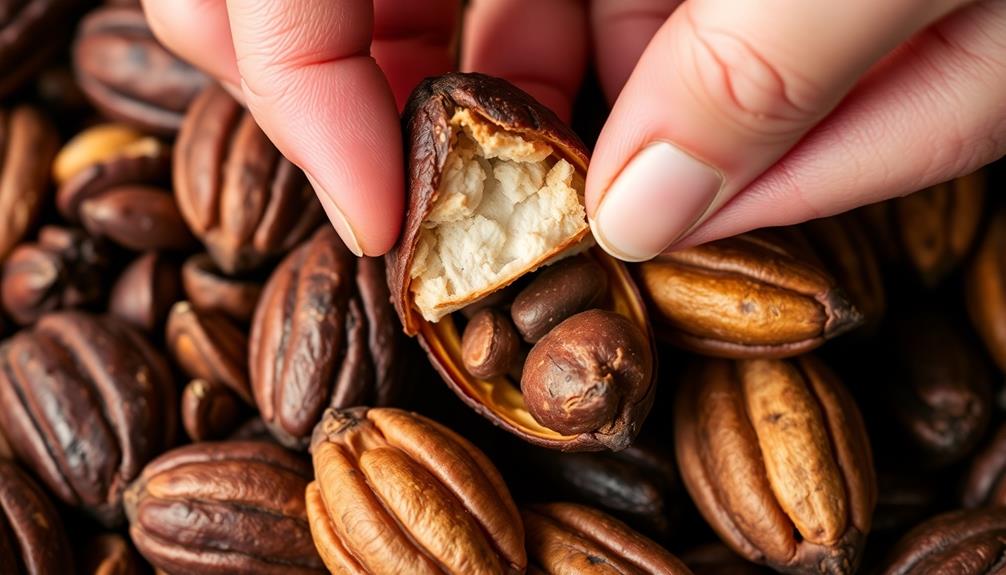
With the roasted cocoa beans in hand, it's time to remove their shells. This crucial step separates the coveted nibs from the bitter outer casings, revealing the flavorful heart of the bean.
First, gently crack open each bean using your fingers or a light tap with a spoon. Be careful not to apply too much pressure, as you don't want to damage the delicate nibs inside.
Once the shells are cracked, you can easily peel them away, exposing the rich, chocolate-colored nibs.
Next, separate the nibs from the shells by hand or with the help of a sieve or winnowing tray. The lightweight shells will naturally rise to the top, while the heavier nibs sink to the bottom, making the separation process simple and efficient.
Step 3. Grind Nibs Into Chocolate Liquor

Now that you have the precious cocoa nibs, it's time to transform them into the foundational ingredient for homemade chocolate – the chocolate liquor.
To begin, you'll need a powerful grinder, such as a spice or coffee grinder, to pulverize the nibs into a smooth, liquid-like consistency.
Start by adding a small batch of nibs to the grinder and processing them for several minutes. You may need to stop and scrape down the sides a few times to ensure even grinding. The friction and heat generated by the grinder will cause the cocoa nibs to release their natural oils, transforming them into a thick, rich chocolate liquor.
Continue grinding in small batches until you've processed all of your cocoa nibs. The final result should be a smooth, glossy chocolate liquor with a velvety texture.
This liquor is the base for all your homemade chocolate-making adventures, so take your time and enjoy the process of transforming those precious nibs.
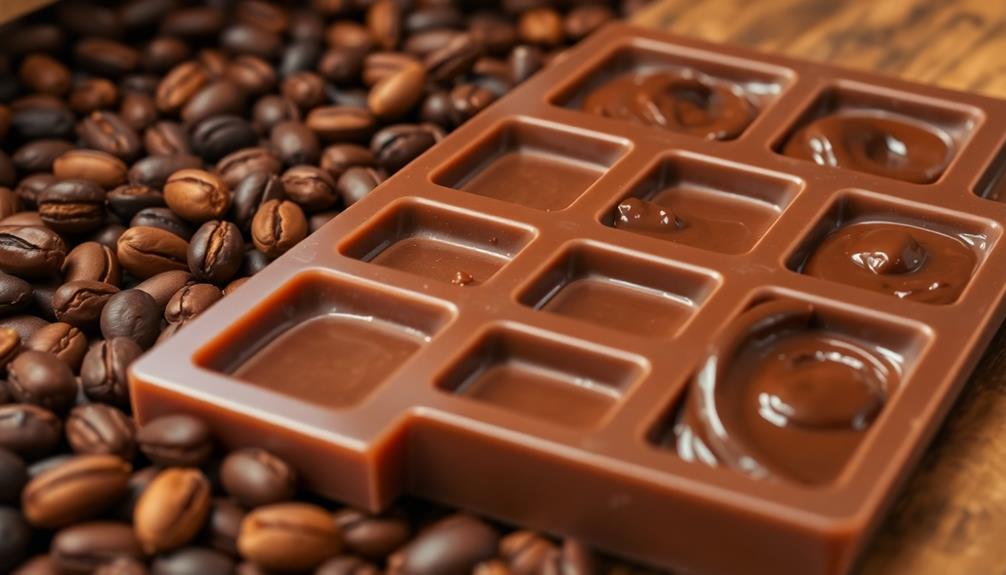
Step 4. Temper the Chocolate Liquor
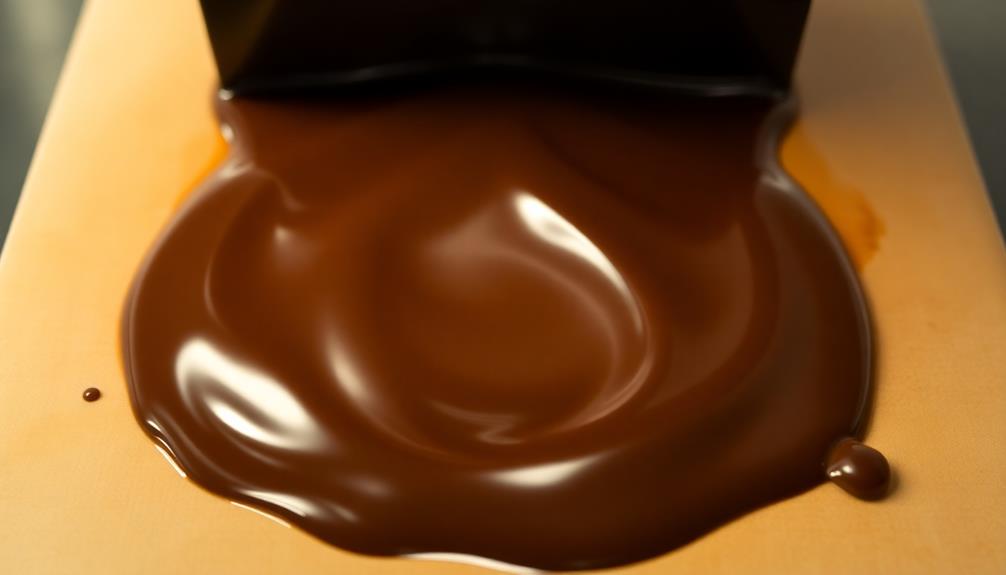
The next crucial step in your homemade chocolate-making process is to temper the chocolate liquor. Tempering is a technique that involves carefully controlling the temperature of the chocolate to ensure it has the right texture, sheen, and snap when it hardens.
To temper the chocolate, start by chopping it into small pieces and placing two-thirds of it in a heatproof bowl. Melt this portion over a double boiler, stirring constantly, until the chocolate reaches 115-120°F.
Remove the bowl from the heat and add the remaining one-third of the chopped chocolate. Stir gently until the temperature drops to 88-90°F. This process allows the chocolate to form the right crystal structure, resulting in a smooth, glossy, and snappy final product.
Once tempered, the chocolate is ready to be molded, dipped, or used in your desired recipe. Be sure to work quickly, as tempered chocolate can easily seize or become thick if overworked or exposed to moisture.
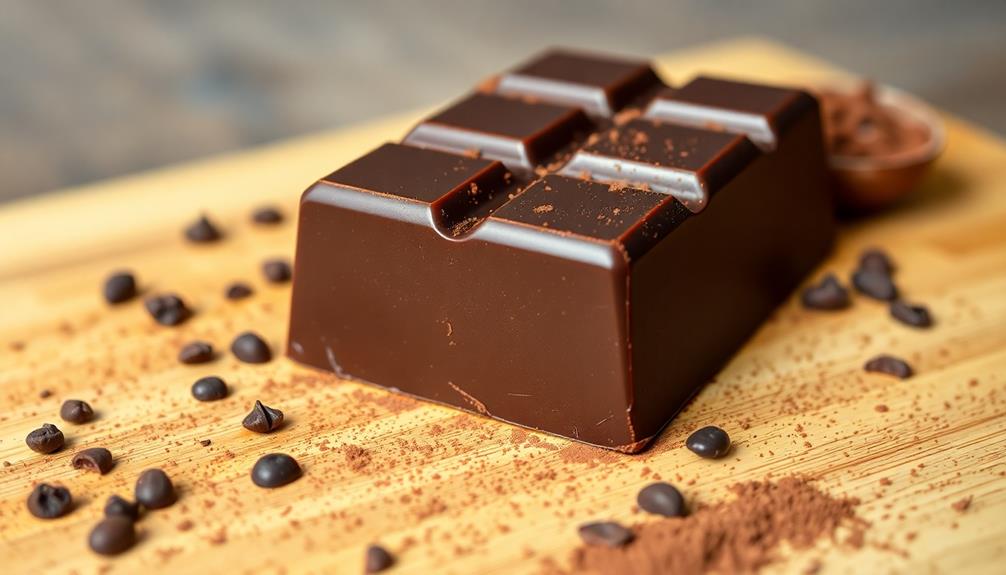
Step 5. Mold and Cool the Chocolate
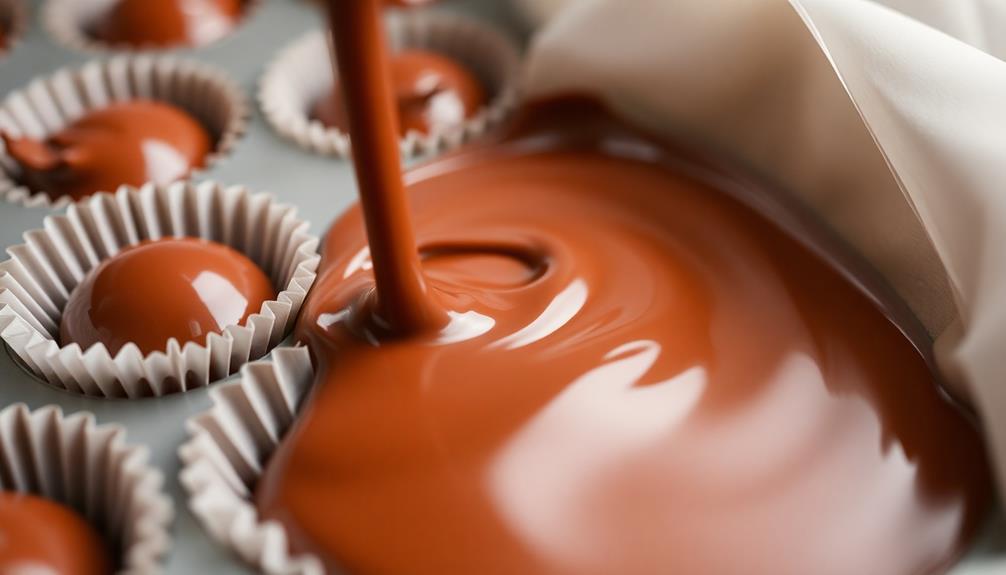
After tempering the chocolate, the next step is to mold and cool it. First, prepare your molds by lightly greasing them with a neutral-flavored oil. This will help the chocolate release easily once cooled.
Then, carefully pour the tempered chocolate into the molds, filling them to the top. Use a spatula or knife to smooth the surface and remove any air bubbles.
Next, place the filled molds in the refrigerator or freezer to cool and harden. This process typically takes around 30 minutes, but the exact time will depend on the size and material of your molds.
Be patient and resist the urge to check on them too often, as this can cause the chocolate to bloom or develop a cloudy appearance.
Once the chocolate is firm, gently remove it from the molds. Your homemade chocolate is now ready to be enjoyed or used in your favorite recipes!

Nuvia Organics Cocoa Butter – 100% USDA Certified Organic, Wafer Form, Non-GMO, Unrefined, Gluten-Free, Food Grade, Edible, Keto, Vegan; 8oz
100% USDA CERTIFIED Organic Cocoa Butter- In conveniently sized wafer shape.
As an affiliate, we earn on qualifying purchases.
As an affiliate, we earn on qualifying purchases.
Final Thoughts
Crafting chocolate from scratch is a rewarding and delightful journey. Though the process may seem daunting at first, the sense of accomplishment and the ability to customize your chocolate to your taste makes it well worth the effort.
From selecting the finest cacao beans to tempering the final product, each step offers an opportunity to develop your skills and unleash your creativity.
As you continue your chocolate-making adventures, remember to experiment and have fun. Try infusing your chocolate with unique flavors, explore different conching techniques, and discover the perfect balance of sweetness and bitterness that suits your palate.
With practice and patience, you'll become a true chocolate artisan, capable of crafting confections that impress and delight.
Embrace the journey, savor the process, and revel in the joy of homemade chocolate. The possibilities are endless, and the rewards are truly sweet. Whether you’re experimenting with new flavors or perfecting classic recipes, the act of creating something from scratch brings a unique kind of satisfaction. As your confidence grows, you may find yourself diving into other culinary adventures, like learning how to make donuts or crafting artisanal breads. Each endeavor enriches your skills and invites more delightful moments to share with family and friends. The kitchen becomes a canvas where your creativity takes center stage, transforming simple ingredients into masterpieces that tell a story. As you master the art of chocolate making, don’t hesitate to branch out and try your hand at other delightful treats, like discovering how to make donuts or experimenting with decadent pastries. Each new recipe offers a chance to create cherished memories, filling your home with the irresistible aromas of love and craftsmanship.
Frequently Asked Questions
Can I Use Regular Cocoa Powder Instead of Cacao Nibs?
You can use regular cocoa powder instead of cacao nibs, but the flavor won't be as rich and intense. The cocoa powder will provide a more mild chocolate taste compared to the deeper, richer notes of cacao nibs.
How Do I Temper the Chocolate Properly?
To properly temper the chocolate, you'll need to heat and cool it in a specific way. Start by melting the chocolate, then spread it on a cool surface and stir it until it reaches the right temperature and consistency.
How Long Will Homemade Chocolate Last?
Your homemade chocolate will typically last 2-3 weeks when stored properly in an airtight container at cool room temperature. Refrigeration can extend its shelf life, but may cause it to develop a dull appearance.
Can I Add Flavorings to the Chocolate?
Absolutely, you can add flavorings to your homemade chocolate. Get creative and experiment with extracts, spices, or even dried fruits to enhance the flavor profile. Just be mindful of the balance so the added elements don't overpower the rich chocolate taste.
Is Making Chocolate From Scratch Cost-Effective?
Making chocolate from scratch may not always be the most cost-effective option. While you can customize the flavors, the time and effort involved may outweigh the benefits for some. Consider your goals and resources to determine if it's the right choice for you.