Recipes
Easy Homemade Hummus Recipe
Prepare a delectable dip with this easy homemade hummus recipe, blending chickpeas, tahini, and aromatic spices into a creamy, nutritious treat. Discover the secret to its irresistible flavor.
Dive into the flavorful world of homemade hummus, a Middle Eastern dip with a rich history spanning thousands of years. This easy recipe calls for simple ingredients like chickpeas, tahini, lemon juice, and garlic, blending them into a silky-smooth consistency. Start by thoroughly draining and rinsing the chickpeas to remove any starch, then process the tahini until creamy. Incorporate the aromatic garlic and tangy lemon juice, and finish with a blend of spices like cumin and paprika. The result is a nutritious and versatile dip that's perfect for pairing with pita, veggies, or crackers. Discover more about the customization and health benefits of this beloved hummus recipe.
Key Takeaways
- This easy homemade hummus recipe requires simple, readily available ingredients like chickpeas, tahini, lemon juice, and garlic.
- The step-by-step instructions outline the essential techniques for achieving a smooth, creamy texture, including thoroughly draining and rinsing the chickpeas.
- Customization options are provided, allowing you to experiment with different spices, roasted vegetables, herbs, and even sweet variations.
- Homemade hummus is a nutritious snack or appetizer, offering a good source of protein, fiber, and essential vitamins and minerals.
- The recipe highlights the benefits of making hummus at home, including the ability to control ingredients, achieve a healthier alternative, and explore unique flavor combinations.
History
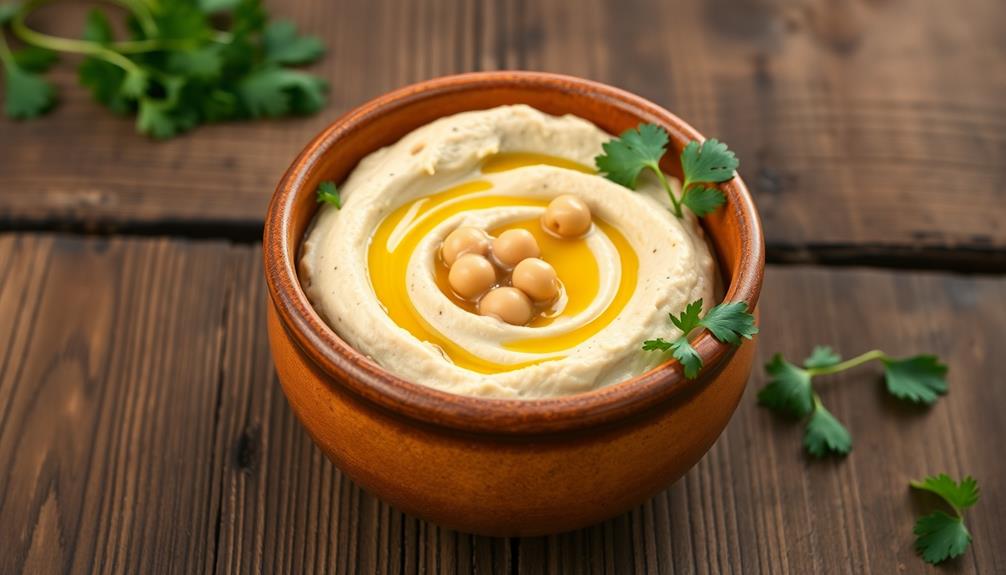
Where did hummus, the beloved Middle Eastern dip, originate? Hummus has a rich history dating back thousands of years, with its roots firmly planted in the culinary traditions of the Levant region. The earliest known references to a dish resembling modern-day hummus can be found in 13th-century Arabic cookbooks, though its origins likely stretch even further back in time.
The word "hummus" itself is Arabic, meaning "chickpeas," the key ingredient that gives this creamy spread its signature texture and flavor.
Over the centuries, hummus has evolved, with each region and culture adding its own unique twist, whether it's the addition of tahini, garlic, lemon juice, or spices.
Today, hummus has become a global sensation, enjoyed by people of all backgrounds as a versatile and healthy snack or appetizer. Its enduring popularity is a testament to the timeless appeal of this simple, yet delicious, Middle Eastern delicacy.
Recipe
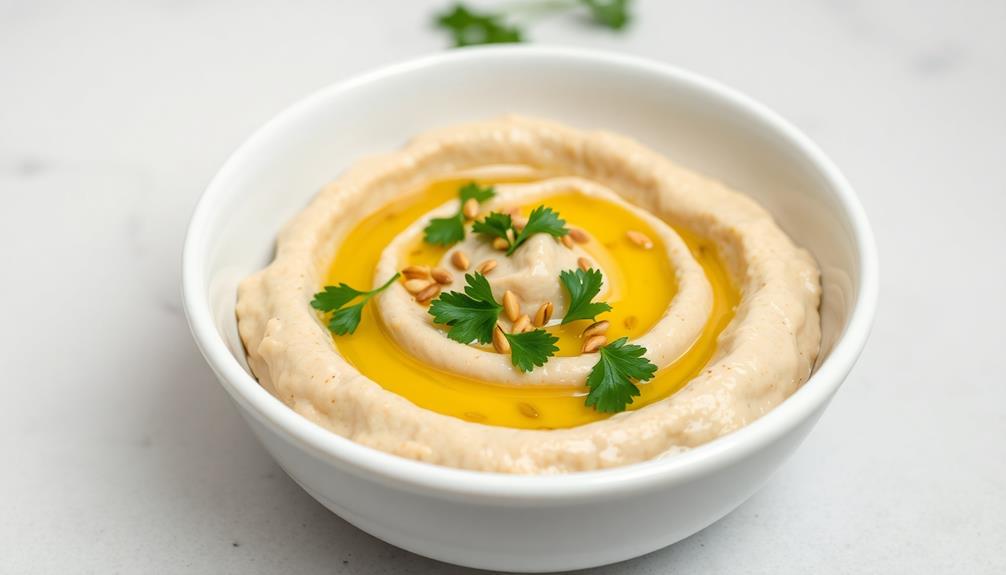
Homemade hummus is a delicious and nutritious dip that can be enjoyed as a snack, appetizer, or accompaniment to a variety of dishes. This recipe is easy to make and allows you to customize the flavors to your liking. It’s perfect for pairing with veggies, pita bread, or spreading on sandwiches for an extra boost of flavor. Additionally, this homemade hummus recipe for snacking can be made ahead of time and stored in the refrigerator for a quick, healthy option throughout the week. Experiment with different spices or toppings, such as roasted red peppers or pine nuts, to truly make it your own!
Hummus is a Middle Eastern staple made from chickpeas, tahini, lemon juice, and a few simple spices. It's packed with protein, fiber, and healthy fats, making it a great choice for those looking to incorporate more plant-based foods into their diet.
Ingredients:
- 1 (15-oz) can chickpeas, drained and rinsed
- 1/4 cup tahini (sesame seed paste)
- 1/4 cup fresh lemon juice
- 2 cloves garlic, minced
- 1/2 teaspoon ground cumin
- 1/4 teaspoon ground paprika
- 1/4 teaspoon salt
- 2-3 tablespoons warm water
In a food processor or high-powered blender, combine the chickpeas, tahini, lemon juice, garlic, cumin, paprika, and salt. Blend until smooth, scraping down the sides as needed.
If the mixture is too thick, add the warm water 1 tablespoon at a time until the desired consistency is reached.
To enhance the flavor and texture of your homemade hummus, consider roasting the garlic before adding it to the mixture. You can also experiment with different spices, such as cayenne pepper or za'atar, to create unique variations.
Serve the hummus with pita bread, fresh vegetables, or your favorite crackers.
Cooking Steps
First, be sure to thoroughly drain and rinse those chickpeas – you want to get rid of any excess liquid.
Next, add the tahini and let it blend in seamlessly.
Then, toss in the garlic and lemon juice to really amp up the flavor.
Blend everything together until you achieve that perfect, silky-smooth consistency.
Step 1. Drain and Rinse Chickpeas Thoroughly
Before adding the chickpeas to your food processor, be sure to drain and rinse them thoroughly. This step is crucial for achieving the optimal texture and flavor in your homemade hummus. Canned chickpeas can often be coated in a starchy liquid, which can make your hummus grainy or gritty if left unattended.
Drain the chickpeas in a colander, allowing the liquid to fully strain out. Once drained, give the chickpeas a good rinse under cool running water. This helps remove any residual starch or impurities, leaving you with clean, fresh chickpeas ready for blending.
Be thorough in this process – spend a minute or two gently stirring and turning the chickpeas to ensure they're completely rinsed. This extra attention to detail will pay off in the final texture of your hummus, making it silky-smooth and creamy.
With the chickpeas properly prepped, you can now move on to the next step of the recipe with confidence.
Step 2. Add Tahini
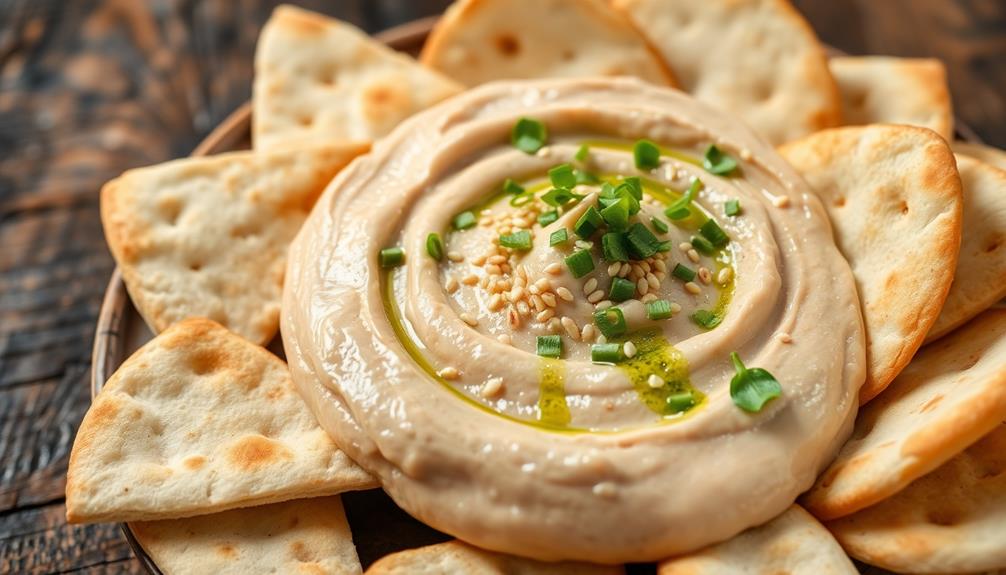
Next, add the tahini to your food processor. Tahini is a paste made from ground sesame seeds, and it's a key ingredient in hummus that provides a subtle nutty flavor and smooth, creamy texture. Start with 2-3 tablespoons of tahini and add more to taste if desired.
Make sure to scrape down the sides of the food processor as you go, ensuring all the ingredients are fully incorporated. The tahini will help bind the chickpeas together and create that signature hummus consistency.
Once the tahini is added, process the mixture for an additional 30 seconds to 1 minute, until it's smooth and creamy.
Taste and adjust the amount of tahini as needed, keeping in mind that the flavor will mellow out as you continue adding the remaining ingredients.
Step 3. Add Garlic and Lemon Juice
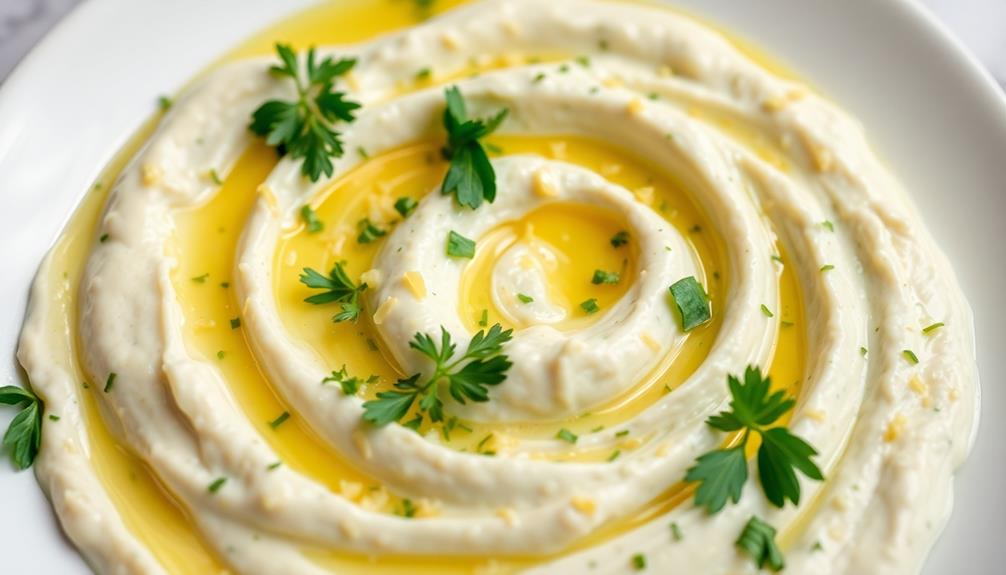
Now that the tahini is incorporated, it's time to add the garlic and lemon juice. Minced garlic will provide a bold, savory flavor, while freshly squeezed lemon juice will lend a bright, tangy note to balance out the richness of the chickpeas.
For best results, use 3-4 cloves of fresh garlic, minced or pressed. This amount of garlic will give the hummus a pronounced yet not overpowering garlicky taste. As for the lemon, start with the juice of 1 small lemon, about 2-3 tablespoons, and adjust to your preferred level of tanginess.
Add the minced garlic and lemon juice to the food processor and blend until fully incorporated. Taste the hummus and add more lemon juice if you desire a stronger citrus flavor.
Alternatively, add a pinch of salt if you'd like to enhance the overall seasoning. Continue blending until the hummus reaches your desired smooth and creamy consistency.
Step 4. Blend Until Smooth Consistency
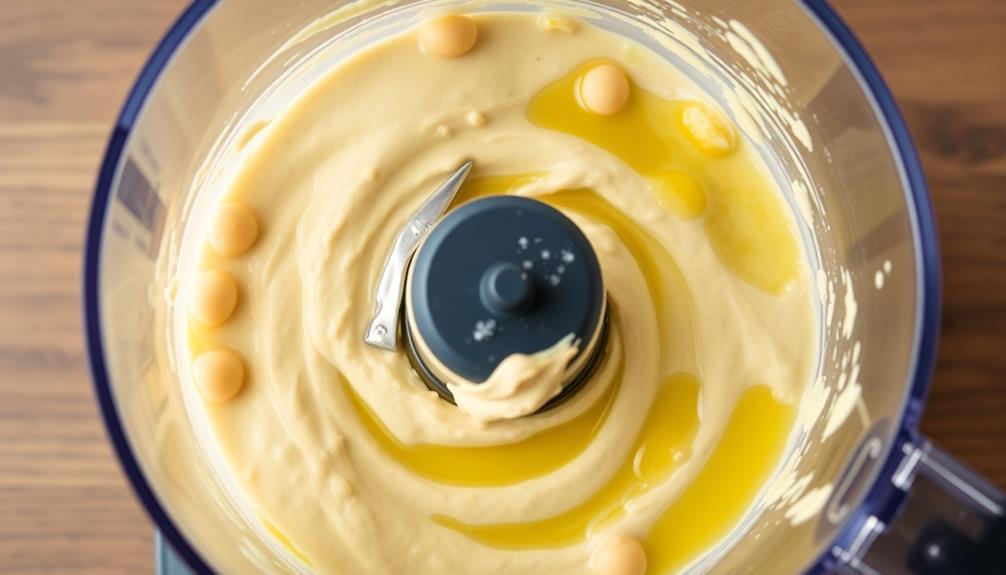
With the garlic and lemon juice incorporated, you'll want to blend the hummus until it reaches a smooth, creamy consistency. This is a crucial step in achieving the signature hummus texture.
Start by adding the garlic-lemon mixture to a food processor or high-powered blender. Turn on the machine and let it run for 2-3 minutes, stopping occasionally to scrape down the sides.
The key is to blend the hummus long enough to break down the chickpeas into a soft, uniform puree. You'll know it's ready when the mixture becomes silky smooth, with no visible chunks or grittiness. Depending on the power of your appliance, this may take a bit of time and patience.
Once the hummus reaches the desired consistency, you can taste it and adjust the seasoning as needed. Add a bit more lemon juice for tang, or a pinch of salt to enhance the flavor.
With the perfectly blended hummus, you're now ready to transfer it to a serving bowl and enjoy!
Step 5. Season With Spices
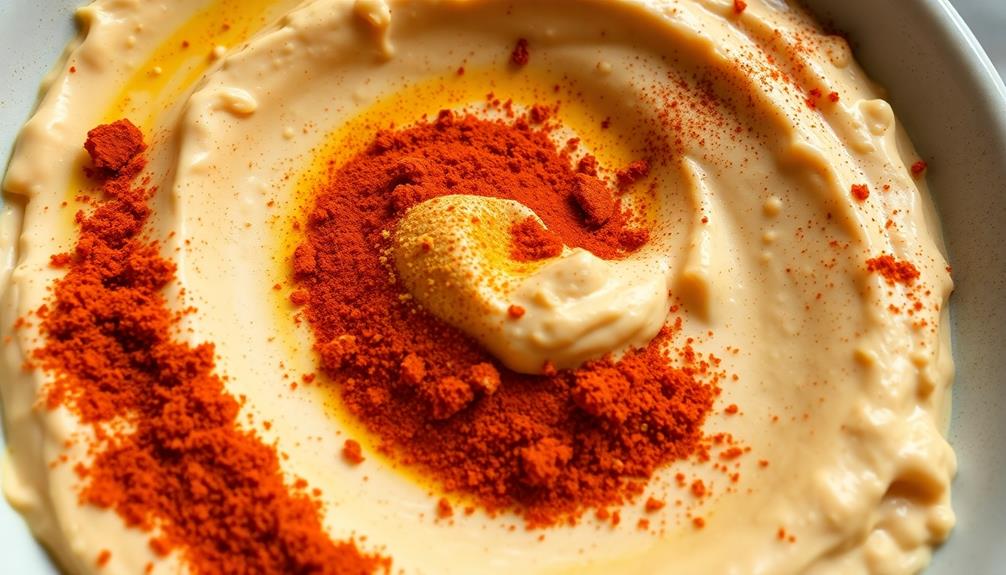
Once the hummus has reached the perfect creamy texture, it's time to season it with some aromatic spices. The right blend of seasonings can elevate your homemade hummus, adding depth of flavor and complexity to this beloved dip.
To enhance its nutritional profile, consider adding a tablespoon of chia seeds, which are a rich source of dietary fiber and can aid digestion and regularity Chia Seeds and Digestive Health.
First, consider the classic flavors of cumin and paprika. A teaspoon or two of each lends a warm, earthy note that complements the chickpeas beautifully.
For an extra burst of brightness, a squeeze of fresh lemon juice or a tablespoon of lemon zest can really make the flavors pop.
Don't be afraid to experiment with other spices as well. A pinch of cayenne pepper or chili powder can add a subtle kick, while a sprinkle of garlic powder or minced fresh garlic enhances the savory qualities.
You can also try herbs like parsley, cilantro, or dill to create a more herbal profile.
Taste your hummus after each addition and adjust the seasonings to your personal preference. The key is to find the perfect balance of flavors that tantalizes your taste buds.
Final Thoughts
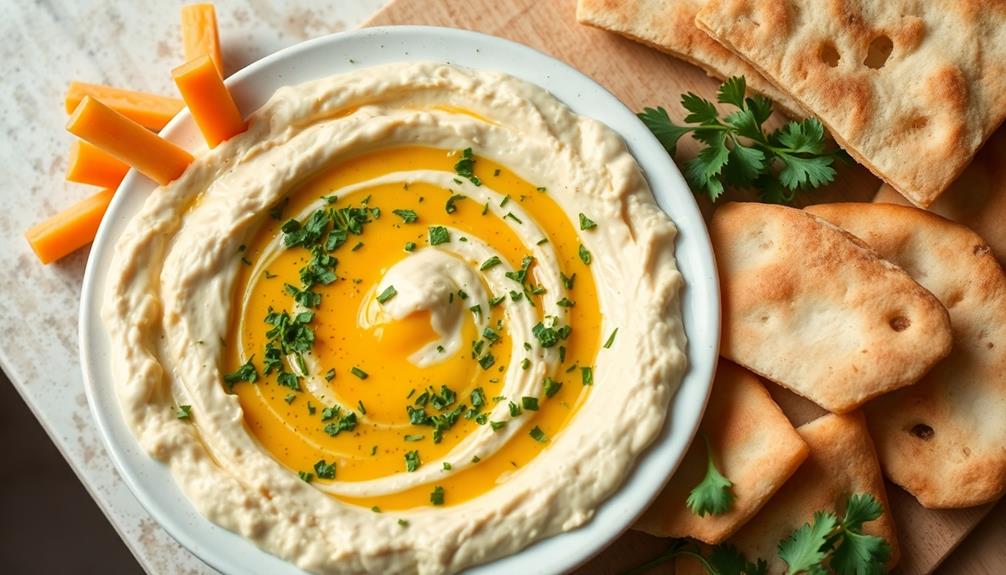
Homemade hummus is a delightful and versatile dish that can elevate any meal. With its creamy texture and bold flavors, it's a fantastic addition to your culinary repertoire. Whether you're hosting a gathering or looking for a healthy snack, this homemade hummus is sure to impress.
One of the best things about making your own hummus is the ability to customize it to your taste. Experiment with different spice blends, roasted vegetables, or even add-ins like pesto or sun-dried tomatoes. The possibilities are endless, allowing you to create a unique hummus that caters to your personal preferences.
Beyond its delicious flavor, homemade hummus is also a nutritious choice. Chickpeas, the main ingredient, are packed with protein, fiber, and essential vitamins and minerals. By preparing it at home, you can control the ingredients, ensuring that your hummus is made with wholesome, high-quality components.
With this easy-to-follow recipe, you'll be well on your way to enjoying the rich, creamy goodness of homemade hummus. Embrace the joy of crafting your own version and savor the satisfaction of a job well done.
Frequently Asked Questions
Can I Use Canned Chickpeas Instead of Dried?
Yes, you can use canned chickpeas instead of dried ones. Canned chickpeas are already cooked and ready to use, which makes the process easier and quicker. Just be sure to rinse and drain them before adding them to your hummus recipe.
How Long Does Homemade Hummus Last in the Fridge?
Homemade hummus can typically last 3-5 days in the fridge when stored properly in an airtight container. The freshness will depend on the ingredients used and how well you've refrigerated it, so be sure to check for any changes in smell or texture.
Can I Make Hummus Without Tahini?
Yes, you can make hummus without tahini. While tahini is a traditional ingredient, you can substitute it with ingredients like olive oil, yogurt, or even nut butters to achieve a similar creamy texture and flavor.
How Can I Make Hummus Thicker or Creamier?
To make your hummus thicker and creamier, add more chickpeas or tahini. You can also try blending the mixture for longer or adding a bit of olive oil or lemon juice. Adjust the consistency to your liking.
What Are Some Tasty Toppings for Homemade Hummus?
You can top your homemade hummus with a variety of tasty toppings. Some ideas include roasted red peppers, kalamata olives, toasted pine nuts, chopped fresh herbs, crumbled feta cheese, or a drizzle of high-quality olive oil and a sprinkle of paprika.
Giovanni is our Chief Tasting Evangelist and the charismatic face of Mad Tasting. He inspires a sense of culinary wonder in all who encounter our brand. With boundless enthusiasm for the art of tasting and a gift for captivating audiences, Giovanni leads our immersive tasting experiences and workshops. He empowers food enthusiasts to discover the true depth and complexity of the flavors we celebrate. Whether he’s guiding a private group through a blind tasting or hosting a masterclass on the art of pairing, Giovanni’s infectious passion for the culinary world is the driving force behind our mission to share the extraordinary.
Recipes
How to Make Quinoa for Any Meal
Learn how to prepare quinoa, a nutritional powerhouse, for delicious and diverse meals, from protein-packed salads to hearty breakfast bowls.
Quinoa is a nutritional powerhouse you can easily incorporate into any meal. First, rinse the grains to remove bitterness. Then, cook it using a 1:2 quinoa-to-liquid ratio, simmering for 15-20 minutes. Fluff it with a fork after cooking, and let it cool slightly before serving. Quinoa's mild, slightly nutty flavor pairs well with endless ingredient combinations, whether you're making a protein-packed salad, savory stir-fry, or hearty breakfast bowl. With its versatility, quinoa can elevate the nutrition of just about any dish. And if you're interested in more tips for cooking this superfood to perfection… …consider experimenting with seasoning or cooking it in broth for added flavor. You can even toast the grains before boiling to enhance their nuttiness. In addition to quinoa, why not boost your meals with gut-friendly beverages like kombucha? For a refreshing drink, check out our **easy homemade kombucha recipe**—it pairs wonderfully with your favorite quinoa dishes for a wholesome, balanced meal. Quinoa’s nutrient-rich profile, combined with a refreshing, probiotic-packed drink, creates a balanced, nutritious meal perfect for any time of day. For a complete dining experience, try pairing your quinoa dish with a homemade brew by following our **easy kombucha recipe at home**, which brings a tangy, fizzy complement to your savory meals. Together, quinoa and kombucha are an excellent way to nourish both your body and your taste buds.
Key Takeaways
- Rinse quinoa under cool running water to remove bitterness-causing saponins and ensure even cooking with a pleasant, nutty flavor.
- Cook quinoa using a 1:2 ratio of quinoa to liquid (water or broth) by bringing it to a boil, then simmering for 15-20 minutes.
- Fluff the cooked quinoa with a fork to distribute moisture evenly and prevent stickiness or mushiness.
- Allow quinoa to cool for 3-5 minutes before serving to maintain its fluffy texture and prevent sogginess.
- Experiment with different seasonings, vegetables, and proteins to incorporate quinoa into a wide variety of dishes.
History
Although quinoa has been a dietary staple in South America for centuries, it's only recently gained popularity worldwide.
Originating in the Andean region, quinoa has been cultivated by the Incas and other indigenous communities for over 6,000 years. These ancient civilizations recognized quinoa as a superfood, praising its nutritional profile and versatility in their cuisine.
Quinoa was considered sacred by the Incas, who referred to it as the "mother grain" or "chisaya mama." It played a crucial role in their diet and was often used in religious ceremonies.
Despite its long history, quinoa was largely unknown to the rest of the world until the 1970s, when it began to be exported and promoted as a health food.
Today, quinoa is grown in various parts of the world, with Bolivia, Peru, and Ecuador remaining the primary producers.
Its rising popularity can be attributed to its exceptional nutritional value, gluten-free status, and adaptability in both savory and sweet dishes.
Recipe
Quinoa is a versatile and nutritious grain that has gained popularity in recent years. It's a gluten-free superfood packed with protein, fiber, and essential vitamins and minerals. Cooking quinoa is a straightforward process that yields a fluffy, flavorful result.
To begin, it's important to rinse the quinoa before cooking. This helps to remove the natural coating called saponin, which can give the grain a bitter taste. Once rinsed, the quinoa is ready to be cooked.
Ingredients:
- 1 cup quinoa
- 2 cups water or broth
- 1/4 teaspoon salt
Instructions:
Combine the quinoa, water or broth, and salt in a medium saucepan. Bring the mixture to a boil, then reduce the heat to low, cover, and simmer for 15-20 minutes, or until the quinoa is tender and the liquid has been absorbed. Fluff the quinoa with a fork before serving.
When cooking quinoa, it's important to use the correct quinoa-to-liquid ratio, which is typically 1 part quinoa to 2 parts liquid. This ensures that the quinoa cooks evenly and doesn't become too dry or too mushy.
Additionally, you can experiment with different cooking liquids, such as vegetable or chicken broth, to add extra flavor to the quinoa.
Cooking Steps
First, you'll want to rinse the quinoa before cooking it to remove any bitter saponins.
Next, add the cooking liquid – usually water or broth – and let the quinoa simmer on low heat until it's light and fluffy.
Step 1. Rinse Quinoa Before Cooking
Before cooking quinoa, it's important to give it a good rinse. Quinoa naturally contains a coating called saponin, which can make the grain taste bitter or soapy if not removed. Rinsing the quinoa helps eliminate this unwanted flavor.
To rinse quinoa, place it in a fine-mesh strainer and hold it under cool running water, gently stirring the quinoa with your fingers. Continue rinsing for 30 seconds to 1 minute, until the water runs clear. This step is crucial for ensuring your quinoa has a pleasant, nutty taste.
Some benefits of rinsing quinoa include:
- Removes bitterness
- Improves texture and flavor
- Helps quinoa cook more evenly
- Prevents it from becoming mushy
After rinsing, you're ready to cook the quinoa according to your recipe. Be sure to drain it well before adding it to the pot.
Rinsing quinoa takes just a minute but makes a big difference in the final dish.
Step 2. Add Cooking Liquid
Once you've rinsed the quinoa, it's time to add the cooking liquid. The ratio of quinoa to liquid is typically 1:2, meaning for every 1 cup of quinoa, you'll need 2 cups of liquid. Water is the most common choice, but you can also use broth or a combination of broth and water for added flavor.
Pour the measured liquid into the saucepan with the rinsed quinoa. Bring the mixture to a boil over high heat. Once it reaches a boil, reduce the heat to low, cover the saucepan with a tight-fitting lid, and let the quinoa simmer for 15-20 minutes.
Avoid lifting the lid during this time, as this allows steam to escape and can affect the cooking process.
The quinoa is ready when it has absorbed all the liquid and the grains have become light and fluffy. Fluff the quinoa with a fork before serving to ensure it has the desired texture.
Step 3. Simmer Quinoa on Low Heat
After bringing the liquid and quinoa mixture to a boil, it's time to let the quinoa simmer. Reduce the heat to low, cover the pot with a tight-fitting lid, and let the quinoa cook for 15-20 minutes.
During this time, you'll want to resist the urge to peek under the lid, as this can release valuable steam and disrupt the cooking process.
As the quinoa simmers, you may notice small holes forming on the surface, and the grains will become soft and fluffy. Keep an eye on the pot, and if the liquid seems to be evaporating too quickly, you can add a bit more water or broth to prevent the quinoa from drying out.
Once the time is up, remove the pot from the heat and let it sit, covered, for an additional 5 minutes.
This resting period allows the quinoa to finish absorbing any remaining liquid, resulting in a perfectly cooked, fluffy texture.
Step 4. Fluff With a Fork Before Serving
Once the quinoa has finished its resting period, it's time to fluff it with a fork before serving. This simple step helps to separate the grains, making the quinoa light and fluffy. Start by gently running a fork through the quinoa, lifting and turning the grains to introduce air pockets. Be careful not to overmix, as this can make the quinoa sticky or mushy.
Fluffing the quinoa serves a few important purposes. First, it helps to evenly distribute any remaining liquid or moisture, ensuring a consistently cooked texture throughout. Additionally, the act of fluffing aerates the quinoa, resulting in a lighter, more appealing presentation on the plate.
This step also allows you to break up any clumps that may have formed during the simmering process. Once the quinoa has been fluffed to your desired texture, it's ready to be served.
This simple step takes just a minute or two but makes a big difference in the final appearance and mouthfeel of your quinoa dish.
Step 5. Let Quinoa Cool Before Serving
After fluffing the quinoa, let it sit and cool for a few minutes before serving. This resting period is crucial to ensure the grains retain their fluffy, light texture.
As the quinoa cools, the steam will gradually dissipate, allowing the individual grains to separate and develop a more pleasant, delicate mouthfeel.
During this cooling phase, you'll notice the quinoa gradually transitions from a vibrant, steaming hot state to a more relaxed, room temperature consistency. This transformation is key to enhancing the overall flavor and texture of the dish.
Allowing the quinoa to cool prevents it from becoming overly soggy or mushy when served.
Once the quinoa has had a chance to cool for 3-5 minutes, it's ready to be served. Fluff it one more time with a fork to ensure an even distribution of the grains, then add any desired seasonings or toppings.
Serving the quinoa at the perfect temperature will ensure it's a delightful addition to your meal.
Final Thoughts
Ultimately, quinoa is a versatile and nutritious grain that can be enjoyed in a variety of dishes. With its fluffy texture and mild, nutty flavor, it's a fantastic base for salads, pilafs, and even breakfast bowls. Quinoa's high protein content and array of essential vitamins and minerals make it a nutritious addition to any meal.
When cooking quinoa, be sure to thoroughly rinse the grains before cooking to remove any bitterness. Fluff the quinoa with a fork after cooking, and let it cool slightly before serving. This will help maintain the grain's light and fluffy texture.
Quinoa is an incredibly versatile ingredient that can be used in both sweet and savory dishes. Experiment with different seasonings, vegetables, and proteins to find your favorite quinoa-based meals.
With its impressive nutritional profile and easy preparation, quinoa is a fantastic choice for healthy, delicious eating.
Frequently Asked Questions
How Long Does Cooked Quinoa Last in the Fridge?
Cooked quinoa can last 3-5 days in the fridge when stored properly. Keep it in an airtight container and enjoy it as a tasty, nutritious side or addition to your meals throughout the week.
Can I Freeze Cooked Quinoa?
You can absolutely freeze cooked quinoa! Just let it cool completely, then portion it out into airtight containers or freezer bags. It'll keep for up to 3 months in the freezer, ready to thaw and reheat whenever you need it.
Is Quinoa Gluten-Free?
Yes, quinoa is naturally gluten-free, making it a great option for those following a gluten-free diet. Its grain-like texture and mild flavor makes it versatile for use in a variety of dishes.
What Is the Best Way to Reheat Quinoa?
To reheat quinoa, you can use the microwave or a skillet on the stove. Just add a splash of water and reheat until it's warm and fluffy. The key is to avoid overcooking to prevent it from drying out.
How Do I Know When Quinoa Is Fully Cooked?
You'll know quinoa is fully cooked when the grains become translucent and the white outer shell has popped open, revealing the spiral-shaped germ. The texture should be fluffy and tender, not crunchy or mushy.
Giovanni is our Chief Tasting Evangelist and the charismatic face of Mad Tasting. He inspires a sense of culinary wonder in all who encounter our brand. With boundless enthusiasm for the art of tasting and a gift for captivating audiences, Giovanni leads our immersive tasting experiences and workshops. He empowers food enthusiasts to discover the true depth and complexity of the flavors we celebrate. Whether he’s guiding a private group through a blind tasting or hosting a masterclass on the art of pairing, Giovanni’s infectious passion for the culinary world is the driving force behind our mission to share the extraordinary.
Recipes
Easy Kombucha Recipe at Home
Mastering the art of brewing your own kombucha at home can be a rewarding and cost-effective way to enjoy this probiotic-rich beverage. Learn more about this ancient elixir’s fascinating history and health benefits.
Brewing your own kombucha at home is an easy, rewarding, and cost-effective way to enjoy this probiotic-rich beverage. You'll need just a few simple ingredients: water, sugar, black tea, and a kombucha SCOBY. The process involves brewing the sweetened tea, combining it with the SCOBY and starter liquid, and allowing it to ferment for 7-14 days. As the kombucha brews, you can experiment with different flavors by adding fresh fruit, herbs, or juices. Homemade kombucha not only saves you money but also allows you to tailor the taste to your preferences. If you're curious to learn more about the fascinating history and health benefits of this ancient elixir, keep reading.
Key Takeaways
- Gather the essential ingredients: water, sugar, black tea, a SCOBY, and a starter kombucha liquid.
- Brew the sweetened tea, let it cool, then combine with the SCOBY and starter in a clean container.
- Cover the container with a cloth and ferment the kombucha for 7-14 days, tasting periodically.
- Strain the finished kombucha, bottle it, and allow a second fermentation for 2-7 days at room temperature.
- Chill the bottled kombucha before serving to enjoy the refreshing, probiotic-rich beverage.
History
Kombucha, a beverage with ancient roots, has captivated the world with its unique, effervescent flavor and purported health benefits. Originating in Northeast China or Russia, the origins of kombucha can be traced back thousands of years. This fermented tea drink was once considered a "tea of immortality" and was enjoyed by various cultures throughout Asia and Eastern Europe.
In the early 20th century, kombucha began to gain popularity in the West, particularly in Germany, where it was used as a folk remedy for a variety of ailments. As interest in natural, probiotic-rich foods has grown in recent decades, kombucha has experienced a resurgence in popularity around the globe.
Today, this fizzy, slightly tart beverage is widely available in grocery stores and has become a staple in the health-conscious community. With its intriguing history and potential health benefits, it's no wonder kombucha has captured the imagination of people worldwide.
Recipe
Kombucha is a delightfully effervescent fermented tea that has become increasingly popular in recent years. Brewing your own kombucha at home is surprisingly easy and allows you to customize the flavor to your liking. This simple recipe will guide you through the process of creating a refreshing batch of homemade kombucha.
The key to successful kombucha brewing is patience and attention to detail. The fermentation process takes time, typically around 7-14 days, but the end result is well worth the wait. The kombucha SCOBY (Symbiotic Culture of Bacteria and Yeast) is the heart of the brew, acting as a living catalyst to transform sweetened tea into a tangy, probiotic-rich beverage.
Ingredients:
- 8 cups water
- 1 cup granulated sugar
- 6 black tea bags or 4 tablespoons loose-leaf black tea
- 1 kombucha SCOBY
- 1 cup unflavored kombucha (from a previous batch or store-bought)
Instructions:
Bring the water to a boil in a large non-reactive pot. Remove from heat and add the sugar, stirring until dissolved.
Drop in the tea bags or loose-leaf tea and let steep for 5-7 minutes. Remove the tea and allow the sweetened tea to cool to room temperature.
Once cooled, pour the sweetened tea into a clean, non-reactive container, such as a glass or ceramic jar. Gently add the SCOBY and the cup of unflavored kombucha.
Cover the container with a clean cloth or paper towel and secure it with a rubber band. Place the container in a warm, dark location and allow the kombucha to ferment for 7-14 days, tasting it periodically to reach your desired level of tartness.
Tips:
When bottling your finished kombucha, reserve a cup of the liquid to use as the starter culture for your next batch.
The SCOBY will continue to grow and can be shared with friends or family to start their own kombucha brewing.
Experiment with different tea blends, fruit juices, or herbs to create unique and flavorful kombucha variations.
Cooking Steps
First, you'll need to procure a starter culture and some tea.
Then, you'll combine the starter culture and tea, letting it ferment for 7-10 days.
Step 1. Procure Starter Culture and Tea
Gather the essential ingredients for your kombucha-brewing journey: a SCOBY (Symbiotic Culture of Bacteria and Yeast) and black or green tea. The SCOBY is the living, fermenting culture that transforms sweetened tea into the probiotic-rich, effervescent kombucha. You can obtain a SCOBY from a friend who brews kombucha, purchase one online, or grow your own by fermenting a bottle of store-bought kombucha.
Along with the SCOBY, you'll need loose-leaf black or green tea, which provides the nutrients for the culture to thrive. Opt for high-quality, organic tea to ensure the best possible kombucha. Avoid flavored or herbal teas, as they may disrupt the delicate fermentation process.
Once you have your SCOBY and tea, you're ready to begin the kombucha-making process. With patience and attention to detail, you'll soon be sipping on your very own homemade kombucha, brimming with beneficial probiotics and a refreshing, tangy flavor.
Step 2. Combine Starter Culture and Tea
With your SCOBY and tea ready, it's time to get brewing. In a large, clean glass container, combine the cooled black or green tea with the starter culture. The SCOBY should be placed on top, making sure it's fully submerged. Cover the container with a breathable cloth, like a coffee filter or paper towel, and secure it with a rubber band.
It's important to note that the quality of the tea you choose can significantly impact the flavor and fermentation process, so opt for high-quality tea leaves for optimal results. Tea selection for kombucha can enhance your brewing experience.
Now, the fermentation process begins. Place the container in a warm, dark spot, away from direct sunlight. The ideal temperature range is 70-85°F.
Over the next 7-14 days, the SCOBY will consume the sugars in the tea, converting them into acids that give kombucha its distinctive flavor.
Check the brew daily, looking for the SCOBY to grow and the liquid to become more vinegar-like. When it reaches your desired taste, it's time to bottle! Carefully remove the SCOBY, reserving it for your next batch.
Then, transfer the kombucha to airtight containers and enjoy your homemade fermented tea.
Step 3. Ferment for 7-10 Days
Once the SCOBY and tea blend is ready, it's time to let the fermentation process begin. This is where the magic really happens! Over the next 7-10 days, the SCOBY will work its fermentation magic, transforming the sweetened tea into delicious, effervescent kombucha.
To enhance your experience, consider using essential oils like lemon or lavender in your kombucha for added flavor and potential health benefits, such as essential oils for relaxation.
Find a quiet spot in your kitchen to place your fermentation vessel. The ideal temperature range is 70-85°F, so avoid areas that are too hot or cold. Cover the top with a breathable cloth, like a coffee filter or cheesecloth, and secure it with a rubber band. This allows air to flow while keeping out dust and pests.
Let the kombucha ferment for 7-10 days, tasting it periodically. You'll notice the flavor becoming less sweet and more tart as the fermentation progresses.
When it reaches your desired taste, remove the SCOBY and pour the kombucha into bottles for the second fermentation. This carbonates the drink and allows you to infuse it with your favorite fruits or flavorings.
Step 4. Bottle and Refrigerate Kombucha
After the kombucha has fermented for 7-10 days, you'll want to bottle it for the second fermentation. This step allows the kombucha to develop more carbonation and flavor complexity.
First, remove the SCOBY and reserved liquid, then pour the kombucha through a fine-mesh strainer to remove any sediment.
Next, prepare your bottles. You can use swing-top bottles, mason jars, or any other airtight container. Avoid plastic, as it can affect the flavor. Fill the bottles, leaving about an inch of headspace at the top. Add any desired flavorings, such as fruit juice or herbs. Secure the lids tightly.
Now, let the bottled kombucha ferment for an additional 2-7 days at room temperature. This allows the yeast and bacteria to continue converting the sugars, resulting in a more carbonated and flavorful drink.
Step 5. Enjoy the Refreshing Kombucha
Your homemade kombucha is now ready to enjoy! After refrigerating the bottled kombucha, it's time to dive into this delightful probiotic beverage.
Start by pouring the chilled kombucha into a glass, being careful not to disturb the yeast sediment at the bottom.
The flavor of your kombucha will depend on the tea and any additional ingredients you've added, but you can expect a slightly effervescent, tangy, and refreshing taste. Feel free to experiment with different flavor combinations – you might enjoy adding fresh fruit, herbs, or a splash of juice.
When drinking your kombucha, take your time and savor the unique flavors. You can even try pairing it with a meal or enjoying it as a refreshing afternoon pick-me-up.
The live cultures in the kombucha provide beneficial probiotics, making it a healthy and satisfying beverage choice.
Sit back, relax, and enjoy the fruits of your kombucha-making labor! This homemade elixir is sure to delight your taste buds. Whether you prefer it fizzy or tart, there’s nothing quite like the satisfaction of sipping on your own handcrafted brew. As you savor your kombucha, perhaps you’ll feel inspired to tackle your next kitchen adventure—like learning how to make homemade enchiladas easily. After all, a day filled with tasty, homemade creations is always a day well spent!
Final Thoughts
Brewing kombucha at home can be a rewarding and cost-effective endeavor. With the right knowledge and a bit of patience, you can enjoy a steady supply of this delicious and healthful beverage.
While the initial setup may seem daunting, the ongoing maintenance is relatively straightforward, and the payoff is well worth the effort.
As you continue your kombucha-making journey, remember to experiment with different flavors and ingredients to find your perfect blend.
Don't be afraid to try new things – the beauty of homemade kombucha is the ability to tailor it to your personal taste preferences.
Additionally, consider sharing your creations with friends and family, as they're sure to appreciate the time and care you've put into crafting your own kombucha.
Ultimately, embracing the art of kombucha brewing can be a rewarding and enriching experience.
Enjoy the process, savor the flavors, and take pride in your homemade creations.
Frequently Asked Questions
How Long Can Homemade Kombucha Be Stored?
Homemade kombucha can typically be stored for 2-4 weeks in the refrigerator. The exact storage time depends on factors like carbonation levels and how long the kombucha fermented. Be sure to monitor it and consume it before it loses its flavor.
Can Kombucha Be Reused to Make More Batches?
Yes, you can reuse your kombucha to make more batches. After finishing a batch, save a cup or two of the liquid to use as a starter for your next batch. This will help kickstart the fermentation process.
What Are the Health Benefits of Drinking Kombucha?
Drinking kombucha can provide you with a host of health benefits. It's rich in probiotics, which support gut health, and it may also help boost your immune system, reduce inflammation, and even aid in weight management.
Can I Add Fruit or Other Flavors to Kombucha?
Yes, you can absolutely add fruit or other flavors to your kombucha! In fact, doing so can enhance the taste and provide additional health benefits. Get creative with your favorite fruits, herbs, or spices.
Is It Safe to Consume Kombucha During Pregnancy?
Consuming kombucha during pregnancy is generally considered safe, but it's best to consult your healthcare provider first. They can advise you on the potential benefits and risks based on your specific health condition.
Giovanni is our Chief Tasting Evangelist and the charismatic face of Mad Tasting. He inspires a sense of culinary wonder in all who encounter our brand. With boundless enthusiasm for the art of tasting and a gift for captivating audiences, Giovanni leads our immersive tasting experiences and workshops. He empowers food enthusiasts to discover the true depth and complexity of the flavors we celebrate. Whether he’s guiding a private group through a blind tasting or hosting a masterclass on the art of pairing, Giovanni’s infectious passion for the culinary world is the driving force behind our mission to share the extraordinary.
Recipes
Tomato Soup Recipe for Cozy Nights
Lush and velvety, this classic tomato soup recipe is the ultimate comfort food for cozy nights, and its fascinating history and versatile serving suggestions await further reading.
Tomato soup is a classic comfort food that'll warm you up on cozy nights. With a rich, tangy flavor and velvety smooth texture, this recipe yields a hearty, aromatic soup that's easy to make. You'll sauté onions and garlic to develop the base, then add tomatoes and broth for a chunky texture. Simmer until the veggies soften, then stir in cream for a creamy finish. Garnish with basil or croutons for enhanced presentation. This soup's enduring appeal has spanned generations, and if you continue reading, you'll discover more about its fascinating history and versatile serving suggestions.
Key Takeaways
- This classic tomato soup recipe yields a rich, flavorful soup with aromatic vegetables and spices, perfect for cozy nights.
- The soup features a base of sautéed onions and garlic, canned diced tomatoes, and optional cream or milk for a creamy texture.
- Garnishes like fresh basil or croutons can enhance the presentation and flavor of the comforting soup.
- Tomato soup is a versatile comfort food that can be enjoyed on its own or paired with grilled cheese or crusty bread.
- The recipe is relatively low in calories and offers nutritional benefits from the vitamins and antioxidants in tomatoes.
History
The origins of tomato soup can be traced back to the 16th century, when the flavorful fruit was first introduced to Europe from the Americas. Initially, tomatoes were viewed with skepticism, as they were thought to be poisonous.
However, as their culinary potential became more widely recognized, creative cooks began experimenting with incorporating them into various dishes, including soup.
Tomato soup, in particular, gained popularity in the 19th century, when industrialization and the rise of canned goods made it more accessible to the masses. The invention of condensed tomato soup by the Campbell Soup Company in 1897 further propelled its widespread adoption, transforming it into a beloved comfort food that's enjoyed to this day.
The soup's versatility, from being a simple yet satisfying meal to a base for more elaborate recipes, has cemented its place as a kitchen staple for generations of home cooks.
Today, tomato soup continues to evolve, with endless variations and interpretations that celebrate its rich history and enduring appeal.
Recipe
Tomato soup is a classic comfort food that can be enjoyed year-round. This easy-to-follow recipe yields a rich, flavorful soup that's sure to please.
The key to this tomato soup is the blend of aromatic vegetables and spices. Sautéeing the onions, garlic, and herbs in olive oil helps to develop the depth of flavor. Canned diced tomatoes provide the base, while a touch of cream or milk adds a creamy texture.
Ingredients:
- 2 tablespoons olive oil
- 1 onion, diced
- 3 cloves garlic, minced
- 2 teaspoons dried basil
- 1 teaspoon dried oregano
- 1 (28-ounce) can diced tomatoes
- 2 cups chicken or vegetable broth
- 1/2 cup heavy cream or milk
- Salt and black pepper, to taste
In a large saucepan, heat the olive oil over medium heat. Add the onion and sauté for 5-7 minutes, until translucent.
Add the garlic, basil, and oregano, and cook for an additional minute, until fragrant. Pour in the diced tomatoes and broth, and bring to a simmer.
Reduce heat and let the soup simmer for 15-20 minutes, until slightly thickened.
For a smooth and creamy texture, use an immersion blender to puree the soup directly in the pot. Alternatively, carefully transfer the soup to a blender and puree until smooth.
Return the soup to the pot and stir in the heavy cream or milk. Season with salt and black pepper to taste.
Serve hot, garnished with fresh basil or croutons, if desired.
Cooking Steps
To begin, dice the onions and mince the garlic.
Next, add the tomatoes and broth to the pot, then let the mixture simmer until the vegetables have softened.
Step 1. Dice Onions, Mince Garlic
Grab a sharp knife and cutting board to tackle the onions and garlic. First, peel the onions, cut off the root and stem ends, and slice them in half lengthwise. Lay the halves flat on the board and thinly slice them, creating half-moon shapes. The thinner you slice the onions, the faster they'll cook down and release their sweet, aromatic flavor.
Next, peel the garlic cloves. Use the flat side of your knife to gently smash each clove, then mince the garlic into tiny pieces. Mincing garlic this way will help it infuse the soup with its pungent, savory notes.
Once the onions are sliced and the garlic is minced, you're ready to sauté them in the pot. This step is crucial for developing the base flavor of the tomato soup.
The onions and garlic will sizzle and become fragrant, preparing the way for the tomatoes to take center stage.
Step 2. Add Tomatoes and Broth
With the onions and garlic ready, you can now turn your attention to the tomatoes and broth. First, grab a 28-ounce can of whole peeled tomatoes or crushed tomatoes. Carefully pour the contents into the pot, using your spoon to break up the tomatoes as they go in. This will create a lovely, chunky texture in your soup.
Using fresh, locally sourced ingredients can enhance the overall flavor, much like how using locally sourced firewood contributes to environmental sustainability.
Next, you'll want to add 4 cups of vegetable or chicken broth. Feel free to use low-sodium or regular broth, depending on your preference. The broth will help thin out the tomato mixture, creating the perfect consistency for your homemade tomato soup.
Bring the tomatoes and broth to a gentle simmer over medium heat. Allow the flavors to meld together for about 10-15 minutes, stirring occasionally. This step is crucial for developing the rich, comforting taste you crave in a classic tomato soup.
Soon, your kitchen will be filled with the mouthwatering aroma of this cozy dish.
Step 3. Simmer Until Vegetables Soften
Once the tomatoes and broth have come to a gentle simmer, you'll want to let the mixture cook for about 10-15 minutes, stirring occasionally. This allows the flavors to meld and the vegetables to soften, creating a rich, velvety texture.
As the soup simmers, you'll notice the tomatoes begin to break down, releasing their natural sweetness and acidity. This is an important step, as it helps to balance the overall flavor of the soup.
To ensure the vegetables fully soften, keep an eye on the pot and stir the mixture every few minutes. You'll know the soup is ready when the carrots and onions can be easily pierced with a fork.
At this point, the soup will have a smooth, silky consistency, and the flavors will have deepened and intensified. This step is crucial for achieving the perfect tomato soup texture and taste.
Step 4. Add Cream and Seasonings
After the vegetables have softened, you'll want to add the cream to the simmering soup. This will lend a velvety, rich texture that perfectly complements the tangy tomato flavor. Be sure to stir the cream in slowly to ensure it incorporates evenly without curdling. Allow the soup to simmer gently for a few more minutes, letting the flavors meld together. For more wholesome meal ideas, be sure to check out our *overnight oats breakfast guide* to start your day off on a nutritious note!
Stir the cream in gently, allowing it to heat through without boiling, which could cause it to curdle.
Now it's time to season the soup to your liking. Start with a pinch of salt and freshly ground black pepper, tasting as you go.
You can also incorporate other dried herbs and spices, such as:
- Dried basil or oregano for an Italian-inspired twist
- A dash of smoked paprika for a subtle warmth
- A sprinkle of garlic powder or crushed garlic for depth
Feel free to experiment and adjust the seasonings until the soup tastes just right.
Step 5. Blend Soup Until Smooth
Once the cream and seasonings have been incorporated, it's time to blend the soup until it's smooth and velvety. This step is crucial for achieving the desired texture – a rich, creamy tomato soup that's perfect for those cozy nights.
To blend the soup, you'll want to use a high-powered blender or an immersion blender. If using a regular blender, work in batches to avoid overfilling and potential splattering. Carefully transfer the hot soup to the blender, secure the lid, and blend on high speed until the mixture is completely smooth and silky.
For an extra-velvety texture, you can strain the blended soup through a fine-mesh sieve, pressing on the solids to extract as much liquid as possible. This step removes any remaining small pieces or skins, resulting in a truly luxurious and refined soup.
Once blended, the soup is ready to be served hot, garnished with fresh basil, a swirl of cream, or a sprinkle of croutons, if desired. Enjoy your perfectly smooth and creamy tomato soup!
Final Thoughts
With the final steps complete, you now have a delicious homemade tomato soup that's sure to delight your taste buds. This soup is the perfect comfort food for cozy nights, filled with the rich, tangy flavors of tomatoes and complemented by a velvety smooth texture.
As you savor each spoonful, you'll appreciate the care and attention that went into crafting this recipe. The blend of aromatic herbs and spices, combined with the slow simmering process, has transformed ordinary tomatoes into a symphony of flavor. The richness of the delicious homemade tomato sauce is evident in every bite, offering a perfect balance of tangy and sweet. Whether poured over pasta, spread on pizza, or enjoyed with a rustic loaf of bread, this sauce elevates any meal to a new level of comfort and satisfaction. Each mouthful brings you back to the warmth of a family kitchen, where tradition and love come together in the form of a simple, yet unforgettable dish. The secret to this unforgettable taste lies in the time-honored homemade tomato sauce recipe passed down through generations, ensuring that each batch captures the essence of authentic, home-cooked meals. With every stir, you’re not only creating a dish but also reliving cherished memories of shared tables and comforting aromas. This homemade tomato sauce recipe is a testament to how simple ingredients, when treated with care, can create moments of pure culinary joy.
This soup isn't only satisfying but also versatile, allowing you to customize it to your personal preferences. Whether you enjoy it on its own or pair it with grilled cheese sandwiches, this tomato soup is sure to become a staple in your household.
The homemade touch elevates the experience, making it a cozy and comforting meal that will warm you from the inside out.
Frequently Asked Questions
How Long Can I Store Leftover Tomato Soup?
You can store leftover tomato soup for 3-4 days in the refrigerator or up to 3 months in the freezer. Be sure to store it in an airtight container to maintain freshness and prevent spoilage.
Can I Make This Soup in a Slow Cooker?
You absolutely can make this tomato soup in a slow cooker! Simply add all the ingredients to the slow cooker and let it simmer on low for 4-6 hours. It's an easy, hands-off way to enjoy a warm and comforting soup.
Can I Substitute Canned Tomatoes for Fresh Ones?
Absolutely! You can substitute canned tomatoes for fresh ones in your recipe. Canned tomatoes are a convenient and versatile option that can work just as well. Just be sure to adjust the seasoning to your taste.
Can I Freeze This Soup for Later Use?
Yes, you can freeze this soup for later use. Simply let it cool completely, then transfer it to an airtight container or freezer bag. When you're ready to enjoy it, thaw it in the refrigerator and reheat it on the stovetop.
What Are Some Variations to This Basic Recipe?
To spice up your basic tomato soup recipe, you can try adding diced bell peppers, a pinch of oregano, or even a splash of cream for a richer flavor. Get creative with toppings like croutons, shredded cheese, or fresh basil.
Giovanni is our Chief Tasting Evangelist and the charismatic face of Mad Tasting. He inspires a sense of culinary wonder in all who encounter our brand. With boundless enthusiasm for the art of tasting and a gift for captivating audiences, Giovanni leads our immersive tasting experiences and workshops. He empowers food enthusiasts to discover the true depth and complexity of the flavors we celebrate. Whether he’s guiding a private group through a blind tasting or hosting a masterclass on the art of pairing, Giovanni’s infectious passion for the culinary world is the driving force behind our mission to share the extraordinary.
-
Italian Cuisine5 months ago
What Italian Dishes Use Parsley
-
Vetted3 months ago
15 Best Non-Toxic Espresso Machines for a Healthier Brew at Home
-
Vetted5 months ago
12 Best Coffee Pods for DeLonghi Espresso Machine to Elevate Your Caffeine Game
-
Vetted3 months ago
15 Best Coffee Beans to Elevate Your Breville Espresso Experience
-
Vetted3 months ago
15 Best Coffee Beans for Your Breville Espresso Machine – Expert Picks for Perfect Brews
-
Vetted5 months ago
15 Best Commercial Automatic Espresso Machines for Your Coffee Shop
-
Vetted5 months ago
15 Best ESE Pod Espresso Machines for Perfect Coffee Every Time
-
Halloween-Themed Recipes1 month ago
Spiderweb Black Bean Dip