Recipes
Easy Cookie Recipe for All Ages
Just a few simple ingredients transform into a delightful batch of cookies that everyone will love; continue reading for the full easy recipe.
![simple cookies for everyone](https://madtasting.com/wp-content/uploads/2024/11/simple_cookies_for_everyone.jpg)
Cookies have a rich history dating back to ancient civilizations, and today you can whip up a delightful batch with this easy recipe suitable for all ages. The key ingredients – all-purpose flour, granulated and brown sugars, unsalted butter, and eggs – come together to create a soft, golden-brown cookie. Start by mixing the dry and wet ingredients separately, then gently combine them to form the dough. Portion it onto a baking sheet, pop it in the oven, and in just 10-12 minutes, you'll have freshly baked cookies to enjoy. Want to get creative? Try adding mix-ins like chocolate chips or nuts – the possibilities are endless!
Key Takeaways
- This easy cookie recipe uses basic pantry ingredients, making it accessible for bakers of all ages and experience levels.
- The recipe requires minimal preparation time, allowing for quick and simple cookie-making sessions.
- The resulting cookies are soft, golden-brown, and can be customized with various mix-ins to cater to different taste preferences.
- Baking with kids promotes engagement, fun, and a sense of togetherness, while maintaining a clean kitchen environment ensures a positive experience.
- Enjoying freshly baked homemade cookies provides a rewarding and indulgent experience that can be shared with family and friends.
History
![historical events and narratives](https://madtasting.com/wp-content/uploads/2025/11/historical_events_and_narratives-18.jpg)
Cookies have a rich and storied history, dating back centuries to ancient civilizations. These beloved treats were first created as an easy way to test the temperature of ovens before baking more complex recipes. Over time, cookies evolved, with various cultures putting their own spin on the formula.
In ancient Egypt, honey-sweetened barley cakes were enjoyed as portable snacks. The Greeks and Romans crafted intricate, anise-flavored wafers, while Chinese bakers during the Song Dynasty experimented with sesame seed cookies.
By the 7th century, the term "cookie" emerged, derived from the Dutch word "koekje" meaning "little cake."
Cookies truly came into their own during the 17th and 18th centuries, as sugar and butter became more accessible. Gingerbread, shortbread, and macaroons grew in popularity, spreading from Europe to the Americas.
Today, cookies remain a cherished part of many traditions and cultures around the world, with endless varieties to delight every palate.
Recipe
![cooking instructions and ingredients](https://madtasting.com/wp-content/uploads/2025/11/cooking_instructions_and_ingredients-33.jpg)
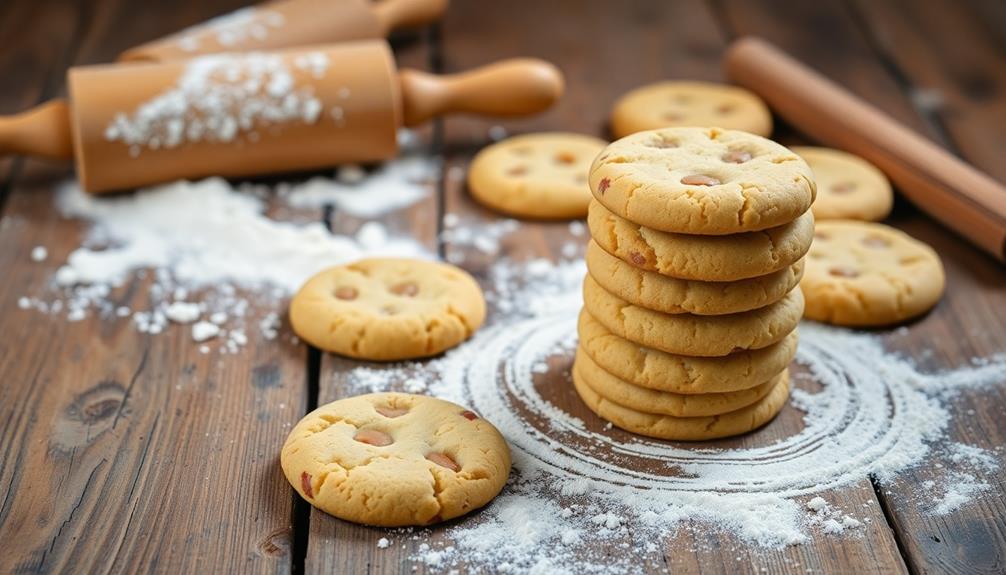
Baking homemade cookies is a simple and rewarding experience that can fill your kitchen with the aroma of freshly baked treats. Whether you're looking to satisfy a sweet craving or create a delightful gift for loved ones, this easy cookie recipe is sure to become a staple in your baking repertoire.
For an even more enjoyable baking experience, consider keeping your kitchen air quality in check while you bake, as good air quality can enhance your overall comfort and focus in the kitchen, especially on air purifier maintenance.
The key to success lies in using high-quality ingredients and following the steps carefully. By taking the time to measure and mix the components, you'll be well on your way to enjoying warm, freshly baked cookies straight from the oven.
- All-purpose flour
- Granulated sugar
- Brown sugar
- Unsalted butter
- Eggs
- Vanilla extract
- Baking soda
- Salt
Preheat your oven to 375°F (190°C) and line a baking sheet with parchment paper. In a large mixing bowl, cream together the softened butter and both sugars until light and fluffy.
Beat in the eggs, one at a time, then stir in the vanilla. In a separate bowl, whisk together the flour, baking soda, and salt. Gradually incorporate the dry ingredients into the wet mixture, mixing just until combined. Fold in any additional ingredients, such as chocolate chips or nuts, if desired, to add a touch of texture and flavor. The batter should be smooth but not overmixed, ensuring a tender final result. This simple technique is perfect for cookie dough or even adapting into a pancakes from scratch recipe that’s both easy and delicious.
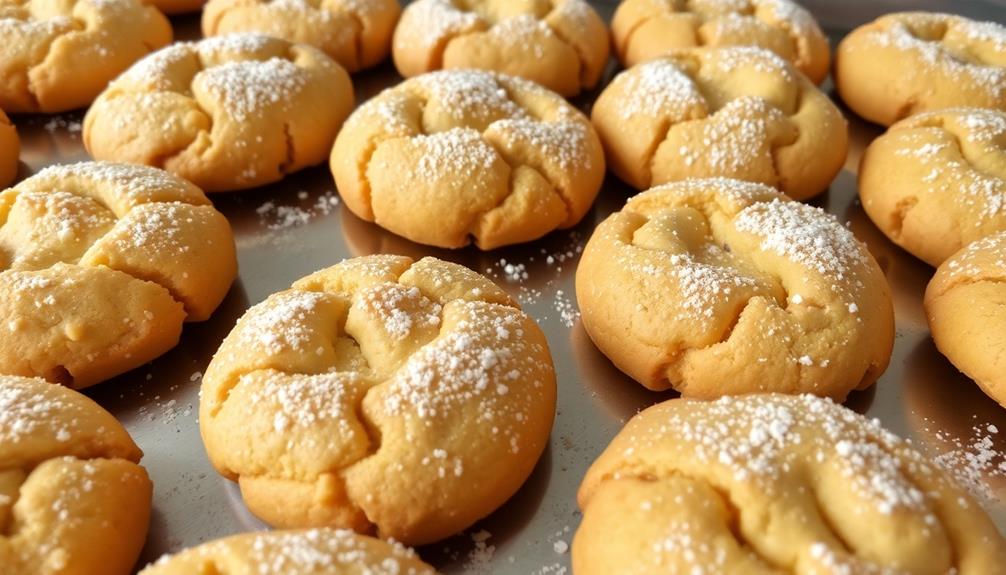
Scoop the dough onto the prepared baking sheet, spacing the cookies about 2 inches apart. Bake for 10-12 minutes, or until the edges are golden brown and the centers are still slightly soft. Allow the cookies to cool on the baking sheet for 5 minutes before transferring them to a wire rack to cool completely.
For best results, use room-temperature ingredients and be mindful not to overmix the dough. This will help ensure your cookies have a perfectly soft and chewy texture.
Enjoy your homemade cookies with a cold glass of milk or a hot cup of tea for a delightful treat.
Cooking Steps
![sequential culinary instructions](https://madtasting.com/wp-content/uploads/2025/11/sequential_culinary_instructions-5.jpg)
Preheat your oven to 350°F to start.
Next, mix the dry ingredients in one bowl.
Then, add the wet ingredients and stir until a smooth dough forms.
Step 1. Preheat Oven to 350°F
![preheat oven to 350 f](https://madtasting.com/wp-content/uploads/2025/11/preheat_oven_to_350_f-2.jpg)
To begin the baking process, you'll want to preheat your oven to a toasty 350°F. This temperature is ideal for baking cookies, as it helps them rise and develop a delicious, golden-brown crust.
Preheating the oven is an essential step that ensures your cookies bake evenly and achieve the perfect texture. Here's why it's so important:
- Preheating allows the oven to reach the desired temperature before you place the cookie dough inside. This helps the cookies bake correctly from the start.
- Baking at the right temperature ensures the cookies don't overcook on the outside while remaining raw in the center, or vice versa.
- Properly preheated ovens help cookies spread just the right amount, creating that classic soft and chewy center with crisp edges.
Once your oven has reached 350°F, you're ready to start scooping and baking your homemade cookies. This simple step lays the foundation for baking success, so don't skip it!
Step 2. Mix Dry Ingredients
![combine dry ingredients thoroughly](https://madtasting.com/wp-content/uploads/2025/11/combine_dry_ingredients_thoroughly-1.jpg)
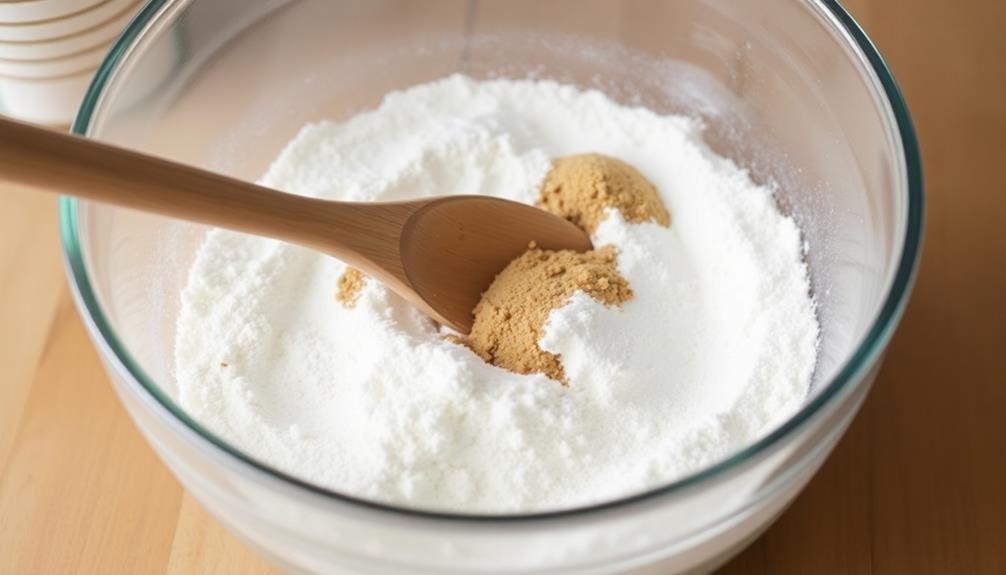
With the oven preheated to the perfect temperature, you can now start mixing the dry ingredients for your cookies.
In a large bowl, combine the all-purpose flour, baking soda, and salt. These dry ingredients form the foundation of your cookie dough, providing structure and stability.
The flour is the primary building block, lending the cookies their classic shape and texture. Baking soda is the leavening agent, responsible for helping the cookies rise and achieve that delightful soft, chewy center.
Meanwhile, the salt enhances the overall flavor, balancing the sweetness and adding a subtle savory note.
Whisk these dry ingredients together until they're evenly distributed. This step ensures your cookies bake consistently and have a uniform texture throughout.
Once the dry mixture is ready, you can move on to incorporating the wet ingredients, bringing your cookie dough to life.
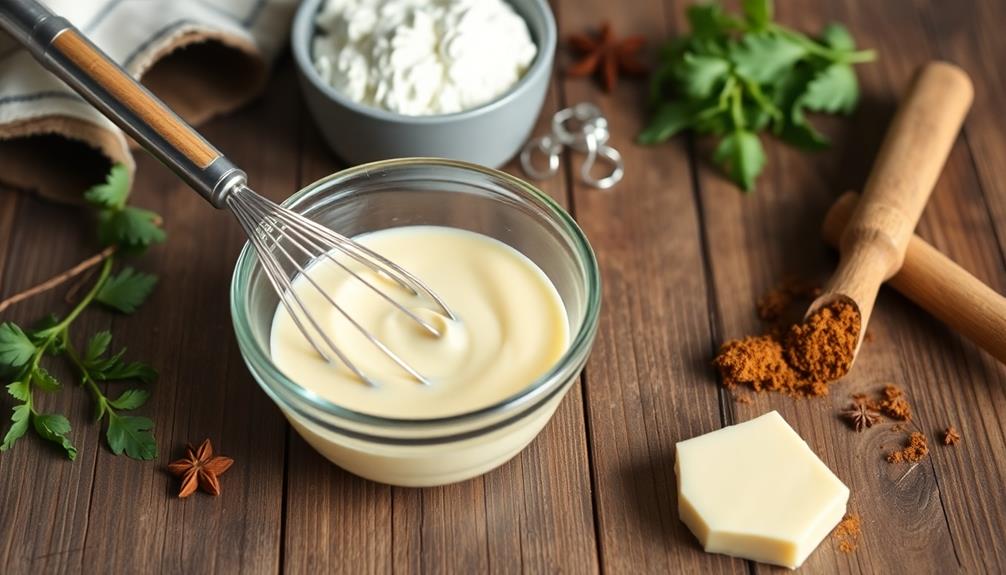
Step 3. Add Wet Ingredients
![incorporate moisture elements](https://madtasting.com/wp-content/uploads/2025/11/incorporate_moisture_elements.jpg)
Next, stir in the room-temperature butter, granulated sugar, and brown sugar. This wet ingredient mixture will give your cookies their signature soft and chewy texture.
Be sure to cream the butter and sugars together until light and fluffy, about 2-3 minutes. This step is crucial, as it incorporates air into the dough, resulting in a more tender cookie.
Once the wet ingredients are well combined, add in the egg and vanilla extract. The egg acts as a binder, holding the dough together, while the vanilla enhances the overall flavor.
Mix until the egg is fully incorporated and the dough is smooth.
Now that you've added the wet ingredients, it's time to combine everything. Slowly mix the dry ingredients into the wet ingredients until a cohesive dough forms.
Be careful not to overmix, as this can lead to tough, dense cookies. The dough should be thick, yet still soft and pliable.
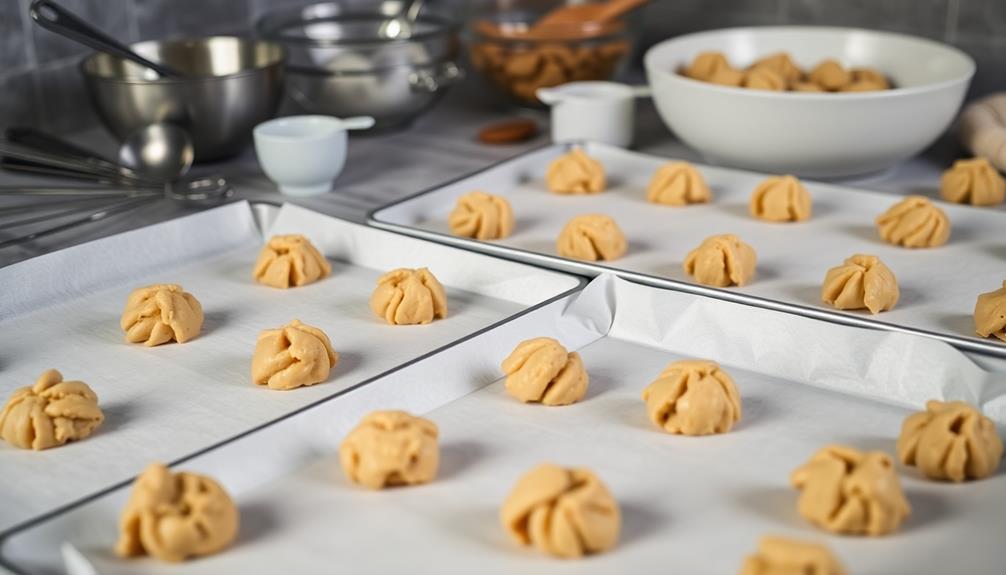
Step 4. Scoop Dough Onto Baking Sheet
![scoop dough onto sheet](https://madtasting.com/wp-content/uploads/2025/11/scoop_dough_onto_sheet.jpg)
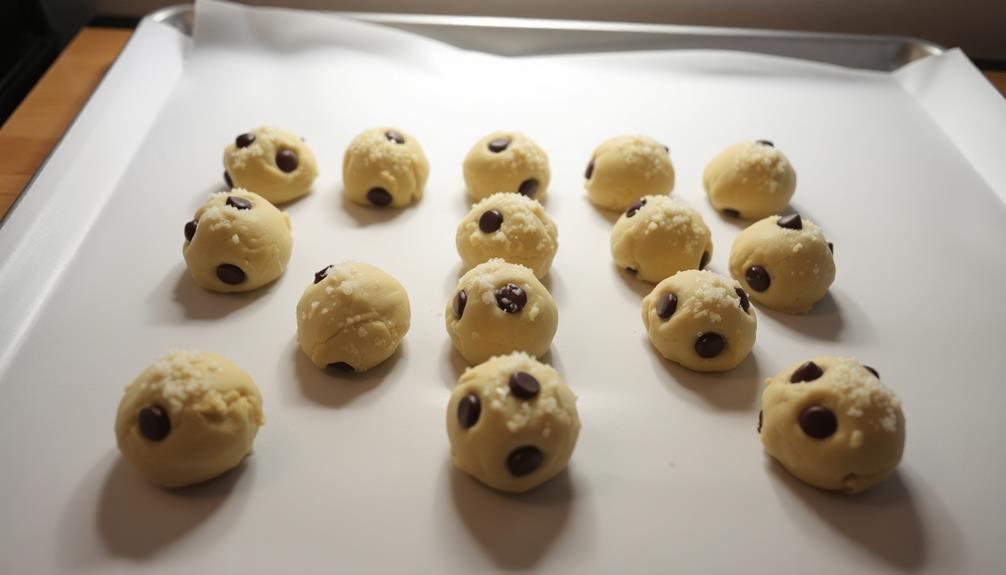
Now that your dough is ready, you can start scooping it onto your baking sheet. Using a spoon or cookie scoop, take a small amount of dough, about a tablespoon in size, and place it onto your prepared baking sheet, spacing the portions about 2 inches apart.
Be sure to leave enough room for the cookies to spread as they bake. As you scoop the dough, try to make the portions as uniform as possible. This will help ensure even baking. If the dough is particularly sticky, you can lightly moisten your hands with water or flour to prevent it from sticking to your fingers.
Once you've placed all the dough portions on the sheet, you can gently flatten them with the back of a fork or your fingertips. This will help the cookies bake more evenly and create a nice, flat surface.
Remember to preheat your oven to the temperature specified in the recipe before you begin scooping the dough. This will ensure your cookies are ready to go in as soon as you've finished portioning them out.
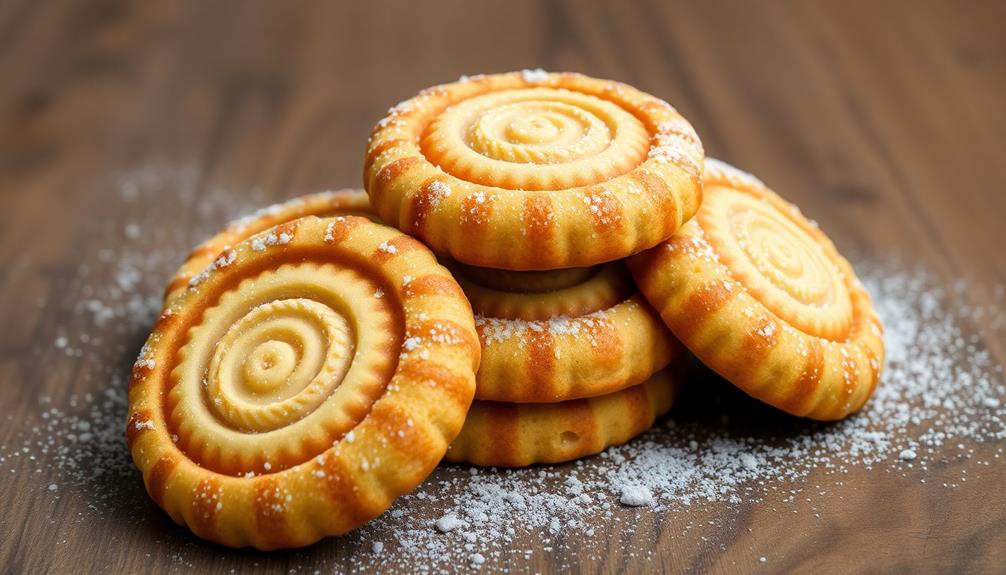
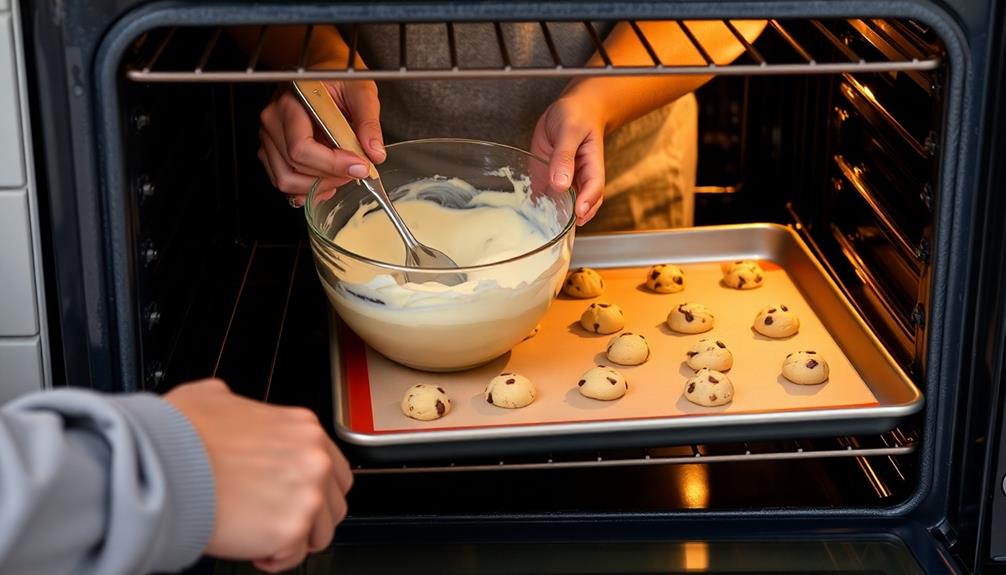
Step 5. Bake Until Golden Brown
![bake until golden brown](https://madtasting.com/wp-content/uploads/2025/11/bake_until_golden_brown.jpg)
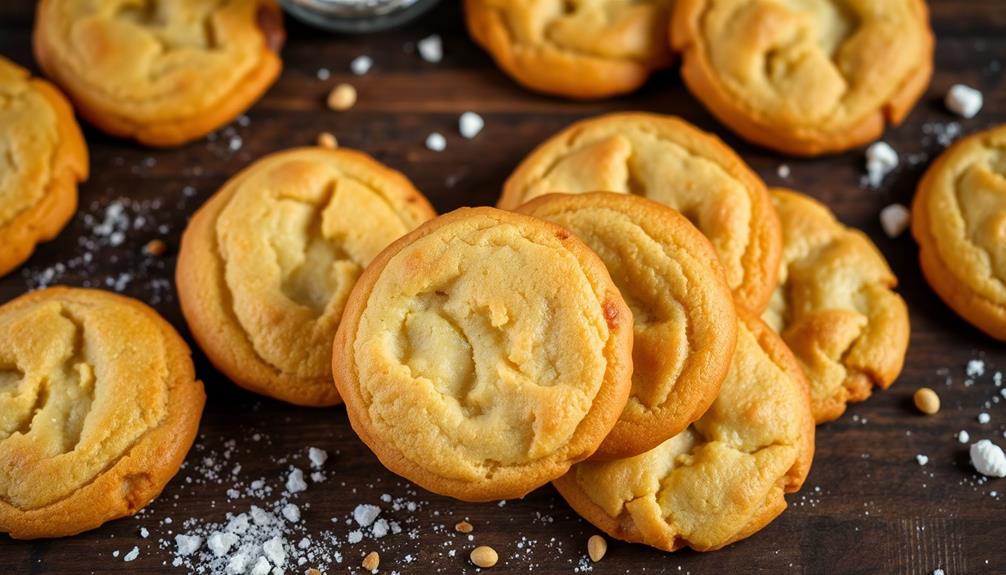
Once your dough is portioned, you can place the baking sheet into the preheated oven. Set the oven temperature to 350°F (175°C). Bake the cookies for 10-12 minutes, keeping a close eye on them. You'll know they're ready when the edges start to turn a golden brown and the centers look set.
It's important not to overbake the cookies, as they'll continue to firm up as they cool on the baking sheet. Once they've reached your desired level of doneness, carefully remove the sheet from the oven.
Let the cookies rest on the hot baking sheet for 5 minutes before transferring them to a wire rack to cool completely.
The cooling process is crucial, as it allows the cookies to set and develop their final texture. Once cooled, you can enjoy your freshly baked homemade cookies!
Feel free to experiment with different mix-ins, such as chocolate chips, nuts, or dried fruit, to create your own unique flavor combinations.
Final Thoughts
![concluding reflections and insights](https://madtasting.com/wp-content/uploads/2025/11/concluding_reflections_and_insights-43.jpg)
With the cookies baked and ready to enjoy, it's time to reflect on the ease and satisfaction of this simple recipe. You've now experienced firsthand how quickly and effortlessly these cookies can come together, requiring just a handful of pantry staples and minimal prep time.
The end result? A batch of delightfully soft, golden-brown cookies that are sure to delight all who try them. Maintaining a clean kitchen while baking can further enhance your experience, as it reduces allergens and promotes a healthier environment health benefits of cleanliness.
This recipe is a true crowd-pleaser, suitable for baking with kids, sharing at gatherings, or treating yourself to a sweet indulgence. The straightforward steps and forgiving nature of the dough make it an ideal choice for novice bakers looking to build confidence in the kitchen. With just a few basic ingredients and minimal prep time, this easy banana bread recipe can be whipped up in no time, filling your home with a comforting aroma. Whether you add chocolate chips, nuts, or keep it simple, it’s a versatile treat that won’t disappoint. Even better, it stores well, making it perfect for enjoying throughout the week.
And with endless opportunities for customization, you can let your creativity shine by experimenting with different mix-ins or decorative flourishes.
Whether you're in the mood for a classic cookie or seeking to put your own spin on the recipe, this easy formula is sure to become a new favorite. Enjoy the fruits of your labor and savor each bite – these cookies are a testament to the joy of simple, homemade treats.
Frequently Asked Questions
How Long Do the Cookies Stay Fresh?
Freshness depends on storage conditions, but homemade cookies typically stay fresh for 3-5 days when kept in an airtight container at room temperature. You can extend their shelf life by refrigerating or freezing the cookies.
Can I Make the Dough Ahead of Time?
Yes, you can make the dough ahead of time. Store it in the refrigerator for up to 5 days or freeze it for up to 3 months. When ready to bake, simply thaw the dough and proceed with the recipe.
What Type of Flour Is Best for This Recipe?
For this recipe, all-purpose flour works best. It provides the structure and texture you want in your cookies without being too heavy or dense. Feel free to use whatever type of flour you have on hand – the recipe is quite flexible.
Can I Substitute the Butter With Oil?
You can substitute the butter with oil, but the texture and flavor may differ. Oil-based cookies tend to be more crisp and have a lighter mouthfeel. Consider using a neutral-tasting oil like vegetable or canola oil.
How Do I Store the Baked Cookies?
You can store the baked cookies in an airtight container at room temperature for up to a week. Avoid storing them in the refrigerator, as this can cause them to dry out and become stale more quickly.
Giovanni is our Chief Tasting Evangelist and the charismatic face of Mad Tasting. He inspires a sense of culinary wonder in all who encounter our brand. With boundless enthusiasm for the art of tasting and a gift for captivating audiences, Giovanni leads our immersive tasting experiences and workshops. He empowers food enthusiasts to discover the true depth and complexity of the flavors we celebrate. Whether he’s guiding a private group through a blind tasting or hosting a masterclass on the art of pairing, Giovanni’s infectious passion for the culinary world is the driving force behind our mission to share the extraordinary.
Appetizers
Green Goddess Feta Dip: A Creamy and Herby Appetizer
Lusciously creamy and herb-infused, Green Goddess Feta Dip is a tantalizing appetizer that promises a flavor journey like no other.
![creamy herby feta dip](https://madtasting.com/wp-content/uploads/2024/06/creamy_herby_feta_dip.jpg)
Immerse yourself in the world of Green Goddess Feta Dip, a delightful combination of feta cheese, garlic, avocado, and a medley of fresh herbs such as mint, dill, and basil. This creamy blend, when combined with Dijon mustard, creates a harmonious blend of flavors that will tantalize your taste buds. Indulge in it with pita chips or vegetables, spread it generously on sandwiches, or let it enhance the flavor of roasted potatoes. Enjoy the versatility and wide appeal of this appetizer – a real crowd-pleaser that guarantees a memorable experience with each bite. Elevate your culinary journey with Green Goddess Feta Dip.
Key Takeaways
- Creamy dip made with feta, avocado, and fresh herbs like mint and dill.
- Serve with roasted potatoes, pita chips, or as a sandwich spread.
- Versatile appetizer perfect for gatherings.
- Experiment with different herb combinations for unique flavors.
- Store in the fridge for up to 3 days in an airtight container.
Ingredients for Green Goddess Feta Dip
To make the Green Goddess Feta Dip, gather feta cheese, garlic, avocado, and a selection of fresh herbs like mint, dill, basil, and chives.
The creamy texture of this dip comes from the addition of avocado, which also contributes a significant richness to its overall flavor profile.
Fresh herbs play an essential role in enhancing the taste, providing a vibrant and herby essence to the dish.
Dijon mustard is used to add a tangy flavor and help emulsify the ingredients when blended together in a food processor until smooth and creamy.
The combination of feta, avocado, fresh herbs, and Dijon mustard creates a harmonious blend of flavors that make Green Goddess Feta Dip a delightful appetizer choice.
The careful selection and precise blending of these ingredients result in a dip that isn't only flavorful but also visually appealing, making it a perfect accompaniment for various dishes or simply as a standalone treat. Its vibrant colors and creamy texture are sure to catch the eye and impress guests at any gathering. Whether you’re preparing a taco dip recipe for parties or just elevating your family snack game, this dish delivers a delightful combination of taste and presentation. With each bite, it promises a burst of flavor that keeps everyone coming back for more. Its versatility ensures it pairs seamlessly with tortilla chips, fresh vegetables, or even as a topping for other culinary creations. The taco dip party favorite never fails to bring people together, creating moments of shared enjoyment and conversation. Its irresistible charm lies not only in its taste but also in the way it turns simple gatherings into memorable celebrations.
Making Green Goddess Feta Dip
![delicious and fresh appetizer](https://madtasting.com/wp-content/uploads/2025/06/delicious_and_fresh_appetizer.jpg)
To make Green Goddess Feta Dip, gather ingredients like:
- Feta cheese
- Garlic
- Ripe avocados
- A selection of fresh herbs such as mint, dill, basil, and chives
Blend these components together in a food processor until smooth, creating a creamy and flavorful dip.
Serve the Green Goddess Feta Dip with:
- Roasted potatoes
- Pita chips
- Fresh veggies
- Crostini
Or use it as a spread on sandwiches for a versatile and crowd-pleasing appetizer.
Ingredients for the Dip
The key components for preparing the Green Goddess Feta Dip include feta cheese, garlic, ripe avocados, and an array of fresh herbs such as mint, dill, basil, and chives.
To add depth and tanginess to the dip, Dijon mustard is also included in the recipe.
The combination of feta cheese, garlic, and the medley of fresh herbs results in a creamy texture that's both savory and revitalizing.
Fresh herbs play a pivotal role in elevating the flavor profile of the Green Goddess Feta Dip, infusing it with a delightful burst of zest and aromatic notes.
This appetizer isn't only versatile but also offers a delightful experience for your taste buds. Pair this delectable dip with pita chips, veggies, or crackers for a delightful snacking experience that's sure to please your guests.
Preparation Steps
Blend feta cheese, garlic, avocados, fresh herbs, and Dijon mustard in a food processor to create the Green Goddess Feta Dip. As the ingredients blend together, slowly stream in olive oil to achieve a smooth and creamy consistency. If needed, adjust the texture by adding water gradually. To enhance the flavor, season the dip with salt and pepper according to your taste preferences. Once all the ingredients are well incorporated, transfer the mixture into a serving bowl.
This creamy dip boasts the vibrant flavors of fresh herbs and the tanginess of feta cheese, making it a delightful appetizer option. The Green Goddess Feta Dip offers an invigorating twist to traditional dips, perfect for various occasions. Serve this appetizing dip immediately with your favorite dippers like pita chips, fresh vegetables, or crackers. Its light and herby taste will surely impress your guests and elevate your snacking experience.
Serving Suggestions
For a delightful and versatile appetizer, consider incorporating Green Goddess Feta Dip into your menu. This creamy dip, infused with a blend of fresh herbs and tangy feta cheese, offers a savory and invigorating flavor profile that's sure to impress your guests.
Here are some serving suggestions to elevate your dining experience:
- Pairing Options: Serve the Green Goddess Feta Dip with an array of accompaniments such as roasted potatoes, pita chips, or a colorful assortment of fresh veggies. The creamy texture of the dip complements the crunchiness of chips and the tenderness of roasted vegetables, providing a delightful contrast in every bite.
- Leftover Utilization: Don't let any excess dip go to waste! Use the leftover Green Goddess Feta Dip as a flavorful topping for dishes like salmon or roasted veggies. Its versatile nature allows you to experiment with various meal combinations, adding a burst of flavor to your dining experience.
- Versatile Usage: Explore the versatility of this dip by incorporating it into different dishes. Whether spread on crostini, tossed with pasta as a sauce, or simply enjoyed with nacho chips, the Green Goddess Feta Dip offers a delicious snacking option that caters to various preferences and occasions.
Variations of Green Goddess Feta Dip
![delicious green goddess dip](https://madtasting.com/wp-content/uploads/2025/06/delicious_green_goddess_dip.jpg)
When exploring the variations of Green Goddess Feta Dip, you can experiment with flavorful ingredient combinations to enhance the taste profile.
Additionally, consider creative serving suggestions to elevate the presentation and overall dining experience.
Flavorful Ingredient Combinations
Consider incorporating a variety of herbs and cheese options to elevate the flavor profile of your Green Goddess Feta Dip. Here are some flavorful ingredient combinations to enhance your dip:
- Cilantro and Goat Cheese: Replace the traditional feta with tangy goat cheese and add a burst of freshness with cilantro. This combination offers a unique twist with a creamy texture and herbaceous notes.
- Jalapeño and Red Onion: For those who enjoy a bit of heat and complexity, dice a seeded jalapeño and finely chop some red onion to mix into your Green Goddess Feta Dip. The spicy kick from the jalapeño paired with the sharpness of the red onion adds a zesty flavor dimension.
- Chicken and Tarragon: Take your dip from appetizer to main course by mixing in cooked chicken shreds and fragrant tarragon. This savory addition provides a hearty and satisfying option for those looking for a more substantial dish.
Serving Suggestions
Enhance your Green Goddess Feta Dip experience by exploring a variety of serving suggestions and tantalizing flavor combinations. When serving this creamy dip, consider pairing it with an assortment of dippers like pita chips, fresh veggies, crostini, or roasted potatoes to provide contrasting textures and flavors. Additionally, think beyond just dipping and try using the Green Goddess Feta Dip as a spread on sandwiches or burgers for an extra burst of herby goodness.
For those looking to switch up the traditional feta flavor, consider swapping it out for goat cheese in the dip recipe to add a tangy twist. If you enjoy a bit of heat, incorporating a seeded jalapeño can bring a spicy kick to the dip.
To make the dip more substantial, experiment with mixing in proteins such as chicken or tuna, transforming it into a heartier dish that can be enjoyed as a light meal or snack.
Expert Tips for Green Goddess Dip
![green dip recipe advice](https://madtasting.com/wp-content/uploads/2025/06/green_dip_recipe_advice.jpg)
For added versatility, try incorporating different herbs into your Green Goddess Feta Dip recipe. Here are some expert tips to elevate your dip:
- Experiment with Fresh Herbs:
Swap out the traditional herbs in your green goddess feta dip with fresh cilantro or parsley for a unique twist on the classic recipe. These herbs can bring a fresh and vibrant flavor profile to your dip.
- Transform Leftover Dip into Salad Dressing:
If you find yourself with leftover dip, consider thinning it out with water to create a creamy and flavorful salad dressing. This simple trick can give your salads a delicious and tangy kick.
- Utilize Dip in Various Dishes:
Besides serving the dip with vegetable boards, chips, or crackers, explore other options like using it as a sauce for grain bowls or as a tasty dipping sauce for fries. The creamy and herby flavors will enhance your dishes with a burst of freshness.
Serving Green Goddess Feta Dip
![delicious green goddess dip](https://madtasting.com/wp-content/uploads/2025/06/delicious_green_goddess_dip-1.jpg)
To serve Green Goddess Feta Dip, offer a selection of accompaniments such as roasted potatoes, pita chips, crostini, or fresh vegetables for a delightful appetizer experience.
The creamy texture of the dip, enriched with the tangy flavor of feta and the freshness of a variety of fresh herbs, makes it a versatile and crowd-pleasing option for gatherings.
Whether you choose to scoop it up with a crispy pita chip or spread it on a slice of crostini, the Green Goddess Feta Dip is sure to impress your guests with its vibrant green color and bold flavors.
Additionally, this flavorful dip can also be used as a sumptuous topping for grilled meats or as a zesty spread on sandwiches.
Its visually appealing appearance, combined with the rich taste of feta and the aromatic blend of fresh herbs, elevates any appetizer spread to a new level of sophistication.
Storage of Green Goddess Feta Dip
![delicious feta dip recipe](https://madtasting.com/wp-content/uploads/2025/06/delicious_feta_dip_recipe.jpg)
When storing Green Goddess Feta Dip, make sure to keep it in the fridge for a maximum of 3 days to maintain its freshness and flavor.
Here are some key points to keep in mind:
- Refrigeration Period: It's recommended to consume the Green Goddess Feta Dip within 3 days of preparation to enjoy it at its freshest. Storing it for longer may compromise the flavor and texture.
- Airtight Container: Store the dip in an airtight container before placing it in the refrigerator. This helps prevent the dip from absorbing other odors present in the fridge, ensuring its flavors remain intact.
- Stir Before Serving: Give the Green Goddess Feta Dip a good stir before serving it after refrigeration. This step helps redistribute any separated ingredients and ensures a consistent taste and texture throughout the dip.
Frequently Asked Questions
What Is Green Goddess Dip Made Of?
Green goddess dip typically consists of feta cheese, garlic, ripe avocados, fresh herbs like mint, dill, basil, and chives, and Dijon mustard. It's blended in a food processor with olive oil and water for the desired consistency.
Why Is My Whipped Feta Dip Runny?
If your whipped feta dip is runny, it might be due to excess liquid like olive oil or water added during blending. Adjust by gradually reducing the amount of oil or water until you achieve a creamy consistency.
How Many Calories Are in Feta Cheese Dip?
So, you're curious about those sneaky calories in feta cheese dip, huh? Well, a 1-ounce serving typically packs around 75-80 calories, so watch out! But hey, moderation is key, right?
What Is Spicy Feta Made Of?
Spicy feta dip is typically made with feta cheese, spicy peppers like jalapeños or red pepper flakes, garlic, olive oil, and sometimes herbs like parsley or cilantro. The spicy kick comes from the hot peppers, adding zest to the feta.
Can the Green Goddess Feta Dip be a Crowd-Pleasing Appetizer as well?
Yes, the Green Goddess Feta Dip can absolutely be a crowd-pleasing appetizer as well. This warm spinach artichoke dip recipe offers a delicious blend of flavors, making it a perfect option for gatherings and parties. Its creamy texture and savory taste are sure to impress any crowd.
Conclusion
To sum up, Green Goddess Feta Dip is a delightful and flavorful appetizer that's sure to impress your guests. With its creamy texture and herby undertones, this dip is a versatile addition to any gathering.
Whether served with veggies, crackers, or as a spread on sandwiches, this dip is a crowd-pleaser. So whip up a batch today and elevate your snacking experience with this tasty and vibrant green goddess creation.
Francesca, as the creative force behind our compelling content, combines culinary expertise with journalistic flair. She has a deep appreciation for the cultural histories and artisanal traditions that influence remarkable flavors around the world. Through engaging narratives, she transports our audience to the heart of each culinary experience. Whether she’s documenting the centuries-old techniques of a Sicilian cheese maker or uncovering the personal stories of our producers, Francesca’s storytelling prowess drives our mission to connect people through food.
Breakfast
Milk Bar Cinnamon Roll Bread: A Sweet and Swirled Breakfast Treat
Lure your taste buds with Milk Bar's Cinnamon Roll Bread, a delectable blend of sweet cinnamon swirls in tender bread, perfect for a delightful breakfast.
![sweet and swirled breakfast treat](https://madtasting.com/wp-content/uploads/2024/06/sweet_and_swirled_breakfast_treat.jpg)
Indulge in Milk Bar’s delectable Cinnamon Roll Bread, a delightful fusion of sweet cinnamon swirls in soft bread that is perfect for breakfast. The recipe uses basic ingredients like flour, sugar, and cinnamon, as well as cream cheese for added richness. You can add nuts or raisins for extra texture and customize the flavors by using different extracts. Top it off with either cream cheese glaze or maple icing for an extra touch of sweetness. For best results, bake the bread in thin-walled loaf pans. Enjoy it warm with tea or as a dessert paired with vanilla ice cream. Keep it fresh by storing it in airtight containers. Check out more tips and FAQs for a more enriching baking experience.
Key Takeaways
- Incorporate cream cheese for richness and creaminess.
- Use a figure-eight motion for defined swirls.
- Experiment with nuts, toffee, or other add-ins.
- Consider cream cheese glaze or unique toppings.
- Serve warm with coffee or as a dessert.
Ingredients for Milk Bar Cinnamon Roll Bread
To make Milk Bar Cinnamon Roll Bread, gather flour, granulated sugar, baking powder, baking soda, and salt for the base ingredients. These elements form the foundation of the delectable Cinnamon Roll Bread, providing the structure and flavor that make it a delightful treat.
In addition to these essential components, the recipe incorporates cinnamon to infuse that classic spicy-sweet taste into each bite. To enhance the richness and creaminess of the final product, cream cheese is also included in the mix.
When combined in the right proportions, these ingredients create a harmonious blend of flavors and textures that will surely tantalize your taste buds. The granulated sugar adds a touch of sweetness, balancing out the warm notes of cinnamon, while the cream cheese brings a creamy and slightly tangy undertone to the bread.
Altogether, these ingredients work in unison to produce a mouthwatering loaf that's perfect for breakfast or a delightful snack.
Step-by-Step Recipe Instructions
![delicious cooking directions provided](https://madtasting.com/wp-content/uploads/2025/06/delicious_cooking_directions_provided.jpg)
When making Milk Bar Cinnamon Roll Bread, you'll start by mixing the ingredients to create a flavorful batter.
Next, you'll roll out the dough and layer it with a delicious cinnamon sugar mixture for that classic swirl.
Following these steps will guarantee a scrumptious bread that's perfect for any time of day.
Mixing the Ingredients
Start by combining flour, sugar, baking powder, baking soda, and salt in a large mixing bowl to create the base for the Milk Bar Cinnamon Roll Bread. Whisk together milk, a large egg, and melted butter in a separate large bowl until well combined. Gradually incorporate the wet ingredients into the dry mixture, stirring until a smooth dough forms.
Next, mix the remaining cinnamon with sugar to create the flavorful filling in a medium bowl. Once the dough is ready, roll it out into a rectangle and spread the cinnamon-sugar mixture evenly over the surface. Carefully roll the dough into a log shape, ensuring the filling is securely enclosed within.
Following the baking instructions, place the rolled and filled dough in the oven and bake for 50-55 minutes until golden brown and cooked through. Once baked, transfer the bread to a wire rack to cool.
Rolling the Dough
Once you have evenly spread the cinnamon-sugar mixture over the rolled dough, it's time to tightly roll it to create the signature swirl in the Milk Bar Cinnamon Roll Bread recipe. To start, gently lift one edge of the dough and begin rolling it into a log shape, taking care to keep the roll tight and even throughout the process. This step is essential in achieving the distinct swirl pattern that makes this bread so visually appealing.
After rolling the dough, place it seam side down on a prepared baking sheet and tuck the ends under slightly to secure the shape. Make sure that the seam is well sealed to prevent the filling from leaking out during baking. The tightly rolled dough will also help maintain the swirl design intact as the bread rises and bakes to perfection.
Once the dough is rolled and shaped, follow the specified baking time in the recipe to achieve a golden-brown crust and a tender interior. After baking, allow the bread to cool on a wire rack before frosting to ensure the ideal texture and flavor development. Cooling the bread properly will also prevent the frosting from melting too quickly, giving you a beautifully finished product ready to be enjoyed.
Tips for Perfect Swirls
![creating beautiful dessert decorations](https://madtasting.com/wp-content/uploads/2025/06/creating_beautiful_dessert_decorations.jpg)
For achieving perfect swirls in your Milk Bar Cinnamon Roll Bread, utilize a thin knife or toothpick to create defined swirls in the batter. Start by layering half of the batter in the loaf pan, then sprinkle with half of the cinnamon sugar mixture for a distinct swirl effect.
Repeat the layering process with the remaining batter and cinnamon sugar mixture to achieve a visually appealing swirl pattern throughout the bread. To enhance the swirls, gently swirl a butter knife through the batter in a figure-eight motion to blend the layers slightly for a marbled effect.
Remember to avoid overmixing the batter once the swirls are created to maintain the distinct cinnamon roll appearance after baking. By following these tips and techniques, you can make sure that your Milk Bar Cinnamon Roll Bread comes out with perfect, eye-catching swirls that not only look great but also add a delicious twist to your breakfast treat.
Customization Options for Flavors
![personalized flavors for everyone](https://madtasting.com/wp-content/uploads/2025/06/personalized_flavors_for_everyone.jpg)
Enhance your Milk Bar Cinnamon Roll Bread with a variety of customization options for flavors to suit your taste preferences and create a unique twist on this classic treat.
When looking to add a touch of sweetness, consider incorporating mix-ins like nuts, toffee, raisins, or diced apples into the batter. These additions not only provide extra texture but also introduce delightful bursts of flavor throughout the bread.
For a different taste profile, experiment with various extracts such as almond or butter; these extracts can elevate the overall taste experience.
If you prefer a tangy and creamy topping, opt for a cream cheese glaze instead of the traditional icing. Additionally, folding in up to ½ cup of your favorite ingredients can further personalize your Cinnamon Roll Bread.
To explore different icing options, try a maple glaze or a caramel drizzle for added sweetness and depth, giving your bread a delicious and unique finishing touch.
Icing and Glaze Ideas
![baking tips and tricks](https://madtasting.com/wp-content/uploads/2025/06/baking_tips_and_tricks.jpg)
To elevate the flavor profile of your Milk Bar Cinnamon Roll Bread, explore a range of enticing icing and glaze ideas. Consider classic options like a rich and tangy cream cheese glaze or a buttery frosting made from powdered sugar, vanilla, and milk for a sweet touch.
For a creative twist, experiment with different icing flavors such as maple, caramel, or a simple powdered sugar and water drizzle. To further customize the glaze, add spices like nutmeg or cardamom to enhance the traditional cinnamon roll taste.
For a decadent touch, drizzle the bread with a luscious chocolate ganache or a citrus-infused glaze. These variations can add depth and complexity to your breakfast treat, making each bite a delightful experience.
Don't hesitate to get creative with your icing choices to truly make your Milk Bar Cinnamon Roll Bread stand out.
Baking Pan Suggestions
![perfect baking pan options](https://madtasting.com/wp-content/uploads/2025/06/perfect_baking_pan_options.jpg)
Consider the type of baking pan you choose as it can greatly impact the outcome of your Milk Bar Cinnamon Roll Bread. For quick bread recipes like this one, thin-walled loaf pans are recommended to guarantee even baking and quicker baking times.
Glass loaf pans can also be a good choice, as they help distribute heat evenly, resulting in a consistent texture throughout the bread. If you want to switch things up, using an 8-inch round cake pan can offer a different presentation for your cinnamon roll bread. However, be cautious when using silicone mini loaf pans, as their material may affect the baking results.
After baking, it's important to let the bread cool in the pan for 30 minutes to an hour before removing it. This cooling period allows the bread to set properly, ensuring a better texture and easier removal from the pan.
Choose your baking pan wisely to achieve the best results with your Milk Bar Cinnamon Roll Bread.
Serving Suggestions and Pairings
![delicious cuisine pairings guide](https://madtasting.com/wp-content/uploads/2025/06/delicious_cuisine_pairings_guide.jpg)
For an enjoyable experience, pair your Milk Bar Cinnamon Roll Bread with various beverages and accompaniments to complement its flavors and textures. When serving this delectable sweet bread, consider these suggestions:
- Enjoy a slice of Cinnamon Roll Bread alongside a steaming cup of coffee or tea for a comforting breakfast option.
- Indulge your sweet tooth by serving warm slices of this delightful bread with a scoop of creamy vanilla ice cream for a satisfying dessert experience.
- Elevate your brunch table by pairing the Cinnamon Roll Bread with fresh fruit, yogurt parfaits, and a selection of invigorating juices for a well-rounded meal.
- Add a touch of elegance to your presentation by dusting the bread slices with a sprinkle of cinnamon or powdered sugar for a visually appealing finish.
These pairings will surely enhance the enjoyment of your sweet and swirled Cinnamon Roll Bread, whether you choose to savor it for breakfast or as a delightful dessert option.
Storage Tips for Freshness
![preserving food shelf life](https://madtasting.com/wp-content/uploads/2025/06/preserving_food_shelf_life.jpg)
To maintain the freshness of your Milk Bar Cinnamon Roll Bread, make sure you wrap it tightly in plastic wrap or store it in an airtight container.
Refrigerating the bread can extend its shelf-life, preserving its texture and flavor for up to a week.
These proper storage techniques will help you enjoy your delicious cinnamon roll bread for longer periods.
Proper Wrapping Techniques
Maintain freshness and preserve the texture of your Milk Bar Cinnamon Roll Bread by tightly wrapping it in plastic wrap.
Here are some tips to guarantee your bread stays delicious:
- Wrap the loaf tightly in plastic wrap to seal in moisture and prevent drying out.
- Allow the cream cheese glaze to set and harden before wrapping the bread to secure its quality.
- When gifting the bread, add a layer of plastic wrap before gift wrapping to protect it during transportation.
Proper wrapping techniques are essential for preserving the flavor and quality of the Cinnamon Roll Bread for an extended period.
Refrigeration for Longer Shelf-Life
Refrigerate your Milk Bar Cinnamon Roll Bread in an airtight container to guarantee its shelf-life and maintain its freshness. Storing the bread in the refrigerator helps preserve its quality by preventing it from drying out and retaining its moist texture. By following proper refrigeration practices, you can enjoy the deliciousness of the bread for up to 1 week. Avoid leaving the bread at room temperature for extended periods as it may lead to spoilage. Utilizing an airtight container ensures that the bread is shielded from external elements that could compromise its taste and texture. Here is a table summarizing the key points for refrigerating your Milk Bar Cinnamon Roll Bread:
Storage Method | Location | Duration |
---|---|---|
Refrigeration | Airtight Container | Up to 1 week |
Frequently Asked Questions (FAQs)
![guide to common inquiries](https://madtasting.com/wp-content/uploads/2025/06/guide_to_common_inquiries.jpg)
Explore the insightful Frequently Asked Questions (FAQs) to discover valuable tips and answers regarding Milk Bar Cinnamon Roll Bread. Here are some common inquiries and helpful responses:
- Ingredient Substitutions: Find out about suitable ingredient swaps to accommodate dietary restrictions or preferences.
- Baking Techniques: Learn expert tips on achieving the perfect texture and flavor in your Cinnamon Roll Bread.
- Storage Tips: Discover the best practices for storing your bread to maintain freshness and taste.
- Gifting Ideas: Get creative suggestions on packaging and presenting Milk Bar Cinnamon Roll Bread as a thoughtful gift.
These FAQs cover a range of topics from ingredient flexibility to presentation suggestions, ensuring you have all the information needed to master the art of making and enjoying this delectable treat. Whether you're a seasoned baker or new to the world of baking, these frequently asked questions offer valuable insights to enhance your experience with Milk Bar Cinnamon Roll Bread.
Frequently Asked Questions
Is a Cinnamon Roll Breakfast or Dessert?
Cinnamon rolls are a versatile delight, perfect for both breakfast and dessert. Enjoy their sweet, cinnamon-infused goodness in the morning or as a satisfying treat after a meal. Indulge in their warm, gooey deliciousness anytime!
What Does Cinnamon Roll Mean in Slang?
In slang, 'cinnamon roll' describes a character who's sweet, kind-hearted, and innocent. Originating from internet culture, it highlights endearing traits. Fans use it to show love and admiration for lovable, wholesome individuals.
What Does Cinnamon Roll Mean in Anime?
When you ask about "cinnamon roll" in anime, it refers to characters who are kind, pure-hearted, and often naive. Fans adore these individuals for their unwavering positivity, sense of justice, and willingness to help others.
What's the Difference Between a Cinnamon Bun and a Cinnamon Roll?
When it comes to cinnamon buns vs. rolls, the key differences lie in the dough type, size, shape, and toppings. Buns tend to have a yeast dough and are larger with cream cheese icing, while rolls use baking powder, are smaller, and feature various toppings.
Can Cinnamon Roll Bread and Fluffy Pancakes Be Combined for a Delicious Breakfast?
Craving the ultimate breakfast treat? Look no further than the fluffiest breakfast pancakes recipe, paired with the delightful flavors of cinnamon roll bread. Indulge in the perfect combination of sweet, fluffy pancakes and the warm, comforting taste of cinnamon for a breakfast that will satisfy your cravings. Perfect for weekend mornings or special occasions, this heavenly pairing is sure to impress family and friends alike. With every bite, you’ll experience the fluffiest pancakes ever made, perfectly balanced with the subtle spice of cinnamon swirls. Don’t miss the chance to elevate your breakfast game with this irresistible duo!
Conclusion
To sum up, while the Milk Bar Cinnamon Roll Bread may not be the healthiest breakfast option, its decadent sweetness is sure to satisfy your cravings.
So go ahead, indulge in this sinfully delicious treat and start your day off on a sugary note.
Just remember, moderation is key – unless you enjoy living life on the edge of a sugar rush.
Francesca, as the creative force behind our compelling content, combines culinary expertise with journalistic flair. She has a deep appreciation for the cultural histories and artisanal traditions that influence remarkable flavors around the world. Through engaging narratives, she transports our audience to the heart of each culinary experience. Whether she’s documenting the centuries-old techniques of a Sicilian cheese maker or uncovering the personal stories of our producers, Francesca’s storytelling prowess drives our mission to connect people through food.
Appetizers
Homemade Egg Rolls: A Crispy and Delicious Appetizer
Get ready to discover the secrets to creating crispy and delicious homemade egg rolls that will leave you craving more.
![crispy homemade egg rolls](https://madtasting.com/wp-content/uploads/2024/06/crispy_homemade_egg_rolls.jpg)
Create your own delicious homemade egg rolls using ground pork, cabbage, carrots, soy sauce, and egg roll wrappers. Make a tasty filling with pork for protein, cabbage for texture, carrots for sweetness, soy sauce for depth, and ginger for warmth. Be sure to seal the edges tightly, roll consistently, keep the wrappers moist, chop evenly, and bake at 400°F for 20 minutes. Brush with sesame oil for extra crunch and flavor. Enjoy with cilantro dressing, soy sauce, or sweet chili sauce. You can also freeze them for later. Each serving has 146 calories, 8g carbs, 6g protein, and 7g fat. Discover more culinary tips inside.
Key Takeaways
- Brushing with sesame oil enhances crispiness and flavor.
- Proper sealing of edges ensures a golden brown finish.
- Use flavorful dipping sauces for a burst of taste.
- Preparing and freezing ahead allows for quick snacks.
- Baking instead of frying offers a healthier option.
Ingredients for Homemade Egg Rolls
To make homemade egg rolls, gather ground pork, shredded cabbage, carrots, soy sauce, and egg roll wrappers as the essential ingredients. Egg rolls are a popular appetizer known for their crispy exterior and flavorful filling.
The filling typically consists of a savory mixture of ground pork, vegetables like cabbage and carrots, and a dash of soy sauce for added depth of flavor. Egg roll wrappers play an important role in creating the crispy shell that encases the delicious filling.
When cooking homemade egg rolls, ensuring they're fried to a golden brown perfection is key to achieving that satisfying crunch with each bite. These homemade delights can be customized by incorporating different proteins or vegetable options to suit your taste preferences.
Experimenting with various fillings can add a fun twist to this classic appetizer, making it a versatile dish for any occasion. Enjoy the process of crafting these delectable treats in your own kitchen! You can try incorporating unique ingredients like sundried tomatoes, fresh herbs, or even a drizzle of honey to elevate the flavor profile. For an extra creative spin, consider pairing it with a whipped ricotta toast recipe, which complements the appetizer perfectly with its creamy texture and rich taste. The possibilities are endless, allowing you to tailor the dish to suit your preferences and impress your guests! To take it a step further, you could use the whipped ricotta appetizer recipe as a base and build upon it with your favorite toppings for a truly personalized creation. The creamy ricotta pairs beautifully with sweet, savory, or even spicy combinations, ensuring there’s something for everyone to enjoy. Don’t hesitate to experiment and discover new flavor pairings that will make your appetizer the star of the table!
Preparing the Egg Roll Filling
![egg roll filling recipe](https://madtasting.com/wp-content/uploads/2025/06/egg_roll_filling_recipe.jpg)
Gather your ground pork, shredded cabbage, carrots, and preferred seasonings to start preparing the flavorful filling for your homemade egg rolls. The egg roll filling is an essential component that determines the taste and texture of the final dish. Here is a breakdown of the key ingredients for the filling:
Ingredient | Description |
---|---|
Ground Pork | Provides a savory flavor and protein-rich element to the filling. |
Shredded Cabbage | Adds a crunchy texture and fresh taste to the filling. |
Carrots | Bring a hint of sweetness and vibrant color to the filling. |
Soy Sauce | Enhances the umami taste and adds depth of flavor to the filling. |
Ginger | Provides a subtle warmth and aromatic essence to the filling. |
Once you have all these ingredients ready, you can combine them in a hot skillet, cooking until the vegetables are tender and the flavors have melded together perfectly. Remember to season generously to ensure a delectable interior for your crispy egg rolls.
Wrapping the Egg Rolls
![preparing delicious homemade appetizers](https://madtasting.com/wp-content/uploads/2025/06/preparing_delicious_homemade_appetizers.jpg)
Maintain a controlled filling amount when wrapping your egg rolls to guarantee even cooking and a well-formed shape. Overstuffing can lead to uneven cooking and a messy appearance.
As you go through the process of wrapping the egg rolls, remember to keep these key points in mind:
- Seal the edges of the egg roll wrappers properly using egg wash to make sure that the filling stays intact during frying.
- Maintain a tight and consistent rolling process from start to finish for a uniform shape and appearance.
- Use a damp towel to keep the egg roll wrappers moist and pliable, making them easier to work with during assembly.
- Consistent chopping of ingredients is essential to achieving an even texture in the filling, enhancing the overall taste and mouthfeel of your homemade egg rolls.
Baking Instructions for Crispy Texture
![crispy texture baking guide](https://madtasting.com/wp-content/uploads/2025/06/crispy_texture_baking_guide.jpg)
To achieve that perfect crispy texture in your homemade egg rolls, it's essential to pay attention to the baking time and temperature, ensuring they cook through evenly.
Properly wrapping the egg rolls before baking is vital to prevent them from unraveling and maintain their shape during the cooking process.
Enhancing the flavor profile can be achieved by brushing the egg rolls with sesame oil or peanut oil before baking, adding an extra layer of crunchiness to your delicious dish.
Baking Time and Temperature
For a crispy texture on your homemade egg rolls, bake them at 400°F for approximately 20 minutes, ensuring a golden brown exterior and a hot, cooked-through interior.
To achieve the perfect bake, consider the following:
- Ensure Proper Temperature and Time: Maintain the oven at 400°F for that crispiness you desire, allowing the egg rolls to bake for around 20 minutes.
- Enhance Crispiness with Oils: Brushing sesame oil or peanut oil on the egg rolls before baking can amplify their crunchiness.
- Convenience of Frozen Egg Rolls: You can bake frozen egg rolls directly without the need for thawing, making it a time-saving option.
- Aim for Golden Brown Perfection: Baking at a high temperature not only crisps up the egg rolls but also gives them that appetizing golden brown color that signals readiness.
Following these guidelines will lead you to egg roll perfection – crispy, flavorful, and satisfying.
Proper Wrapping Technique
Brushing egg rolls with sesame oil or peanut oil before baking helps achieve a crispy exterior, enhancing their overall texture and taste.
When making egg rolls, make sure that the wrappers are properly sealed to prevent the filling from leaking during the baking process.
To freeze uncooked egg rolls, place them on a parchment-lined baking sheet in a single layer to avoid sticking together. This method allows for easy storage and quick access to a delicious appetizer.
When ready to bake, you can conveniently place the frozen egg rolls directly from the freezer into a preheated oven set to 400°F. Baking them at this temperature for approximately 20 minutes will result in a crispy texture on the outside while ensuring the filling is heated through.
Enhancing Flavor Profile
For a truly delightful crunch in your homemade egg rolls, make sure they're baked at 400°F until achieving a golden brown perfection.
Brush your egg rolls with sesame oil or peanut oil before baking for a crispy exterior.
Freeze uncooked egg rolls on a parchment-lined baking sheet for easy storage.
Bake frozen egg rolls directly without thawing at 400°F for about 20 minutes to guarantee a crispy outside and hot inside.
Baking your egg rolls until they reach a golden brown color will provide that satisfying crunchy texture you desire.
Brushing With Sesame Oil
![massage and oil therapy](https://madtasting.com/wp-content/uploads/2025/06/massage_and_oil_therapy.jpg)
To enhance the flavor and crispiness of your homemade egg rolls, consider lightly coating them with sesame oil before baking. Brushing the egg rolls with sesame oil not only helps in achieving a crispy and flavorful exterior but also adds a nutty and aromatic essence to the dish.
During the baking process, the sesame oil aids in giving the egg rolls a beautiful golden brown color, elevating their visual appeal. This simple yet effective technique of brushing with sesame oil enhances the overall taste and texture of the baked egg rolls.
Dipping Sauce Suggestions
![tasty dipping sauce ideas](https://madtasting.com/wp-content/uploads/2025/06/tasty_dipping_sauce_ideas.jpg)
When it comes to dipping sauce suggestions for your homemade egg rolls, there are various flavorful options worth exploring.
From a creamy cilantro dressing to a spicy variation with jalapeños or chipotle seasoning, there are choices to suit every taste preference.
Experimenting with different dipping sauces can elevate the enjoyment of your crispy egg rolls, providing a delightful burst of flavor with each bite.
Flavorful Dip Pairings
Enhance the enjoyment of your homemade egg rolls by exploring a variety of flavorful dip pairings. These dips can add an extra depth of flavor to your crispy appetizers.
Here are some delicious dip options to try:
- Sweet Chili Sauce: A popular choice that adds a hint of sweetness and spice to your egg rolls.
- Soy Sauce: A classic option that brings a salty umami flavor to complement the crispy texture.
- Rice Vinegar: Provides a tangy and slightly acidic taste that balances well with the richness of the egg rolls.
- Toasted Sesame Oil: Adds a nutty aroma and flavor that elevates the overall taste profile of your egg rolls.
Easy Homemade Options
Explore a variety of easy homemade options for dipping sauces that will elevate the flavor of your homemade egg rolls. When preparing your crispy and delicious appetizer, consider customizing your dipping sauce to suit your preferences.
Ingredients like soy sauce, rice vinegar, sriracha, and toasted sesame oil can be combined to create a flavorful dip that complements the taste of your baked egg rolls.
For a sweet and tangy twist, try pairing your egg rolls with popular choices like savory plum sauce or sweet chili sauce. Experiment with different flavors and ingredients to craft a unique dipping sauce that enhances the overall experience of your appetizer.
Dipping sauces play an important role in adding a burst of flavor to each bite of your baked egg rolls, making them a delightful treat for any occasion. Don't hesitate to get creative and discover the perfect dipping sauce that will take your homemade egg rolls to the next level.
Serving Suggestions for Egg Rolls
![egg roll recipe ideas](https://madtasting.com/wp-content/uploads/2025/06/egg_roll_recipe_ideas.jpg)
Consider serving your homemade egg rolls with a variety of delicious dipping sauces and garnishes to elevate the dining experience.
To enhance the flavor and presentation of your egg rolls, try the following suggestions:
- Dipping Sauces: Pair your egg rolls with classic choices like sweet chili sauce, soy sauce, or a savory plum sauce for a burst of flavor.
- Green Onions: Garnish your egg rolls with finely chopped green onions to add a fresh and aromatic touch to each bite.
- Baked Option: Opt for baked egg rolls as a healthier alternative to the traditional deep-fried version, maintaining crispiness without excess oil.
- Asian Pairings: Enjoy your egg rolls alongside Asian favorites like stir-fries, fried rice, or noodle dishes for a complete and satisfying meal experience.
Make-Ahead and Freezing Tips
![meal prep and storage](https://madtasting.com/wp-content/uploads/2025/06/meal_prep_and_storage.jpg)
Prepare your homemade egg rolls in advance by filling and rolling them before freezing for future quick and convenient appetizers. To guarantee the uncooked rolls freeze individually, place them in a single layer on a baking sheet lined with parchment paper.
Once frozen solid, transfer the rolls to a freezer-safe bag for storage. When you're ready to enjoy them, simply air fry or bake the frozen egg rolls for a crispy exterior and a piping hot, flavorful center.
Store any leftover cooked egg rolls in the freezer for up to 3 months, making sure they stay fresh and ready to eat at a moment's notice. Reheat the frozen cooked rolls in the oven or air fryer for a quick snack or party appetizer.
These make-ahead and freezing tips not only save you time but also ensure you always have a delicious treat on hand for any occasion.
Nutritional Information for Homemade Egg Rolls
![egg roll nutrition facts](https://madtasting.com/wp-content/uploads/2025/06/egg_roll_nutrition_facts.jpg)
Discover the nutritional breakdown of homemade egg rolls to make informed choices about your snack or appetizer consumption.
When indulging in these crispy appetizers, keep in mind that each serving of homemade egg rolls contains approximately 146 calories. This snack also offers 8g of carbohydrates, making it a moderate source of this nutrient.
Concerning protein content, homemade egg rolls provide 6g per serving, contributing to a satisfying appetizer choice. Additionally, it's essential to note that these delicious treats are relatively high in fat, with each serving containing 7g.
Furthermore, be cautious of the sodium content as homemade egg rolls contain 177mg of sodium per serving. As you enjoy these flavorful appetizers, be mindful of portion sizes and consider balancing your overall daily intake to maintain a well-rounded diet.
Frequently Asked Questions
How to Keep Homemade Egg Rolls Crispy?
To keep homemade egg rolls crispy, fry them at 350-375°F for a golden crunch. Drain on a wire rack post-fry to avoid sogginess. Don't overcrowd the pan; maintain oil temp for even cooking. Reheat in the oven and store in a paper towel-lined container.
How Do You Keep Egg Rolls Warm and Crispy for a Party?
When keeping egg rolls warm and crispy for a party, place them on a baking sheet in a single layer in a preheated oven at 200°F. Never stack them to avoid sogginess. Use a wire rack for air circulation and serve with dipping sauces.
Can Egg Rolls Be Made Ahead of Time?
Yes, you can definitely make egg rolls ahead of time. Prepare, fry until golden, cool completely, then freeze. Reheat in the oven or air fryer when ready to enjoy. Save time with crispy homemade egg rolls for any occasion.
How to Make Tight Egg Rolls?
To make tight egg rolls, don't overfill the wrappers. Seal edges with an egg wash. Roll tightly from start to finish. Keep it consistent for pro results. Follow a visual guide for perfect rolls.
Can Egg Roll Ingredients Be Used to Make a Breakfast Rollup?
Yes, egg roll ingredients can be used to make a breakfast rollup. Simply fill a tortilla with scrambled eggs, veggies, and maybe some bacon or sausage, then roll it up and enjoy! You can even dip it in dumpling sauce for an extra burst of flavor. Try it for a tasty twist on breakfast.
Conclusion
To sum up, homemade egg rolls offer a delightful combination of crispy texture and flavorful filling. With careful preparation and baking techniques, these appetizers are sure to impress your guests.
Remember to brush with sesame oil for that extra touch of authenticity.
Whether served as a snack or part of a larger meal, homemade egg rolls are a versatile and delicious option for any occasion.
So, roll up your sleeves and get cooking!
Francesca, as the creative force behind our compelling content, combines culinary expertise with journalistic flair. She has a deep appreciation for the cultural histories and artisanal traditions that influence remarkable flavors around the world. Through engaging narratives, she transports our audience to the heart of each culinary experience. Whether she’s documenting the centuries-old techniques of a Sicilian cheese maker or uncovering the personal stories of our producers, Francesca’s storytelling prowess drives our mission to connect people through food.
-
Vetted4 months ago
15 Best Non-Toxic Espresso Machines for a Healthier Brew at Home
-
Italian Cuisine2 weeks ago
What Italian Dishes Use Parsley
-
Vetted4 months ago
15 Best Coffee Beans for Your Breville Espresso Machine – Expert Picks for Perfect Brews
-
Vetted6 months ago
12 Best Coffee Pods for DeLonghi Espresso Machine to Elevate Your Caffeine Game
-
Vetted3 months ago
15 Best Espresso Ground Coffees for Your Espresso Machine: A Barista’s Guide
-
Vetted6 months ago
15 Best Commercial Automatic Espresso Machines for Your Coffee Shop
-
Vetted4 months ago
15 Best Coffee Beans to Elevate Your Breville Espresso Experience
-
Vetted6 months ago
15 Best ESE Pod Espresso Machines for Perfect Coffee Every Time