
Crafting homemade butter is a rewarding experience that connects you to its rich history. Start by gathering high-quality heavy whipping cream, avoiding ultra-pasteurized options for better whipping. Agitate the cream vigorously using a stand mixer, hand mixer, or jar until clumps form, then drain the remaining buttermilk. Rinse the butter under cold water to remove any residue, and knead it to achieve a smooth texture. Mold the butter into your desired shapes, then enjoy it in a variety of dishes or experiment with flavored variations. The satisfaction of making butter from scratch is undeniable, and there's more to discover about this culinary craft.
Key Takeaways
- Homemade butter requires only 1 pint (2 cups) of high-quality heavy whipping cream and can be made by vigorously agitating the cream.
- The butter-making process involves draining the remaining buttermilk, rinsing the butter under cold water, and kneading it to achieve the desired texture.
- Homemade butter can be shaped into various forms, such as logs or flat blocks, and stored wrapped in parchment paper or plastic wrap.
- Homemade butter is versatile and can be used for spreading on bread, sautéing, baking, and adding rich, creamy flavor to dishes.
- Homemade butter can be further customized by incorporating herbs, spices, or honey to create unique flavored butter spreads.
History
Butter has a rich history dating back thousands of years. Its origins can be traced to ancient civilizations, where people discovered that vigorously agitating fresh cream would result in the separation of solid butterfat from the liquid buttermilk. This simple process was a game-changer, providing a spreadable, shelf-stable fat that revolutionized cooking and baking.
Over the centuries, butter production evolved, with advancements in technology and techniques. In the 19th century, the invention of the mechanical butter churn allowed for larger-scale production, making butter more accessible to the masses.
As butter became increasingly important in culinary traditions worldwide, regional variations emerged, each with its own unique flavor profile and production methods.
Today, homemade butter remains a beloved and respected craft, allowing people to connect with the rich history of this versatile ingredient. By understanding its origins and evolution, you can appreciate the art of crafting your own delicious, high-quality butter at home.
Recipe
Making homemade butter is a rewarding and satisfying experience. Not only does it allow you to control the quality and freshness of the ingredients, but it also provides a sense of accomplishment in creating a delectable dairy product from scratch.
The process is relatively simple and requires minimal equipment. Homemade butter can elevate your cooking and baking, adding a rich, creamy texture and flavor to a variety of dishes. All you need is heavy cream and a bit of patience. With just a few steps, this **easy homemade butter recipe** yields fresh, delicious butter in under 20 minutes. Whether you spread it on warm bread or use it in your favorite pastries, the result is sure to impress. The best part about this homemade butter recipe is that it allows you to customize your butter with added herbs, garlic, or a pinch of salt to suit your taste. Plus, by making it yourself, you can ensure there are no unnecessary additives or preservatives, giving you a pure and natural product. This simple yet rewarding process makes the homemade butter recipe a must-try for anyone looking to enhance their culinary creations.
Ingredients:
- 1 pint (2 cups) heavy whipping cream, chilled
- 1/2 teaspoon salt (optional)
Instructions:
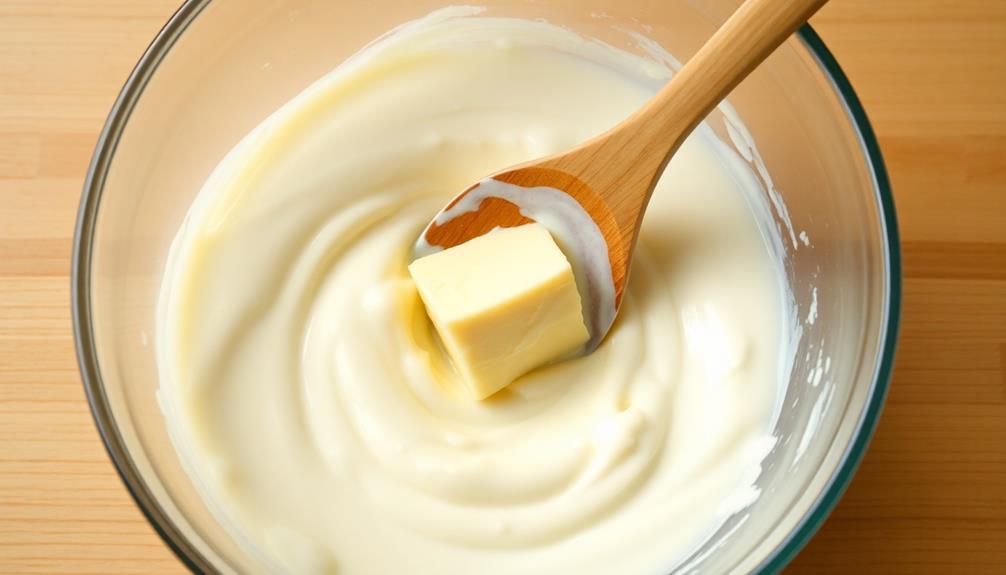
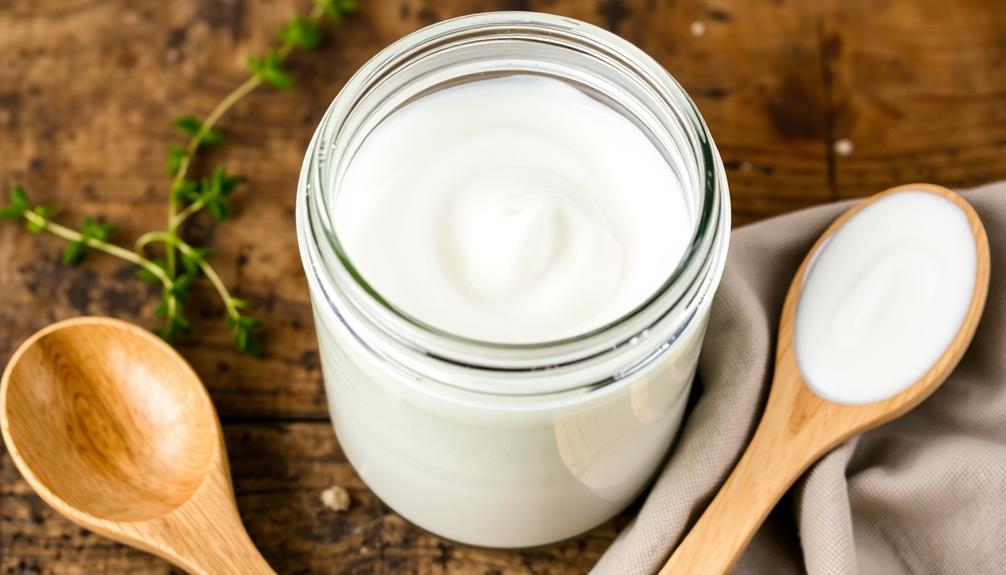
Pour the chilled heavy whipping cream into a clean, dry mixing bowl or a food processor with a whisk attachment. Begin mixing on high speed, and continue until the cream thickens and the butter separates from the buttermilk. This process may take 5 to 10 minutes.
Once the butter has formed, stop the mixer and pour out the buttermilk, reserving it for later use. Rinse the butter under cold running water, gently kneading it to remove any remaining buttermilk. Add the salt, if desired, and continue to knead until the butter is smooth and creamy.
Shape the butter into a desired form, such as a log or a pat, and it's ready to use or refrigerate for later use. The leftover buttermilk can be used in baking, smoothies, or enjoyed as a refreshing beverage.
Tips:
- Use the freshest, highest-quality heavy cream for best results.
- Chill the cream and equipment before starting to aid in the butter-making process.
- Experiment with different flavors by adding herbs, spices, or other mix-ins to the butter.
- Homemade butter can be stored in the refrigerator for up to 1 week or frozen for several months.
Cooking Steps
Gather your heavy whipping cream and get ready to agitate it vigorously.
Once the butter forms, you'll need to drain the remaining buttermilk and rinse the butter under cold water.
Step 1. Gather Heavy Whipping Cream
To make homemade butter, you'll first need to gather heavy whipping cream. This key ingredient is essential for the butter-making process. Heavy whipping cream typically contains a higher percentage of milk fat compared to regular whipping cream or half-and-half, making it the ideal choice.
When selecting your cream, look for high-quality, fresh options that are free from any additives or stabilizers. Organic or local dairy products can be fantastic choices. Avoid ultra-pasteurized creams, as they may not whip up as easily. You'll want around 1 to 2 cups of heavy whipping cream to yield a decent amount of homemade butter.
Once you have your cream, make sure it's at a cool room temperature, around 60-70°F. This temperature range will help the cream whip up efficiently.
Now you're ready to start the butter-making process! With your heavy whipping cream in hand, you can move on to the next step: churning the cream into delicious, homemade butter.
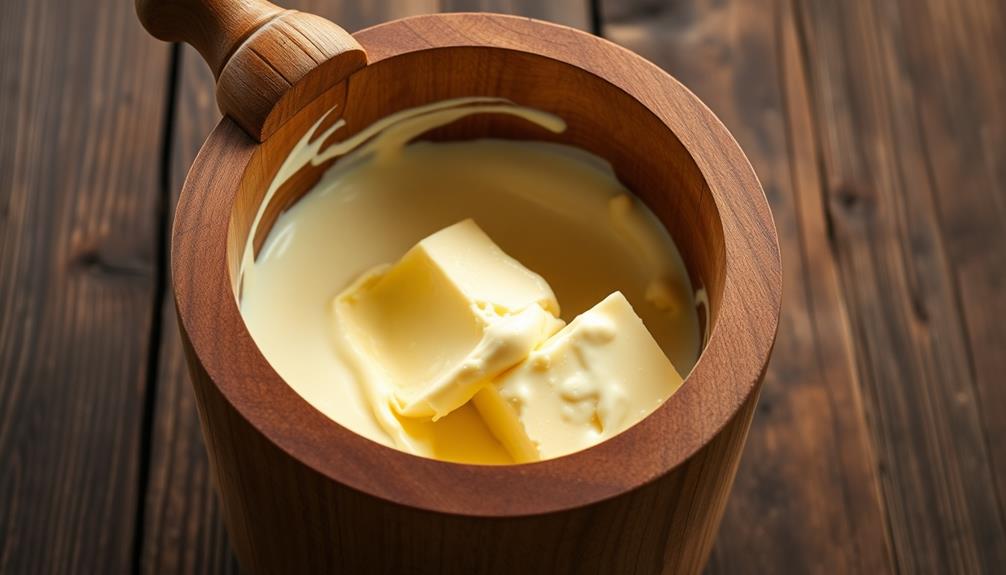
Step 2. Agitate the Cream Vigorously
Next, agitate the cream vigorously. This step is crucial for transforming the cream into butter. To do this, you can use a stand mixer, hand mixer, or even a simple jar with a tight-fitting lid.
If using a mixer, turn it on to medium-high speed and let it run for 5-10 minutes, until the cream thickens and begins to form clumps.
If using a jar, pour the cream into the jar, leaving about 1/4 of the jar empty for shaking. Tightly secure the lid and shake the jar vigorously for 5-10 minutes, until the cream has transformed into butter.
You'll know you're on the right track when the sound of sloshing liquid transitions to a thicker, more solid consistency.
During this agitation process, the fat globules in the cream begin to stick together, forming butter. As the butter solidifies, the remaining liquid separates, becoming buttermilk.
Be patient and keep agitating until the transformation is complete.
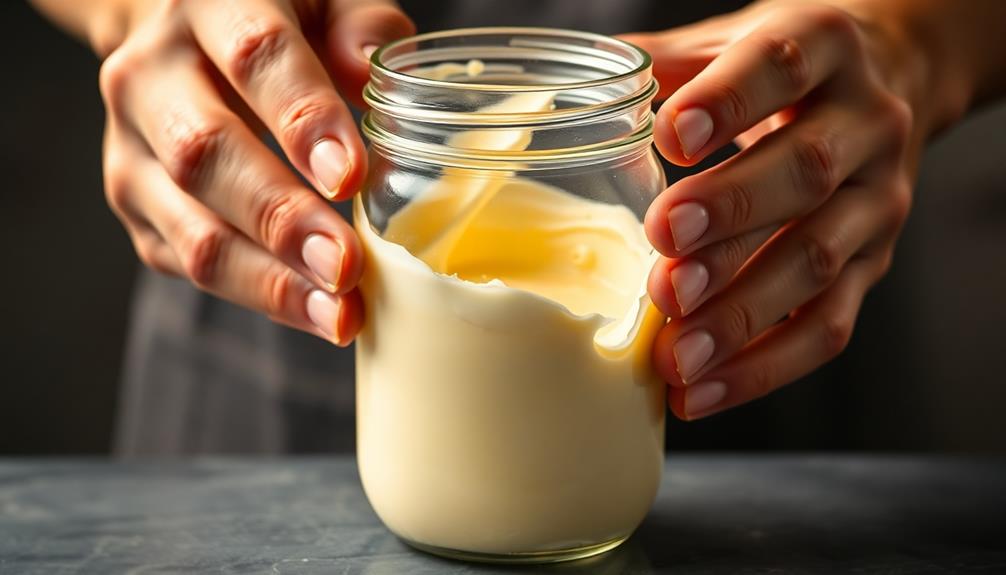
Step 3. Drain Remaining Buttermilk From Butter

Once the butter has formed, you'll need to drain the remaining buttermilk. This step is crucial to ensure your butter has the right texture and flavor.
First, gather a fine-mesh strainer or cheesecloth. Carefully pour the contents of the bowl through the strainer, allowing the buttermilk to drain into a separate container. Gently squeeze the butter to help release any additional liquid.
To enhance your butter-making experience, consider using specialized butter tools like silicone molds or stove top infusers for added convenience and creativity in your kitchen specialized butter tools.
Next, pour some cold water over the butter in the strainer. This will help wash away any lingering buttermilk. Give the butter a few gentle kneads to further expel the buttermilk. Repeat this process until the water runs clear, indicating you've removed as much buttermilk as possible.
Once the butter is thoroughly drained, you can move on to the next step – working the butter to remove any air pockets and create a smooth, creamy texture. This will ensure your homemade butter has the ideal consistency for spreading, baking, or any other use.
Step 4. Rinse Butter Under Cold Water
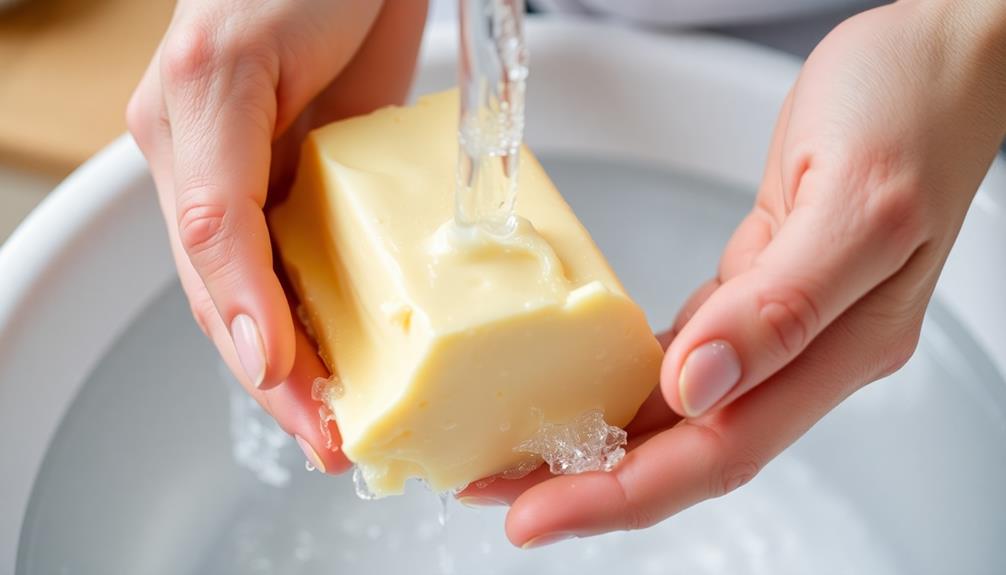
After draining the buttermilk, you'll want to rinse the butter under cold water. This step helps remove any remaining buttermilk, which can cause the butter to spoil more quickly.
Start by placing the butter under a steady stream of cold water, gently working the butter with your hands to help the water penetrate.
You may need to rinse the butter several times, until the water runs clear. This ensures you've removed all traces of buttermilk.
Be careful not to overwork the butter, as this can cause it to become too soft or greasy in texture.
Once the butter is thoroughly rinsed, you can pat it dry with a clean paper towel or piece of cheesecloth. This will help prepare the butter for the next step – molding or shaping it into your desired form.
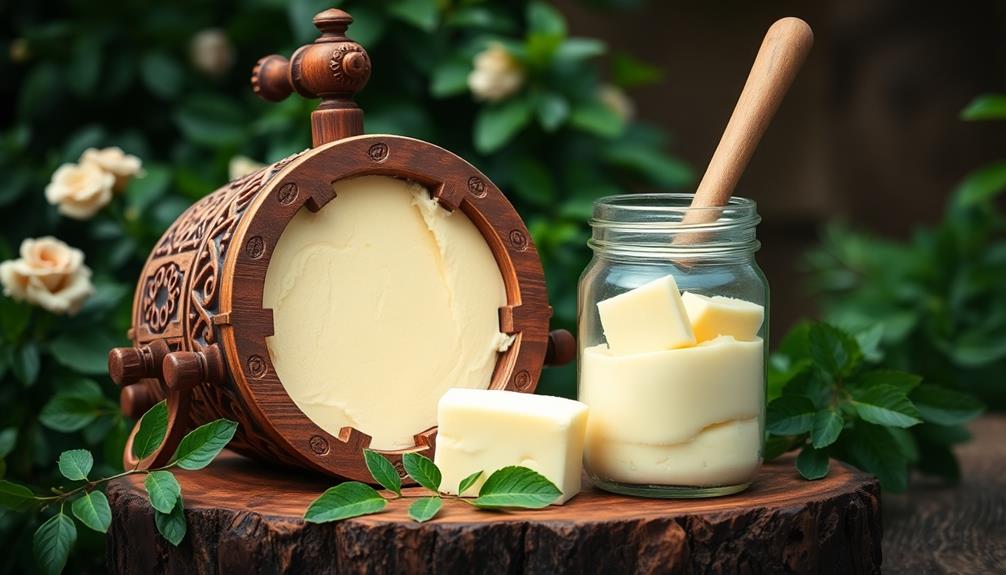
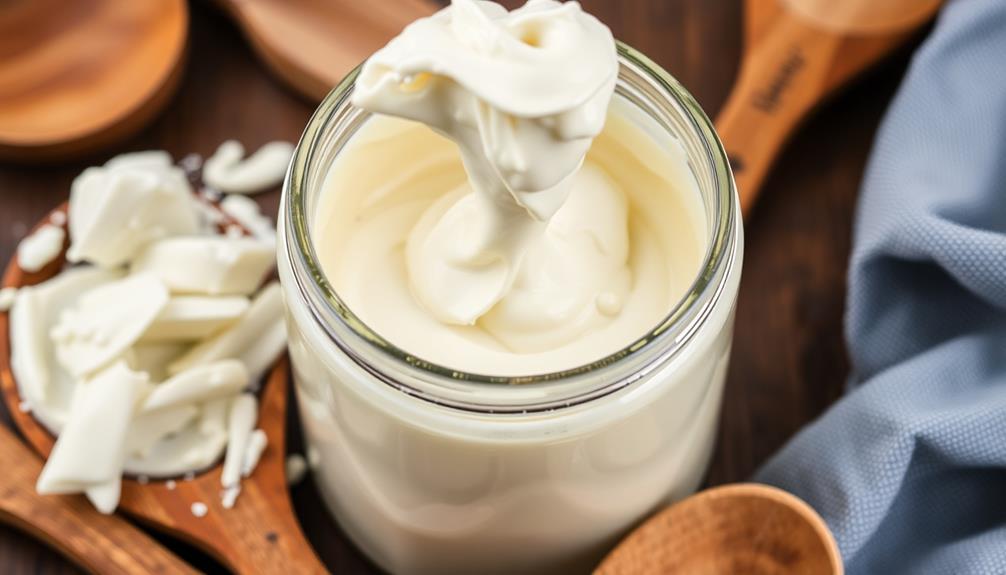
Step 5. Knead and Shape the Butter
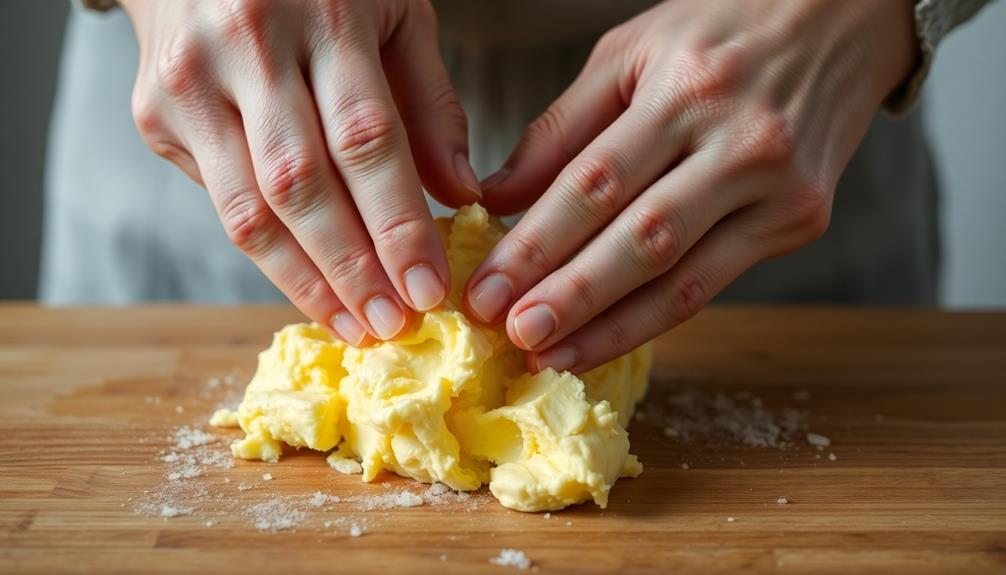
Kneading and shaping the butter is the next crucial step in the homemade butter-making process. This step helps remove any remaining buttermilk and ensures the butter has a smooth, uniform texture.
Start by placing the butter on a clean, cool surface. Using the palms of your hands, gently knead the butter, pressing and folding it over itself. As you knead, the butter will become more cohesive and less grainy. This is important because a well-kneaded butter not only improves the texture but also enhances its flavor, making it a delightful addition to various dishes, as discussed in butter's role in global cuisine.
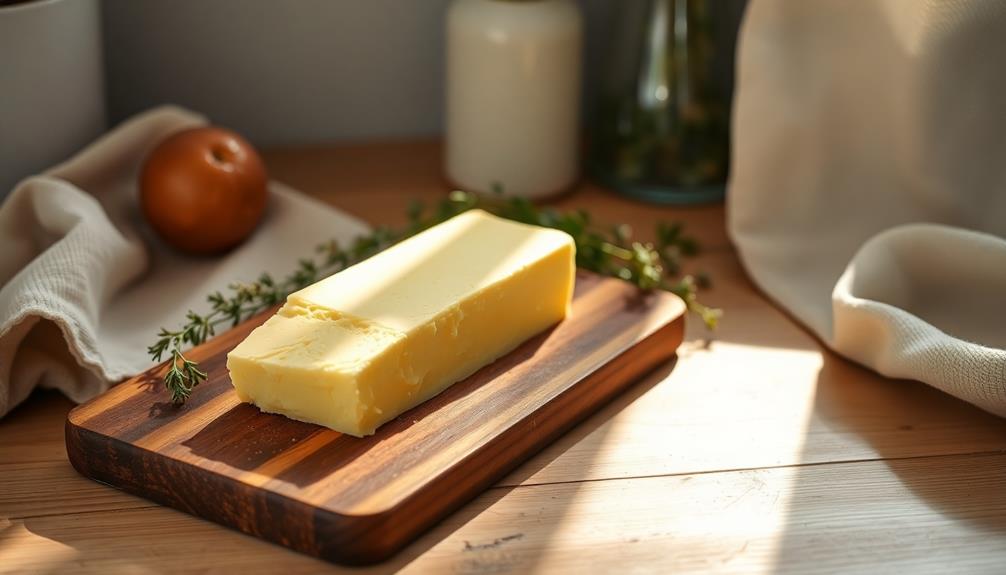
Once the butter has a smooth, pliable consistency, it's time to shape it. You can mold the butter into a log, pat it into a flat block, or sculpt it into any desired shape. For a more uniform look, place the butter in a mold or container and press it firmly to fill the shape.
Wrap the shaped butter in parchment paper or plastic wrap to protect it and prevent it from drying out.
Congratulations! You've successfully kneaded and shaped your homemade butter. Now it's ready to enjoy or store for later use.
Final Thoughts
With all the homemade butter-making steps behind you, it's time to reflect on your accomplishments.
You've successfully transformed fresh cream into a delightful, spreadable treat. From the initial skimming to the final kneading, you've witnessed the transformation of liquid to solid, and you should feel proud of your newfound butter-making skills.
As you savor your homemade butter, consider the versatility it offers. Spread it on freshly baked bread, use it for sautéing, or even incorporate it into your favorite baked goods.
The rich, creamy flavor will elevate any dish, and you'll know that it was crafted with your own hands.
Looking ahead, you might even experiment with flavored butters, incorporating herbs, spices, or even honey to create unique and personalized spreads.
The possibilities are endless, and the satisfaction of making your own butter will only continue to grow.
Frequently Asked Questions
How Long Does Homemade Butter Last in the Refrigerator?
Homemade butter can last up to two weeks in the refrigerator if properly stored. It's important to keep it tightly covered and away from strong-smelling foods to maintain its freshness and flavor.
Can I Use a Mixer Instead of a Jar or Churn?
Yes, you can use a mixer instead of a jar or churn. A mixer will agitate the cream and separate the butterfat from the buttermilk, just like the traditional methods. It's a quick and easy way to make homemade butter.
What Are the Health Benefits of Homemade Butter?
Homemade butter offers more health benefits than store-bought varieties. It's richer in vitamins A and E, contains beneficial fatty acids, and lacks the preservatives found in commercial butters. Plus, you control the ingredients, making it a healthier choice for your family.
Can I Add Flavors to My Homemade Butter?
Yes, you can definitely add flavors to your homemade butter! You can experiment with herbs, spices, or even sweet additions like honey or maple syrup to create unique and delicious spreads.
Is Homemade Butter More Expensive Than Store-Bought?
Homemade butter can be more expensive than store-bought, depending on the ingredients you use and the scale of your operation. The cost may vary, but the freshness and quality of homemade butter often makes it worthwhile.