
Homemade hummus is a versatile and nutritious snack that's easy to prepare. Originating in the Levant region, this chickpea-based dip has gained global popularity for its rich protein, fiber, and healthy fats. To make it, you'll blend chickpeas, tahini, lemon juice, garlic, and olive oil until smooth. Feel free to customize the flavors by adding herbs, spices, or roasted vegetables. Homemade hummus is cheaper and healthier than store-bought versions, plus you'll have control over the ingredients. Serve it with pita bread or fresh veggies for dipping. If you'd like to explore more recipes and tips for making delicious homemade hummus, keep reading.
Key Takeaways
- Homemade hummus is a cost-effective and healthier alternative to store-bought versions, allowing for ingredient control and customization of flavors.
- Homemade hummus is rich in plant-based protein, fiber, and healthy fats, making it a nutritious and guilt-free snack option.
- Homemade hummus can be easily prepared with simple ingredients, and the preparation steps are straightforward and convenient.
- Homemade hummus is highly versatile, as it can be served as a dip, spread, or incorporated into various dishes and cuisines.
- Homemade hummus offers a range of flavor variations, from traditional to unique options, allowing for experimentation and personalization.
History
Hummus, the creamy Middle Eastern dip, has a rich history dating back thousands of years. Originating in the Levant region, which includes countries like Egypt, Syria, and Lebanon, hummus has long been a staple in the local cuisine. The earliest known records of a hummus-like dish date back to the 13th century, where it was referred to as "hommus bi tahina" in Arabic cookbooks.
The word "hummus" itself is derived from the Arabic word for "chickpea," the primary ingredient in this versatile spread. Over the centuries, hummus has evolved, with different regions developing their own unique variations, each reflecting the local flavors and traditions. For instance, some versions may include spices like cumin or garlic, while others incorporate roasted red peppers or olives.
Today, hummus has gained global popularity, becoming a beloved snack and appetizer around the world. Its creamy texture and nutty flavor make it a versatile dip that pairs well with pita bread, fresh vegetables, or as a topping for various dishes.
Recipe
Homemade hummus is a delicious and nutritious snack that can be easily made at home. Not only is it more cost-effective than store-bought options, but you can also customize the flavors to your liking. The key to a perfect hummus is achieving the right balance of flavors and textures.
Hummus is a versatile dip that can be enjoyed with a variety of crunchy vegetables, pita bread, or even as a spread on sandwiches. It's a great source of plant-based protein, fiber, and healthy fats, making it a wholesome choice for snacking or as part of a balanced meal.
Ingredients:
- 1 (15 oz) can of chickpeas, drained and rinsed
- 1/4 cup tahini (sesame seed paste)
- 2 tablespoons fresh lemon juice
- 2 cloves of garlic, minced
- 2 tablespoons olive oil
- 1/4 cup water
- 1/2 teaspoon ground cumin
- 1/4 teaspoon salt
- Paprika or cayenne pepper (for garnish, optional)
Instructions:
In a food processor or high-speed blender, combine the chickpeas, tahini, lemon juice, garlic, olive oil, water, cumin, and salt. Blend until the mixture is smooth and creamy, scraping down the sides as needed. Adjust the seasoning to taste.
For best results, let the hummus chill in the refrigerator for at least 30 minutes to allow the flavors to meld. When ready to serve, transfer the hummus to a serving bowl and garnish with a sprinkle of paprika or cayenne pepper, if desired. Enjoy with your favorite dipping vegetables, pita bread, or crackers.
Tips:
- For a creamier texture, add more water or olive oil to the mixture.
- Experiment with different herbs and spices, such as roasted red peppers, za'atar, or fresh parsley, to create unique flavor profiles.
- Store leftover hummus in an airtight container in the refrigerator for up to 5 days.
Cooking Steps
First, drain and thoroughly rinse the chickpeas to remove any excess liquid.
Next, add the chickpeas, tahini, and your desired seasonings to a blender or food processor, and blend until smooth and creamy.
Step 1. Drain and Rinse Chickpeas Thoroughly
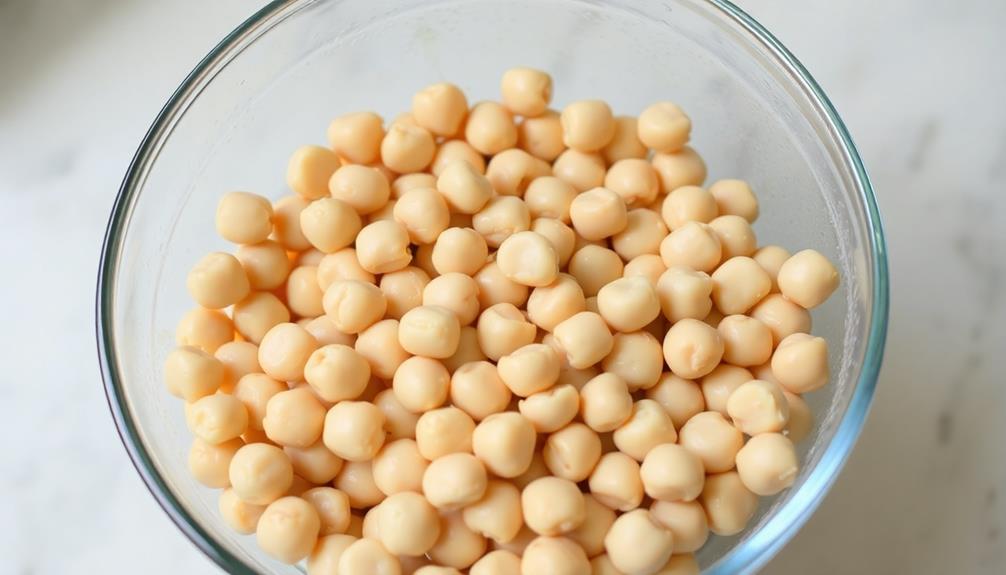
Begin by draining the chickpeas through a fine-mesh sieve, ensuring to thoroughly rinse them under cool running water. This step is crucial, as it removes any excess liquid or brine from the canned chickpeas, which can negatively impact the texture and flavor of your homemade hummus.
Rinsing the chickpeas also helps remove any residual salt or preservatives, allowing the natural, nutty taste of the chickpeas to shine through. Be sure to shake the sieve vigorously to remove as much liquid as possible, then transfer the rinsed chickpeas to a clean bowl or food processor, ready for the next step in the hummus-making process.
Taking the time to properly drain and rinse the chickpeas ensures your hummus will have a silky-smooth consistency, without any unwanted chunkiness or grittiness.
This simple step sets the foundation for a delicious, homemade hummus that you can enjoy as a satisfying snack or appetizer.
Step 2. Blend Chickpeas, Tahini, and Seasonings
To make your homemade hummus, add the rinsed chickpeas, tahini, lemon juice, garlic, and any other desired seasonings to a food processor or high-powered blender. Blend the ingredients until smooth, gradually adding water or olive oil to reach your desired consistency. Adjust the seasoning with salt or more lemon juice for extra flavor. While you’re at it, if you’re interested in making homemade hummingbird food, simply mix four parts water with one part sugar, boil the solution, and let it cool before filling your feeder. Once your hummus is ready, serve it with fresh veggies, pita bread, or as a delicious spread for sandwiches. You can also experiment by adding roasted red peppers, olives, or cumin for a unique twist. While you’re enjoying your hummus, don’t forget that making homemade hummingbird food is just as simple—keeping your feathered friends happy with a quick sugar-water mixture! For those who love multitasking in the kitchen, perfecting your hummus recipe while learning how to make hummingbird food is an efficient way to create something both you and your backyard visitors can enjoy. After all, providing a delightful treat for yourself and a nourishing snack for hummingbirds is equally rewarding. So, whether you’re sharing hummus at your dining table or watching hummingbirds dart around your feeder, you’ll be surrounded by happy diners.
Pulse the mixture several times to begin breaking down the ingredients. Then, blend the mixture on high speed for about a minute, stopping to scrape down the sides as needed, until the hummus reaches your desired consistency.
Taste and adjust the seasonings as necessary, adding more lemon juice for tang, garlic for flavor, or tahini for a creamier texture. If the hummus is too thick, you can thin it out by adding a bit of cold water, olive oil, or the reserved chickpea liquid.
Blend again until everything is well combined and smooth. Once you've reached the perfect hummus, transfer it to a serving bowl and enjoy with fresh vegetables, pita bread, or your other favorite dippers.
Step 3. Add Lemon Juice and Olive Oil

Next, add the lemon juice and a drizzle of olive oil to the blended chickpea mixture. The lemon juice will provide a bright, citrusy flavor that helps balance the richness of the hummus. Start with 2 tablespoons of lemon juice and adjust to taste, as the amount can vary depending on personal preference and the size of your lemons.
Next, drizzle in about 2 tablespoons of high-quality extra virgin olive oil. The olive oil will lend a smooth, creamy texture and enhance the overall flavor profile of the hummus. Be sure to use a good-quality olive oil, as it will contribute significantly to the taste.
Once the lemon juice and olive oil are incorporated, give the mixture another brief blend to ensure everything is well combined.
Taste and adjust the seasoning as needed, adding more lemon juice, olive oil, or a pinch of salt to achieve your desired flavor balance.
Step 4. Transfer to Serving Bowl
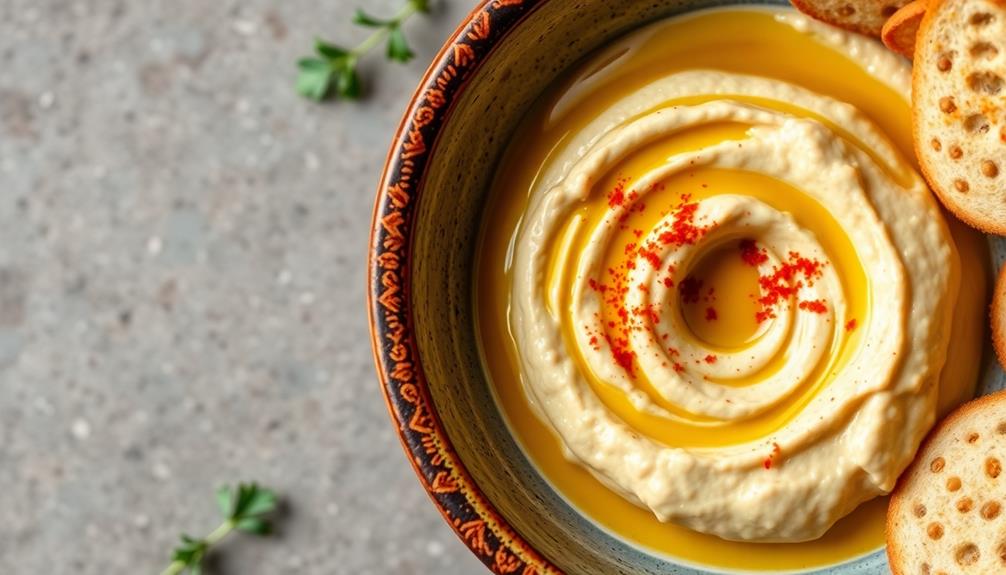
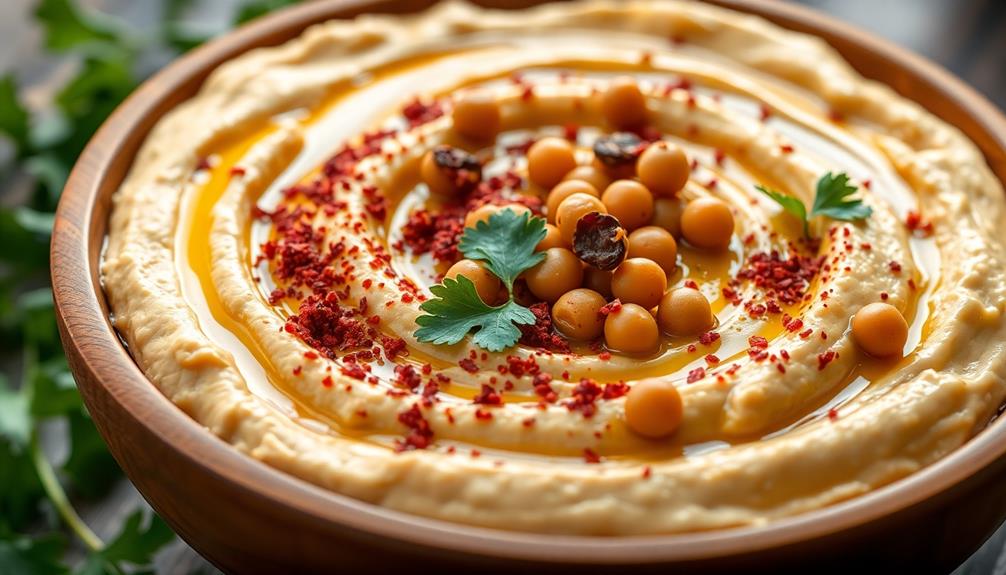
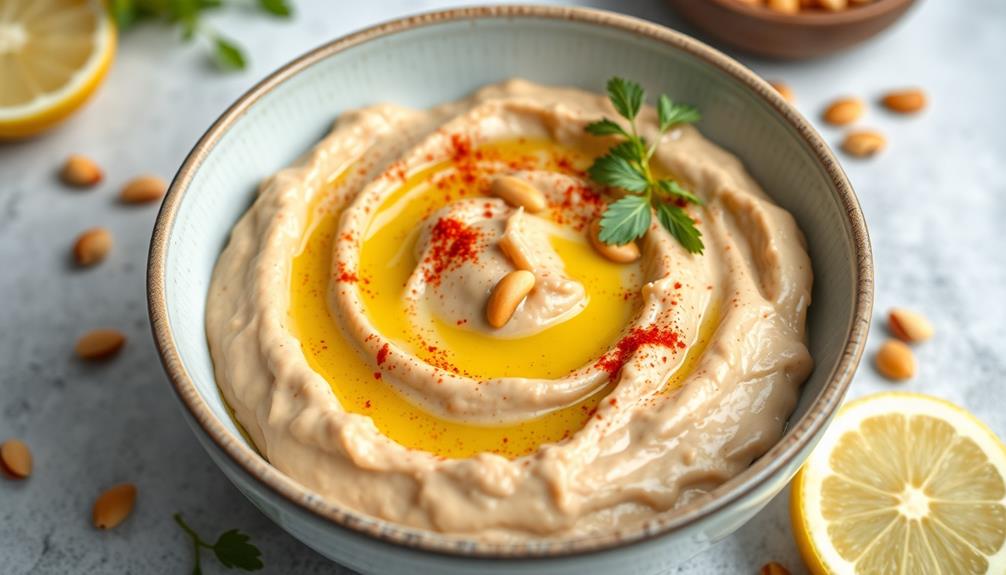
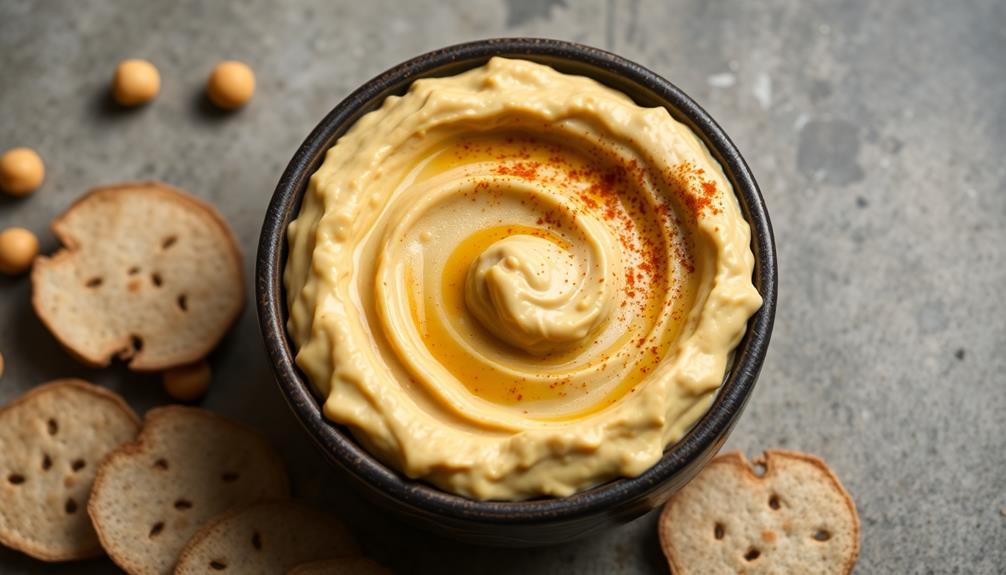
Once the lemon juice and olive oil are well-incorporated, transfer the homemade hummus to a serving bowl. This step ensures your delicious hummus is ready for serving and enjoying. Use a spoon or spatula to scoop the thick, creamy hummus into a shallow bowl or plate.
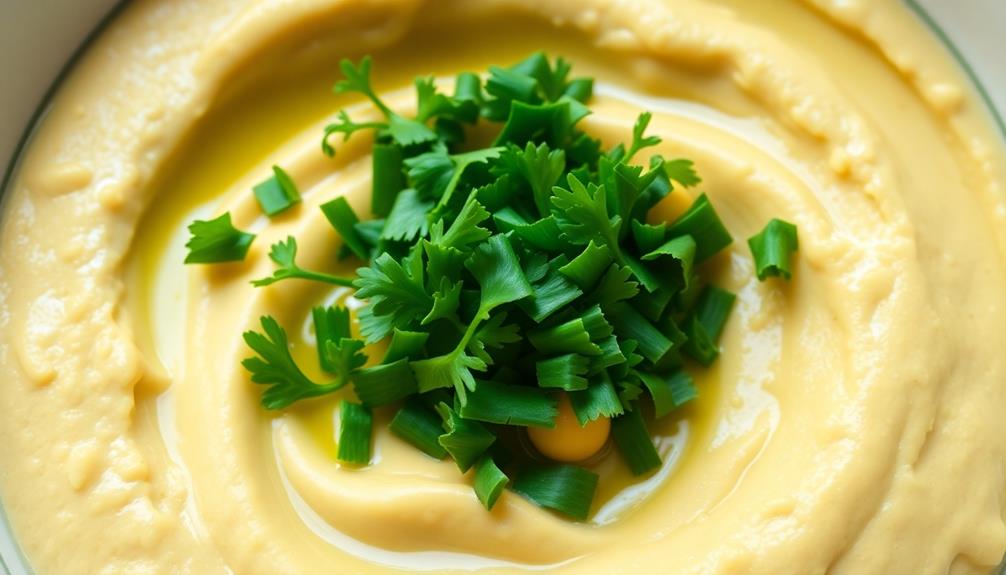
Arrange the hummus in the center of the bowl, then use the back of the spoon to create a shallow well or indentation in the center. This not only makes for a visually appealing presentation, but it also provides a space to drizzle a bit of extra olive oil or sprinkle some paprika or toasted sesame seeds, if desired.
Be sure to scrape down the sides of the food processor or blender to incorporate any last bits of hummus. Transfer every last morsel to the serving bowl for maximum enjoyment.
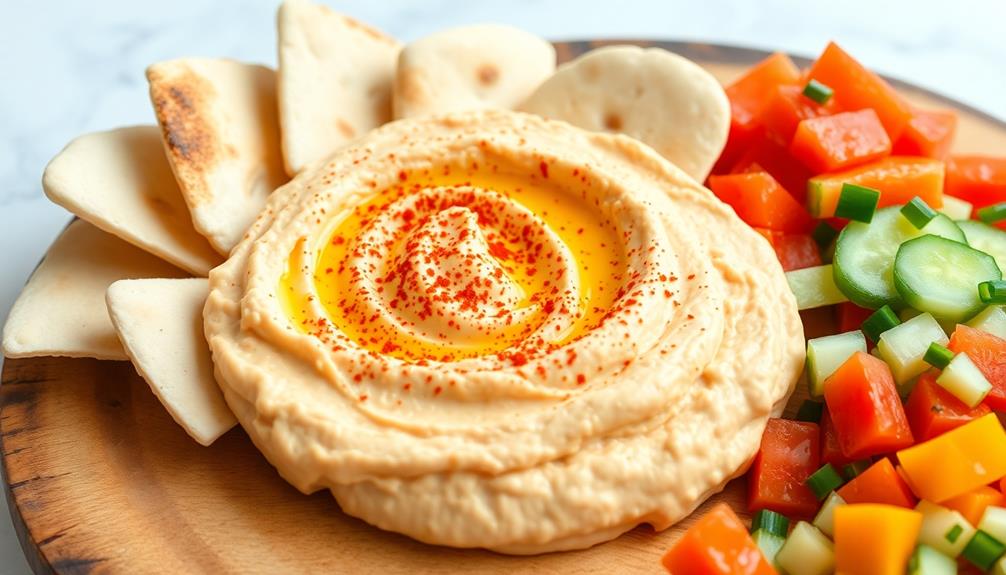
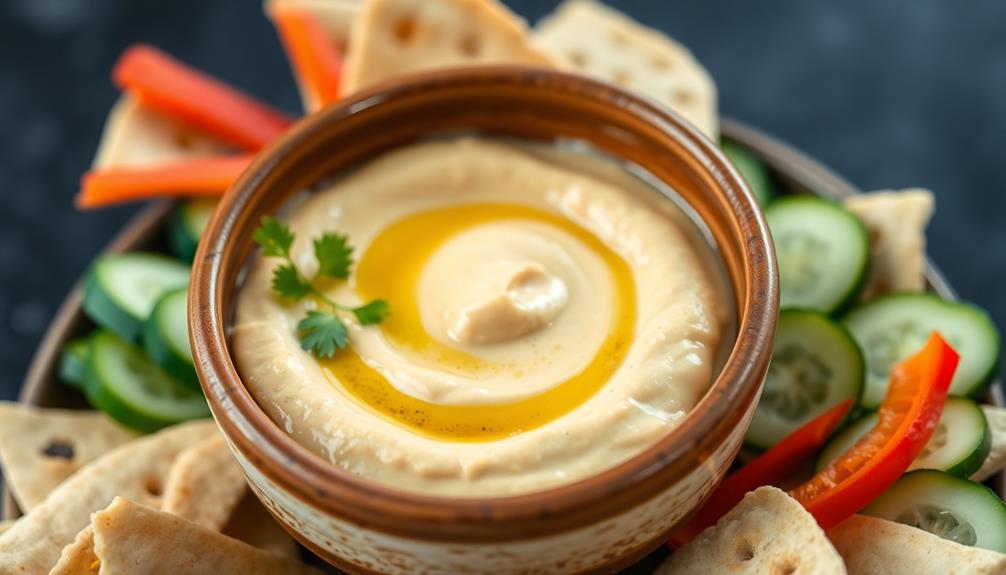
Now your homemade hummus is ready to be served with pita bread, veggie sticks, or your favorite dippers. Dig in and savor the fresh, flavorful results of your homemade hummus!
Step 5. Enjoy With Pita or Vegetables
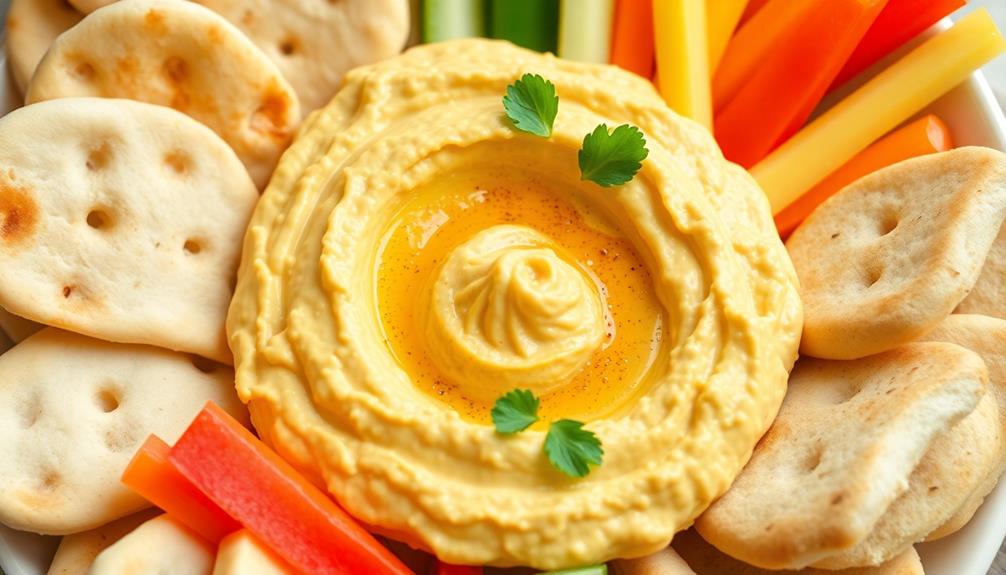
With the hummus now nestled in a serving bowl, it's time to gather your favorite dippers. Pita bread is a classic pairing, offering a sturdy yet supple platform to scoop up every last morsel of the creamy, garlicky delight. Slice the pita into wedges or tear it into bite-sized pieces for easy dipping.
Alternatively, you can opt for an assortment of fresh vegetables, such as carrot sticks, cucumber slices, or bell pepper strips. The cool, crunchy textures of these veggie dippers provide a refreshing contrast to the rich hummus.
For a more elevated presentation, you can arrange the pita and vegetables around the bowl of hummus, allowing your guests to help themselves. This setup encourages interaction and makes for a visually appealing snack platter.
Final Thoughts
After following the recipe and tasting the homemade hummus, you'll likely be impressed by how straightforward it's to make this tasty and nutritious snack at home.
Homemade hummus isn't only more cost-effective than store-bought, but it also allows you to control the ingredients, ensuring it's free from any unwanted additives or preservatives.
The versatility of hummus is another significant advantage. You can enjoy it as a dip with pita bread, fresh vegetables, or even as a spread on sandwiches and wraps.
Additionally, hummus makes a great protein-packed topping for salads, bowls, and other meals. Feel free to experiment with different flavor variations by adding spices, herbs, or roasted vegetables to the basic recipe.
Ultimately, mastering the art of homemade hummus is a rewarding experience that will provide you with a healthy, delicious, and convenient snack option.
With a little practice, you'll be whipping up batches of this Middle Eastern staple with ease, impressing your family and friends in the process.
Frequently Asked Questions
How Long Can Homemade Hummus Be Stored?
Homemade hummus can be stored in the refrigerator for 3-5 days. Be sure to keep it in an airtight container and consume it within this time frame for the best taste and texture.
What Are Some Healthy Toppings for Hummus?
To top your homemade hummus, try healthy options like sliced vegetables, fresh herbs, olive oil, or a sprinkle of spices. These tasty additions can boost the nutritional value and flavor of your hummus snack.
Can Hummus Be Frozen for Later Use?
Yes, you can absolutely freeze homemade hummus for later use. Simply transfer it to an airtight container, leaving a bit of headspace, and store it in the freezer for up to 3 months. When ready to use, thaw in the fridge overnight.
Is Homemade Hummus Healthier Than Store-Bought?
Homemade hummus is typically healthier than store-bought versions. You can control the ingredients and avoid preservatives or additives found in commercially-produced hummus. Plus, you'll get a fresher, more flavorful dip when you make it yourself.
What Are the Benefits of Eating Hummus?
Eating hummus provides a range of benefits. It's packed with protein, fiber, and healthy fats, which can keep you feeling full and satisfied. Plus, it's a versatile snack that pairs well with veggies, pita, or whole-grain crackers.

Giovanni is our Chief Tasting Evangelist and the charismatic face of Mad Tasting. He inspires a sense of culinary wonder in all who encounter our brand. With boundless enthusiasm for the art of tasting and a gift for captivating audiences, Giovanni leads our immersive tasting experiences and workshops. He empowers food enthusiasts to discover the true depth and complexity of the flavors we celebrate. Whether he’s guiding a private group through a blind tasting or hosting a masterclass on the art of pairing, Giovanni’s infectious passion for the culinary world is the driving force behind our mission to share the extraordinary.