

To master milk steaming and create perfect microfoam, start by choosing fresh, cold milk and position your steam wand just below the surface at a slight angle. Keep steady, introduce gentle air for fine bubbles, and swirl the milk to achieve a smooth, velvety texture. Avoid rushing or overheating, and regularly clean your equipment. If you want to access the secrets behind flawless microfoam techniques, continue exploring this thorough guide.
Key Takeaways
- Proper milk selection and temperature control are essential for creating smooth, velvety microfoam with optimal texture.
- Correct steam wand positioning and gradual air incorporation produce fine, consistent microfoam ideal for latte art.
- Regular cleaning and maintenance of the steam wand prevent blockages and ensure high-quality foam production.
- Mastering swirling and layering techniques unlocks creative possibilities like latte art and decorative foam designs.
- Monitoring steam pressure and equipment calibration helps maintain microfoam consistency and prevents common steaming mistakes.
Understanding Microfoam: The Basics and Beyond

Understanding microfoam is essential for creating the perfect espresso-based drinks, as it directly impacts texture and flavor. To achieve ideal microfoam, you need to consider milk composition, which affects how it froths and its overall quality. Whole milk tends to produce creamier, more stable foam due to its fat content, while skim milk creates lighter, more airy microfoam. Foam stability is crucial because it determines how long the microfoam holds its structure without collapsing. Proper steaming introduces tiny air bubbles that form a velvety texture, essential for latte art and smooth drinks. Achieving consistent microfoam also depends on the milk temperature, which influences foam quality and stability. By mastering milk composition and foam stability, you guarantee your microfoam is silky, consistent, and enhances the flavor of your beverages.
The Perfect Milk: Choosing the Right Type and Preparation

Choosing the right type of milk plays a significant role in achieving perfect microfoam and enhancing your espresso drinks. Different milk types, like whole, skim, or plant-based options, each have unique properties that affect steamability and foam texture. Whole milk creates richer, creamier microfoam, while skim milk produces lighter, more velvety froth. Plant-based milks, such as almond or soy, require specific preparation methods to achieve good foam—often involving adjustments in steaming time and temperature. To prepare the perfect milk, start with cold, fresh milk and heat it gradually, paying attention to the texture you want. Proper preparation methods help guarantee consistent microfoam, making your drinks more enjoyable and professional-looking. Exploring the history of milk processing can provide valuable insights into optimal techniques and traditional practices. Experiment with different milk types and techniques to find what works best for you.
Mastering the Steam Wand: Techniques for Consistent Results
To get consistent microfoam, you need to focus on proper wand positioning and technique. Keep the wand just below the milk’s surface and at a slight angle to create smooth, steady steam. Mastering these details will guarantee your milk is perfectly textured every time. Additionally, understanding automation in business can help you streamline your kitchen workflows, making your milk steaming process more efficient and consistent.
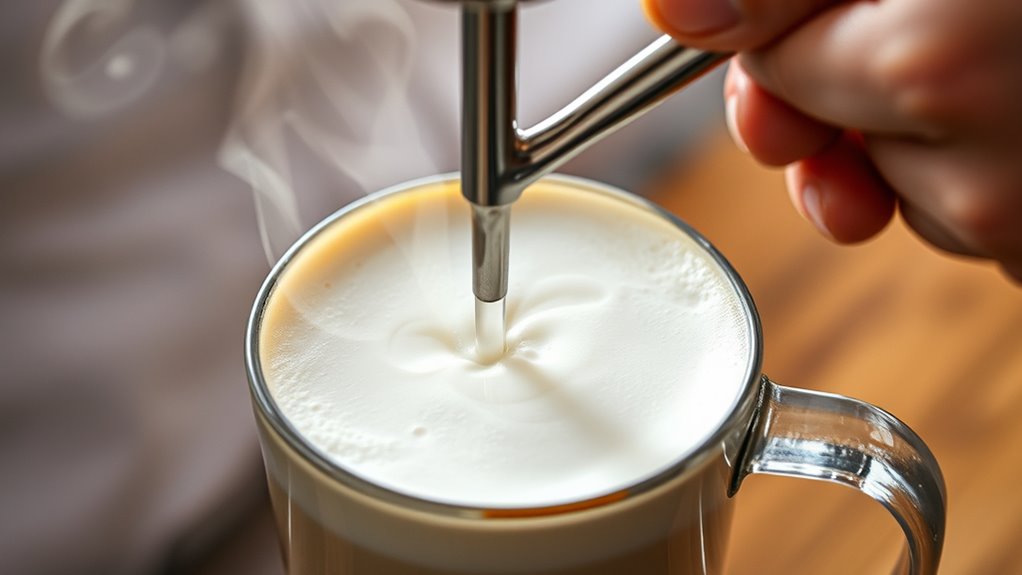
Proper Wand Positioning
Mastering proper wand positioning is essential for achieving consistently creamy microfoam. To do this, focus on your wand angle and wand depth. Keep the wand at a slight angle, pointing just below the milk surface, not too deep or shallow. This helps create a whirlpool effect that integrates air and milk smoothly. Adjust the wand so it’s close enough to the surface to introduce microbubbles but not so close that it causes splattering. Maintain a steady hand, and don’t move the wand too much once you find the right spot. Remember these tips:
- Keep the wand at a slight angle
- Maintain consistent wand depth
- Find the right distance from the surface
- Avoid splattering by not immersing too deep
- Steady your hand for control
Additionally, understanding steam pressure and how it influences foam texture can help you better control the microfoam consistency and achieve professional results.
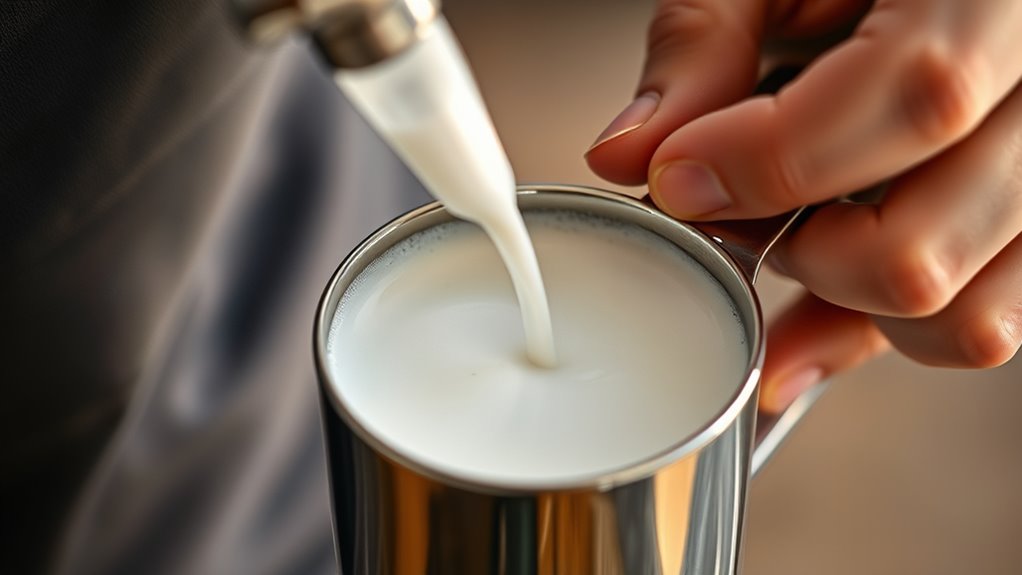
Technique for Microfoam
Once you’ve positioned the wand correctly, focus on the technique to produce smooth, velvety microfoam. Keep the tip just below the milk’s surface to introduce air gradually, which helps achieve consistent frothing. Maintain a steady, gentle motion, swirling the pitcher to promote even heat distribution and uniform frothing consistency. Pay close attention to milk temperature; aim for around 140°F (60°C), as this ensures ideal microfoam without scorching the milk. As the milk heats, lower the wand slightly to incorporate more air, then submerge it deeper to heat without adding air. Consistently monitoring both milk temperature and frothing technique results in microfoam that’s silky, shiny, and ideal for latte art or smooth drinks. Practicing proper frothed milk techniques is essential for mastering this process.
Common Mistakes and How to Avoid Them
Many beginners struggle with creating smooth, glossy microfoam because they often rush the steaming process or don’t pay attention to key details. Common mistakes include overheating the milk, which destroys the milk foam quality, or using the wrong pitcher size, making it hard to control airflow. Skipping proper steaming tips can result in uneven or frothy milk instead of silky microfoam. Additionally, not positioning the steam wand correctly causes irregular textures. In the end, rushing the process or stopping too early leaves you with subpar milk foam. To avoid these pitfalls, focus on gentle, steady steaming, keep the wand just below the surface, and monitor milk temperature closely. Practice patience and consistency for perfect microfoam every time. Understanding milk frothing techniques can further improve your results and help you achieve professional-quality microfoam.
Creative Uses of Microfoam in Coffee, Tea, and Kitchen Creations

You can turn simple drinks into works of art with creative latte art innovations and edible foam decorations. Microfoam allows you to add playful designs or intricate patterns that impress your guests. Experimenting with these techniques opens up new possibilities for enhancing your coffee, tea, and kitchen creations. Using microfoam techniques, you can elevate your presentations and truly showcase your barista skills in any setting.
Latte Art Innovations
Latte art innovations push the boundaries of traditional microfoam designs, inspiring creative expressions not only in coffee but also in tea and kitchen crafts. With advanced latte art tools and foam color techniques, you can experiment beyond classic hearts and rosettas. Try blending food-safe colorants into the foam for vibrant, eye-catching designs. Use fine tools for detailed line work or layered foam for 3D effects. Incorporate contrasting colors to highlight intricate patterns or create illusions. You can even craft mini sculptures or abstract art directly in your cup. These innovations open up endless possibilities, turning each beverage into a canvas. Whether you’re adding a splash of color or exploring new textures, your microfoam artistry becomes a personal statement in every sip. Incorporating rustic lighting or vintage decor elements can enhance your presentation and create a cozy, farmhouse-inspired atmosphere for your beverage creations.
Edible Foam Decorations
Building on latte art innovations, microfoam now serves as a versatile medium for edible decorations that enhance the visual appeal of coffee, tea, and culinary creations. You can create intricate edible foam designs that act as decorative toppings, turning simple drinks into artful masterpieces. Use microfoam to craft flowers, leaves, or abstract patterns directly on your beverage surface, making each cup unique. For added flair, layer different foam colors or textures for contrast and dimension. These decorative toppings are not only visually stunning but also edible, ensuring they complement the flavor profile. Incorporating visual presentation techniques from the personal development industry can also boost your confidence and creativity in presentation. Whether for special occasions or everyday indulgence, edible foam decorations elevate your presentation, showcasing your creativity and attention to detail in every sip.
Troubleshooting and Maintaining Your Milk Steaming Equipment

Regular maintenance and prompt troubleshooting are essential to keep your milk steaming equipment functioning smoothly and producing high-quality microfoam. Start by regularly cleaning your steam wand to prevent milk residue buildup, which can affect steam wand hygiene and foam quality. Check equipment calibration periodically to ensure the steam pressure and temperature are accurate, avoiding under- or over-steaming milk. If you notice inconsistent microfoam, inspect for clogged steam holes or leaks. Keep an eye on the water level and descale your equipment to prevent mineral buildup. Always follow manufacturer guidelines for maintenance. Additionally, exploring options for best laundry detergents can help maintain your equipment and clothes in top condition. Here are some tips to help you stay on top of it:
Regular maintenance and troubleshooting ensure high-quality microfoam and smooth equipment operation.
- Clean the steam wand after every use
- Descale your equipment regularly
- Calibrate your machine as recommended
- Inspect for leaks or blockages
- Maintain proper water levels
Frequently Asked Questions
How Does Milk Temperature Affect Microfoam Texture and Stability?
You’ll notice that when milk is steamed to around 140-150°F, its viscosity increases, creating a smooth, velvety microfoam. If it gets too hot, above 160°F, foam stability decreases, and bubbles break down quickly. Too cool, and the foam remains thin and less stable. Maintaining the right temperature guarantees your microfoam stays silky and stable, giving your drinks that perfect, professional finish.
Can Alternative Milk Options Produce Comparable Microfoam Quality?
Imagine you’re in 1920s Paris, but today, plant-based alternatives can produce surprisingly good microfoam. While dairy-free options like oat, almond, and soy milk can create smooth, velvety microfoam, their quality depends on the brand and formulation. You may need to experiment with temperature and steaming techniques, but many dairy-free options now rival traditional milk, making them a viable choice for delicious, microfoam-topped drinks.
What Are the Best Storage Practices for Steamed Milk?
You should store leftover steamed milk in a clean milk container, ensuring it’s sealed tightly. Keep it at a refrigeration temperature of around 37°F (3°C) to preserve freshness and prevent spoilage. Avoid leaving it out at room temperature, as bacteria can grow quickly. Reheat gently before use, and consume within 24 hours for the best flavor and safety. Proper storage helps maintain quality and prevents waste.
How Long Can Microfoam Be Kept Before It Loses Quality?
Think of your microfoam as a delicate bloom that withers with time. You should use it within 15-20 minutes to preserve milk freshness and prevent foam deterioration. After this window, microfoam begins to lose its silky texture and expands bacteria growth, compromising flavor and safety. To enjoy ideal quality, serve your steamed milk promptly, and avoid storing it too long, just as you’d cherish a fleeting blossom.
Are There Eco-Friendly or Energy-Saving Tips for Milk Steaming?
To save energy while steaming milk, use reusable steaming equipment like stainless steel pitchers, which retain heat well and last longer. Opt for energy-efficient heating methods, such as induction or microwave steamers, to cut down on power usage. Pre-warm your equipment to reduce steaming time, and only steam the amount of milk you need. These tips help you stay eco-friendly while achieving perfect microfoam.
Conclusion
Think of microfoam as the heartbeat of your crafted beverages—each skillful swirl and steady steam breathes life into your creations. When you master it, you’re not just frothing milk; you’re awakening a symphony of flavors and artistry. With patience and care, your microfoam becomes a vessel of passion, transforming simple ingredients into moments of warmth and connection. Embrace the craft, and let your steaming journey flow like a gentle tide of inspiration.

Giovanni is our Chief Tasting Evangelist and the charismatic face of Mad Tasting. He inspires a sense of culinary wonder in all who encounter our brand. With boundless enthusiasm for the art of tasting and a gift for captivating audiences, Giovanni leads our immersive tasting experiences and workshops. He empowers food enthusiasts to discover the true depth and complexity of the flavors we celebrate. Whether he’s guiding a private group through a blind tasting or hosting a masterclass on the art of pairing, Giovanni’s infectious passion for the culinary world is the driving force behind our mission to share the extraordinary.