Halloween-themed Recipes
Spiderweb Black Bean Dip
Prepare to bewitch your Halloween party guests with this eerie Spiderweb Black Bean Dip. But beware, its delicious flavor might just…
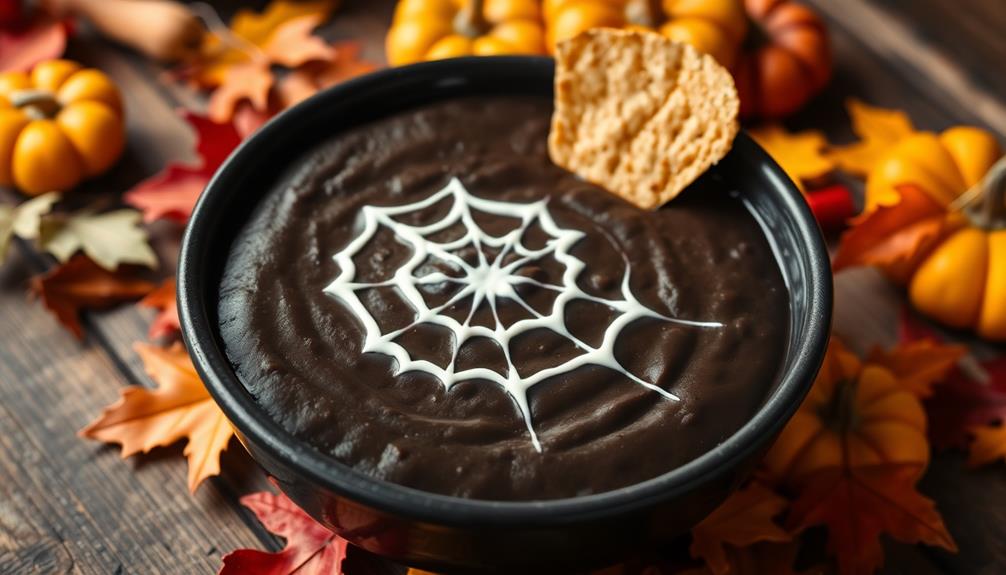
You'll love this spooky and delicious Spiderweb Black Bean Dip! It's a Halloween party favorite that's been around since the early 2000s. To make it, you'll blend black beans until smooth, add tasty spices like cumin and chili powder, and create a creepy spiderweb design with sour cream. Chill it for 30 minutes to let the flavors blend, then serve with colorful tortilla chips. It's not just fun to look at; it's also a healthier snack option for both kids and adults. Get ready to impress your guests with this festive and flavorful dip. There's so much more to discover about this spooky treat!
Key Takeaways
- Spiderweb Black Bean Dip is a Halloween-themed party food that originated in the early 2000s.
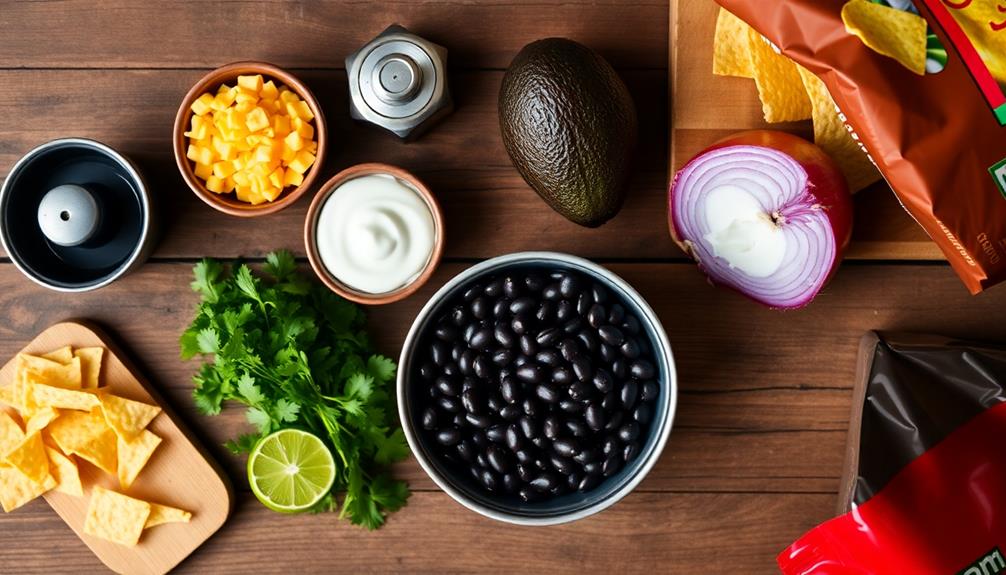
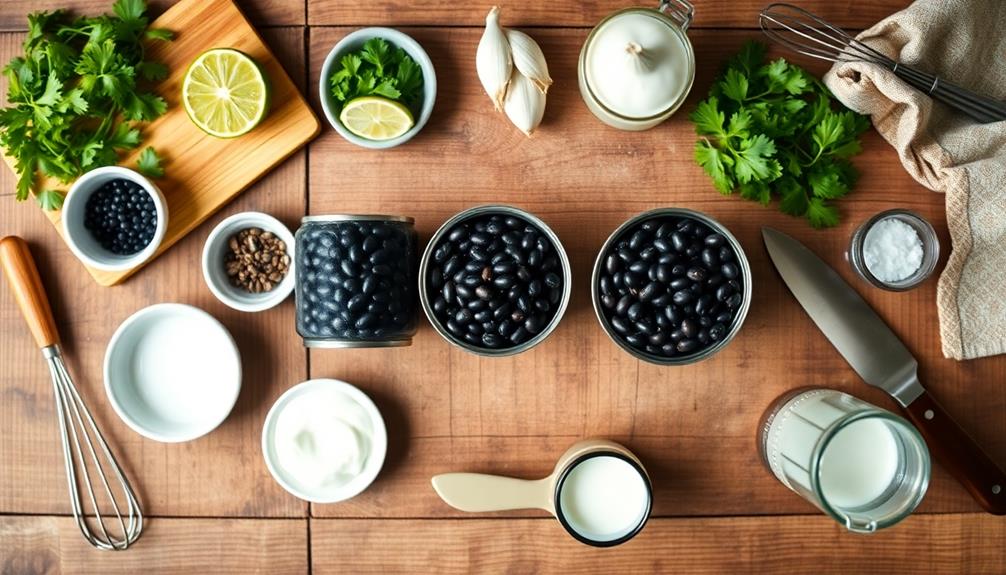
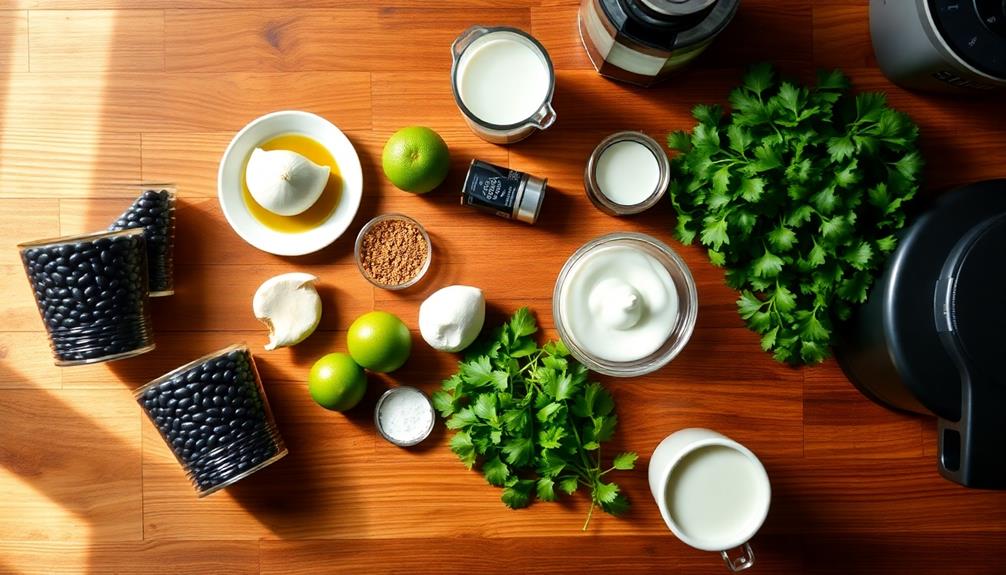
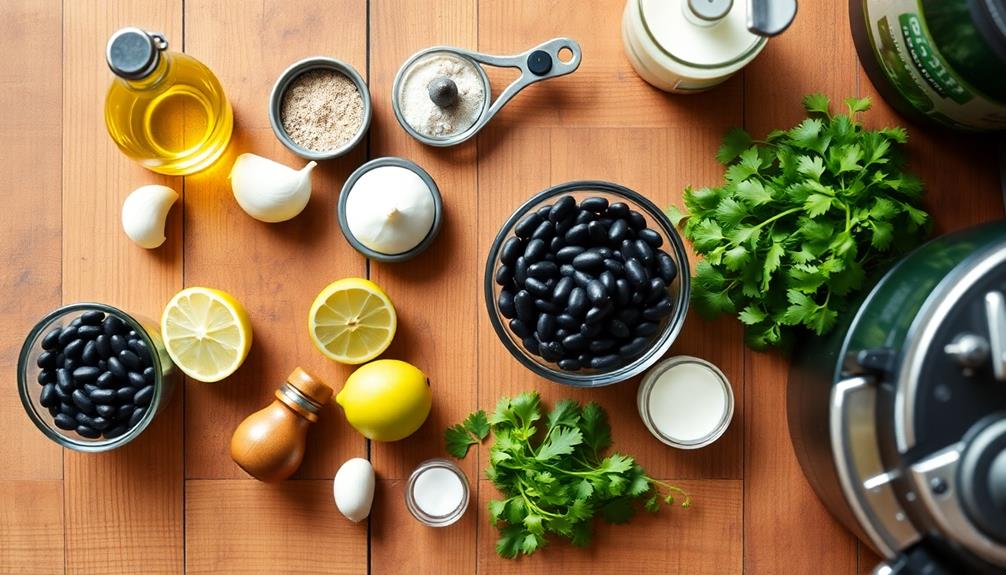
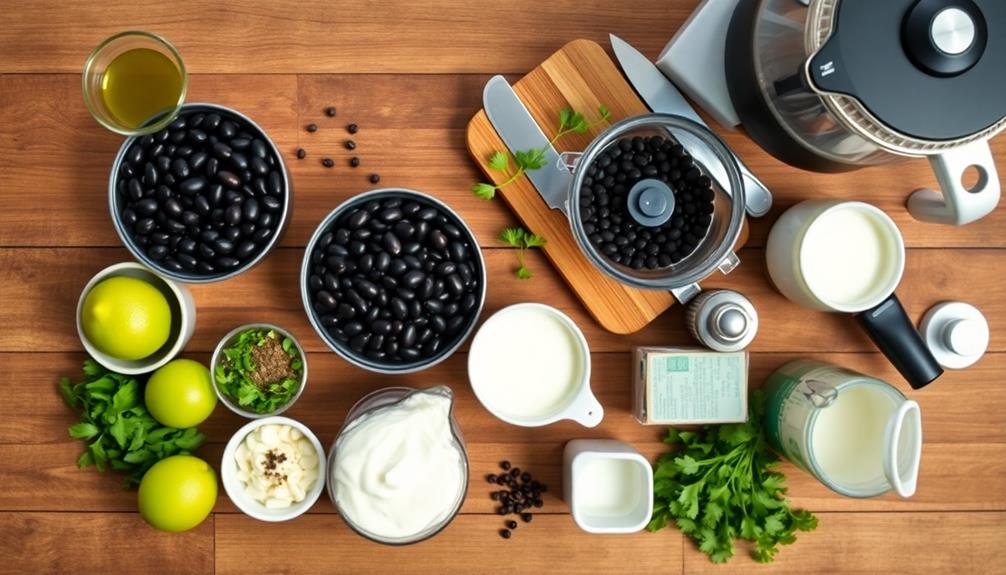
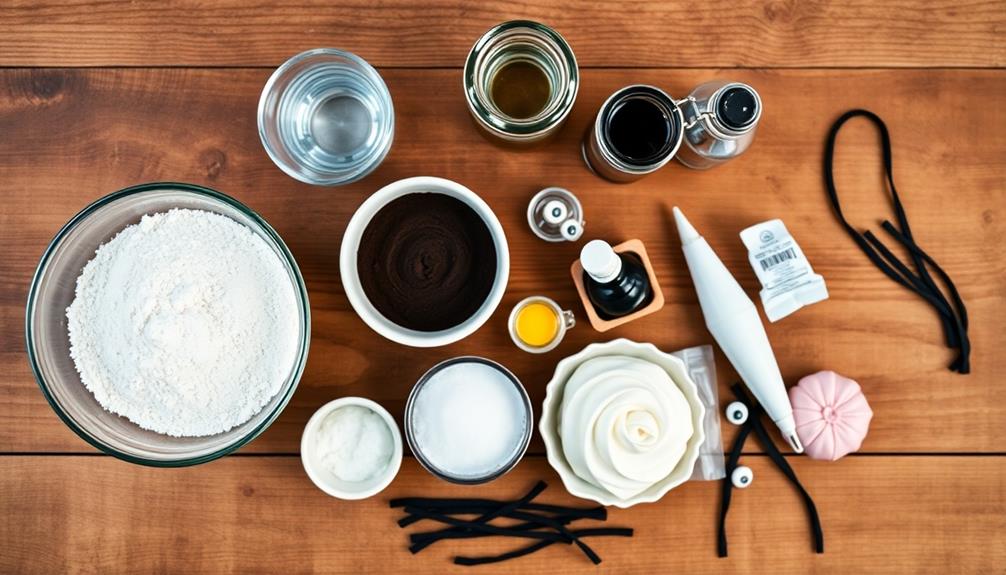
- The dip's main ingredients include black beans, cream cheese, sour cream, and various spices like cumin and chili powder.
- A spiderweb design is created on top using sour cream in a spiral pattern with connected lines.
- The dip is typically served chilled with colorful tortilla chips or vegetable dippers.
- It's a healthier snack option that's easy to prepare and visually appealing for Halloween parties and fall festivals.
History
The origins of Spiderweb Black Bean Dip can be traced back to the early 2000s, when creative Halloween-themed party foods began to gain popularity. You might remember seeing this spooky treat at Halloween parties or fall festivals. It quickly became a hit because it's not only delicious but also looks fantastic on the buffet table.
As people started sharing recipes online, the Spiderweb Black Bean Dip spread like wildfire. Food bloggers and party planners loved how easy it was to make and how it added a fun, creepy touch to their events.
You'll find that the basic recipe hasn't changed much over the years. It still uses black beans as the base, with sour cream creating the spider web design on top.
What's great about this dip is that it's perfect for both kids and adults. You can adjust the spiciness to suit your taste, and it's a healthier option compared to many other party snacks.
As Halloween parties have grown more elaborate, this dip has become a staple that you'll see at gatherings across the country.

Cooking Steps
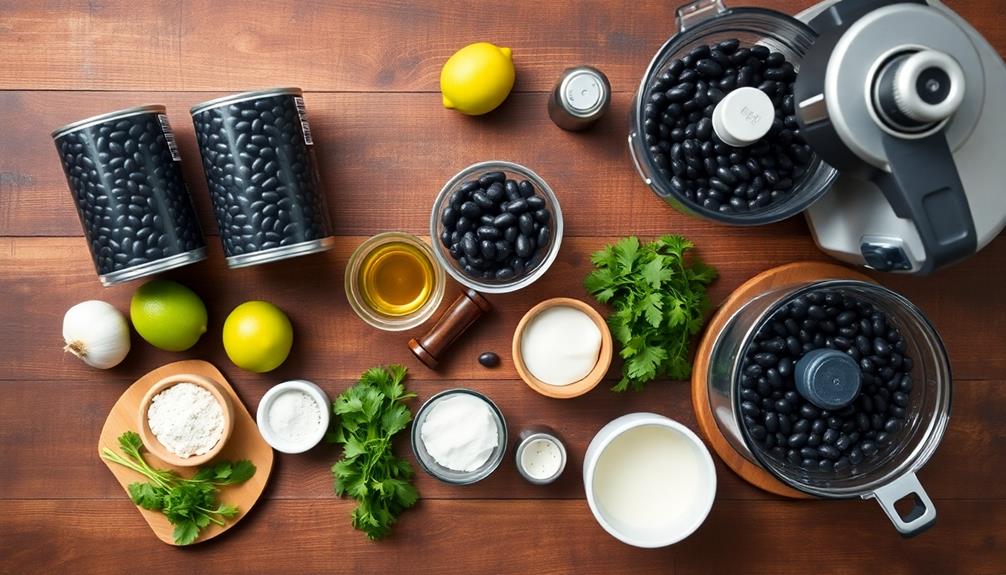
Begin by combining the black beans, garlic, lime juice, cumin, and salt in a food processor. Blend until smooth, scraping down the sides as needed. Taste and adjust the seasoning if necessary.
You'll want a creamy consistency that's perfect for dipping!
Next, transfer the bean dip to a shallow serving bowl. Smooth the top with a spatula to create an even surface.
Now, it's time to make your spiderweb design! Scoop sour cream into a plastic bag and snip off a tiny corner. Starting from the center of the bowl, squeeze out the sour cream in a spiral pattern.
To create the web effect, use a toothpick or skewer. Gently drag it from the center to the edge of the bowl, creating lines that intersect the sour cream spirals.
Repeat this step several times around the bowl until you've formed a spiderweb pattern.
Step 1. Blend Beans Until Smooth
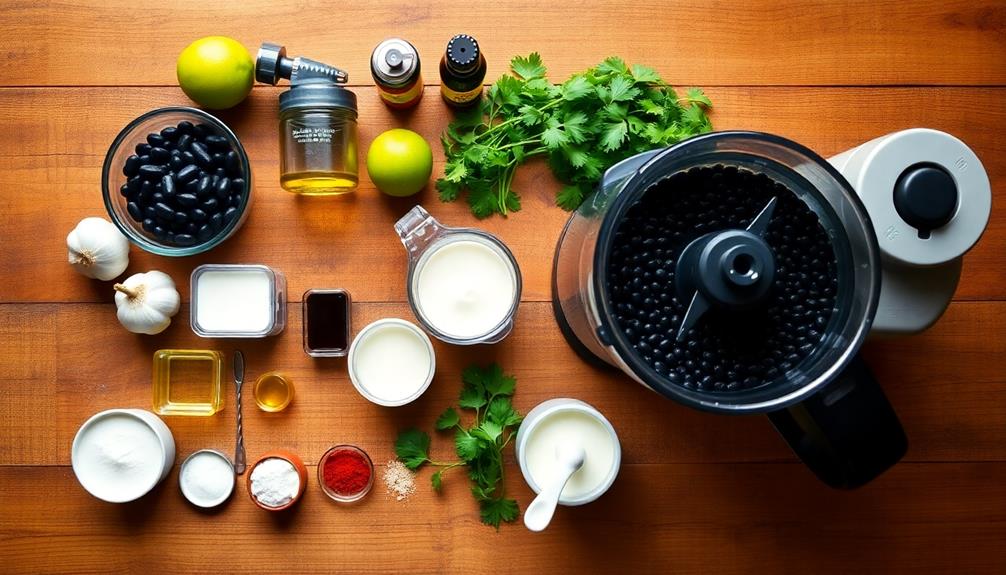
After draining and rinsing the black beans, place them in a food processor or blender. You'll want to make sure you've got all the liquid out, so give them a good shake in the colander before adding them.
Now it's time to get blending! Start with short pulses to break up the beans, then let the machine run continuously. You'll need to stop every so often to scrape down the sides with a spatula. This helps make sure everything gets mixed evenly.
Keep blending until the beans are smooth and creamy. It might take a few minutes, but don't rush it! The smoother your dip, the better it'll look when you create the spiderweb design later.
If the mixture seems too thick, you can add a little liquid. Try using some of the reserved bean liquid, or a splash of water or lime juice. Add just a tablespoon at a time until you get the right consistency.
Once your dip is silky smooth, give it a taste. You might want to add a pinch of salt or a squeeze of lime to brighten the flavors.
Step 2. Add Seasonings and Spices

Now that your black bean base is smooth and creamy, it's time to amp up the flavor. You'll want to add some delicious seasonings and spices to make your dip irresistible.
Start by adding a teaspoon of cumin, which gives a warm, earthy taste. Cumin not only enhances flavor but also offers potential health benefits, as some studies suggest it may have anti-inflammatory properties.
Then, sprinkle in some chili powder for a bit of kick. Don't forget the garlic powder – it adds a savory punch that everyone loves!
Next, squeeze in some fresh lime juice. It'll brighten up the flavors and give your dip a tangy twist.
Add a pinch of salt and a dash of black pepper to enhance all the other tastes. If you like it spicy, toss in some diced jalapeños or a few drops of hot sauce.
Step 3. Create Spiderweb Design
With your flavorful black bean dip prepared, it's time to transform it into a spooky spiderweb design. Grab a squeeze bottle or a plastic bag with a small corner snipped off. Fill it with sour cream or Greek yogurt for a striking contrast against the dark bean dip.
Start by spreading your bean dip evenly in a round serving dish. Now, let's create the web! Begin at the center of the dish and squeeze out a small spiral. Next, draw straight lines from the center to the edge of the dish, like spokes on a wheel. You'll want about 8 to 10 lines for a good web effect.
Here's where the magic happens! Connect these lines by drawing curved lines between them, starting from the center and working your way out. As you go, make the spaces between the curved lines wider. This creates the illusion of a real spiderweb!
For an extra spooky touch, use a plastic spider or make one from black olives to place on your web. Your guests will be impressed by your creativity and excited to dig into this fun Halloween-themed dip!
Step 4. Chill for 30 Minutes
Once you've created your spooky spiderweb design, it's time to let your dip chill out. Place your decorated dip in the refrigerator for at least 30 minutes. This cooling time is crucial for two reasons. First, it allows the flavors to blend and develop, making your dip even more delicious.
Second, it helps the sour cream design set, ensuring your spiderweb pattern stays intact.
While you're waiting, why not prepare some fun dippers? Slice up some colorful bell peppers into strips, or cut tortilla chips into spooky shapes like bats or pumpkins. You can also arrange some carrot sticks or cucumber rounds on a platter. These will look great next to your chilled dip!
After 30 minutes, take your dip out of the fridge. You'll notice it's firmed up a bit, which is perfect for serving. If you're not ready to serve it right away, you can keep it chilled for up to 24 hours. Just remember to cover it with plastic wrap to prevent the surface from drying out.
When you're ready to serve, place your dip in the center of your platter and surround it with your prepared dippers. Your guests will be impressed by your spooky creation!
Step 5. Serve With Tortilla Chips
Presentation is key when serving your spooky Spiderweb Black Bean Dip. After chilling, it's time to set the stage for your Halloween party guests. Choose a large, flat platter or a shallow bowl to showcase your creation. Carefully transfer the dip from its container onto the serving dish, making sure not to disturb the sour cream web design on top.
For an added festive touch, consider incorporating a variety of toppings, similar to how you might customize Dirt Cups with different garnishes. Now, it's time to add the perfect companion to your dip: tortilla chips! Select a variety of colorful chips to complement your spooky theme. You can use blue corn chips for a night sky effect or orange-tinted chips to match the Halloween vibe.
Arrange the chips in a circle around the dip, creating a festive border. For an extra touch, you can use bat-shaped or pumpkin-shaped tortilla chips if you can find them at your local store.
Don't forget to provide serving utensils like a small spoon or spreader for your guests. This will make it easy for them to scoop up the delicious dip onto their chips. Your Spiderweb Black Bean Dip is now ready to be the star of your Halloween spread!
Final Thoughts
This spiderweb black bean dip isn't just a tasty appetizer; it's a showstopper that'll impress your guests at any Halloween gathering. You'll love how easy it's to make and how quickly it disappears from the plate.
Plus, the playful presentation can spark laughter and joy, much like the humor found in seniors texting that bridges generations. Remember, the key to a perfect spiderweb design is patience and a steady hand. Don't worry if it's not perfect; the rustic look adds to its charm!
Feel free to get creative with your presentation. Serve the dip in a hollowed-out pumpkin for an extra festive touch, or use orange and black tortilla chips to complement the Halloween theme. You can even make this dip ahead of time and store it in the fridge, giving you more time to focus on other party preparations.
Whether you're hosting a spooky soirée or just want to add some Halloween flair to your family dinner, this spiderweb black bean dip is sure to be a hit. It's not only delicious but also a great conversation starter.

Caterina, with her background as a food scientist and innovative chef, is the driving force behind our product development. Her keen eye for detail and relentless pursuit of perfection guide her as she curates our collection of extraordinary ingredients, beverages, and culinary experiences. Whether she’s sourcing the rarest spices or collaborating with master artisans, Caterina’s passion for elevating the culinary landscape shines through in every new discovery that graces our shelves.
Halloween-themed Recipes
Black Cat Cupcakes
Unleash your creativity with spooky-cute Black Cat Cupcakes, perfect for Halloween parties and bake sales, but beware…

Black Cat Cupcakes are a purr-fect Halloween treat you'll love making! These adorable cupcakes combine delicious flavors with spooky fun. You'll start by baking chocolate cupcakes, then transform them into cute cats using black frosting. It's easy to create pointed ears, whiskers, and bright eyes with a piping bag. You can customize each cat's expression, making them playful or mysterious. They're great for parties, bake sales, or just as a special treat. Kids and adults alike will be charmed by these feline sweets. With a bit of practice, you'll be creating your own litter of cupcake kitties in no time. Discover how simple it is to bring these cupcakes to life!
Key Takeaways
- Black Cat Cupcakes are popular Halloween-themed treats decorated to resemble black cats.
- The cupcakes typically feature black frosting and decorative elements like pointed ears, eyes, and whiskers.
- They can be made with various cake flavors, often chocolate, and decorated using piping techniques.
- Black Cat Cupcakes are ideal for Halloween parties, bake sales, and themed events.
- Customization allows for unique designs, reflecting different cat personalities and expressions.
History
The origin of black cat cupcakes is shrouded in mystery, much like the enigmatic felines they represent. You might wonder when these adorable treats first appeared, but there's no clear answer.
What we do know is that they've become a popular Halloween staple in recent years. Black cats have long been associated with superstition and Halloween, so it's no surprise that bakers eventually combined this theme with everyone's favorite dessert: cupcakes!
As people looked for fun ways to celebrate the spooky season, creative bakers started decorating cupcakes to look like cute black cats. You'll find that these treats have gained popularity through social media and baking blogs.
People love sharing photos of their cat-inspired creations, which has helped spread the trend. While there's no specific date for when black cat cupcakes first appeared, they've become a beloved part of Halloween celebrations in many homes and bakeries.
Today, you'll see countless variations of black cat cupcakes, from simple designs with candy eyes to more elaborate creations with fondant decorations. They're a hit at parties and a fun way to get into the Halloween spirit!
Cooking Steps
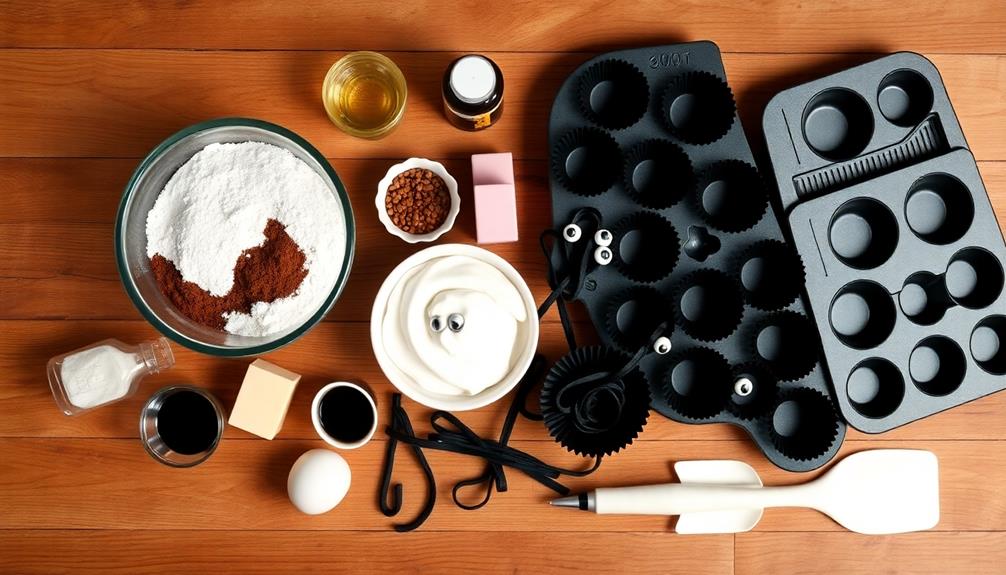
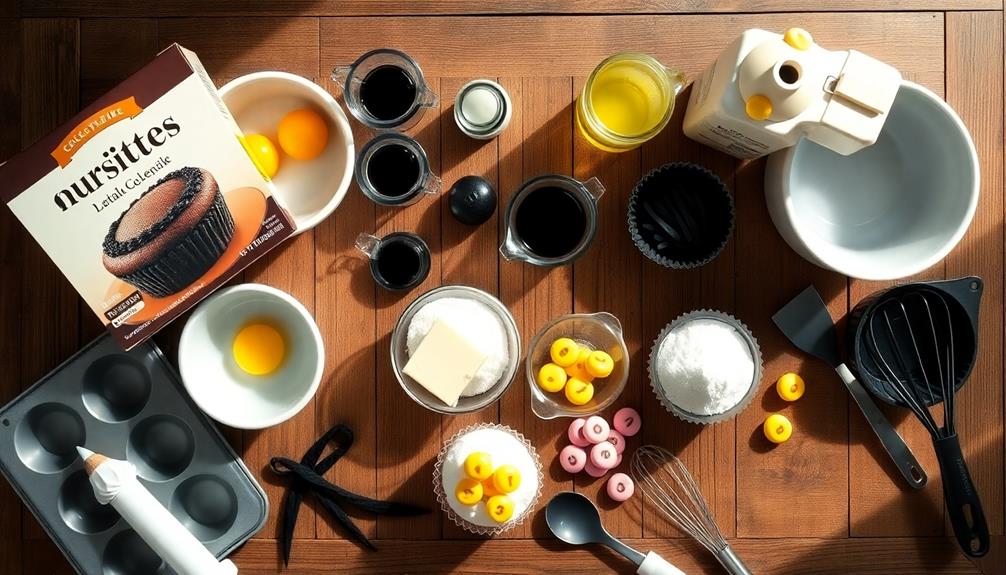
Once you've gathered all your ingredients, it's time to start baking these adorable black cat cupcakes.
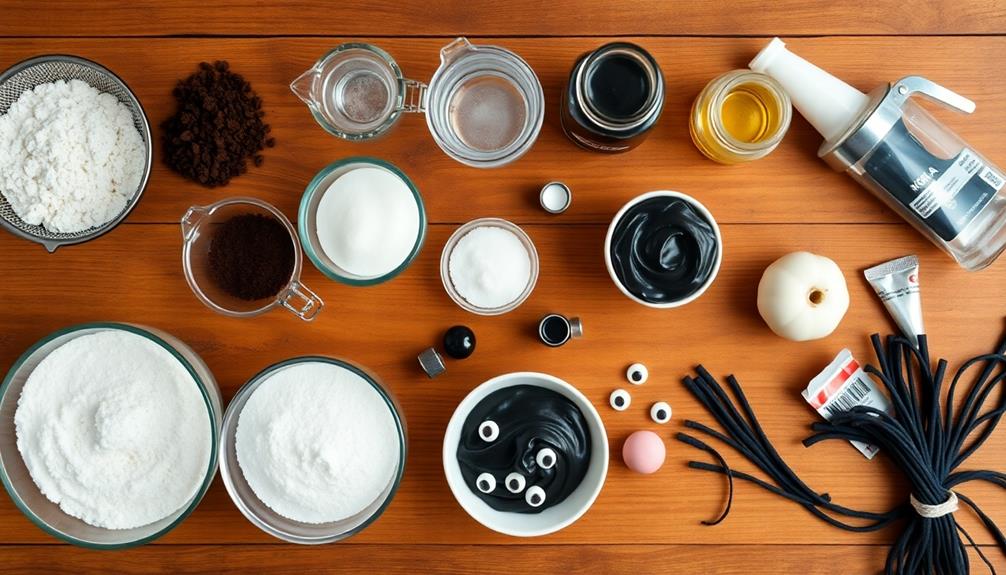
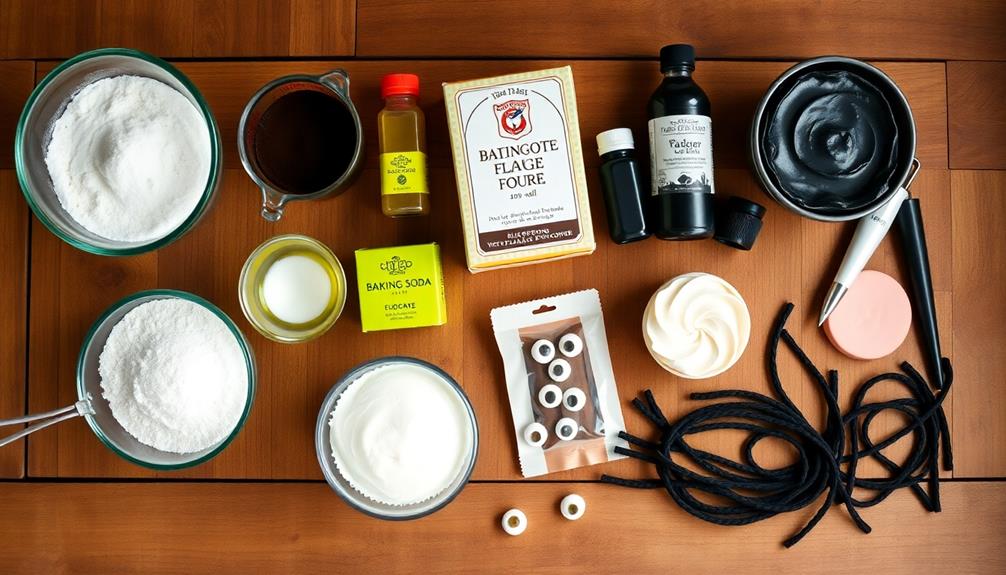
First, preheat your oven to 350°F and line your cupcake tin with paper liners. In a large bowl, mix together the flour, sugar, cocoa powder, baking soda, and salt.
In another bowl, whisk the eggs, milk, oil, and vanilla extract until well combined.
Now, pour the wet ingredients into the dry ingredients and stir until you have a smooth batter. Don't overmix! Fill each cupcake liner about two-thirds full with the batter.
Pop the tin in the oven and bake for 18-20 minutes. You'll know they're done when a toothpick inserted in the center comes out clean.
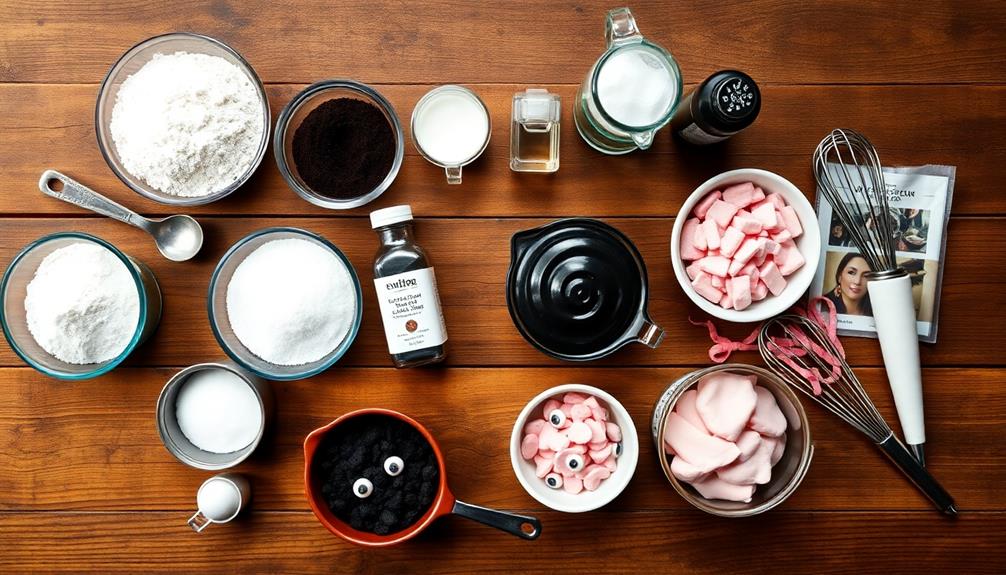
While the cupcakes cool, it's time to make the frosting. Mix butter, powdered sugar, and black food coloring until you get a smooth, deep black frosting.
Once the cupcakes are completely cool, frost them generously. Use candy eyes, licorice whiskers, and fondant ears to create cute cat faces.
Your spooky-sweet treats are ready to serve!
Step 1. Preheat Oven to 350°F

Bakers, get ready to start your culinary journey! The first step in creating your adorable Black Cat Cupcakes is preheating the oven. It's a simple task, but it's crucial for perfect cupcakes.
Set your oven to 350°F (175°C). This temperature is ideal for most cupcake recipes, ensuring they bake evenly and rise properly.
While you're waiting for the oven to heat up, you can gather your ingredients and prepare your baking tools.
Remember, every oven is a bit different. If you know yours runs hot or cool, adjust the temperature slightly. It's always a good idea to use an oven thermometer to double-check the actual temperature inside.
Don't rush this step! A fully preheated oven is key to successful baking. It usually takes about 10-15 minutes for most ovens to reach 350°F.
Use this time wisely to line your cupcake pan with paper liners or grease it if you're not using liners.
Step 2. Mix Dry Ingredients Together
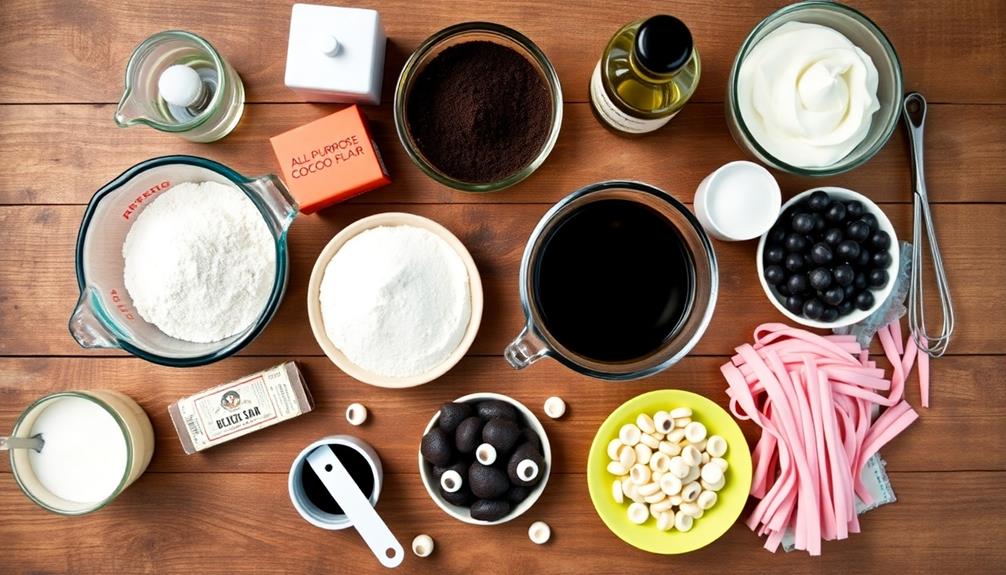
With your oven preheating, it's time to focus on the dry ingredients. You'll need a large mixing bowl to combine all the elements that'll give your cupcakes their fluffy texture and delicious flavor.
Start by measuring out the all-purpose flour, making sure to level it off for accuracy. Next, add the sugar, which will sweeten your cupcakes just right. Don't forget the baking powder and baking soda – these are crucial for helping your cupcakes rise and become light and airy.
Now, it's time to add a pinch of salt. This might seem odd in a sweet recipe, but it actually enhances the other flavors. If you're feeling adventurous, you can also add a dash of cocoa powder for a chocolatey twist.
Once all your dry ingredients are in the bowl, it's time to mix them together. Use a whisk or a fork to blend everything thoroughly. Make sure there aren't any lumps and that all the ingredients are evenly distributed.
This step is important for ensuring your cupcakes have a consistent texture and taste throughout. You're now ready for the next exciting part of making your Black Cat Cupcakes!
Step 3. Mix Wet Ingredients Separately
The wet ingredients play a crucial role in bringing your Black Cat Cupcakes to life. In a separate bowl, you'll combine these ingredients to create a smooth, creamy mixture that'll give your cupcakes their delicious texture.
Start by cracking two large eggs into your bowl. Make sure there aren't any shell pieces! Next, pour in 1/2 cup of vegetable oil and 1 cup of milk. These liquids will help keep your cupcakes moist and fluffy.
Now, it's time to add some sweetness! Measure out 1 cup of granulated sugar and mix it in well. For that extra special touch, add 1 teaspoon of vanilla extract. This will give your cupcakes a lovely aroma and enhance their flavor. If you're feeling adventurous, you can also add a pinch of salt to balance the sweetness.
Using a whisk or electric mixer, blend all these ingredients together until they're well combined. You'll want a smooth, lump-free mixture. Don't overmix, though! Just stir until everything's evenly incorporated.
Now you're ready to combine your wet and dry ingredients to make the perfect Black Cat Cupcake batter!
Step 4. Combine Wet and Dry Mixtures
Now that you've prepared your wet and dry mixtures separately, it's time to bring them together to create your Black Cat Cupcake batter. This step is crucial for achieving the perfect texture and flavor in your cupcakes.
Start by making a well in the center of your dry ingredients. Slowly pour the wet mixture into the well, and use a spatula to gently fold everything together. Don't overmix! Stir just until you can't see any more dry flour. The batter might look a bit lumpy, but that's okay.
Next, grab your black food coloring. Add a few drops at a time, stirring carefully until you reach the desired shade of deep, midnight black. Remember, the batter will darken slightly as it bakes.
Once you're happy with the color, it's time to fill your cupcake liners. Use an ice cream scoop or a 1/4 cup measure to ensure each cup gets the same amount of batter. This will help your cupcakes bake evenly and look uniform when they're done.
Your Black Cat Cupcake batter is now ready for baking!
Step 5. Pipe Frosting Into Cat Shape
Ready to transform your cupcakes into adorable black cats? Let's get started with the fun part – piping the frosting!
First, you'll need a piping bag fitted with a round tip. Fill the bag with your black frosting, making sure there aren't any air bubbles.
Hold the piping bag at a 90-degree angle to the cupcake's surface. Start by creating two pointed ears at the top of the cupcake. Next, pipe a large oval for the cat's face, filling it in completely.
For the eyes, use white frosting to pipe two small circles. Once they're set, add tiny black dots in the center for pupils.
To give your cat some whiskers, use a thin piping tip to draw three lines on each side of the face. Don't worry if they're not perfect – cats have wispy whiskers!
Final Thoughts
Bakers and cat lovers alike will find these Black Cat Cupcakes irresistible. They're not just adorable treats; they're also a fun way to celebrate Halloween or show your love for feline friends any time of year.
You'll be amazed at how simple it's to create these charming cupcakes, and your guests will be impressed by your creativity.
Remember, practice makes perfect when it comes to piping the frosting. Don't worry if your first few cats don't look exactly like you imagined. Each one will have its own unique personality, just like real cats! You can always smooth out any mistakes with a butter knife or spatula.
These cupcakes are perfect for parties, bake sales, or just as a special treat for yourself. You can even get creative with the flavors, using different cake batters or frosting colors to make a whole litter of cat cupcakes. The possibilities are endless!
Caterina, with her background as a food scientist and innovative chef, is the driving force behind our product development. Her keen eye for detail and relentless pursuit of perfection guide her as she curates our collection of extraordinary ingredients, beverages, and culinary experiences. Whether she’s sourcing the rarest spices or collaborating with master artisans, Caterina’s passion for elevating the culinary landscape shines through in every new discovery that graces our shelves.
Halloween-themed Recipes
Zombie Finger Hot Dogs
Frightful and fun, zombie finger hot dogs transform ordinary wieners into spooky Halloween treats. But can you stomach these creepy creations?
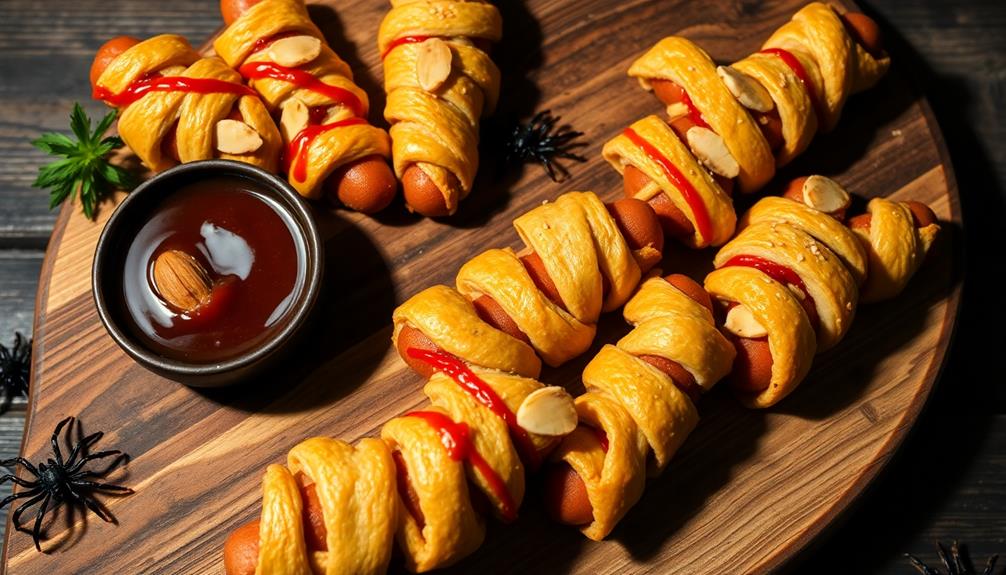
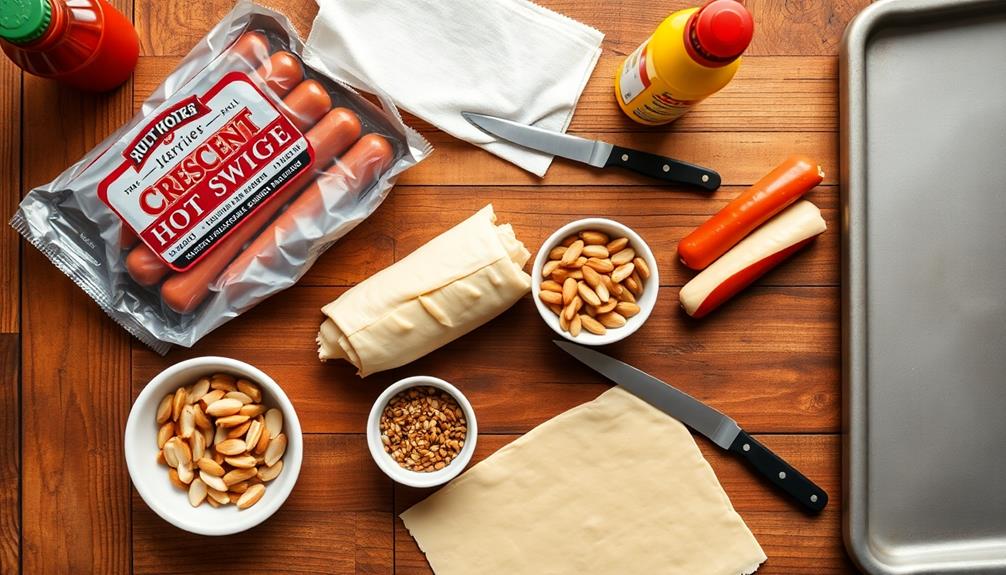
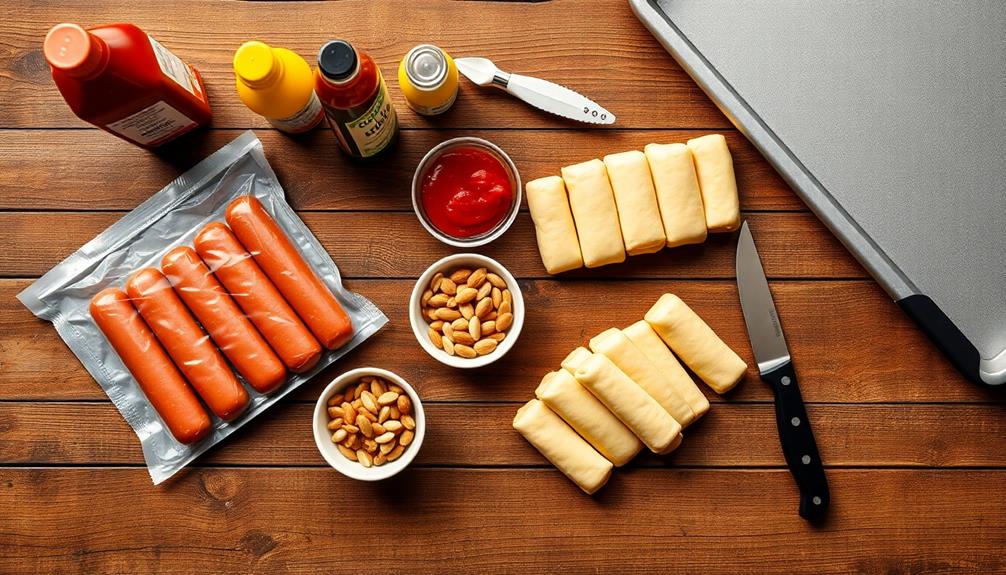
Zombie finger hot dogs are a spooky and delicious Halloween treat you'll love making! These creepy snacks emerged in the early 2000s, inspired by zombie movies. To create them, you'll slice hot dogs lengthwise, insert almond "fingernails," and wrap them in pastry dough. After brushing with egg wash, you'll bake them until golden brown. The result? Realistic-looking zombie fingers that are both fun and tasty. You can get creative with condiments like ketchup for "blood" or green food coloring for "mold." These ghoulish goodies are sure to be a hit at your next Halloween party. Discover how easy it is to whip up these frightfully good snacks!
Key Takeaways
- Zombie Finger Hot Dogs are Halloween-themed treats made from hot dogs, pastry dough, and almonds for fingernails.
- They originated in the early 2000s, inspired by zombie pop culture, and became a popular Halloween party food.
- The process involves slicing hot dogs lengthwise, inserting almond "fingernails," and wrapping them in pastry dough.
- Creative details like ketchup for blood and textured dough for a decaying appearance enhance the spooky effect.
- Baked until golden brown, these treats offer a fun, tasty, and visually striking addition to Halloween festivities.
History
Since the early 2000s, zombie finger hot dogs have been a popular Halloween party food. You've probably seen these creepy treats at spooky gatherings or even made them yourself. They're a fun twist on the classic hot dog, designed to look like severed fingers – perfect for giving your guests a delicious fright!
The idea for zombie finger hot dogs came from creative party planners who wanted to make Halloween snacks more exciting. They took inspiration from the rising popularity of zombie movies and TV shows. By combining this trend with a beloved American food, they created a hit that's stood the test of time.
You'll find that these ghoulish goodies have evolved over the years. At first, they were simple hot dogs with an almond "fingernail" stuck on the end.
Now, you'll see versions with realistic-looking skin made from cheese, ketchup "blood," and even edible eyeballs! Some people have taken it further, creating entire "hands" out of linked sausages.
It's amazing how a simple idea has grown into a Halloween staple that kids and adults alike can't get enough of.
Cooking Steps
To create these spooky zombie finger hot dogs, you'll need to follow three main steps.
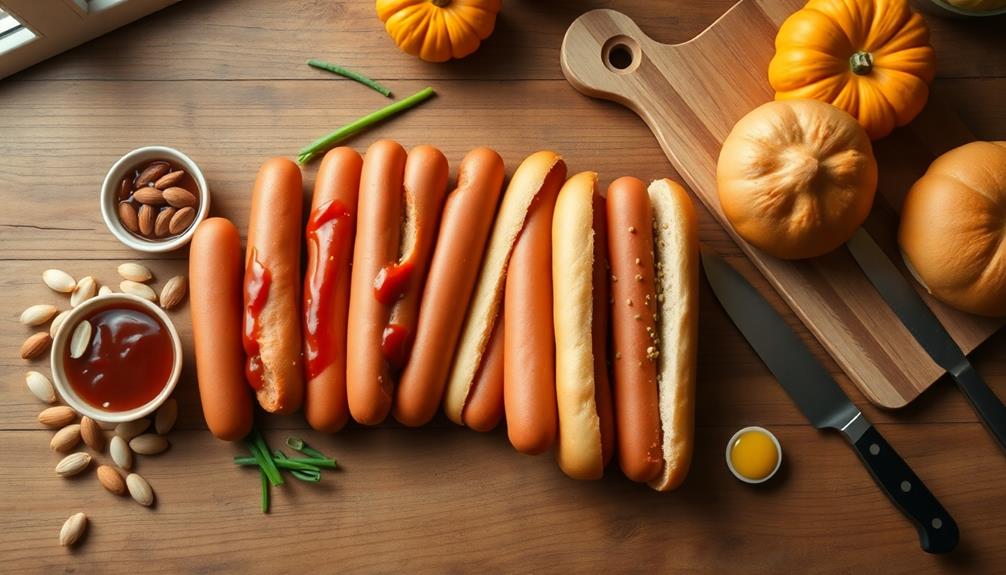
First, prepare your hot dogs by cutting them in half lengthwise, leaving about an inch uncut at one end. This will create the "finger" shape. Next, use a small knife to carefully carve knuckle lines into the hot dog's surface. Don't worry if they're not perfect – it'll add to the creepy effect!
Second, it's time to cook your zombie fingers. You can either grill them for a few minutes on each side or pan-fry them in a skillet until they're nicely browned.
Keep an eye on them to make sure they don't burn.
Step 1. Slice Hot Dogs Lengthwise
Carefully slice each hot dog lengthwise, stopping about 1/2 inch from the end. This step is crucial for creating those spooky zombie fingers! You'll want to use a sharp knife and take your time to ensure a clean cut. Don't worry if it's not perfect – zombies aren't known for their manicures!
Once you've made the initial cut, gently spread the hot dog open. It should look a bit like a butterfly when you're done. This will give you more surface area to work with and help the hot dog cook evenly. Plus, it'll make your zombie fingers extra creepy!
Now, you can get creative with your cuts. Try making small, diagonal slices along the edges to create knuckle-like bumps. Or, if you're feeling adventurous, carve out tiny nail shapes at the tips. Remember, the goal is to make these hot dogs look as finger-like as possible. The more detail you add, the spookier your zombie fingers will be!
Don't forget to have fun with this step. It's all about unleashing your inner mad scientist and bringing those undead digits to life!
Step 2. Insert Almond Fingernails

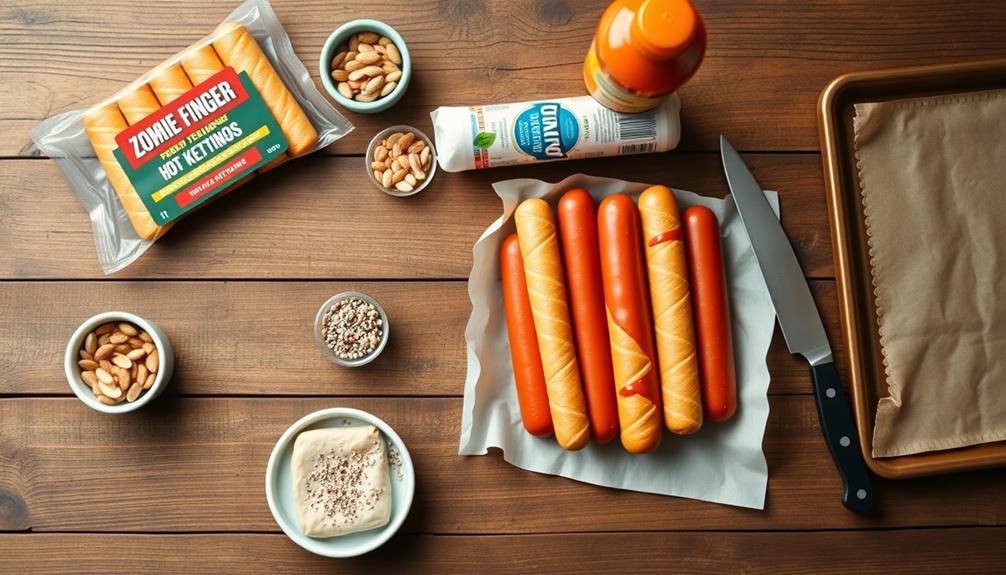
Now that you've sliced your hot dogs, it's time to give them some creepy claws! Grab a bag of whole, blanched almonds and get ready to transform your hot dogs into spooky zombie fingers.
For each hot dog piece, you'll need one almond. Take an almond and carefully press it into the rounded end of the hot dog slice. The almond's pointed tip should stick out slightly, creating a realistic fingernail effect.
If the almond doesn't stay in place, you can use a small knife to make a tiny slit in the hot dog first. This will help the almond fit snugly.
As you insert the almonds, make sure they're all facing the same direction for a uniform look. You can adjust them slightly to create a more natural appearance.
If you want extra creepy fingers, try using different sizes of almonds or even cutting some at angles for broken nail effects.
Once you've added all the almond fingernails, your zombie fingers are ready for the next step in their ghoulish transformation. These edible fingernails will add the perfect touch of horror to your spooky hot dog creation!
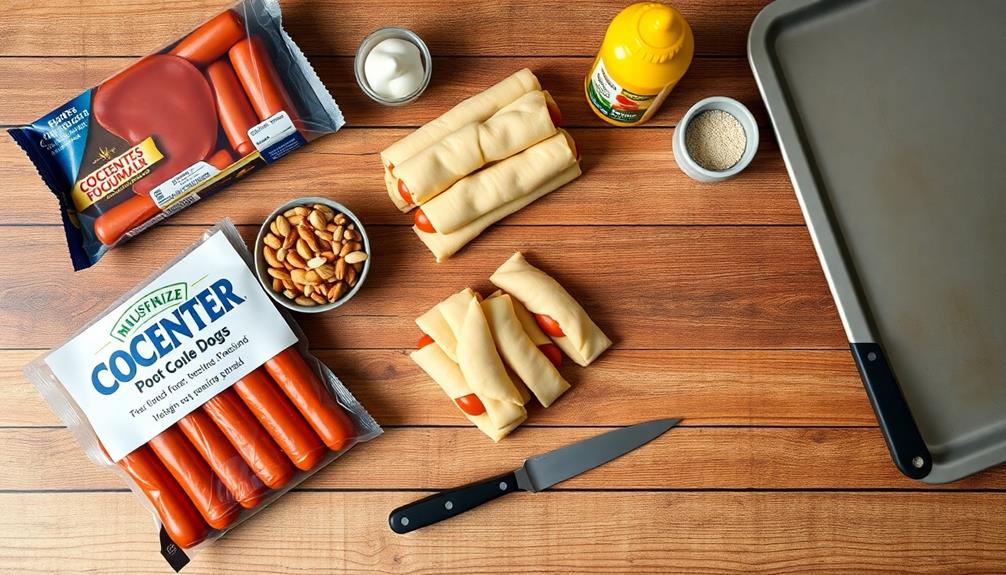
Step 3. Wrap in Pastry Dough
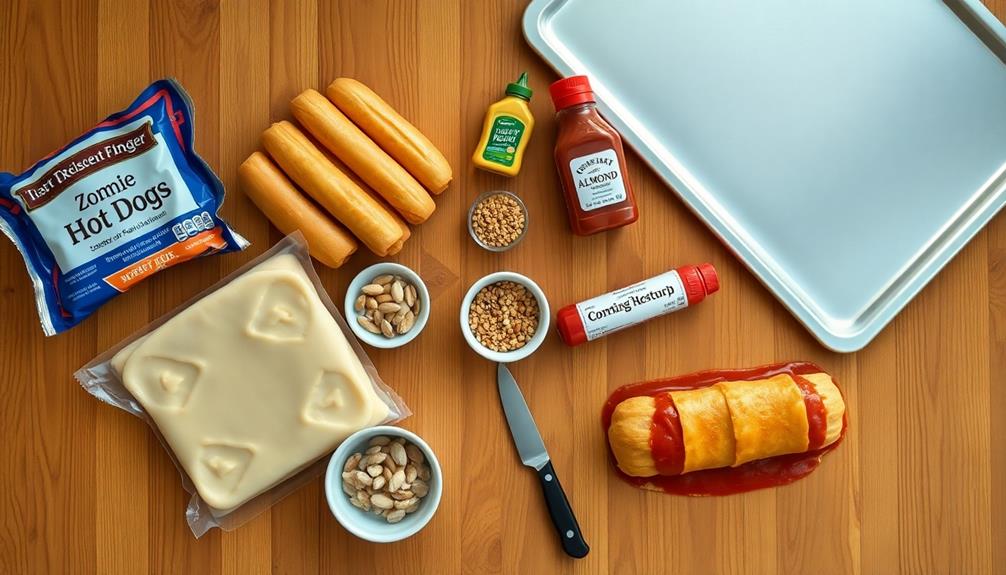
The next step in creating your zombie finger hot dogs involves wrapping them in pastry dough. It's time to give your spooky snacks their eerie, flesh-like appearance!
Start by rolling out your favorite pastry dough on a lightly floured surface. You'll want it to be about 1/8 inch thick.
Cut the dough into long, thin strips, about 1/2 inch wide and 6 inches long. These strips will become the zombie skin!
Now, carefully wrap each hot dog with a strip of dough, starting at one end and spiraling your way up. Make sure to leave a small gap at the top for the almond fingernail you inserted earlier.
As you wrap, create some wrinkles and folds in the dough. This will give your zombie fingers a more realistic, decaying look.
Don't worry if it's not perfect – zombies aren't known for their smooth skin!
Once you've wrapped all your hot dogs, place them on a baking sheet lined with parchment paper.
Before popping them in the oven, brush each wrapped hot dog with a beaten egg. This will give them a golden, ghoulish glow when baked.
Step 4. Brush With Egg Wash

An egg wash is the secret to achieving that perfect golden-brown sheen on your zombie finger hot dogs. It's super easy to make and apply! You'll need one egg and a tablespoon of water. Crack the egg into a small bowl and add the water. Whisk them together until they're well combined.
Now, grab a pastry brush. If you don't have one, don't worry! You can use a clean paintbrush or even a folded paper towel. Dip your brush into the egg wash and gently brush it over the pastry-wrapped hot dogs. Make sure you cover all the exposed dough, but don't soak it.
The egg wash does two important things. First, it gives your zombie fingers that spooky, glossy look when they're baked. Second, it helps the dough stick together, so your creations don't fall apart in the oven.
If you want to get extra creative, you can sprinkle some sesame seeds or poppy seeds on top of the egg wash. They'll stick to the dough and look like creepy skin texture!
Step 5. Bake Until Golden Brown
With your zombie finger hot dogs prepped and egg-washed, it's time to bake them to perfection. Preheat your oven to 375°F (190°C) and line a baking sheet with parchment paper. Carefully place your creepy creations on the sheet, leaving some space between each one.
Slide the baking sheet into the middle rack of your oven. You'll want to bake these spooky treats for about 15-20 minutes. Keep an eye on them as they cook! You're looking for that perfect golden-brown color that'll make your zombie fingers look deliciously undead.
As they bake, you might notice a wonderful aroma filling your kitchen. That's the smell of success! When the hot dogs are nicely browned and the dough is cooked through, it's time to take them out. Use oven mitts to remove the baking sheet and set it on a heat-safe surface.
Let your zombie finger hot dogs cool for a few minutes before serving. They'll be hot, so be careful! Once they're cool enough to handle, arrange them on a platter and get ready to impress your guests with these ghoulishly good treats.
Final Thoughts
Don't be afraid to experiment with different condiments for blood or pus effects. Ketchup works great for blood, while mustard can make a convincing pus.
You can even add some green food coloring to mayonnaise for a moldy look. The possibilities are endless!
These Zombie Finger Hot Dogs aren't just fun to make, they're delicious too. The combination of soft, warm bread and savory hot dog is a classic that everyone loves.
Caterina, with her background as a food scientist and innovative chef, is the driving force behind our product development. Her keen eye for detail and relentless pursuit of perfection guide her as she curates our collection of extraordinary ingredients, beverages, and culinary experiences. Whether she’s sourcing the rarest spices or collaborating with master artisans, Caterina’s passion for elevating the culinary landscape shines through in every new discovery that graces our shelves.
Halloween-themed Recipes
Eyeball Deviled Eggs
Ghoulishly clever and deliciously spooky, eyeball deviled eggs transform a classic appetizer into Halloween party perfection. But can you stomach the
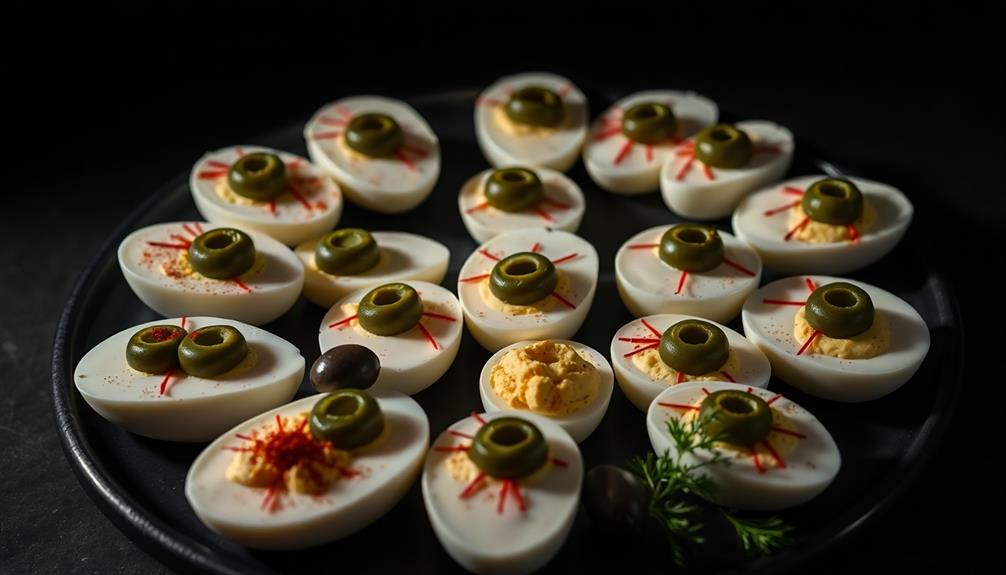
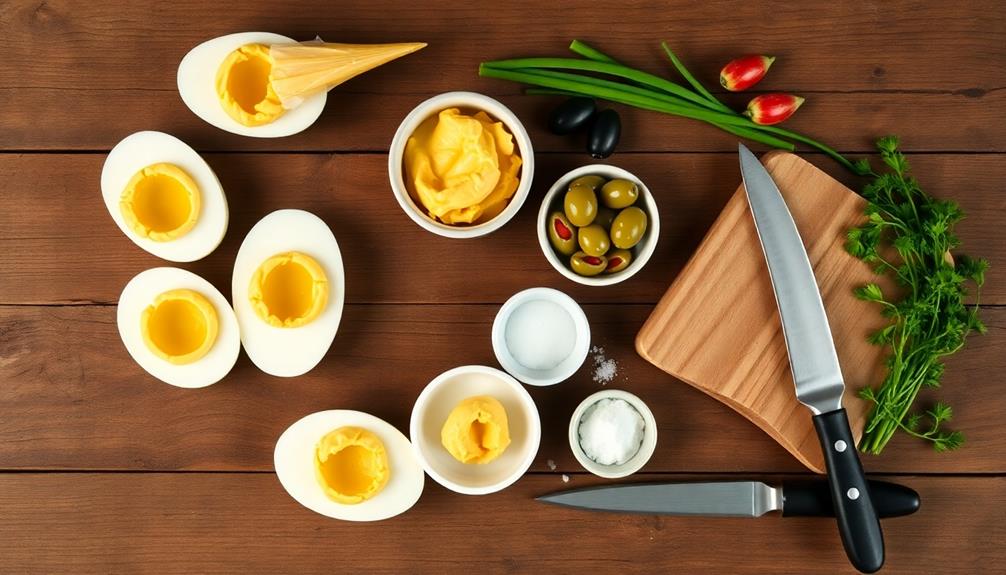
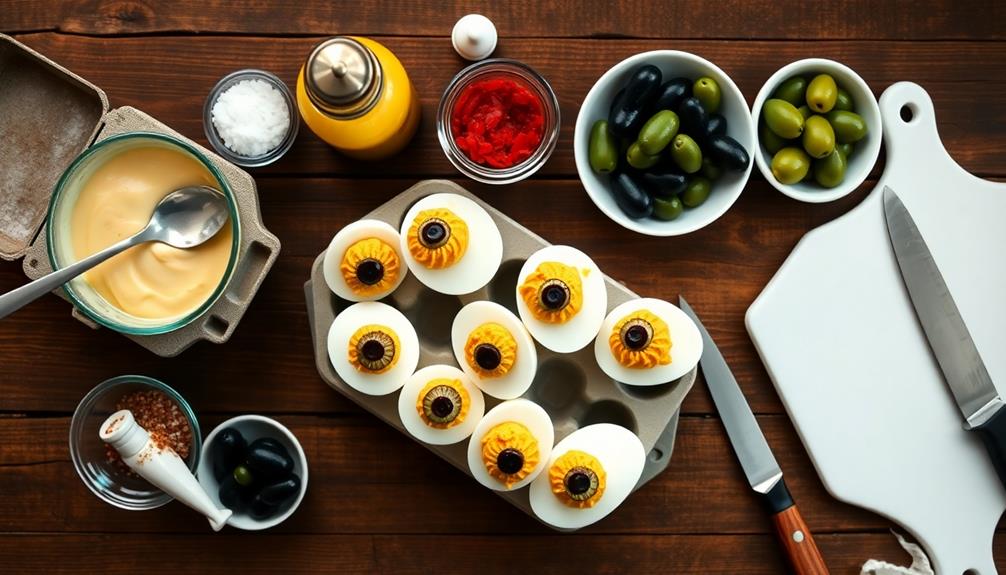
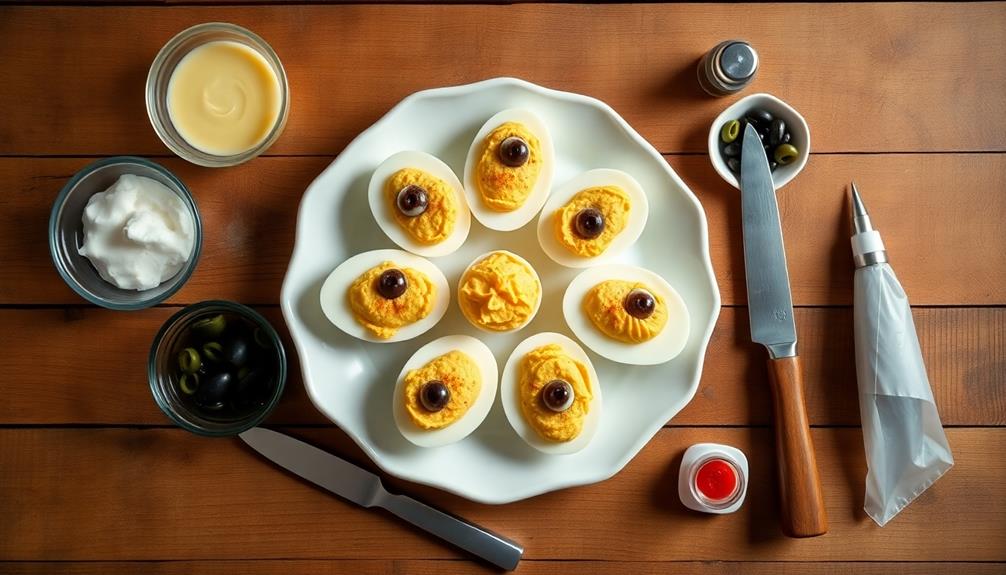
You'll love making eyeball deviled eggs, a spooky twist on a classic appetizer that's perfect for Halloween parties. Start by boiling eggs, then carefully halve them and remove the yolks. Mix the yolks with mayo, mustard, and spices for a creamy filling. Pipe the mixture back into the egg whites, creating a rounded surface. Add sliced black olives for pupils, and use red bell peppers to create bloodshot veins. Arrange your creepy creations on a platter with some fake spider webs for extra flair. These fun and tasty treats will be the talk of your Halloween bash. Discover how easy it is to turn ordinary deviled eggs into eye-catching masterpieces!
Key Takeaways
- Eyeball deviled eggs are a spooky Halloween twist on traditional deviled eggs using creative garnishes.
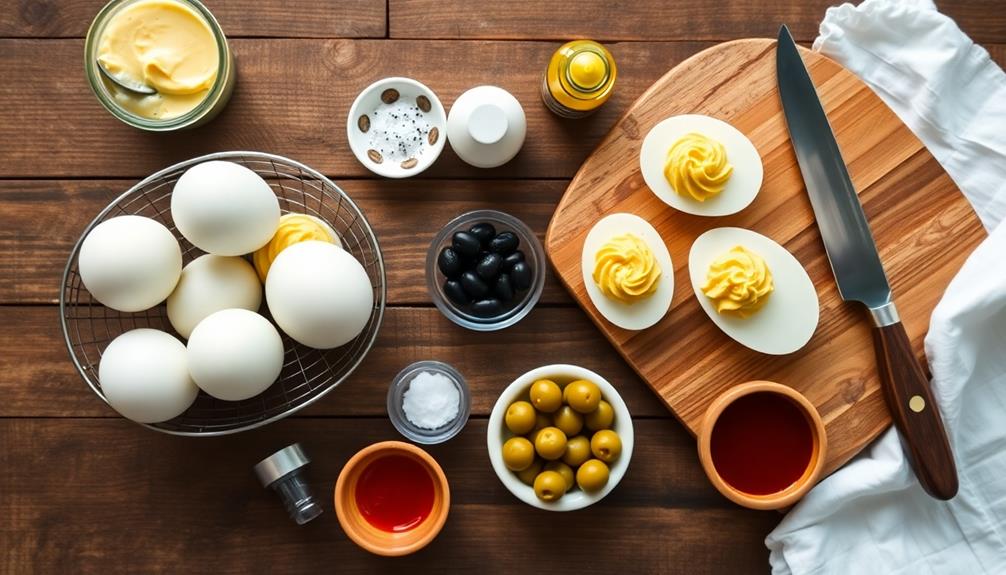
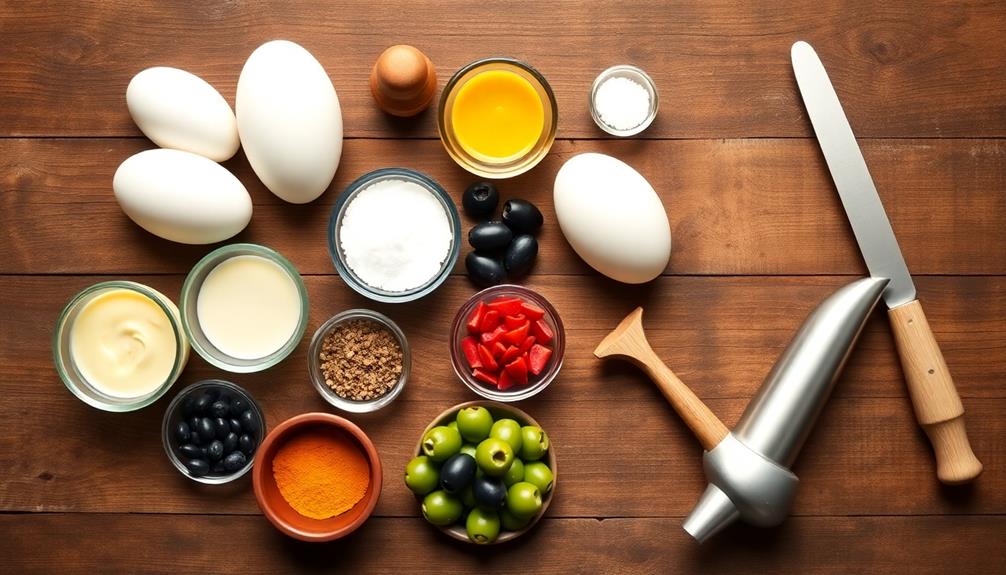
- Key ingredients include boiled eggs, mayonnaise, mustard, and black olives for the pupils.
- The recipe involves boiling eggs, mixing yolks with fillings, and piping the mixture back into egg whites.
- Black olive slices create pupils, while optional red bell peppers add a bloodshot effect.
- These themed appetizers are popular for Halloween parties and can be made ahead of time.
History
Eyeball deviled eggs have no specific historical origin, but they're a fun Halloween twist on traditional deviled eggs. You've probably seen these spooky treats at Halloween parties or on social media. They've become increasingly popular over the past few decades as people look for creative ways to celebrate the holiday.
The idea behind eyeball deviled eggs likely came from combining two things: the classic deviled egg recipe and the Halloween tradition of creating creepy food. Deviled eggs themselves have been around for centuries, with recipes dating back to ancient Rome.
But it wasn't until the 1940s that the term "deviled egg" became common in the United States. As Halloween parties grew more elaborate in the late 20th century, people started getting creative with their food presentations.
That's when eyeball deviled eggs likely emerged. Clever cooks realized they could turn the yellow yolk filling into an "iris" and add an olive or other garnish for the "pupil." The result? A deliciously spooky treat that's perfect for your Halloween spread!
Cooking Steps
To create these spooky treats, you'll need to follow three main steps.
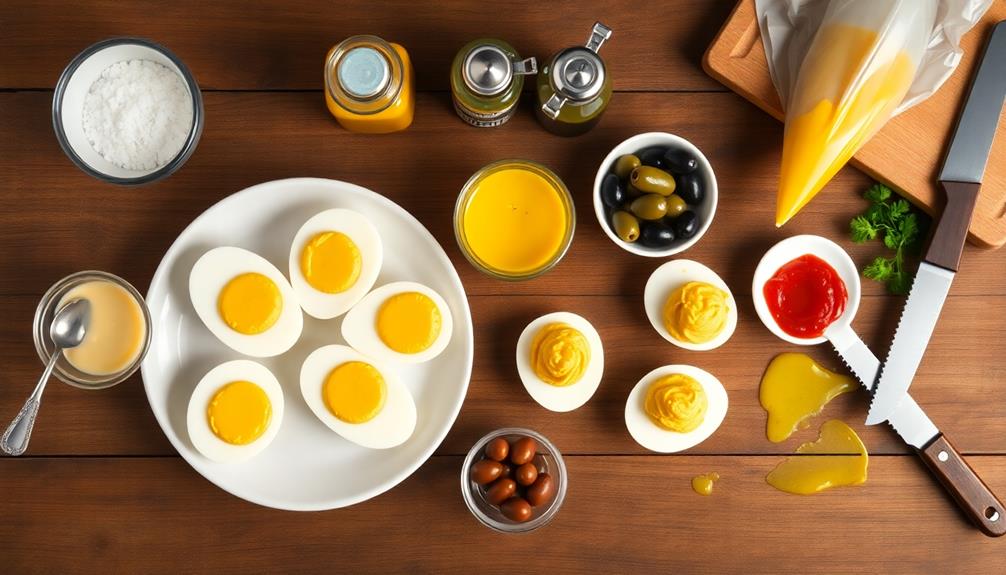
First, boil your eggs until they're hard. Once they're cool, carefully peel off the shells. Cut each egg in half lengthwise and scoop out the yolks into a bowl.
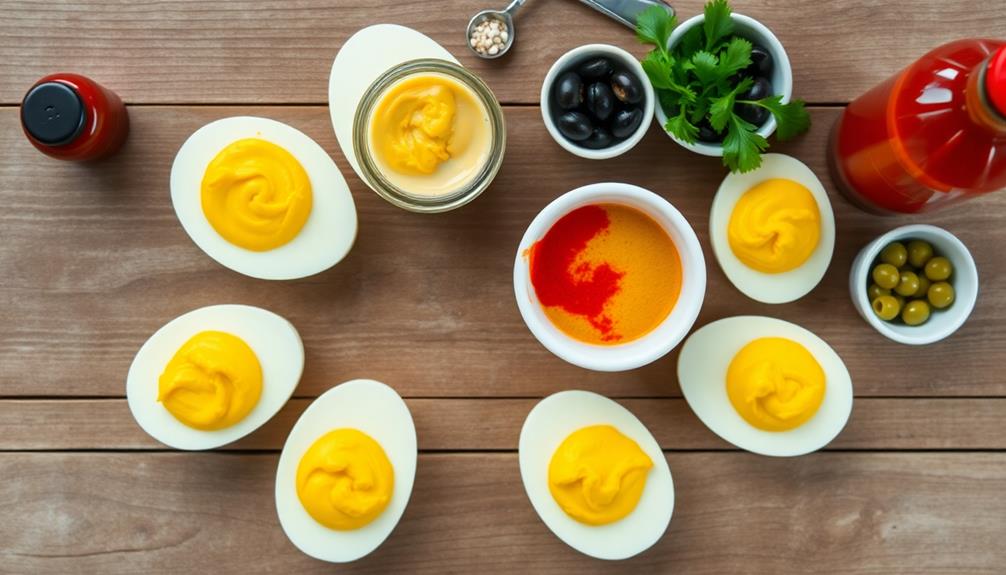
Next, it's time to make the filling. Mash the yolks with a fork and mix in mayonnaise, mustard, salt, and pepper. You can add a little paprika for extra flavor if you'd like. Spoon or pipe this mixture back into the egg white halves.
Finally, let's turn these deviled eggs into eyeballs! Place a small slice of black olive in the center of each yolk to create the "pupil."
Then, use thin strips of red bell pepper to make "veins" radiating out from the center. For an extra creepy touch, you can add a drop of red food coloring around the olive to make the eye look bloodshot.
Arrange your eyeball deviled eggs on a platter, and you're ready to serve! Your guests will be both impressed and spooked by these eerie-looking treats.
Step 1. Prepare Boiled Eggs
Before diving into the spooky creation, you'll need to start with perfectly boiled eggs. To begin, carefully place your eggs in a pot and cover them with cold water. Make sure there's about an inch of water above the eggs.
Next, put the pot on the stove and turn the heat to high. Once the water starts to boil, set a timer for 9 minutes.
While you're waiting, prepare a bowl of ice water. When the timer goes off, use a slotted spoon to quickly transfer the eggs to the ice bath. This stops the cooking process and helps prevent that green ring around the yolk. Let the eggs cool in the ice water for about 5 minutes.
Now comes the tricky part – peeling the eggs. Gently tap each egg on the counter to crack the shell all over. Start peeling from the larger end, where there's usually an air pocket.
If you're having trouble, try peeling the eggs under running water. This can help separate the shell from the egg white. Once you've peeled all your eggs, you're ready to move on to the next step in creating your eyeball deviled eggs!
Step 2. Halve Eggs and Remove Yolks
With your perfectly boiled and peeled eggs ready, it's time to transform them into spooky eyeballs.
Grab a sharp knife and carefully slice each egg in half lengthwise. You'll want to make sure your cuts are clean and even, so take your time with this step.
Once you've halved all the eggs, it's time to remove the yolks.
Gently squeeze each egg half over a medium-sized bowl. The yolk should pop out easily, but if it's stubborn, you can use a small spoon to scoop it out. Be careful not to damage the egg white "eyeball" as you work.
As you remove the yolks, place the empty egg white halves on a clean plate or tray.
Once you've removed all the yolks, you'll have a bowl full of yellow centers and a plate of white egg halves. These hollow egg whites will serve as the perfect canvas for your creepy eyeball creations.
Don't worry if some of the whites tear slightly – you can always use those for taste-testing later!
Step 3. Mix Yolk Filling Ingredients
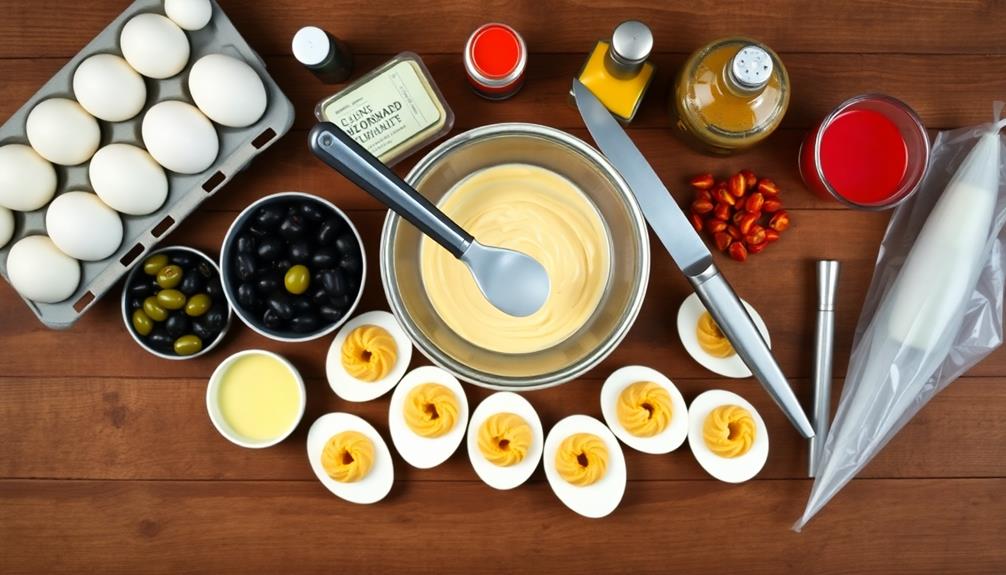
Now that you've separated the yolks, it's time to create the creepy filling for your eyeball deviled eggs. Grab a medium-sized bowl and place the yolks inside. Using a fork, mash the yolks until they're smooth and crumbly. This will help your filling mix evenly and prevent any lumps.
Next, add mayonnaise to the bowl. It'll give your filling a creamy texture and help bind everything together. Squirt in some mustard for a tangy kick, and sprinkle in salt and pepper to taste.
If you want to make your eyeballs extra spooky, add a drop of green food coloring to give them an eerie glow.
Now, it's time to mix! Use your fork or a small whisk to blend all the ingredients thoroughly. Keep stirring until the mixture is smooth and creamy, with no lumps in sight.
If it seems too thick, add a tiny bit more mayonnaise. If it's too runny, sprinkle in some extra yolk. Once you're happy with the consistency, give it a taste test. Adjust the seasoning if needed, and get ready to fill those egg white "eyeballs"!
Step 4. Pipe Filling Into Egg Whites
The filling's ready, so let's turn those egg whites into spooky eyeballs. Grab your piping bag and fill it with the yolk mixture. If you don't have a piping bag, don't worry! You can use a zip-top plastic bag with a corner snipped off instead.
Hold the bag over an egg white half and gently squeeze. Start from the center and work your way out in a circular motion. Fill each egg white cavity, creating a smooth, rounded surface. This will be the "eyeball" part of your creepy treat.
As you pipe, make sure you're applying even pressure. If the filling comes out too fast, you might overfill the egg whites. Go slowly and steadily for the best results. If you make a mistake, simply scoop out the filling and try again.
Once you've filled all the egg whites, take a step back and admire your work. You've just created the base for your eyeball deviled eggs!
They're already starting to look eerie, but we're not done yet. The next step will really bring these spooky snacks to life!
Step 5. Add Olive Pupils
Let's dive into the next step: adding olive pupils to your deviled egg eyeballs. This is where your creepy creations really come to life! You'll need some black olives for this part, so make sure you've got them ready.
Start by draining the olives and patting them dry with a paper towel. Then, carefully slice them into thin rounds. You'll want to choose the best-looking slices for your pupils.
Next, gently place one olive slice in the center of each deviled egg, pressing it down slightly so it sticks to the filling. For an extra spooky touch, you can use a toothpick to adjust the position of the olive "pupil." This will help you create different expressions for your eyeballs. Some can look straight ahead, while others can glance to the side for a more eerie effect.
If you want to go all out, you can use small pieces of red bell pepper to create bloodshot veins around the pupils. Just arrange them carefully on the white part of the egg for a truly gruesome look!
Final Thoughts
These spooky Eyeball Deviled Eggs are sure to be a hit at your next Halloween party or themed event. They're not only delicious but also a fun and creative way to add some Halloween flair to your table.
You'll love how easy they're to make, and your guests will be impressed by your culinary skills.
Remember, you can always experiment with different ingredients to create your own unique eyeball designs. Try using different types of olives, or even small pieces of vegetables like red peppers for a bloodshot effect.
Don't be afraid to get creative!
When serving, arrange your Eyeball Deviled Eggs on a platter with some spooky decorations around them. You could add fake spider webs, plastic spiders, or even some green lettuce leaves to make it look like they're peeking out from a monster's lair.
These creepy treats are perfect for both kids and adults. They're a great way to get everyone into the Halloween spirit while enjoying a tasty snack.
Caterina, with her background as a food scientist and innovative chef, is the driving force behind our product development. Her keen eye for detail and relentless pursuit of perfection guide her as she curates our collection of extraordinary ingredients, beverages, and culinary experiences. Whether she’s sourcing the rarest spices or collaborating with master artisans, Caterina’s passion for elevating the culinary landscape shines through in every new discovery that graces our shelves.


15 Best Rated Espresso Machines With Grinders for Coffee Lovers in 2024
Uncover the top 15 espresso machines with grinders for coffee enthusiasts in 2024 and find out which one will elevate...


3 Best Espresso Machines Under $1000 That Will Elevate Your Coffee Game
Discover the top three espresso machines under $1000 that will transform your coffee experience—each one offers unique features you won't...


15 Best Cheap Espresso Machines With Grinders That Won’t Break the Bank
You won't believe the affordable espresso machines with grinders that can elevate your coffee game—discover the top 15 models that...


11 Best Super Automatic Espresso Machines Under $1500 – Brew Like a Barista at Home
Perfect your coffee experience with the 11 best super automatic espresso machines under $1500, but which one will elevate your...


15 Best Espresso Machines of 2024 – Brew Perfect Coffee at Home
See the top 15 espresso machines of 2024 that promise to elevate your home brewing experience—find out which one suits...


9 Best Ground Coffees for Your Espresso Machine: Brew Like a Barista at Home
The ultimate guide to the 9 best ground coffees for your espresso machine awaits, revealing secrets to brew like a...


10 Best Espresso Machines of 2023, According to Reddit Users
Uncover the top 10 espresso machines of 2023, as recommended by Reddit users, and discover which one might be your...


15 Best Tips for Making the Perfect Latte With Your Breville Espresso Machine
If you're ready to elevate your latte-making skills, discover the 15 best tips to achieve café-quality drinks at home that...


15 Best Espresso Machines for Home Use: Brew Barista-Quality Coffee at Home
You'll discover the top 15 espresso machines that will elevate your coffee game at home, but which one is perfect...


15 Best Espresso Machines for Home in 2024 – Brew Barista-Quality Coffee at Home
Uncover the top 15 espresso machines of 2024 that promise barista-quality coffee at home—discover which one will elevate your brewing...


14 Best Full Auto Espresso Machines for Effortless Cafe-Quality Brews at Home
Hunt for the ultimate full auto espresso machine that transforms your home brewing experience; discover which models make café-quality coffee...


15 Best Mid-Priced Espresso Machines for Crafting Café-Quality Coffee at Home
You won't believe the quality these 15 mid-priced espresso machines can bring to your home brewing experience—discover your perfect match...
-

 Italian Cuisine5 months ago
What Italian Dishes Use Parsley
-

 Vetted4 months ago
12 Best Coffee Pods for DeLonghi Espresso Machine to Elevate Your Caffeine Game
-

 Vetted4 months ago
15 Best Commercial Automatic Espresso Machines for Your Coffee Shop
-

 Vetted2 months ago
15 Best Coffee Beans for Your Breville Espresso Machine – Expert Picks for Perfect Brews
-

 Vetted2 months ago
15 Best Coffee Beans to Elevate Your Breville Espresso Experience
-

 Vetted4 months ago
15 Best ESE Pod Espresso Machines for Perfect Coffee Every Time
-

 Vetted2 months ago
15 Best Fully Automatic Espresso Machines Under $1000 for Coffee Lovers on a Budget
-

 Italian Cuisine4 months ago
Cheesy Polenta: A Creamy Italian Side Dish