
To perfect your latte art skills at home, focus on achieving a smooth milk texture by using whole milk or barista blends. Keep your pitcher close to the coffee’s surface while pouring to manage surface tension. A second pitcher helps reduce bubbles for a finer texture. Start pouring aggressively, then switch to a gentle flow for detailing designs. Mistakes are learning opportunities, and with persistence, your skills will improve over time. There’s more you can explore to elevate your technique!
Key Takeaways
- Choose high-fat content milk, like whole cow’s milk or barista blends, for optimal frothing and creamy texture in your latte art.
- Master your pouring technique by keeping the pitcher close to the coffee surface and adjusting angles for better control over designs.
- Use a second pitcher to transfer milk, which reduces bubbles and enhances aeration for a smoother texture.
- Start with simple designs and progressively practice complex techniques, documenting your sessions to track improvement and refine skills.
- Watch online tutorials to learn specific pouring movements and techniques, allowing you to mimic and practice effectively at home.
Understanding the Importance of Milk Texture

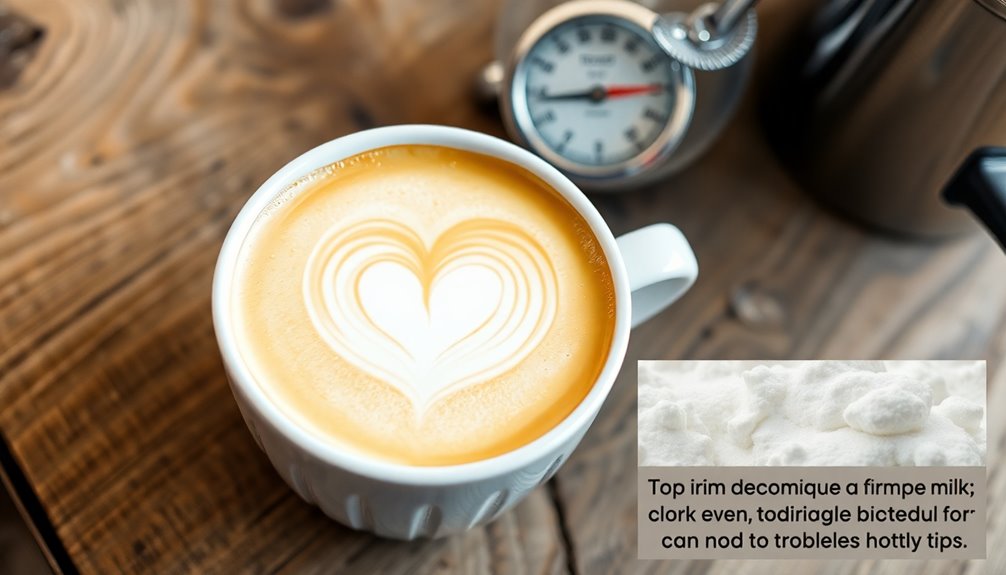
When you’re aiming to create stunning latte art, understanding milk texture is vital. The right milk texture allows you to achieve that smooth, glossy finish important for intricate designs.
To get there, limit aeration during steaming to just 1-2 seconds to avoid excessive bubbles. You want your milk to resemble glossy paint, which indicates proper frothing without too much air.
Establish a vortex in your milk pitcher while steaming; this guarantees uniform texture and heat distribution, making the milk hot to the touch.
Remember, clumpy milk signifies over-aeration and must be avoided. A smooth, well-frothed milk texture is key for achieving those high-contrast designs that wow everyone. Additionally, incorporating essential oils like lavender for relaxation can elevate the overall sensory experience of your latte.
Master the milk texture, and your latte art will flourish!
Managing Surface Tension for Better Designs

To create stunning latte art, managing surface tension is essential for achieving those intricate designs you crave. If you overpour while creating your base, excessive surface tension can inhibit the flow and detail of your design.
To maintain low surface tension, focus on pouring with a smooth, glossy milk texture, which enhances contrast and visibility in your art. Start by tilting the cup and keeping the pitcher close to the milk’s surface; this helps you manage surface tension effectively.
With practice, you’ll develop a technique that allows for a controlled pour, reducing surface tension and improving design flow. As your confidence grows, you’ll find it easier to execute small, detailed patterns without frustration. Understanding the brewing methods can also enhance your overall coffee experience and make your latte art even more enjoyable.
The Benefits of Using a Second Pitcher

Using a second pitcher when frothing milk can really elevate your latte art game.
It helps reduce bubbles and clumping, giving you that smooth texture essential for beautiful designs.
Plus, transferring the milk allows for better aeration and improved pouring consistency, making it easier to create intricate patterns. Additionally, incorporating chia seeds into your morning routine can provide a nutritious boost to start your day right.
Enhanced Milk Texture
While many baristas may overlook the importance of a second pitcher, it can be a game-changer for achieving enhanced milk texture in your latte art.
By transferring frothed milk into a second pitcher, you greatly reduce bubbles and clumping, resulting in a smoother, more consistent texture. This glossy, paint-like consistency is essential for creating beautiful designs atop your espresso shot.
Using a larger pitcher also improves aeration control, allowing better management of air incorporation for that perfect texture.
Although the extra cleanup might seem intimidating, the benefits of improved milk texture lead to more successful latte designs, especially for beginners.
Plus, practicing with a second pitcher helps you develop muscle memory and refine your pouring techniques over time. Additionally, understanding the importance of color accuracy can enhance your overall presentation, making your latte art even more visually appealing.
Improved Pouring Consistency
One of the key benefits of employing a second pitcher is the significant improvement in your pouring consistency. By transferring frothed milk to a second pitcher, you can eliminate clumps and achieve a smoother texture, essential for intricate latte art. This technique is especially valuable for beginners, as it helps build confidence in your pouring skills.
| Aspect | Benefit |
|---|---|
| Milk Texture | Smoother and creamier |
| Clump Elimination | Glossy, paint-like finish |
| Control Over Frothing | Enhanced pouring consistency |
| Cleanup | Minimal compared to benefits |
| Skill Development | Boosts confidence |
Utilizing a second pitcher may require extra cleanup, but the improved pouring consistency leads to visually appealing and successful designs. Additionally, mastering this technique can enhance your overall coffee preparation skills, allowing you to create café-quality beverages at home.
Reduced Bubbles and Clumping
Transferring milk to a second pitcher can greatly reduce bubbles and clumping, resulting in a smoother texture that’s essential for creating stunning latte art.
This technique gives you better control over your milk steaming, allowing for a more consistent, glossy finish. By using a larger second pitcher, you can create a vortex while frothing, which helps achieve that paint-like consistency you’re aiming for.
Additionally, this transfer process encourages muscle memory, as it provides more practice in handling the pitcher. While it may seem like extra cleanup, the improved milk texture and easier pouring will enhance the quality of your latte art.
Ultimately, the benefits outweigh the drawbacks, making it a worthwhile technique to master. Furthermore, using a technique similar to herbal infusion machines that ensures consistency can elevate your overall coffee-making skills.
Optimizing Your Pouring Technique

To create stunning latte art, mastering your pouring technique is essential.
Start by tilting your cup at a 45-degree angle; this dynamic flow helps control your design. Keep the pitcher spout close to the coffee surface, particularly near the center, for a smooth pour.
Begin pouring from a height, allowing the milk to sink into the espresso before lowering the pitcher to shape your art. As you near the end, maintain a steady, aggressive pour to build layers without stiffening the milk.
For designs like the tulip, land the pitcher in the center, gently push forward, and layer again.
Incorporating high water content from ingredients like celery juice can enhance the overall richness of your beverage and improve its texture.
With practice and your espresso machine, you’ll create beautiful latte art that impresses every time.
Choosing the Right Materials for Latte Art

To create stunning latte art, you need the right materials.
Start by selecting milk with higher fat content for a creamy texture and choose equipment that enhances your pouring technique.
A quality milk pitcher and frothing tool will make all the difference in achieving those beautiful designs. Additionally, using higher fat content milk can help create a velvety microfoam that is ideal for intricate latte art.
Essential Milk Choices
When it comes to perfecting your latte art, the choice of milk plays a crucial role in achieving the best results.
Opt for whole cow’s milk or specialized barista blends, as their higher fat content provides a creamier texture essential for smooth designs.
Steer clear of low-fat or non-dairy milk options that aren’t designed for frothing, as they can lead to unstable foam.
- A larger milk pitcher improves aeration and control.
- A shallow cup makes it easier to access the coffee surface.
- A French press or handheld frother effectively incorporates air.
Additionally, choosing the right milk can enhance scalp health by ensuring a stable and consistent foam, much like how glycolic acid can promote scalp health through exfoliation.
Ideal Equipment Selection
Selecting the right equipment is essential for mastering latte art. Start with a milk pitcher that aligns with your pouring style; larger pitchers offer better control and consistency when frothing milk.
Choose higher-fat milk, like whole milk or barista blends, for a creamier texture that enhances your art. For practice, use a shallow cup; it allows easier access to the coffee’s surface for precise pouring.
To froth milk, consider a French press or a handheld milk frother. The French press heats and pumps the milk, while the handheld frother quickly creates foam.
Finally, keep instant coffee handy as an alternative to espresso, mixing it with hot water for a suitable practice base. With the right tools, your latte art skills will flourish! Additionally, ensure proper airflow around the unit when using an air purifier to maintain optimal performance in your workspace.
Troubleshooting Common Milk Texture Issues
While mastering latte art, you might encounter some common milk texture issues that can hinder your progress.
To help you troubleshoot, keep these tips in mind:
- If your milk’s too thick, limit aeration to 1-2 seconds during frothing.
- For thin milk, increase air incorporation time for a glossy, smooth consistency.
- Listen for splashing; adjust the angle of your frother or pitcher if needed.
Mastering the Art of Pouring

Mastering the art of pouring is essential for creating stunning latte designs, as the way you pour directly influences the outcome. Start by tilting your cup at a 45-degree angle to create a stable base. Keep your pitcher spout close to the milk’s surface for better control. Begin with an aggressive pour to mix the milk and espresso, then switch to a gentle pour for details. Practice layering your pour, landing the pitcher in the center and pushing forward to craft designs like the tulip. Consistent practice is key; focus on gradual improvement and develop your muscle memory.
| Step | Technique |
|---|---|
| 1 | Tilt cup at 45 degrees |
| 2 | Spout close to milk surface |
| 3 | Start aggressive, finish gentle |
| 4 | Layer pour for designs |
Learning Through Practice and Video Content

After honing your pouring technique, it’s time to enhance your skills through practice and video content. Regularly watching latte art tutorials on platforms like YouTube can help you grasp key techniques and visual cues essential for improvement.
Start with simple designs, like the classic latte heart, to build confidence before tackling more complex patterns.
Make certain to:
- Mimic the pouring process during practice to develop muscle memory.
- Engage with step-by-step video content for clearer guidance.
- Practice consistently, even when mistakes happen, to guarantee gradual improvement.
Embracing Mistakes as Part of the Process

Embracing mistakes is essential for your growth in latte art, as it transforms errors into valuable lessons. When you encounter issues like inconsistent milk texture or poor pouring technique, recognize these as opportunities to improve.
Embracing mistakes helps you develop muscle memory—each attempt refines your skills over time. Analyze your errors, such as excessive surface tension or improper milk aeration, to deepen your understanding of latte art fundamentals.
Documenting each practice session allows you to track progress and pinpoint areas needing improvement. Remember, even professional baristas face setbacks; persistence is key.
Frequently Asked Questions
How Can I Practice Latte Art at Home?
To practice latte art at home, start with a shallow cup, making it easier to access the coffee surface.
Use a French press or handheld frother to get that glossy milk texture.
Tilt the cup at a 45-degree angle, keeping your pitcher spout close to the surface for better control.
Begin with simple designs, like a heart, and gradually tackle more complex patterns.
Don’t forget to check out online tutorials for tips and techniques!
How to Make a Nice Latte at Home?
To make a nice latte at home, start by brewing a shot of espresso.
Heat up some milk, ideally whole or a barista blend, until it’s steaming but not boiling.
Froth the milk using a French press or a frother to create a creamy texture.
Pour the frothed milk into your espresso, starting at the center.
Tilt your cup and move the pitcher to achieve your desired design.
Enjoy your homemade latte!
How to Get the Perfect Milk for Latte Art?
To achieve the perfect milk for latte art, you need to master the milk’s magic.
Start with high-fat milk for a creamy consistency, and froth it gently, incorporating minimal air.
Aim for a glossy, paint-like texture by swirling steadily, preventing separation.
If your milk’s too thick, decrease the air; if it’s too thin, add a bit more.
Finally, pour smoothly from a second pitcher for a flawless finish, enhancing your latte art experience.
How Long Does It Take to Perfect Latte Art?
Perfecting latte art takes time and dedication. You can expect to see noticeable improvement within 4-6 weeks if you practice consistently. Each session should last about 30-60 minutes to help build muscle memory and refine your technique.
Initially, you might struggle, but don’t get discouraged! With patience and regular practice, you’ll create recognizable designs.
Ultimately, achieving advanced skills may take anywhere from 6 months to a year, so keep at it!
Conclusion
So, as you commence your latte art journey, remember that each pour is a step toward mastering this delightful craft. Embrace the little hiccups along the way—they’re just the universe’s way of adding character to your creations. With practice and a sprinkle of patience, you’ll transform your mornings into a canvas of frothy masterpieces. Keep experimenting, and soon, you’ll be serving up lattes that not only taste great but look like a work of art, too!