Connect with us

Dessert

No Churn Birthday Cake Ice Cream: A Fun and Easy Dessert

Whip up a delightful no-churn birthday cake ice cream – a fun and easy dessert that'll make celebrations extra special!

Published

on

birthday cake ice cream

To create a delightful and celebratory dessert, try making no-churn birthday cake ice cream. This fun and easy treat impresses both kids and adults. The recipe calls for heavy whipping cream, sweetened condensed milk, vanilla extract, cake mix, and rainbow sprinkles. The process involves whipping the cream, mixing in condensed milk and cake mix, folding in whipped cream, adding sprinkles, then freezing for 4 hours. Tips include chilling the pan, using quality ingredients, and experimenting with different flavors. Serve in bowls or cones, topped with extra sprinkles or sauce. Explore this simple yet rewarding culinary adventure for a dessert that everyone will enjoy.

Key Takeaways

  • Simple no-churn recipe with cake mix and sprinkles for a festive treat.
  • Suitable for all ages and occasions, bringing joy with minimal effort.
  • Customize with different cake flavors and toppings for personal touch.
  • Enjoy the rich, creamy texture without needing an ice cream maker.
  • Indulge in a fun and easy dessert that satisfies sweet cravings effortlessly.

Ingredients

To make No Churn Birthday Cake Ice Cream, gather heavy whipping cream, sweetened condensed milk, vanilla extract, cake mix, and rainbow sprinkles.

The sweetened condensed milk mixture, combined with the cake mix, imparts the delightful cake batter flavor to this no-churn ice cream.

Rainbow sprinkles are essential to add a pop of color and fun, reminiscent of a birthday cake celebration.

The heavy whipping cream contributes to the rich and creamy texture of the ice cream, ensuring a decadent treat with every scoop.

By incorporating these specific ingredients, you can easily whip up a batch of homemade birthday cake funfetti ice cream without the need for an ice cream maker.

Advertisement

It's the perfect dessert to enjoy on special occasions or whenever you're craving a sweet and festive treat.

Get ready to indulge in a delightful blend of flavors and textures with this no-churn Birthday Cake Ice Cream recipe.

Recipe

delicious and simple dessert

To make No Churn Birthday Cake Ice Cream, you'll need a few key ingredients like sweetened condensed milk, heavy cream, cake mix, and sprinkles.

The step-by-step instructions will guide you through the process of creating this creamy and celebratory dessert at home.

Ingredients Needed

For making No Churn Birthday Cake Ice Cream, you'll need heavy cream, sweetened condensed milk, mini cupcakes, vanilla extract, salt, and rainbow sprinkles. These ingredients come together to create a delightful homemade ice cream with a cake batter taste, perfect for any celebration.

The heavy cream provides richness, while the sweetened condensed milk adds sweetness and creaminess to the dessert. Adding mini cupcakes to the mixture enhances the birthday cake flavor, making each bite a celebration in itself.

Advertisement

A dash of vanilla extract enriches the overall taste, and a pinch of salt helps balance the sweetness. The rainbow sprinkles not only bring a pop of color but also contribute to the festive birthday theme.

This no-churn recipe eliminates the need for an ice cream maker, making it a simple dessert to whip up at home. In just a few steps, you can enjoy a scoop of this scrumptious birthday cake ice cream, bringing joy to any occasion.

Step-By-Step Instructions

Begin by whipping the heavy cream until stiff peaks form for a creamy texture.

In a bowl, mix sweetened condensed milk, melted butter, and your choice of boxed cake mix to create a flavorful base for your Birthday Cake Ice Cream.

Gently fold in the whipped cream to the condensed milk mixture, being careful to maintain a light and airy texture.

Advertisement

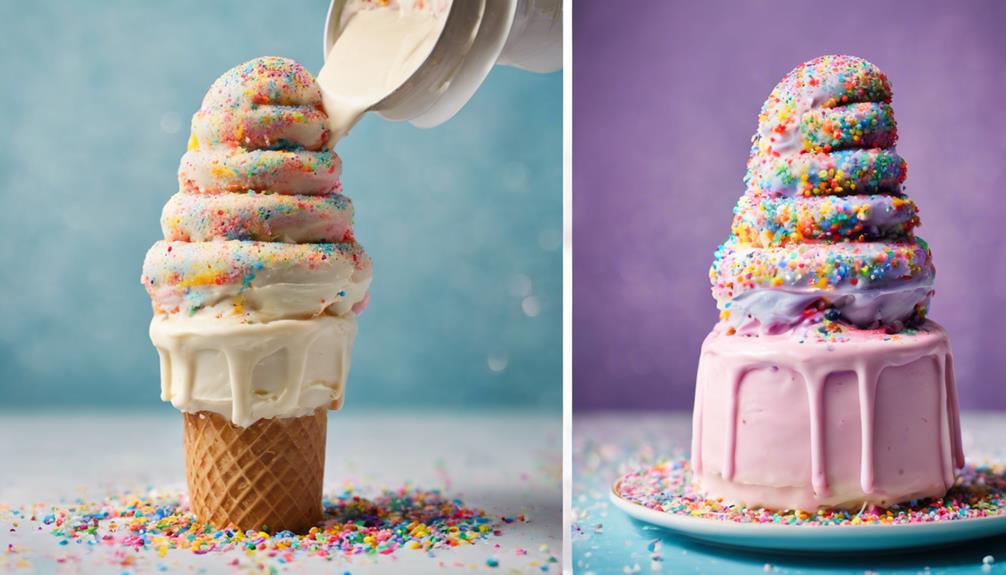
Add a generous amount of rainbow sprinkles to the mixture for a festive and colorful touch that will make your ice cream visually appealing.

Pour the combined mixture into a loaf pan, spreading it evenly.

Cover the pan with plastic wrap and freeze for a minimum of 4 hours, allowing the ice cream to set and develop its delicious flavors.

Once the ice cream is firm, scoop it into bowls or cones, and enjoy a delightful treat that captures the essence of a birthday celebration in every bite.

This no-churn recipe is simple to make and guarantees a delicious outcome that will satisfy your sweet tooth.

Advertisement

Steps

following the right path

To create the birthday cake ice cream, you'll first need to prepare the ingredients. These include heavy cream, sweetened condensed milk, butter, cake mix, and rainbow sprinkles.

Once all the ingredients are ready, you'll proceed with whipping the cream, mixing in the condensed milk, butter, and cake mix.

Next, fold in the rainbow sprinkles. After the mixture is well combined, it should be spread in a loaf pan and frozen until firm.

Ingredient Preparation

Chill the loaf pan in the freezer before adding the ice cream mixture to guarantee proper setting.

Using a whisk, combine the sweetened condensed milk, vanilla extract, and other ingredients until smooth.

Whip the heavy cream with a mixer until stiff peaks form, ensuring a light and airy base for the ice cream.

Advertisement

Gently fold the whipped cream into the condensed milk mixture to maintain its fluffy texture.

Remember to incorporate rainbow sprinkles and cake pieces at the end to infuse the birthday cake ice cream with a colorful and fun twist.

Once prepared, transfer the mixture into the chilled loaf pan and place it back in the freezer to allow the flavors to meld.

Freezing and Serving

Spread the No Churn Birthday Cake Ice Cream mixture evenly in a loaf pan and freeze it for at least 4 hours until it reaches a firm consistency.

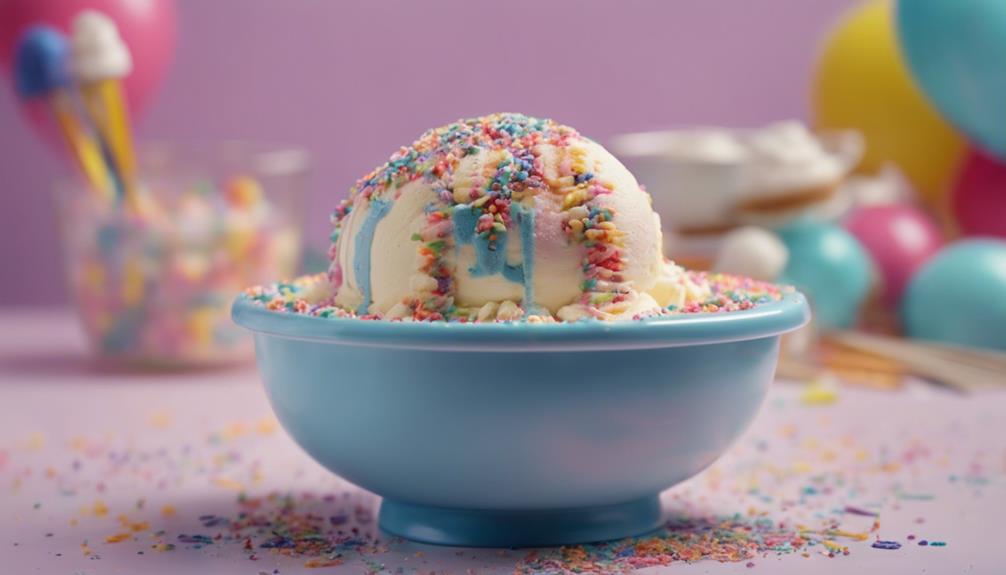
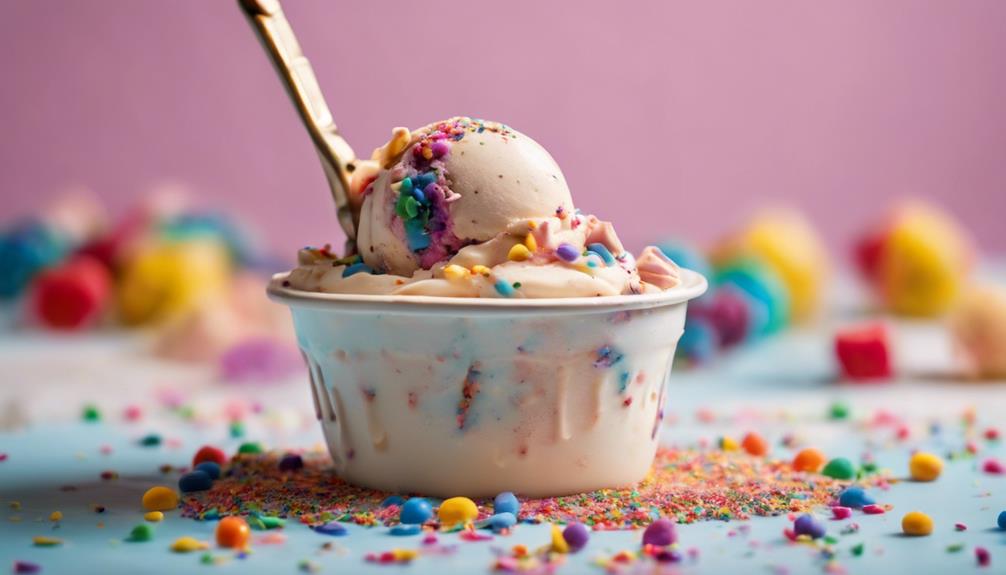
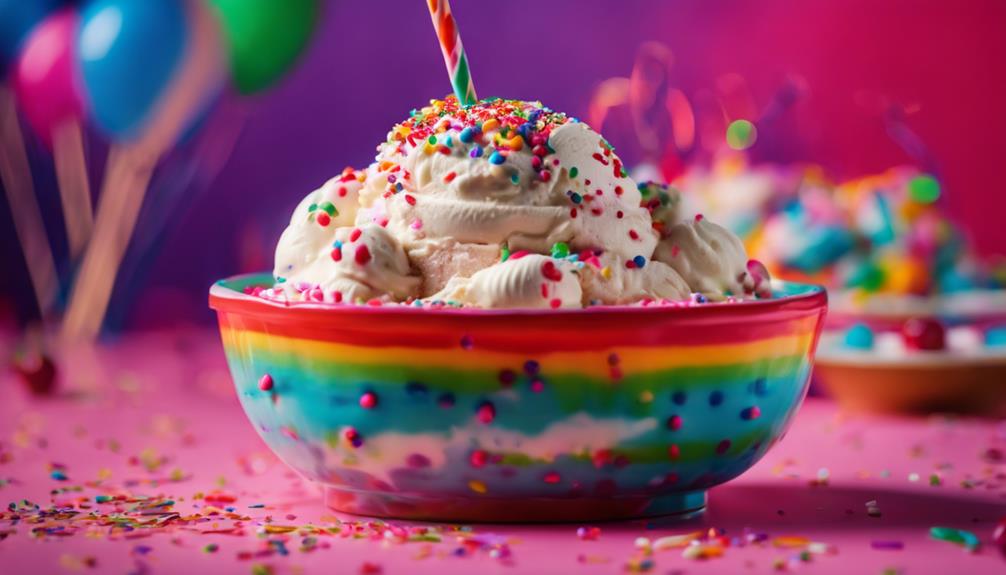
Once frozen, scoop the Birthday Cake Ice Cream into serving bowls, cones, or waffle bowls for a delightful presentation.

Advertisement

Enhance the ice cream by topping it with extra rainbow sprinkles, whipped cream, or a drizzle of caramel or chocolate sauce for added flavor and visual appeal.

To store any remaining ice cream, cover the loaf pan tightly with plastic wrap, ensuring to place wax paper directly on top to prevent the formation of ice crystals.

If you prefer a softer serve consistency, allow the ice cream to sit on the counter for a few minutes before scooping and serving.

Enjoy this homemade treat with friends and family, savoring the festive flavors of birthday cake in every bite.

Tips

four word phrase challenge

Consider using high-quality vanilla extract to enhance the rich and authentic flavor of your birthday cake ice cream.

When whipping the heavy cream, freeze your mixing bowl and beaters beforehand to achieve maximum volume and stability. Avoid overmixing to prevent the cream from turning into butter. For a super creamy texture, use a whisk attachment on your mixer.

Advertisement

Opt for rainbow jimmies sprinkles over sugar sprinkles for a more visually appealing appearance. Adding extra sprinkles can bring more fun and color to your homemade ice cream.

If desired, chopped nuts can provide a delightful crunch to complement the creamy texture. Remember that quality ingredients like butter and cake will greatly impact the final taste.

Variations

variety in genetic sequences

To add a creative twist to your birthday cake ice cream, explore various flavor combinations and ingredient additions in the 'Variations' section. Mix up the sprinkles with rainbow varieties to customize the appearance of your dessert.

Experiment with different cake options like chocolate, red velvet, or funfetti to create unique and delicious flavor combinations. If you need a gluten-free adaptation, choose a gluten-free cake mix and verify all ingredients are free from gluten contaminants for a safe treat.

Enhance the texture and flavor by adding extra ingredients such as chopped nuts, chocolate chips, or cookie crumbles. These additions provide a delightful crunch or burst of sweetness in every bite.

When serving your birthday cake ice cream, consider pairing it with colorful treats like macarons or sugar cookies for a festive dessert spread that will delight your guests with its variety and visual appeal.

Advertisement

Serving Suggestions

great for meal planning

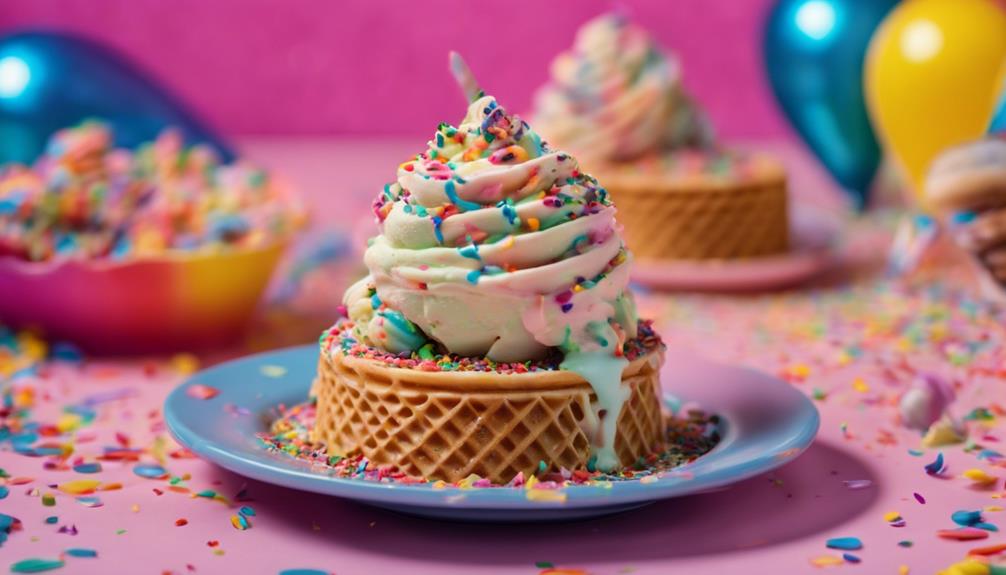
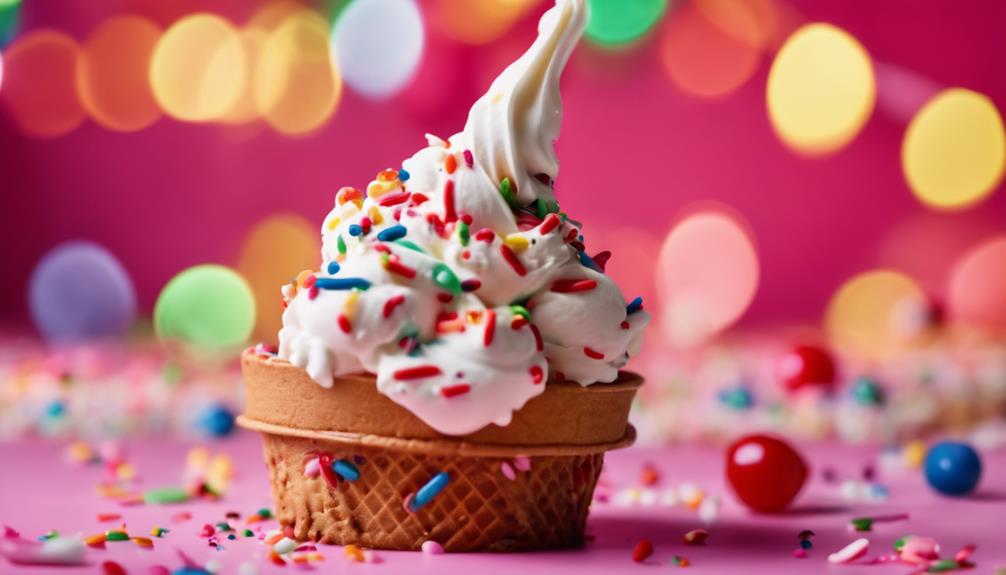
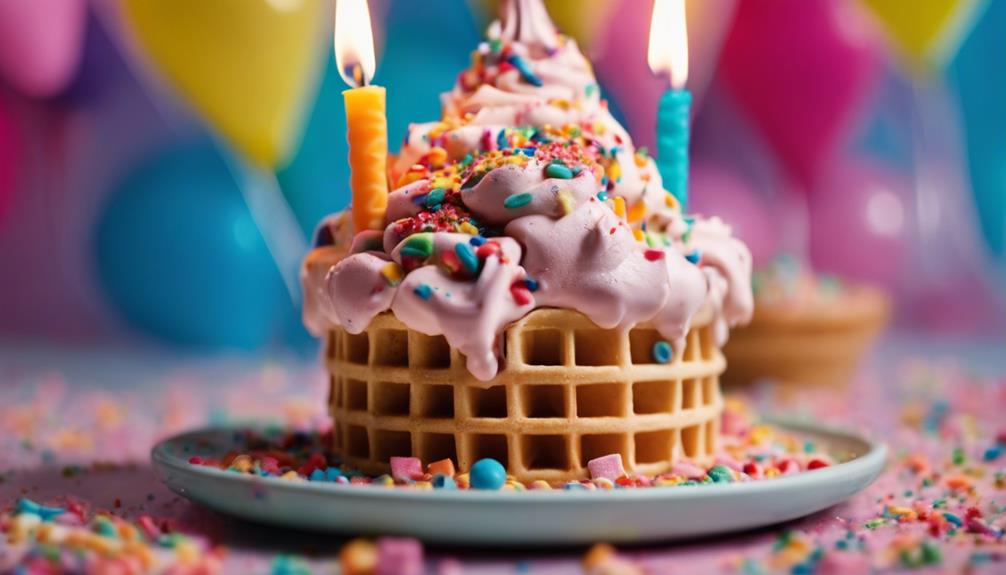
Serve your No Churn Birthday Cake Ice Cream in bowls, waffle cones, or ice cream cups for a fun presentation.

To add a festive touch, top your ice cream with extra rainbow sprinkles, creating a colorful and vibrant dessert. For an indulgent experience, consider drizzling caramel sauce, chocolate sauce, or a dollop of whipped cream over the ice cream. These toppings not only enhance the flavor but also elevate the overall presentation of this fun dessert.

If you're looking to give your ice cream a delicious twist, try adding mini chocolate chips, nuts, or fresh berries like strawberries to create a unique and satisfying blend of flavors.

To enjoy a soft serve consistency, allow the ice cream to sit out for a few minutes before scooping and serving.

More Recipes

delicious and varied dishes

Discover a variety of exciting dessert recipes to expand your culinary repertoire and satisfy your sweet tooth. Experiment with flavors and variations like the invigorating No Churn Lemon Poppy Seed or indulgent Mint Chip Fudge Ice Cream.

For a twist, try the luscious Fresh Cherry Chocolate Ice Cream. These recipes offer a creative way to explore different frozen dessert options in your kitchen. Whether you enjoy fruity, chocolaty, or minty flavors, there's something for everyone to enjoy.

The process of making these no-churn ice creams is simple and rewarding, allowing you to showcase your skills and creativity without the need for an ice cream maker. Get ready to set out on a culinary journey filled with exciting and delicious treats that will leave you wanting more.

Advertisement

Let your taste buds guide you as you experiment with new and unique combinations, making each dessert a delightful surprise.

Frequently Asked Questions

Is Birthday Cake Ice Cream the Same as Cake Batter Ice Cream?

No, birthday cake ice cream isn't the same as cake batter ice cream. Birthday cake ice cream has cake mix and sprinkles for a birthday cake flavor, while cake batter ice cream focuses on the essence of raw cake batter taste.

What Is a Good Birthday Cake Alternative for People Who Don T Like Sweets?

When you don't fancy sweets, go for a savory cheese or charcuterie board, a revitalizing fruit tart, or a light yogurt parfait with granola. For an upscale touch, a gourmet cheese platter is a sophisticated choice.

What to Make Someone for Their Birthday if They Don't Like Cake?

If they don't like cake, consider their favorite treats or flavors for a personalized birthday dessert. Try non-traditional options like sundaes or a dessert board. Experiment with cheesecake, tiramisu, or truffles to cater to their taste.

What Flavor Is Birthday Cake Ice Cream?

Birthday cake ice cream captures the essence of a celebratory cake. Its flavor mimics the joy of birthdays with a vanilla base, cake mix, and sprinkles. The creamy texture and sweet taste make it a festive delight for any occasion.

Advertisement

Can Vanilla Ice Cream from Berry Crostata be used in No Churn Birthday Cake Ice Cream recipe?

Yes, the vanilla ice cream from berry crostata can definitely be used in the no churn birthday cake ice cream recipe. The creamy texture and subtle sweetness of the berry crostata with vanilla ice cream will add a delicious twist to the traditional birthday cake flavor.

Conclusion

Get ready to indulge in a delicious and creamy no churn birthday cake ice cream that's sure to impress your taste buds.

With just a few simple ingredients and easy steps, you can create a fun and festive dessert that everyone will love.

So why wait? Try this recipe today and treat yourself to a sweet and satisfying treat that will be the highlight of any celebration.

Advertisement
Continue Reading
Advertisement

Dessert

Raspberry-Lemon Granita Recipe | Refreshing & Easy

Discover how to make a delightful raspberry-lemon granita with this simple and refreshing recipe. Perfect for hot summer days!

Published

on

raspberry-lemon-granita

Imagine making a delightful raspberry-lemon granita on a hot summer day. The sun is shining, and the heat is intense. You find comfort in your cool kitchen. There, a basket of juicy raspberries and a bright lemon catch your eye. Suddenly, you’re inspired to combine these flavors into a refreshing dessert. This is how you start making a semi-frozen treat called raspberry-lemon granita.

You begin by gathering raspberries, water, sugar, fresh lemon juice, and lemon zest. Excitement fills the air as you mix raspberries, water, and sugar to make a pink syrup. The sweet smell of raspberries blends with the zing of fresh lemon. Stirring lemon juice and zest into the syrup adds a punch of flavor.

Next, the mixture goes into a shallow dish in the freezer. You check on it, watching as it turns into icy crystals. By scraping the mix with a fork, you create a fluffy, snow-like texture. You can hardly wait to try the combination of raspberry and lemon flavors.

Finally, it’s time to enjoy. The raspberry-lemon granita is ready in its pink glory. With the first bite, you’re hit with coolness and vibrant flavors. The raspberries’ tartness and the lemons’ acidity create a summer explosion. It’s a perfect relief from the heat.

This raspberry-lemon granita recipe is incredibly simple. All you need is a blender, shallow dish, and fork. It’s a fantastic dessert that will wow your friends and family. Indulge in a bit of paradise with this refreshing summer treat.

Advertisement

We’ll cover making raspberry-lemon granita, from ingredients to preparation. Discover the story behind this Italian dessert and try different flavor variations. Raspberry-lemon granita is ideal for summer events or as a cool treat.

Key Takeaways:

  • Raspberry-lemon granita is a simple and refreshing dessert perfect for hot summer days.
  • The recipe calls for raspberries, water, sugar, fresh lemon juice, and lemon zest.
  • Granita is made by freezing the mixture and periodically scraping it with a fork to form crystals.
  • You can customize the flavor of your granita by using different fruits, such as blueberries or strawberries.
  • Raspberry-lemon granita is a great option for summer parties and BBQs, and it offers health benefits from the raspberries and lemon.

What is a Granita?

A granita is a semi-frozen Italian dessert. It’s refreshing and combines sugar, water, and flavors. Its texture is like a slush, perfect for hot summer days. It can have various fruit flavors like raspberries, blueberries, or strawberries.

Granita is great because it has no dairy. It’s ideal for those who can’t have lactose or prefer vegan options. Its unique texture melts in your mouth, offering a cool relief.

To make granita, start with sugar and water to create a syrup. Then, add flavors like fruit juices, coffee, or herbs. Freeze the mixture, scraping it occasionally. This process creates a flavorful, semi-frozen treat.

Looking for a delicious, refreshing dessert for the summer? Try granita. Its Italian roots and variety of flavors make it a treat for any occasion.

Advertisement

Making Raspberry-Lemon Granita

To make a cool and zesty raspberry-lemon granita, you’ll need raspberries, water, sugar, fresh lemon juice, and lemon zest. Here are the easy steps to get a delicious outcome:

  1. Step 1: Making the Simple Syrup
    Heat water and sugar in a pot over a medium flame. Stir until the sugar melts completely, creating a simple syrup. Let it cool down after.
  2. Step 2: Preparing the Raspberry Puree
    Blend the raspberries until they’re very smooth. Then, strain the puree into a bowl through a sieve to get rid of the seeds.
  3. Step 3: Combining the Ingredients
    Mix the raspberry puree, simple syrup, fresh lemon juice, and lemon zest in a big bowl. Stir well so the flavors blend together.
  4. Step 4: Freezing the Mixture
    Put the mix into a shallow tray to spread out. Then, freeze it.
  5. Step 5: Creating Flaky Crystals
    Every hour, stir the semi-frozen mix with a fork. This breaks it into icy flakes. It makes the granita fluffy and light.
  6. Step 6: Repeating the Process
    Keep scraping every hour until it’s completely frozen. It should take around 4-6 hours.
  7. Step 7: Serving Your Raspberry-Lemon Granita
    When it’s ready, scoop the granita into chilled glasses. Add some lemon zest on top for extra zestiness.
making raspberry-lemon granita

This raspberry-lemon granita is perfect for cooling off on hot days. It’s also a fresh and zesty dessert for any event.

Flavor Variations

The recipe suggests raspberries and lemon, but you can switch it up. Why not use blueberries or strawberries? Mixing different berries for a mixed berry granita is also a fun idea. No matter the fruit, the granita-making process stays the same.Blueberry Granita

Serving Suggestions

Are you looking for an ideal dessert for summer events? Raspberry-lemon granita is your go-to choice. It’s refreshing for hot days and brings a pop of flavor to any party.

The granita becomes wonderfully slushy, making it super refreshing. It blends tangy raspberries and zesty lemon perfectly. This mix of sweet and tart cools you down like nothing else.

Want to try other berries? Feel free to swap raspberries with blueberries or strawberries. This lets you play with flavors and surprise your guests with new twists on the dessert.

To wow your guests, serve the granita in fancy glass bowls or glasses. A bit of lemon zest on top adds color and flavor, making it look stunning. The bright colors and citrus scent make everyone feel like they’re in a summer paradise.

Advertisement
Serving Suggestions Benefits
Serve raspberry-lemon granita in chilled dessert glasses or bowls for an elegant presentation. • Perfect dessert for summer parties, BBQs, and Fourth of July celebrations
• Refreshing and slushy texture when served
• Customizable with different berries like blueberries or strawberries
• Beautiful presentation with additional lemon zest
Top the granita with a sprinkle of lemon zest for added flavor and visual appeal.
Place the granita bowls or glasses in the freezer to keep them chilled until serving.
Pair the granita with fresh berries, a sprig of mint, or a dolop of whipped cream for added indulgence.

By choosing raspberry-lemon granita, you’ll dazzle your guests. They’ll love the flavors, texture, and how it looks. So, make this icy delight for your next party and watch everyone enjoy the taste of summer.serving suggestions

Driscoll’s Raspberry-Lemon Granita Recipe

If you love raspberries, try Driscoll’s unique raspberry-lemon granita. This well-known berry company offers a refreshing version you’ll adore.

To make Driscoll’s raspberry-lemon granita, you need:

  • Water
  • Sugar
  • Lemon juice
  • Driscoll’s raspberries

Start by boiling water, sugar, and lemon juice to create a syrup. Then, blend the syrup with Driscoll’s raspberries until it’s smooth. Strain the mix to remove seeds for a smooth texture.

Next, put the raspberry mix in a shallow pan and freeze it. Remember to scrape it occasionally with a fork. This creates the granita’s flaky texture.

When it’s frozen and flaky, it’s ready to serve. Driscoll’s Raspberry-Lemon Granita is great for summer. You can make it 2 days ahead, perfect for parties.Driscoll's Raspberry-Lemon Granita Recipe

This granita blends Driscoll’s raspberries’ sweetness with lemon’s tang. It’s a refreshing, easy treat that will impress. Try making Driscoll’s Raspberry-Lemon Granita for a taste of summer.

Sicily’s Granita Tradition

Granita started in Sicily and has a significant place there. It offers cool relief during the hot summers. Also, it shows how Arab conquerors influenced Sicily. They chilled sweet fruit syrups using snow from Mount Etna.

Advertisement

In Sicilian culture, making granita is a well-loved tradition. Coffee and lemon are the favorites. Sicilians make delicious granita even without an ice cream maker. This makes granita a common homemade dessert in Sicily.

“Sicily’s love for granita is strong. People enjoy it from morning till night. You’ll see both locals and tourists having a refreshing cup. They might choose coffee or lemon granita, often with whipped cream or a brioche.”

Granita comes in many flavors beyond coffee and lemon. You can find strawberry, watermelon, almond, and pistachio flavors all over Italy. The variety of granita flavors is vast.

Creating granita is simple and allows people to be creative. Sicilians like trying new tastes or adding liqueur. Granita is perfect alone or with something sweet like a brioche or cannoli. It’s a great way to cool down in Sicily.

Sicilian Granita Flavors

These are some well-loved granita flavors in Sicily:

  • Coffee: A strong coffee flavor makes this granita a great morning or afternoon choice. It’s usually served with whipped cream or a sweet brioche.
  • Lemon: This granita offers a perfect mix of sweetness and tanginess. Its bright yellow color and fresh taste are ideal for hot days.
Sicilian granita tradition
Flavor Description
Coffee A rich and intense coffee experience, perfect with whipped cream or a brioche.
Lemon It’s refreshing and tangy, great for beating the summer heat.

Health Benefits of Raspberry-Lemon Granita

Raspberry-lemon granita is not just tasty. It’s also full of health benefits. Raspberries lend their bright red color and sweet-tart taste. But that’s not all. They pack a lot of nutrients too. Raspberries are full of antioxidants like anthocyanins. These antioxidants fight inflammation and may prevent cancer.

They help keep your body safe from harmful free radicals. This is important for your long-term health. Antioxidants fight oxidative stress too.

Advertisement

Raspberries are also great for your gut. They’re high in fiber, which keeps your digestive system running smoothly. Fiber helps you stay regular and prevents constipation. Plus, raspberries are mostly water. This makes them both hydrating and delicious.

Lemons add a tangy twist and are rich in vitamin C. Vitamin C boosts your immune system. It fights off immune system deficiencies. Adding lemons to your diet is an easy way to get this important vitamin.

Having a serving of raspberry-lemon granita combines these benefits. It’s a refreshing, tasty treat. And it’s a guilt-free way to enjoy the good stuff in raspberries and lemons. Plus, it’s great for satisfying your sweet tooth.Health Benefits of Raspberry-Lemon Granita

Visual representation of the health benefits of raspberry-lemon granita.

Conclusion

Raspberry-lemon granita is the perfect treat for hot days and special summer events. It’s refreshing and loved by all. Try the classic mix or use different berries to impress.

This dessert is not just tasty but also healthy. Raspberries have lots of antioxidants and fiber. Lemons are full of vitamin C to boost your immune system. Enjoy this sweet treat while feeling good about its benefits.

Advertisement

Add this yummy and wholesome dessert to your summer menu. Your guests will love it, and you can enjoy the cool, tangy taste. Raspberry-lemon granita is the best way to enjoy summer and impress your friends.

FAQ

What is raspberry-lemon granita?

Raspberry-lemon granita is a semi-frozen treat from Italy. It’s made with sugar, water, raspberries, and the juice and zest of fresh lemons. This dessert is slushy and perfect for cooling off in summer.

How do you make raspberry-lemon granita?

First, gather raspberries, water, sugar, lemon juice, and lemon zest. Make a syrup by heating water and sugar. Then blend the raspberries and strain them. Mix the raspberry juice with syrup, lemon juice, and zest.Next, pour it into a shallow dish and freeze. Scrap it every hour to form crystals. Finally, serve it with a sprinkle of lemon zest on top.

Can I use other fruits besides raspberries?

Absolutely! Blueberries or strawberries can also be used to make granita. The steps are the same, no matter the fruit.Advertisement

How can I serve raspberry-lemon granita?

Raspberry-lemon granita is great for summer events and BBQs. It’s a hit at Fourth of July parties. Serve it chilled with extra lemon zest for a refreshing dessert.

Is there a specific recipe for Driscoll’s raspberry-lemon granita?

Yes, Driscoll’s has a special raspberry-lemon granita recipe. It uses water, sugar, lemon juice, and Driscoll’s raspberries. You boil water, sugar, and lemon juice to create a syrup, blend it with raspberries, and then strain. Freeze the mixture in a pan and scrape it periodically to form crystals.

What is the tradition of granita in Sicily?

Granita is a classic Sicilian dessert, especially in coffee and lemon flavors. It’s a favorite homemade treat during the scorching summers. The method of using snow from Mount Etna to chill sweet fruit syrups came from Arab conquerors.

Are there any health benefits to raspberry-lemon granita?

Yes, eating raspberry-lemon granita is healthy. Raspberries are full of antioxidants and fiber, which help with inflammation and digestion. Lemons provide vitamin C, boosting your immune system. This delicious dessert is a fun way to get those nutrients.

Can White Chocolate Peppermint Blondies be Paired with Raspberry-Lemon Granita for a Dessert Combo?

Indulge in a delightful dessert combo by pairing festive white chocolate blondies with refreshing raspberry-lemon granita. The creamy sweetness of the blondies perfectly complements the tartness of the granita, creating a harmonious balance of flavors and textures. This unique pairing will surely impress your taste buds.

Advertisement

Source Links

Continue Reading

Dessert

Dirt Cups: A Fun and Easy Dessert

Unleash your inner child with Dirt Cups – a whimsical dessert blending chocolate pudding, cookies, and gummy worms that promises a delightful treat!

Published

on

dirt cup dessert recipe

For a delightful and straightforward dessert, try immersing yourself in making Dirt Cups! These treats blend chocolate pudding, milk, whipped topping, crushed cookies like Oreos, and fun gummy worms for a playful touch. Simply prepare the pudding, layer it with cookies in cups or jars, and add gummy worms for a whimsical finish. Experiment with various pudding flavors, decorations, and textures to cater to different tastes and occasions. Enhance the presentation by using clear containers and creative toppings. Remember to chill leftovers, and involve kids for an enjoyable mixing experience. Engage in making these enjoyable desserts with ease and creativity!

Key Takeaways

  • Quick and simple recipe using chocolate pudding and crushed cookies.
  • Fun presentation with gummy worms for a playful touch.
  • Versatile recipe with various flavor and topping options.
  • Perfect dessert for kids' parties or themed events.
  • Easy to make ahead and store for convenience.

Ingredients for Dirt Cups

To make Dirt Cups, you'll need basic ingredients like chocolate pudding mix, milk, whipped topping, crushed cookies such as Oreos, and gummy worms for a delightful and easy-to-create dessert.

The chocolate pudding mix serves as the creamy base of the dessert, providing a rich and indulgent flavor profile. When combined with milk, it creates a smooth and luscious texture that complements the other elements.

The gummy worms add a fun and playful touch to the dessert, mimicking the look of real dirt with worms crawling through it. These chewy candies not only enhance the visual appeal of Dirt Cups but also add a contrasting texture to the dish, keeping each bite interesting.

Easy Steps to Make Dirt Cups

simple dirt cup recipe

For making Dirt Cups, begin by preparing the instant pudding mix with milk according to the package instructions.

Once the pudding is ready, gently fold in the whipped topping to create a light and creamy texture.

Next, it's time to assemble the Dirt Cups. Start by layering the bottom of each cup with a spoonful of crushed cookies to resemble the 'dirt.'

Advertisement

Then, spoon a dollop of the prepared pudding mixture on top of the cookies to form the next layer.

Repeat this process to create multiple layers until the cup is almost full, making sure to finish with a layer of the crushed cookies on top.

To add a playful touch, place a few gummy worms on the 'dirt' layer as a fun garnish.

Refrigerate the Dirt Cups for at least an hour to allow the flavors to meld together.

Once chilled, serve and enjoy this whimsical and easy dessert with a delightful mix of flavors and textures.

Advertisement

Tips for Perfect Dirt Cups

dirt cup dessert recipe

For perfect dirt cups, consider experimenting with different recipe variations to suit your taste preferences.

From classic chocolate to unique flavors like butterscotch, the possibilities are endless.

When it comes to serving, pay attention to presentation by layering the ingredients in clear cups or jars for an aesthetically pleasing dessert experience.

Recipe Variations

Experiment with different flavors of pudding mix to create unique variations of dirt cups. Here are some tips to help you perfect your dirt cup recipe:

  1. Flavorful Pudding Mixes:

Try using different types of pudding mix like vanilla, peanut butter, or butterscotch to add a twist to your dirt cups.

  1. Themed Candies:

Customize your dirt cups for special occasions by incorporating themed candies such as candy corn for Halloween or pastel-colored candies for Easter.

  1. Lighter Alternatives:

For a healthier option, swap out the whipped cream with Greek yogurt or a low-fat whipped cream alternative to reduce calories.

  1. Fruity Layers:

Add layers of fresh fruits like strawberries or bananas between the pudding and cookie layers for a invigorating fruity flavor in your dirt cups.

Serving Presentation

Consider enhancing the presentation of your dirt cups by opting for clear plastic cups or small mason jars to showcase the layers and toppings in a visually appealing way. Using clear cups allows for a striking display of the chocolate pudding strata intertwined with cookie crumbs, creating an enticing visual contrast.

These transparent vessels not only highlight the intricate layers of your dessert but also serve as the perfect backdrop to showcase the playful gummy worms that adorn the top of the dirt cups. The choice of cups plays a significant role in enhancing the overall presentation and enjoyment of this delightful treat.

Advertisement

Whether you prefer the simplicity of clear plastic cups or the elegance of small mason jars, the right vessel can elevate your dirt cups from a mere dessert to a visually engaging and delicious experience that's sure to delight both kids and adults alike.

Fun Flavor Variations

delicious ice cream treats

Trying different flavor variations in your dirt cups can add excitement and variety to your dessert options. Here are some ideas to help you elevate your dirt cups:

  1. Chocolate Peanut Butter Dirt Cups: Incorporate peanut butter into the pudding mix for a rich and nutty flavor profile, complemented by chocolate cookies and gummy worms.
  2. Vanilla Dirt Cups: Swap out chocolate pudding for vanilla pudding and use vanilla sandwich cookies for a lighter dessert option. Top with candy pumpkins for a sweet twist.
  3. Easter Dirt Cups: Decorate with pastel-colored candies, candy eggs, and edible grass for a festive Easter treat. Consider using vanilla pudding for a different flavor experience.
  4. Birthday Dirt Cups: Customize with sprinkles, colorful candies, and a birthday candle for a fun and celebratory dessert. Try adding gummy worms for added texture and visual appeal.

These flavor variations won't only enhance the taste of your dirt cups but also make them visually appealing for any occasion.

Creative Cup Presentation Ideas

innovative cup design ideas

When considering creative cup presentation ideas for your dirt cups, think about cup decorating techniques, theme-based cup designs, and serving suggestions.

These elements can elevate the visual appeal of your dessert and make it more engaging for your guests. By incorporating unique cup decorations and themes, you can enhance the overall experience of enjoying dirt cups.

Cup Decorating Techniques

For an eye-catching presentation of dirt cups, opt for clear plastic cups or mason jars to showcase the delicious layers of pudding and cookie crumbs. To enhance the visual appeal of your dirt cups, consider the following cup decorating techniques:

  1. Layering: Create visually appealing layers of pudding and cookie crumbs in the cups or jars to add texture and enhance the presentation.
  2. Gummy Worms: Top your dirt cups with gummy worms in a fun and creative way. You can place them strategically to make it look like the worms are crawling through the 'dirt.'
  3. Experiment with Cup Sizes: Try using different cup sizes and shapes to create unique and personalized dirt cup designs. This experimentation can add a touch of originality to your presentation.
  4. Additional Decorations: Consider adding extra decorations such as candy flowers or themed sprinkles to make your dirt cups even more visually appealing. These small additions can elevate the overall look of your dessert.

Theme-based Cup Designs

Consider enhancing the visual appeal of your dirt cups by incorporating theme-based cup designs that align with specific occasions or seasonal celebrations. Utilize clear plastic cups to showcase the layers of pudding and crushed cookies, or opt for small mason jars for a more elegant presentation.

For themed events, such as Easter or summer parties, explore using themed cups like Easter-themed ones with pastel colors and bunny decorations. Get creative with cup designs by choosing mini terra cotta pots for garden-themed gatherings or mini beach pails for summer celebrations.

Personalize the cups further by adding labels or tags that match the event's theme, adding a special touch for your guests. By carefully selecting the appropriate cups and incorporating theme-based designs, you can elevate the presentation of your dirt cups, making them not only delicious but visually appealing and memorable for any occasion.

Advertisement

Serving Suggestions

Explore using disposable clear plastic cups or small mason jars to serve your Dirt Cups for a visually appealing presentation. When considering how to present your Dirt Cups, here are some suggestions to elevate the serving experience:

  1. Opt for Clear Cups: Clear plastic cups allow your guests to admire the layers of pudding and cookie crumbs, enhancing the visual appeal of the dessert.
  2. Themed or Colorful Cups: For special occasions like Halloween or Easter, consider using themed or colorful plastic cups to add a festive touch to your Dirt Cups presentation.
  3. Rustic Touch with Mason Jars: Using small mason jars can bring a rustic charm to your dessert display, adding a unique aesthetic to the serving presentation.
  4. Glass Cups for Elegance: If you're aiming for a more sophisticated look, glass cups can provide an elegant touch to your Dirt Cups presentation, making it suitable for formal events or gatherings.

Storing Your Dirt Cups

dirt cup storage tips

To maintain the freshness and texture of your dirt cups, keep them chilled until serving time. The chilled environment helps preserve the crunchiness of the cookies within the dessert, guaranteeing a delightful taste experience.

If you have any leftover dirt cups, it's advisable to cover them with plastic wrap and consume them within 2-3 days for best flavor. Additionally, consider adding freshly crushed cookies before serving to restore the original texture and enhance the overall taste.

When storing your dirt cups, it's recommended to refrigerate them in an airtight container. This method prevents the dessert from absorbing other flavors present in the fridge, preserving the integrity of the dirt cups. By following these storage guidelines, you can ensure that your dirt cups maintain their quality and are ready for enjoyment whenever you desire.

Make-Ahead Dirt Cup Tips

prepare dirt cups ahead

To efficiently prepare dirt cups in advance, assemble the layers of pudding, crushed cookies, and gummy worms in individual cups and store them in the refrigerator for up to 2-3 days before serving. Here are some make-ahead tips to guarantee your dirt cups turn out delicious:

  1. Store Properly: Keep assembled dirt cups in an airtight container to prevent the flavors from mixing and maintain freshness.
  2. Top with Fresh Cookies: Add freshly crushed cookies on top just before serving to preserve their crunchiness.
  3. Batch Preparation: Consider making a larger batch of dirt cup components and assemble them in cups as needed for quick and easy serving.
  4. Leftovers Maintenance: Cover any leftovers with plastic wrap to avoid drying out and to make sure they stay fresh until the next serving.

Pro Tips for Delicious Dirt Cups

making tasty dirt desserts

For a delightful twist on traditional dirt cups, consider incorporating different types of cookies for varied flavors and textures. You can use Oreos for a classic taste or experiment with chocolate chip cookies for a unique twist.

When it comes to the whipped topping in your dirt cups, choose Cool Whip for a stable texture, or if you prefer a lighter option, homemade whipped cream can be a great alternative. Adding more Cool Whip can result in a lighter and fluffier texture, enhancing the overall mouthfeel of your dessert.

To enhance the visual appeal of your dirt cups, consider using black food gel to darken the pudding for a more realistic 'dirt' appearance. Remember to add gummy worms strategically to create a playful and thematic presentation.

Advertisement

Keep in mind that Oreos may become soggy when chilled, so to maintain top crunchiness, add them just before serving. Engaging kids in the mixing and assembling process can make preparing dirt cups a fun and interactive activity for the whole family.

Kid-Friendly Dessert Options

kid friendly dessert suggestions

Consider trying out a variety of kid-friendly dessert options to satisfy young taste buds and create memorable sweet moments. Here are some easy and delightful recipes that children will love:

  1. Dirt Cups Recipe: Create a fun and interactive dessert by layering chocolate pudding, crushed cookies, and gummy worms in individual cups. This simple recipe is a hit at parties and can be customized with different toppings for added flair.
  2. Ice Cream Sundae Bar: Set up a DIY ice cream station with various ice cream flavors, colorful sprinkles, chocolate syrup, whipped cream, and cherries. Let kids build their own sundaes for a personalized treat.
  3. Fruit Kabobs: Thread chunks of fresh fruit onto skewers for a healthy and visually appealing dessert. Kids can enjoy assembling their own fruit kabobs and dipping them in yogurt or chocolate sauce.
  4. Mini Cupcake Decorating: Bake a batch of mini cupcakes and provide an assortment of frosting colors, sprinkles, and edible decorations. Kids will have a blast decorating their own mini treats.

Oreo Dessert Recipes to Try

delicious oreo dessert options

When it comes to Oreo dessert recipes, there are endless possibilities to explore.

From classic Oreo Dirt Cups to decadent Oreo cheesecakes, these sweet treats offer a delightful mix of chocolatey goodness and creamy indulgence.

Whether you prefer a simple no-bake option or a more elaborate baked creation, Oreo-based desserts are sure to satisfy your cravings.

Sweet Oreo Treats

Indulge in the decadent world of Oreo dessert recipes with a sweet twist on classic treats. If you enjoy the delightful combination of chocolate pudding, crushed Oreos, and gummy worms, then Oreo Dirt Cups are the perfect sweet indulgence for you.

Here are some key points to keep in mind when exploring the world of sweet Oreo treats:

Advertisement
  1. Delicious Combination: Oreo Dirt Cups offer a delectable mix of chocolatey flavors from the crushed Oreos and the creamy texture of the pudding.
  2. Kid-Friendly: Loved by both children and adults, these treats aren't only tasty but also fun to eat, especially with the playful addition of gummy worms.
  3. Simple Ingredients: Creating Oreo Dirt Cups is a breeze, requiring basic items like pudding mix, milk, whipped topping, Oreos, and of course, the iconic gummy worms.
  4. Versatile Options: Customize your Oreo Dirt Cups for any occasion by experimenting with different pudding flavors, themed candies, or decorative toppings.

Delicious Oreo Creations

Explore the delectable world of Oreo dessert recipes with a delightful twist on classic treats. Oreo Dirt Cups, featuring layers of chocolate pudding, crushed Oreos, and gummy worms, offer a playful and tasty experience. These dessert cups provide a fun and creative way to enjoy the beloved Oreo flavor combination in a whimsical presentation.

Perfect for themed parties, kids' events, or as a unique treat for any occasion, Oreo Dirt Cups are versatile and sure to delight both children and adults alike. The beauty of Oreo Dirt Cups lies in their customizability; you can experiment with various pudding flavors, cookie types, and toppings to suit your taste preferences.

With simple ingredients and quick assembly, these Oreo creations are a convenient option for adding a touch of fun to any gathering. So, why not indulge in the nostalgia of Oreos with a modern twist by trying out these delicious Oreo dessert recipes today?

Frequently Asked Questions

What Is the Simplest Type of Dessert?

When you're looking for the simplest type of dessert, opt for treats like no-bake cookies, fruit parfaits, or ice cream sundaes. These require minimal effort and ingredients, perfect for a quick sweet fix.

What Are Dirt Cups Made Of?

To make dirt cups, you'll need pudding mix, milk, whipped topping, crushed cookies (like Oreos), and gummy worms. Mix the pudding with milk and whipped topping, layer with crushed cookies, and top with gummy worms for a fun treat.

How Do You Make Yogo Dirt Dessert?

To make Yogo dirt dessert, whisk pudding mix with milk, then layer with crushed cookies in cups. Top with gummy worms for a fun treat. Customize with various flavors and toppings for a creative twist.

Advertisement

What Is Dirt Cake Made Of?

To make dirt cake, you combine layers of chocolate pudding, crushed cookies (usually Oreos), and whipped topping. Gummy worms are often used for decoration. You can customize with different pudding flavors, cookies, and toppings for a unique twist.

Are No Churn Birthday Cake Ice Cream and Dirt Cups Similar in Difficulty to Make?

Making no churn birthday cake ice cream and dirt cups are similar in difficulty. Both require simple ingredients and minimal preparation. However, the ice cream may need more time to set, while the dirt cups are ready to eat immediately. Both are easy and delicious treats for any celebration.

Conclusion

To sum up, dirt cups are a delightful and easy-to-make dessert that's sure to impress. So why not roll up your sleeves, dig in, and whip up a batch of these tasty treats for your next gathering?

Remember, the proof is in the pudding, or in this case, the dirt cup! Enjoy the delicious combination of flavors and textures in every bite, and watch as your guests delight in this simple yet satisfying dessert.

Advertisement
Continue Reading

Dessert

Birthday Cake Blondies: A Fun and Festive Dessert

Amp up your celebrations with Birthday Cake Blondies, a fun and festive dessert that will bring joy to any occasion.

Published

on

celebratory birthday cake bars

Celebrate with Birthday Cake Blondies, a delightful mix of brown sugar, vanilla, and sprinkles, elevating any event with joy and festivity. The recipe calls for brown sugar, melted butter, eggs, flour, and baking powder, alongside vanilla extract, sprinkles, and white chocolate chips for added flavor. This chewy treat strikes the perfect balance between the sugars, creating a luscious texture. Remember to follow baking tips like using softened butter and not overbaking for that desired fudgy consistency. For a twist, try variations with nuts, different chocolate chips, or dried fruit. Stay tuned for more ways to perfect this festive dessert.

Key Takeaways

  • Infused with vanilla flavor and rainbow sprinkles for a festive touch.
  • Chewy texture from the perfect balance of brown and white sugars.
  • Quick and easy recipe for a fun baking experience.
  • Colorful and flavorful with rainbow sprinkles and white chocolate chips.
  • Great for birthdays with a celebratory and vibrant appearance.

Ingredients for Birthday Cake Blondies

To make Birthday Cake Blondies, gather brown sugar, melted butter, eggs, flour, baking powder, vanilla extract, sprinkles, and white chocolate chips. These ingredients combine to create a delightful twist on traditional brownies, infusing them with a vanilla flavor and a burst of color from rainbow sprinkles and white chocolate chips.

The chewy texture of the Birthday Cake Blondies comes from the perfect balance of brown sugar and white sugar, offering a satisfying sweetness with each bite.

The addition of white chocolate chips adds a creamy richness to the blondies, complementing the vanilla undertones. The sprinkles not only add a pop of color but also bring a playful element to the dessert, making it ideal for birthday celebrations or any festive occasion.

This easy-to-follow recipe ensures that you can quickly whip up a batch of these fun and flavorful blondies, providing a delicious treat for yourself or to share with friends and family.

Step-by-Step Instructions

detailed sequential guidance provided

To make these Birthday Cake Blondies, you'll start by mixing the batter, incorporating the wet and dry ingredients until well combined.

Next, you'll bake the blondies in the preheated oven for 30-35 minutes, ensuring they're cooked through.

Advertisement

Mixing the Batter

Start by combining the melted butter, brown sugar, white sugar, eggs, and vanilla extract in a mixing bowl. Whisk these wet ingredients together until a smooth and well-combined mixture forms.

In a separate bowl, combine the flour, baking powder, and salt, ensuring they're evenly mixed. Gradually fold the dry ingredients into the wet batter, being careful not to overmix. The goal is to achieve a uniform batter with no visible streaks of flour.

Next, it's time to add the fun elements that make these blondies special. Sprinkle in rainbow sprinkles and white chocolate chips, then gently fold them into the batter. This step not only adds a burst of color but also introduces delightful pockets of sweetness throughout the blondies.

The rainbow sprinkles create a festive appearance, while the white chocolate chips offer a creamy contrast to the soft texture of the blondies. Once the sprinkles and chocolate chips are evenly distributed, your batter is ready to be transformed into delectable birthday cake blondies.

Baking the Blondies

Preheat your oven to 350°F and line an 8×8 inch baking pan with parchment paper.

Advertisement

In a mixing bowl, beat together the melted butter, brown sugar, white sugar, eggs, vanilla extract, and milk until the mixture is well combined.

In a separate bowl, whisk together the flour, baking soda, and salt before gently folding it into the wet ingredients to form a smooth batter.

Next, mix in the white chocolate chips and rainbow sprinkles to add a festive touch to the blondies.

Pour the batter into the prepared baking dish, spreading it evenly. Place the baking dish in the preheated oven and bake the blondies for 30-35 minutes, or until they turn golden brown.

Once baked, remove the blondies from the oven and allow them to cool before slicing.

Advertisement

These blondies are now ready to be served as a delightful and celebratory dessert for any birthday occasion.

Decorating and Serving

After baking the blondies to perfection, it's time to add the final decorative touches and serve them in style. When it comes to decorating your birthday cake blondies, consider spreading a layer of frosting or glaze on top to enhance the sweetness and flavor. Sprinkle some rainbow sprinkles or white chocolate chips over the frosting to elevate the festive look of the blondies. To make serving easier, cut the blondies into neat squares or bars for portion control.

For an elegant presentation, place the decorated blondies on a decorative platter or cake stand. This not only adds a touch of sophistication but also makes them ready for special occasions. To take the indulgence up a notch, serve the birthday cake blondies alongside a scoop of vanilla ice cream or a dollop of whipped cream. This pairing creates a delightful dessert experience that your guests will surely enjoy.

DecorationServing
FrostingCut into squares
Rainbow SprinklesPlace on a platter
White Chocolate ChipsPair with vanilla ice cream
GlazeServe with whipped cream

Baking Tips for Perfect Blondies

bake perfect blondies easily

To guarantee the perfect blondie texture, make sure you use softened butter and room-temperature eggs. These ingredients help create a smooth and creamy batter that bakes into a deliciously chewy treat.

When mixing the batter, gently fold in rainbow sprinkles for a pop of color and a fun, festive touch to your blondies.

Be cautious not to overbake the blondies; this could result in a dry texture instead of the desired fudgy consistency.

Advertisement

Once baked and cooled, store the birthday cake blondies in an airtight container at room temperature for freshness, keeping them delectable for up to 3 days.

If you want to extend their shelf life, consider freezing the blondies for up to 3 months. Remember to thaw them before serving to maintain the best taste and texture.

Fun Variations to Try

exploring new yoga poses

Get creative with your birthday cake blondies by trying out these fun variations for a delightful twist on the classic recipe. Enhance the texture and flavor by incorporating chopped nuts like walnuts or pecans into your blondie batter.

Experiment with different types of chocolate chips such as rich dark chocolate or creamy milk chocolate to add a unique touch to your dessert. For a burst of sweetness and tanginess, consider adding dried fruit like cranberries or cherries to your blondies.

To elevate the decadence, swirl in a ribbon of caramel or dulce de leche for a luscious caramel birthday cake blondie. Before baking, sprinkle a bit of sea salt on top of your blondies to enhance the flavors and create a delightful contrast to the sweetness.

These variations will add depth and complexity to your birthday cake blondies, making them a standout treat for any occasion.

Advertisement

Decorating Ideas for Blondies

blondie baking tips shared

Looking to add a creative flair to your blondies? Try decorating them with colorful rainbow sprinkles or drizzling a vanilla or white chocolate glaze over the top for a touch of sweetness.

Use cookie cutters to make fun shapes like stars, hearts, or circles, creating a playful presentation. Dusting the blondies with powdered sugar can give them a simple yet elegant finishing touch.

For a pop of color and freshness, consider garnishing your blondies with fresh berries or edible flowers. These decorations not only enhance the visual appeal but also add a burst of flavor to your dessert.

Whether you prefer a festive appearance with sprinkles and white chocolate or a more refined touch with powdered sugar and fresh berries, decorating your blondies allows you to customize them to your liking and impress your guests with a fun and delightful treat.

Storage Tips for Leftover Blondies

blondie storage suggestions provided

You can maintain the freshness of leftover birthday cake blondies by storing them in an airtight container at room temperature for up to 3 days. To extend the storage time, freezing the blondies in a freezer-safe container is recommended for up to 3 months. When ready to enjoy the frozen blondies, make sure to thaw them in the refrigerator before reheating or serving to preserve their delicious texture. It's important to avoid placing the blondies in direct sunlight or near heat sources, as this can lead to them drying out prematurely. Proper storage techniques are essential in maintaining the flavor and texture of birthday cake blondies for extended enjoyment.

Storage Tips for Leftover Blondies
Store at room temperatureUp to 3 days
Freeze in airtight containerUp to 3 months
Thaw in refrigerator before servingPrior to eating
Avoid direct sunlightPrevent drying

More Festive Dessert Recipes

delicious holiday treats galore

For a delightful array of festive dessert options, consider trying out some fun and colorful recipes to elevate your sweet treats.

Start by making Birthday Cake Cereal Bars for a festive treat that's sure to bring a smile to your face.

If you're looking for a fruity twist, experiment with Raspberry Chocolate Chip Blondies. These blondies offer a unique flavor combination that combines the tartness of raspberries with the sweetness of chocolate chips.

Advertisement

If you or your loved ones have dietary restrictions, explore Gluten-Free Sugar Cookies. These cookies are a delightful dessert option that caters to those who require gluten-free treats.

For a colorful and delightful treat, try White Chocolate Blueberry Oatmeal Cookie Bars. The combination of white chocolate and blueberries creates a unique flavor profile that's both delicious and visually appealing.

If you're looking for a plant-based dessert, treat yourself to a Vegan Single Serve Funfetti Cookie. This vibrant and fun dessert option is perfect for those who follow a vegan diet and enjoy a delightful dessert without any animal products.

Frequently Asked Questions

What Makes a Blondie Different From a Brownie?

Blondies differ from brownies by omitting chocolate, using brown sugar for a rich, caramel flavor. They offer a vanilla base, chewy texture, and are versatile with mix-ins like white chocolate chips. Customize for a buttery, sweet treat.

What Is a Blondie Dessert Made Of?

A blondie dessert is made of butter, brown sugar, eggs, vanilla extract, flour, and salt. It lacks chocolate, showcasing a rich vanilla flavor. You can customize them with add-ins like white chocolate chips, sprinkles, nuts, or frosting.

Advertisement

What Is a Good Birthday Cake for Someone Who Doesn T Like Sweets?

If sweets aren't your thing, consider a savory cheese or charcuterie board as a unique birthday cake alternative. For a less sweet treat, try a fruit tart, cheesecake, or tiramisu. Personalize with favorite flavors like coffee or chai for a tasty surprise.

What Can You Have Instead of a Birthday Cake?

If you're looking for an alternative to a traditional birthday cake, you could try Birthday Cake Blondies. They offer a chewy, buttery twist with rainbow sprinkles and white chocolate chips, perfect for a fun celebration.

Can Dirt Cups Be Made in a Birthday Cake Blondies Style for a Festive Dessert?

Yes, you can make fun dirt cups recipe in a birthday cake blondies style for a festive dessert. Simply incorporate the fun dirt cups elements into a blondie batter, bake, and then decorate with the usual toppings for a playful and delicious twist on a classic dessert.

Conclusion

To sum up, these birthday cake blondies are a delightful and easy-to-make dessert option for any celebration. With a simple recipe, fun variations, and creative decorating ideas, they're sure to be a hit with friends and family.

By following the step-by-step instructions and baking tips provided, you can create a delicious treat that will leave everyone wanting more.

Advertisement

So, why not give these festive blondies a try and add a touch of sweetness to your next gathering?

Continue Reading

Trending