Breakfast
Cinnamon Buns: A Warm and Gooey Breakfast Treat
Melt-in-your-mouth cinnamon buns: an irresistible breakfast indulgence that promises to elevate your mornings with warm, gooey goodness.
For a delightful breakfast, treat yourself to the exquisite taste of cinnamon buns. These warm, gooey buns are crafted with a fluffy dough enriched by a blend of warm milk, butter, sugar, and flour, ensuring a truly decadent experience. The gooey filling, a mix of butter, sugar, and cinnamon, bestows upon these buns their irresistible flavor. Achieve perfection by paying close attention to baking temperature and rolling techniques. To elevate your culinary adventure, customize with nuts, spices, or fruits. Brushed with melted butter and served warm, these buns promise to captivate your senses with each delectable bite.
Key Takeaways
- Warm, gooey cinnamon buns are made with a rich dough and a sweet, cinnamon filling.
- Serve buns warm with cream cheese frosting or powdered sugar for a delicious breakfast treat.
- Achieve fluffy, golden-brown buns by following precise baking instructions.
- Customize buns with nuts, fruits, or spices for a unique flavor experience.
- Store leftovers properly to maintain freshness and reheat for a quick and tasty snack.
Recipe Overview
When making cinnamon buns, start by preparing the dough for the rolls. This dough is essential to achieving the fluffy, homemade cinnamon rolls that everyone loves. The dough for these delectable treats requires yeast, warm milk, butter, sugar, and flour. The yeast helps the dough rise, creating that airy texture, while the warm milk and butter add richness. Mixing in the sugar provides sweetness, balancing the warm, gooey cinnamon filling that makes these rolls so irresistible.
After preparing the dough, the next step is to roll it out and generously spread a mixture of butter, sugar, and cinnamon. This gooey filling is what gives cinnamon buns their signature taste and texture.
Once the rolls are sliced and placed in a baking dish, they're ready to be baked to golden perfection. After baking, a luscious cream cheese icing is drizzled over the warm cinnamon buns, adding a final touch of sweetness and decadence.
Ingredients Needed
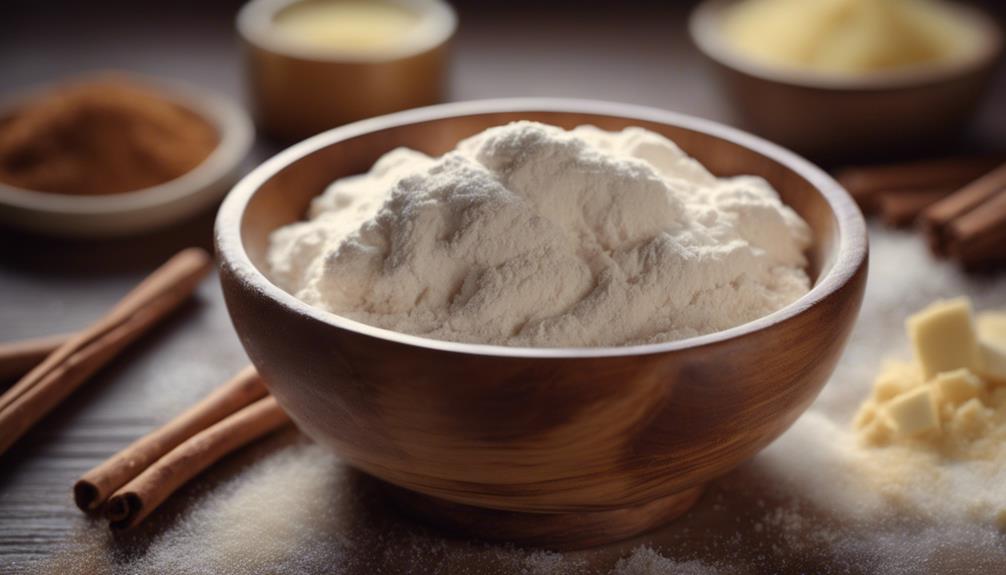
To prepare delicious cinnamon buns, gather key ingredients like all-purpose flour, yeast, warm milk, butter, sugar, and cinnamon. The following items are essential for creating these warm and gooey breakfast treats:
- All-purpose Flour: Provides the structure and base for the dough.
- Yeast: Helps the dough rise and gives the cinnamon rolls their fluffy texture.
- Warm Milk: Adds moisture and richness to the dough, creating a soft and tender bun.
For the filling, a mixture of butter, brown sugar, and cinnamon is combined to create that irresistible gooey swirl inside the rolls.
To top off these delectable treats, a choice of cream cheese frosting or a simple powdered sugar icing can be used. These icing options add a sweet finish to the cinnamon buns, enhancing their flavor profile and providing a delightful contrast to the warm cinnamon-infused rolls.
Step-by-Step Instructions
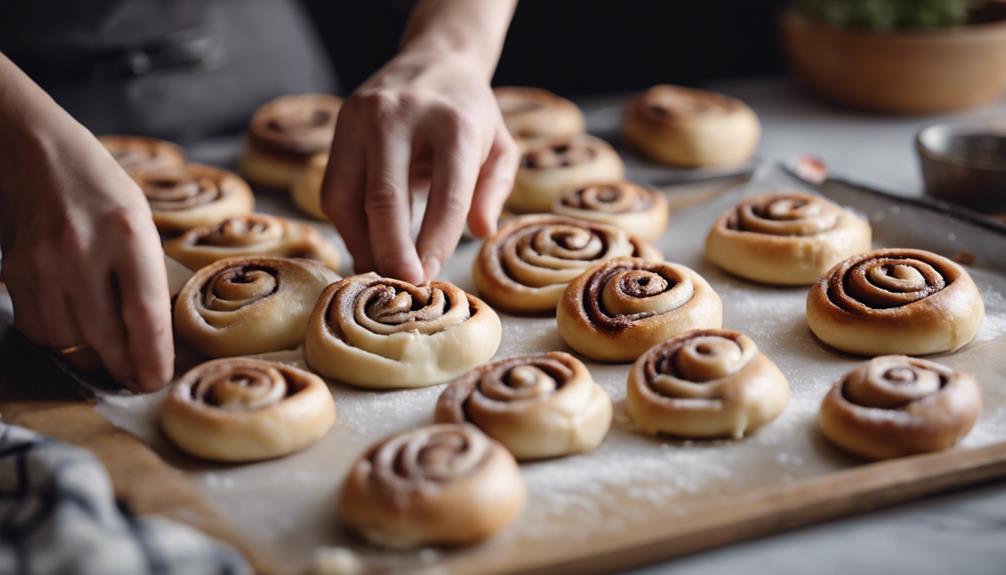
Start by preparing the dough for your delicious cinnamon buns, ensuring it rises properly for that fluffy texture you crave. Begin by combining quality ingredients like flour, yeast, sugar, milk, and butter. Knead the dough until it's smooth and elastic, then let it rest in a warm place until it doubles in size. This step is essential to achieving the desired light and airy consistency in your buns.
Once the dough has risen properly, roll it out into a rectangular shape. Spread a rich and flavorful filling of butter, cinnamon, and brown sugar evenly over the dough. Roll the dough tightly from one end to the other and slice it into equal portions. This helps to make sure that each bun bakes uniformly and looks visually appealing.
Place the sliced buns on a baking tray, leaving space between them to expand. Bake until golden brown and aromatic.
Finish off your warm and gooey breakfast treat by drizzling a delicious icing or frosting over the freshly baked cinnamon buns. Enjoy the sweet indulgence of your homemade creation.
Tips for Perfect Cinnamon Buns
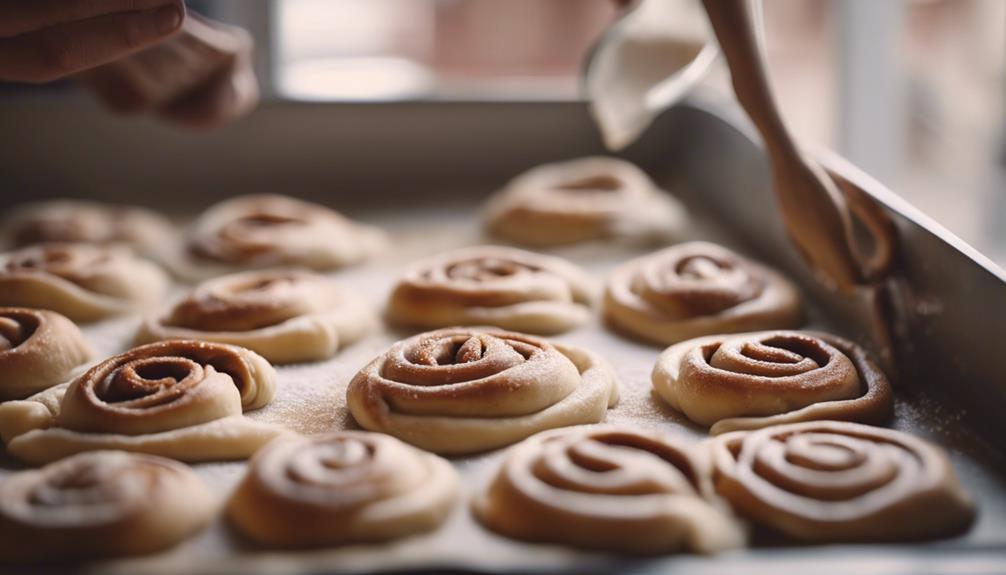
To achieve perfect cinnamon buns, it's essential to pay close attention to baking temperature tips and rolling technique secrets.
Ensuring the correct temperature and baking time will result in golden, gooey buns that are a delight to enjoy.
Mastering the art of rolling the dough tightly will create beautiful spirals in your baked treats, enhancing both the presentation and texture.
Baking Temperature Tips
Preheat your oven to 350°F (175°C) for soft and evenly baked cinnamon buns. Achieving the essential oven temperature is vital in guaranteeing your cinnamon buns turn out just right.
Here are some essential baking temperature tips to help you achieve perfectly baked cinnamon buns:
- Properly Preheated Oven: Always preheat your oven before placing the cinnamon buns inside. This ensures that the baking temperature is consistent from the start, promoting even baking throughout.
- Golden Brown Tops: Maintaining the recommended baking temperature helps in achieving those desirable golden brown tops on your cinnamon buns, giving them a visually appealing finish.
- Crunchy Edges: Baking at the right temperature not only prevents undercooked or doughy centers but also helps in creating crisp edges that add a delightful texture to your cinnamon buns.
Rolling Technique Secrets
For flawless cinnamon buns, make sure your dough log is rolled tightly without any gaps to create consistent swirls. When you spread the butter and cinnamon sugar mixture evenly over the dough, each bite will burst with flavor. It's important to seal the ends of the dough log tightly to prevent any filling from leaking out while baking. To guarantee clean and precise cuts, use a sharp knife or unflavored dental floss when portioning your cinnamon buns. Remember, properly proofed and shaped cinnamon buns will bake up beautifully, boasting a golden exterior and a soft, gooey filling.
Rolling Technique Secrets | Tips for Perfect Cinnamon Buns |
---|---|
Roll tightly without gaps | Create consistent swirls |
Spread butter and cinnamon sugar evenly | Ensure flavor in every bite |
Seal the ends of the dough log tightly | Prevent filling leaks during baking |
Use a sharp knife or dental floss | For clean and precise cuts |
Proofed and shaped dough | Results in beautifully baked buns |
Baking and Serving Suggestions
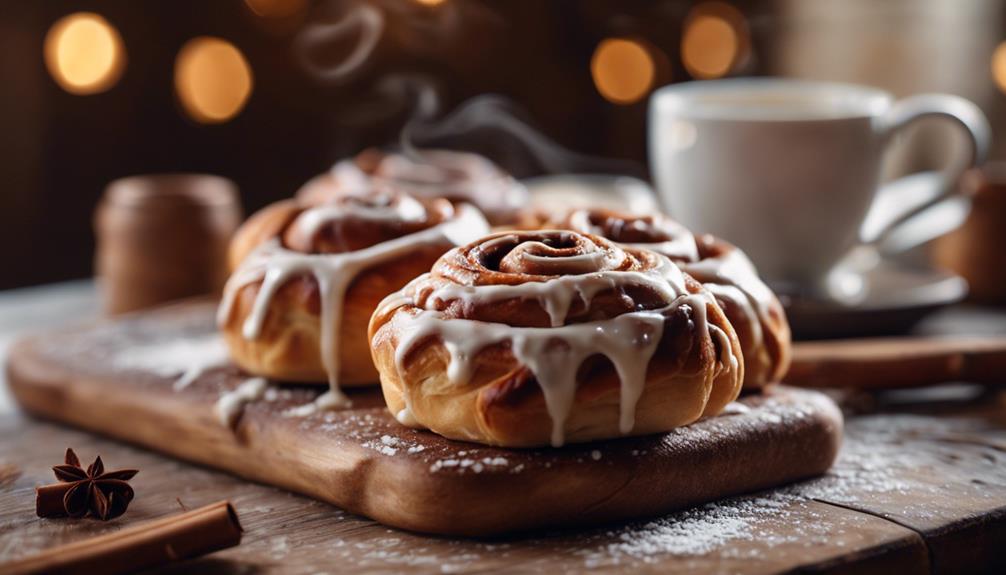
Consider lightly brushing melted butter on the cinnamon buns after baking for added richness and flavor.
To enhance the experience, here are some suggestions for baking and serving your perfect cinnamon rolls:
- Achieve the ideal soft and gooey texture by baking the cinnamon buns until they're lightly golden on top.
- Serve the warm cinnamon buns fresh out of the oven to savor the best flavor and enjoy the gooey goodness.
- For an extra touch of indulgence, drizzle either cream cheese frosting or vanilla icing over the warm cinnamon buns.
Cinnamon buns are a delightful breakfast treat that can also be enjoyed as a comforting snack at any time of the day.
Remember to store any leftover cinnamon buns tightly covered at room temperature. When craving that freshly baked taste, simply reheat them briefly in the microwave.
Variations and Customizations
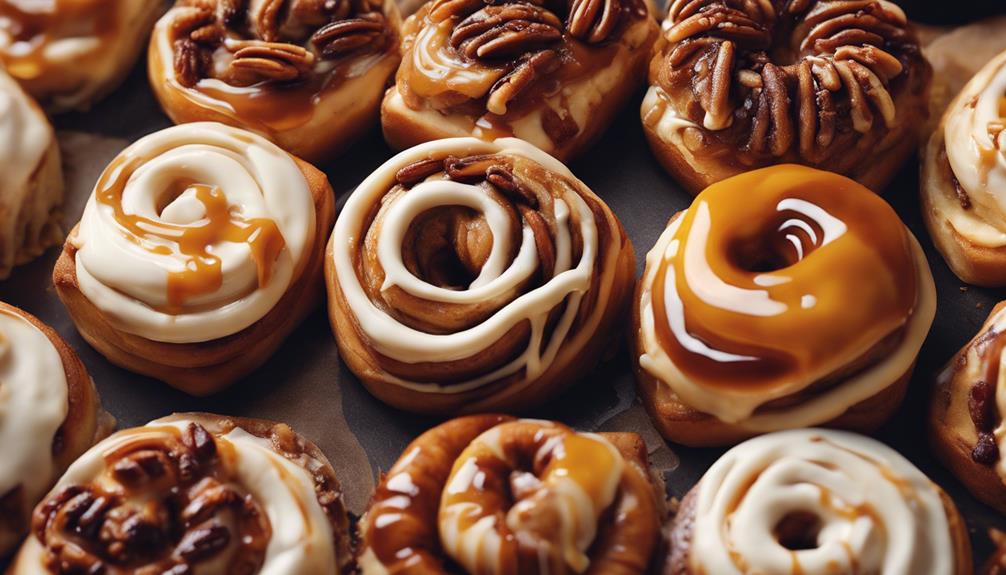
Get creative with your cinnamon buns by exploring a variety of delicious variations and customizations. Customize your sweet treats by incorporating nuts such as pecans or walnuts to provide an added crunch and rich flavor.
Experiment with an array of spices like cardamom, nutmeg, or ginger to create unique and aromatic profiles that will tantalize your taste buds. For an extra touch of indulgence, drizzle some decadent caramel or rich chocolate sauce on top of your cinnamon buns.
If you're feeling adventurous, consider adding fruits like apples, raisins, or cranberries into the filling for a delightful fruity twist. For those who prefer a savory option, try sprinkling bacon bits or a pinch of sea salt on your cinnamon buns to elevate the flavors to a whole new level.
With these customizable options, the possibilities are endless when it comes to making your cinnamon buns truly your own.
Troubleshooting Common Issues
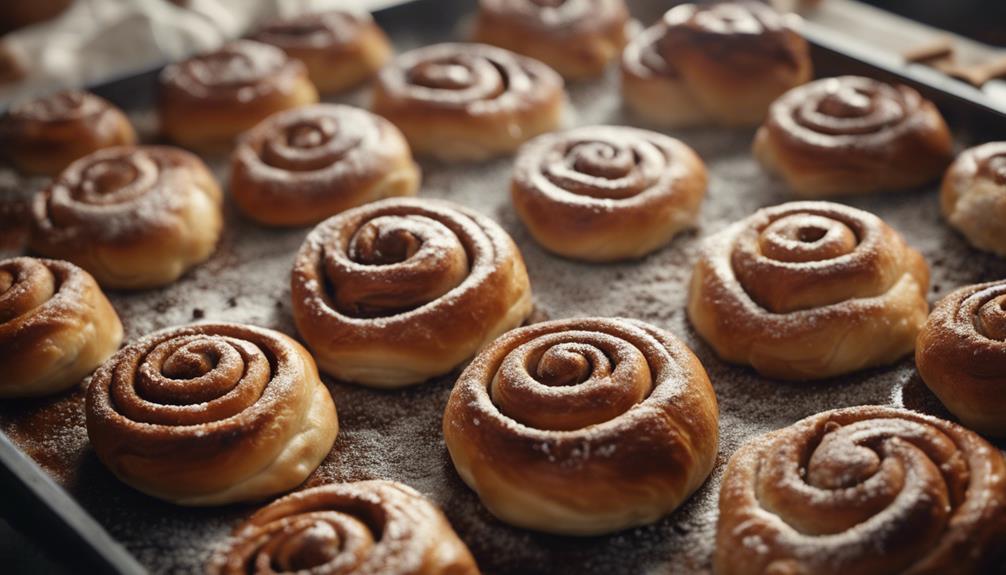
If your cinnamon buns turn out dense or dry, you may have used too much flour in the dough.
To guarantee your cinnamon buns turn out perfectly gooey and delicious, consider the following tips:
- Let the rolls rest: After baking, allow your warm cinnamon rolls to rest for a few minutes before serving. This helps the flavors meld and the texture to settle, giving you the best experience.
- Using a sharp knife: When slicing your cinnamon buns, use a sharp knife to get clean and neat cuts. This ensures that the layers and filling stay intact, providing a visually appealing presentation.
- Ensure proper dough rise: Make sure to let your dough rise in a warm environment. This step is essential for achieving the right texture and fluffiness in your cinnamon buns.
Storage and Reheating Instructions
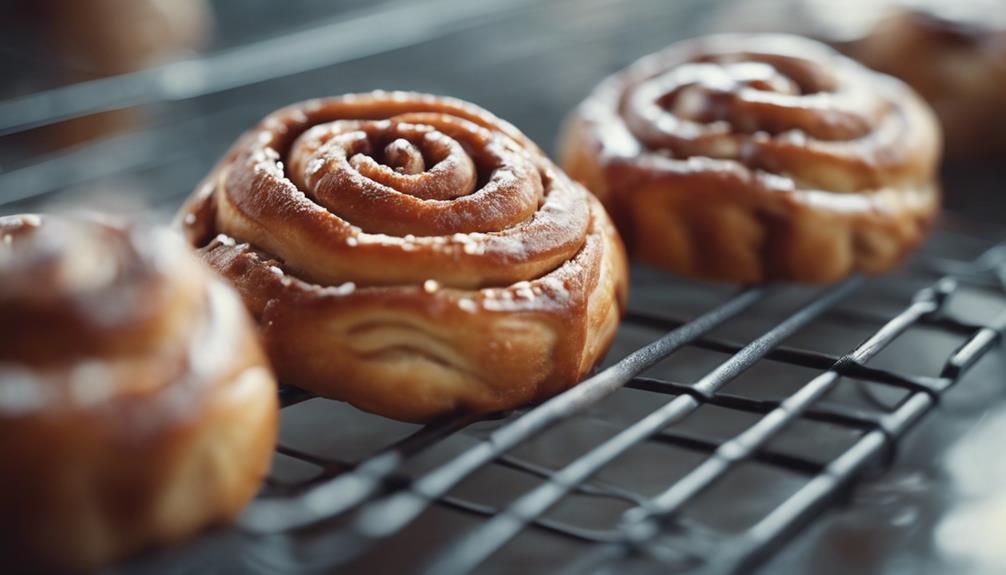
For peak freshness and convenience, make sure to follow proper storage and reheating instructions for your cinnamon buns.
When storing leftover cinnamon rolls, it's best to keep them tightly covered at room temperature for up to 2 days. If you wish to extend their shelf life, refrigerate the rolls in an airtight container for up to a week. For longer storage, consider freezing unbaked rolls by wrapping them tightly in plastic wrap and aluminum foil.
To enjoy frozen rolls, remember to defrost them in the refrigerator overnight and let them rise at room temperature before baking.
When it comes to reheating leftover cinnamon rolls, you have two options. You can either warm them in the microwave for a few seconds or use the oven at a low temperature to restore their warmth and softness.
Frequently Asked Questions
Are Cinnamon Buns Breakfast or Dessert?
Are cinnamon buns breakfast or dessert? Indulge in their warm, sweet flavors any time of day. Whether you savor them in the morning or after a meal, cinnamon buns' gooey goodness makes them a versatile treat.
What Happened to Kroger Ooey Gooey Cinnamon Rolls?
You asked about what happened to Kroger Ooey Gooey Cinnamon Rolls. Unfortunately, Kroger discontinued them, leaving many disappointed fans. Backlash and petitions ensued. Customers are now searching for similar alternatives or recipes to satisfy their cravings.
Why Are Cinnabon Rolls so Gooey?
Cinnabon rolls are so gooey because of their high sugar content, buttery dough, and cream cheese frosting. The rolling technique traps the filling inside, creating a gooey center. Baking melts the filling with the dough, enhancing the irresistibly gooey texture.
What Is the Best Way to Eat a Cinnamon Bun?
To enjoy a cinnamon bun, you should savor it fresh from the oven, warm and gooey. Pair it with coffee or milk, and if you like, add cream cheese icing for extra sweetness. Indulge, there's no wrong way.
Can Cinnamon Buns Be Enjoyed as a Savory Breakfast Option Like Chilaquiles?
Absolutely! Cinnamon buns can be a flavorful Mexican breakfast recipe by adding savory elements like eggs, cheese, and salsa. Just like chilaquiles, the sweet and spicy flavor combination makes for a delicious morning meal that is sure to satisfy your taste buds. Try it for a tasty twist on breakfast!
Conclusion
To sum up, while cinnamon buns may appear simple to make, their deceptively gooey and irresistible nature can lead to unexpected challenges in achieving perfection.
So, next time you start on the journey of creating these warm breakfast treats, remember to proceed with caution and attention to detail.
After all, the sweet reward of a perfectly baked cinnamon bun is truly worth the effort and patience required.
Francesca, as the creative force behind our compelling content, combines culinary expertise with journalistic flair. She has a deep appreciation for the cultural histories and artisanal traditions that influence remarkable flavors around the world. Through engaging narratives, she transports our audience to the heart of each culinary experience. Whether she’s documenting the centuries-old techniques of a Sicilian cheese maker or uncovering the personal stories of our producers, Francesca’s storytelling prowess drives our mission to connect people through food.
Breakfast
Cornbread Pancakes: A Sweet and Savory Breakfast
Journey into a breakfast experience like no other with cornbread pancakes, where sweet and savory flavors collide for an unforgettable treat.
Experience a unique breakfast delight with cornbread pancakes, combining sweet and savory notes for a tasty treat. An ideal balance of all-purpose flour, cornmeal, and flavorful ingredients creates a fluffy texture with a crispy finish. Cook on a preheated griddle until golden, then pair with a tangy cranberry-orange compote for a burst of flavor. Serve with whipped cream, maple syrup, or fresh mint for a delightful touch. Explore various flavor combinations and benefit from cornmeal's fiber-rich, gluten-free properties. Enhance your breakfast with tailored beverage pairings to elevate the experience. Subtle hints of further culinary delights await.
Key Takeaways
- Balance sweet and savory flavors for a crispy outside and tender inside.
- Incorporate cornmeal for a gluten-free, fiber-rich, and low-calorie option.
- Serve with cranberry-orange compote for a tangy and zesty contrast.
- Pair with whipped cream, powdered sugar, or warm maple syrup for added sweetness.
- Experiment with beverage pairings like coffee, cold milk, or herbal tea for a complete breakfast experience.
Ingredients for Cornbread Pancakes
To make delicious cornbread pancakes, gather all-purpose flour, fine ground cornmeal, baking powder, sugar, salt, buttermilk, egg, and melted butter. These ingredients form the base for creating a delightful stack of pancakes that blend the wholesome flavor of cornbread with the fluffy texture of traditional pancakes.
Once cooked to golden perfection, these cornbread pancakes can be topped with a generous drizzle of warm maple syrup and a dollop of creamy butter to enhance their taste.
Adding warm syrup and butter to your cornbread pancakes creates a harmonious balance of sweetness and richness that elevates the overall dining experience. The syrup seeps into the crevices of the pancakes, infusing them with a comforting sweetness, while the butter melts to create a luscious coating that complements the cornmeal's earthy flavor.
Together, these toppings transform a simple breakfast dish into a decadent treat that satisfies both the palate and the soul.
Mixing the Pancake Batter
Begin by mixing the dry ingredients such as flour, cornmeal, sugar, baking powder, and salt in a mixing bowl. Make sure these dry components are well combined to create a uniform mixture.
In a separate bowl, whisk together the wet ingredients, including buttermilk, egg, and melted butter. It's important to blend the wet ingredients thoroughly to achieve a smooth consistency.
Once both the dry and wet ingredients are prepared, gently combine them, being cautious not to overmix. This step is essential to maintain the desired light and fluffy texture of the pancake batter.
The balance between sweet and savory flavors in the batter is key to enhancing the overall breakfast experience. By carefully incorporating the wet and dry ingredients, you set the foundation for delicious cornbread pancakes that are crispy on the outside and tender on the inside when cooked on a skillet.
Cooking the Pancakes on the Griddle
Preheat the griddle to medium heat before cooking the cornbread pancakes. Use a non-stick pan or apply a small amount of butter on the griddle to guarantee they do not stick. Pour the pancake batter onto the griddle in small circles to create individual pancakes. Cook each pancake until bubbles form on the surface, then flip and cook the other side until golden brown. Keep the cooked pancakes warm in a low oven while finishing the rest of the batch to make sure they stay hot for serving.
Cooking Step | Instructions | Reminder |
---|---|---|
Preheat the griddle to medium heat | Make sure the griddle is evenly heated to cook the pancakes uniformly. | Adjust heat if needed to prevent burning. |
Apply non-stick spray or butter to the griddle | Prevent the pancakes from sticking to the surface for easy flipping. | Reapply between batches for consistent results. |
Pour batter in small circles on the griddle | Create individual pancakes that cook evenly and are easy to manage. | Leave enough space between each pancake for flipping. |
Cook until bubbles form, then flip | Wait for bubbles to appear before flipping, ensuring proper cooking on both sides. | Use a spatula to flip gently to avoid splattering. |
Keep cooked pancakes warm in a low oven | Maintain the pancakes' temperature while finishing the batch to serve them hot. | Cover with a cloth to prevent drying out. |
Making Cranberry-Orange Compote
Prepare the tangy Cranberry-Orange Compote by simmering fresh cranberries with orange juice, sugar, and orange zest until the mixture thickens to a syrup-like consistency. This flavorful compote serves as an ideal pancake topping, especially for those seeking a balance of sweet and savory flavors. The combination of fresh cranberries, vibrant orange juice, and the subtle sweetness of sugar creates a delightful burst of citrusy goodness that perfectly complements the hearty cornbread pancakes.
Simmer the cranberries until they burst open, infusing the compote with a rich, tangy flavor profile. The addition of orange zest enhances the citrus notes, adding a zesty kick to the compote. Once the mixture reaches a thick, syrup-like consistency, it's ready to be generously drizzled over your savory pancakes, elevating them with a touch of brightness and contrast.
This Cranberry-Orange Compote can be conveniently prepared ahead of time and stored in the refrigerator, making it a convenient and delicious addition to your breakfast repertoire.
Serving Suggestions for Pancakes
To enhance the experience of enjoying your cornbread pancakes, consider these creative serving suggestions that will elevate your breakfast meal. Garnish your medium cornmeal pancakes with a dollop of whipped cream for a decadent touch, and sprinkle some powdered sugar on top for an extra hint of sweetness. Pair your pancakes with warm maple syrup to complement the savory flavors of the cornbread. To add a pop of color and freshness, garnish your pancakes with fresh mint leaves. For a balanced breakfast, serve the pancakes with a side of dairy-free yogurt. As you indulge in these baked delights, enjoy a hot cup of coffee or herbal tea to complete your cozy morning meal. Experiment with these serving suggestions to create a delightful breakfast experience that combines the warmth of Baking with the comforting flavors of cornbread and maple syrup.
Serving Suggestions | Description |
---|---|
Dollop of Whipped Cream | Adds a decadent touch to your pancakes. |
Powdered Sugar | Provides an extra hint of sweetness. |
Warm Maple Syrup | Complements the savory flavors of the cornbread. |
Fresh Mint Leaves | Garnish for a pop of color and freshness. |
Tips for Perfect Pancake Flipping
To achieve perfect pancake flipping, make sure you use a flat spatula to slide under the pancake effortlessly.
Wait until bubbles form and the edges look set before flipping in one swift motion to prevent breaking.
Flipping Technique Tips
For a successful pancake flip, make sure you have a flat spatula ready to slide under the pancake effortlessly.
When flipping, gently lift the pancake and execute the flip in one smooth motion to avoid any mishaps.
It's important to wait until bubbles start forming on the pancake's surface before attempting the flip. This guarantees that the pancake is adequately cooked and won't fall apart during the process.
Additionally, keep an eye on the heat level; if the pancake is browning too quickly or too slowly, adjust the heat accordingly to achieve the perfect flip.
Practice is key in mastering the art of pancake flipping, so don't be discouraged if your first few attempts aren't flawless.
With patience and persistence, you'll soon become a pro at flipping delicious cornbread pancakes.
Timing for Best Results
When considering the ideal timing for flipping your cornbread pancakes, make sure that bubbles have formed on the surface and the edges appear set for the best results. Waiting for these key indicators guarantees that your pancakes are cooked evenly and thoroughly.
Here are some tips to help you achieve perfect pancake flipping:
- Wait for the Bubbles: Patience is key; wait until bubbles have formed on the surface of the pancake before attempting to flip it.
- Check the Edges: Ensure that the edges of the pancake look set and slightly golden before turning it over.
- Avoid Flipping Too Early: Flipping too early can result in a raw center, so be attentive to the signs of readiness.
- Use a Gentle Touch: When flipping, use a spatula to lift the pancake gently to avoid any breakage or misshaping.
Variations of Cornbread Pancakes
Explore the diverse range of flavors you can create with variations of cornbread pancakes. By incorporating different ingredients into the cornmeal base, you can transform the flavor and texture of these pancakes to suit your preferences.
Sweet versions may include additions like honey, vanilla, or warm maple syrup, enhancing the pancake's sweetness and providing a delightful contrast to the cornmeal's earthy taste.
On the other hand, savory variations may feature ingredients such as bacon, green onions, or bacon drippings, offering a savory and rich twist to the traditional pancake recipe.
These variations cater to a wide range of taste preferences, allowing for customization and creativity in the kitchen. The adaptability of cornbread pancakes makes them a versatile option for breakfast or brunch, perfect for those looking to experiment with different flavors and toppings to elevate their dining experience.
Health Benefits of Cornmeal
Cornmeal offers a variety of health benefits that can contribute to a well-rounded diet and overall well-being.
When incorporating cornmeal into your diet, you can enjoy the following advantages:
- Fiber: Cornmeal is a good source of fiber, providing about 5 grams per cup, aiding in digestion and promoting gut health.
- Essential Minerals: It contains essential minerals like iron, magnesium, and phosphorus, which are important for energy production and bone health.
- Gluten-Free: Cornmeal is gluten-free, making it a suitable option for those with gluten sensitivities or celiac disease.
- Low in Fat and Calories: Being low in fat and calories, cornmeal is a good choice for those looking to manage their weight or maintain a healthy diet.
Pairing Pancakes With Beverages
When it comes to pairing your cornbread pancakes with beverages, you have a plethora of options to ponder. From a classic cup of coffee to a invigorating glass of orange juice, each choice can enhance the flavors of your meal.
Experimenting with different beverages can elevate your breakfast experience and add a new dimension to your sweet and savory cornbread pancakes.
Ideal Beverage Pairings
Enhance your cornbread pancake dining experience by carefully selecting the ideal beverage pairings to complement the sweet or savory flavors. When enjoying sweet cornbread pancakes, consider pairing them with a hot cup of coffee or a glass of cold milk for that classic breakfast combination. Alternatively, for a more indulgent experience, opt for a tall glass of maple syrup-infused milkshake or a creamy vanilla latte to elevate the sweetness of the pancakes.
On the other hand, if you're savoring savory cornbread pancakes, complement them with a side of freshly squeezed orange juice or a tangy tomato juice for a invigorating contrast in flavors. To add a zesty kick to your meal, pair savory cornbread pancakes with a Bloody Mary or a spicy chai tea for a flavorful and satisfying dining experience.
- Hot cup of coffee or cold milk
- Freshly squeezed orange juice or tangy tomato juice
- Maple syrup-infused milkshake or creamy vanilla latte
- Zesty Bloody Mary or spicy chai tea
Enhancing Flavor Profiles
To elevate the flavor profiles of your cornbread pancakes, consider pairing them with a variety of beverages that complement both the sweet and savory elements of the dish. The savory-sweet flavors of cornbread pancakes can be enhanced by enjoying them with a hot cup of freshly brewed coffee for a classic breakfast combination. For a refreshing twist, savor the taste of cornbread pancakes with a glass of cold orange juice. If you prefer a cozy morning meal, pair your cornbread pancakes with a steaming cup of herbal tea. To add a creamy and dairy-free element to your breakfast, serve the pancakes with a side of dairy-free yogurt. For a decadent touch, top your cornbread pancakes with a dollop of vegan whipped cream.
Beverage | Description |
---|---|
Freshly brewed coffee | Classic pairing with savory-sweet flavors |
Cold orange juice | Refreshing accompaniment for a burst of flavor |
Herbal tea | Cozy option to complement the sweet elements |
Dairy-free yogurt | Creamy addition enhancing the overall experience |
Storage Tips for Leftover Pancakes
Consider storing your leftover cornbread pancakes in an airtight container in the refrigerator for up to 3-4 days. When dealing with storage tips for leftover pancakes, it's crucial to maintain their freshness and taste for later consumption.
Here are some recommendations to make the most of your leftover cornbread pancakes:
- Use Airtight Containers: Seal your pancakes in airtight containers to prevent moisture loss and maintain their texture.
- Label and Date: Always label your containers with the date you stored the pancakes to keep track of freshness.
- Consider Freezing: If you want to extend the shelf life, freeze the pancakes in freezer-safe bags or containers for up to 2-3 months.
- Thaw Properly: When reheating frozen pancakes, ensure they're properly thawed in the refrigerator before using the microwave or skillet method.
Frequently Asked Questions
What to Eat Pancakes With for Breakfast?
Pancakes are versatile; top them with fresh berries, maple syrup, or pair with eggs, bacon, or avocado for a savory twist. Add Greek yogurt or cottage cheese for protein. Experiment with fruit compote, chocolate chips, or cinnamon for a delicious experience.
What Makes Diner Pancakes Taste so Good?
You love diner pancakes because buttermilk gives them a tangy kick and fluffy texture. The cornmeal adds crunch and depth of flavor, while sweet and savory combos like honey butter syrup or bacon bits make them irresistible.
How to Make Fluffy Pancakes Gordon Ramsay?
To make fluffy pancakes Gordon Ramsay-style, separate egg whites and yolks, whip whites to stiff peaks, fold into batter with buttermilk, cook on preheated griddle over medium heat. Follow these steps for light, delicious pancakes.
How to Make Pancakes the Night Before?
Prepare for a stress-free morning by prepping your pancake batter the night before. Combine dry and wet ingredients, cover, refrigerate. In the AM, pour onto hot skillet. Enjoy fresh cornbread pancakes hassle-free!
Which Corn-based Breakfast Option is More Filling?
Looking for a satisfying breakfast option? Try our cornflake crusted French toast recipe. The cornflake coating adds a satisfying crunch to the classic French toast, making it more filling and delicious. Give it a try and start your day with a hearty meal that will keep you satisfied until lunchtime.
Conclusion
To sum up, cornbread pancakes offer a delightful blend of sweet and savory flavors that will surely satisfy your breakfast cravings.
As you indulge in these delicious pancakes, remember the versatility of cornmeal and the health benefits it provides.
So, whip up a batch of these delectable pancakes, top them with cranberry-orange compote, and savor each bite with a warm cup of coffee.
Start your day right with this comforting and flavorful breakfast option.
Francesca, as the creative force behind our compelling content, combines culinary expertise with journalistic flair. She has a deep appreciation for the cultural histories and artisanal traditions that influence remarkable flavors around the world. Through engaging narratives, she transports our audience to the heart of each culinary experience. Whether she’s documenting the centuries-old techniques of a Sicilian cheese maker or uncovering the personal stories of our producers, Francesca’s storytelling prowess drives our mission to connect people through food.
Breakfast
Egg Rollup and Dumpling Sauce: A Quick and Tasty Breakfast
Crispy hash browns, eggs, bacon, and cheese rolled up with flavorful dumpling sauce – a breakfast adventure waiting to unfold.
Step into a flavorsome breakfast world with Egg Rollup and Dumpling Sauce that kickstarts your day efficiently. Crafted from hash browns, eggs, milk, bacon, and cheese, these creations are a culinary delight. Prepare the filling with meticulous steps — an essential key to success. Immerse yourself in a morning adventure of taste and texture with this innovative dish that promises to elevate your breakfast routine to the next level. Roll up the components tightly, sealing them with precision for that perfect outcome. Enhance your dining experience by exploring diverse dipping sauce options, adding unique dimensions to your breakfast affair.
Key Takeaways
- Prepare hash browns, eggs, bacon, and cheese for a flavorful filling.
- Cook filling until crispy and seasoned well for optimal taste.
- Roll filling tightly in wrappers, sealing edges to avoid spillage.
- Serve with creative sauces like spicy mayo or sweet chili for variety.
- Enjoy crispy and satisfying breakfast egg rolls for a quick and tasty morning meal.
Ingredients for Egg Rollup
For the Egg Rollup, you'll need hash browns, eggs, milk, bacon, and cheese. To begin, whisk together the eggs and milk until well combined.
Next, cook the hash browns until crispy, then add in the bacon and cheese to create a flavorful filling. Once all the ingredients are cooked, combine them with the egg mixture to form the base of your egg rollup.
This breakfast option isn't only convenient but can also be prepared ahead of time and frozen for later consumption. The versatility of the egg rollup allows for customization with various ingredients such as breakfast sausage, Canadian bacon, or ham, catering to different taste preferences.
After filling the egg roll wrappers with the prepared mixture, fry them in hot oil until they turn golden brown and crispy.
Serve the egg rollups with a side of spicy ketchup dipping sauce for an extra kick of flavor. Enjoy this delicious and satisfying breakfast dish that's sure to please your taste buds.
Preparing the Egg Roll Filling
When preparing the egg roll filling, make sure you have all the necessary ingredients, including cooked hash browns, scrambled eggs with bacon, and cheese.
Allow the filling to cool before rolling it into the egg roll wrappers to prevent sogginess.
Distribute the mixture evenly to guarantee consistent flavors throughout each egg roll, creating a hearty and flavorful breakfast option.
Egg Roll Ingredients
To create the flavorful egg roll filling, combine hash browns cooked with oil, scrambled eggs whisked with milk and seasonings, crispy bacon, and shredded cheese.
When preparing the ingredients for your egg rolls, it's essential to follow these steps:
- Cook hash browns with oil and spices until crispy.
- Whisk together eggs with milk and additional seasonings for a fluffy texture.
- Crisp up bacon until it's golden and add it to the mixture.
- Incorporate shredded cheese for a gooey and savory touch.
Cooking the Filling
After preparing the flavorful egg roll filling ingredients as described earlier, proceed to cook the mixture until all the flavors meld together into a delicious and hearty filling. Start by heating a skillet over medium heat and adding the hash browns, scrambled eggs, bacon, and cheese. Stir the mixture continuously, ensuring that all ingredients are thoroughly combined. The heat will help intensify the flavors and create a cohesive filling.
Once the filling is cooked, allow it to cool to room temperature. This step is vital to prevent the egg roll wrappers from becoming soggy when wrapping the filling. The cooling process also allows the flavors to settle and develop further, enhancing the overall taste of the egg rolls.
Cooking the filling to perfection is essential for a successful breakfast dish. By following these steps and letting the filling cool to room temperature, you're on your way to creating a delicious and satisfying meal.
Flavorful Seasonings
Enhance the taste of your egg roll filling by seasoning it with a delightful blend of salt, pepper, garlic powder, and onion powder for a savory flavor profile.
To elevate the flavors further, consider the following additions:
- Add a dash of paprika or cayenne pepper for a hint of heat and extra flavor in the filling.
- Incorporate fresh herbs like chopped parsley or chives to enhance the overall aroma and taste profile.
- Consider sprinkling a touch of grated Parmesan or cheddar cheese for a cheesy and gooey texture in the filling.
- Experiment with different seasonings like Italian seasoning, Cajun spice blend, or taco seasoning to create unique flavor profiles in the egg roll filling.
Rolling the Egg Roll Wrappers
When rolling the egg roll wrappers, it's imperative to carefully place the filling in the center, ensuring an even distribution. Remember to fold the bottom corner over the filling, tuck in the sides, and roll tightly towards the top corner for a secure seal.
Pay attention to using a flour paste to seal the edges effectively, preventing any leakage during frying.
Rolling Technique Tips
To achieve perfectly rolled egg rolls, start by placing a small amount of filling near one corner of the wrapper. Proper rolling technique is essential to make sure your egg rolls turn out just right.
Here are some tips to help you master the art of rolling:
- Fold the corner over the filling as tightly as possible to create a compact roll.
- Next, fold in the sides to cover the filling completely, ensuring a neat appearance.
- Roll the wrapper towards the opposite corner, maintaining a firm grip to prevent any filling from spilling out.
- Seal the edge with a flour paste to secure the egg roll, keeping it intact during frying.
Wrapper Handling Tricks
For better control and successful sealing, handle the egg roll wrappers with care as you roll them around the filling. When rolling tightly, lightly dampen the edges of the wrapper to guarantee a secure seal.
Overfilling the wrapper can impede the rolling process, making it challenging to seal properly. To create a strong seal, brush a flour paste on the edges before rolling.
Remember, rolling the egg roll wrapper tightly is essential to prevent the filling from escaping during frying. While rolling, gently press out any air bubbles to avoid the egg rolls from bursting in the oil.
Mastering the art of wrapper handling tricks won't only result in perfectly rolled egg rolls but also ensure a delightful dining experience. So, take your time, pay attention to detail, and enjoy the process of creating delicious egg rollups.
Filling Placement Guidance
Position a spoonful of the cooled egg and hash brown mixture towards the bottom corner of the egg roll wrapper.
When rolling the egg roll, remember to leave some space around the edges to prevent the filling from spilling out during the process.
Start by folding the bottom corner over the filling, then proceed to fold in the sides to enclose the filling securely.
To complete the rolling, tightly roll the wrapper towards the opposite corner, ensuring a tight seal by using the flour paste. This step is essential to prevent any leakage of the filling while frying.
By following these rolling techniques, you can create perfectly rolled egg rolls with the filling evenly distributed, providing a delicious and satisfying breakfast experience.
Cooking the Egg Rollups
Begin frying the egg rollups in hot oil to achieve a crispy exterior and guarantee the filling is thoroughly cooked.
Stirring often while cooking ensures that all sides of the rollup achieve an even golden brown color.
After frying, draining the cooked egg rollups on a wire rack is crucial to prevent sogginess caused by excess oil.
It's recommended to allow the egg rollups to cool slightly before serving to preserve the flavors and prevent burns from the hot filling.
Serving the egg rollups with a spicy ketchup dipping sauce enhances the overall taste, adding a flavorful kick to the dish.
Remember to handle the hot oil with care and use appropriate utensils to turn the egg rollups to avoid splatters.
Making the Dumpling Sauce
To create the flavorful dumpling sauce, combine soy sauce, rice vinegar, sesame oil, and a touch of sugar in a mixing bowl. Here's a quick and easy guide to making this delicious accompaniment:
- Mix 1/4 cup of soy sauce, 2 tablespoons of rice vinegar, 1 tablespoon of sesame oil, and 1 teaspoon of sugar in a bowl.
- Adjust the ingredients to suit your taste preferences by adding more soy sauce for saltiness, vinegar for tanginess, sesame oil for aroma, or sugar for sweetness.
- For an extra kick, consider incorporating minced garlic, grated ginger, chili paste, or green onions into the sauce.
- Get creative with your flavors by experimenting with additions like lime juice, honey, or sriracha to elevate the taste profile of your dumpling sauce.
This sauce is a versatile and essential component for enhancing the enjoyment of your egg rolls or dumplings, offering a perfect balance of savory, tangy, and sweet notes.
Serving and Enjoying the Breakfast
Indulge in the satisfying crunch and delicious flavors of the breakfast egg rolls as you savor a delightful start to your day. These egg rolls are a great recipe that offers a convenient and tasty breakfast option. Serve them hot and crispy, accompanied by a side of spicy ketchup dipping sauce for an extra burst of flavor. Whether you're rushing out the door on a busy morning or hosting a weekend brunch, these egg rolls are perfect for any occasion. To elevate the experience, consider trying different dipping sauces or condiments to cater to various preferences.
Here's a table to showcase some creative serving ideas:
Serving Suggestions | Description |
---|---|
Spicy Mayo Dip | Creamy with a kick, perfect for those who enjoy spice. |
Sweet Chili Sauce | Offers a balance of sweet and tangy flavors. |
Soy Ginger Glaze | A savory option with a hint of ginger for added depth. |
With these options, you can customize your breakfast egg rolls and enjoy a flavorful meal that suits your taste buds.
Frequently Asked Questions
What Is the Best Sauce to Eat With Eggrolls?
For egg rolls, the best sauce to enjoy is spicy ketchup. Its tangy kick complements the savory fillings perfectly. Adjust the spice level to your liking for a personalized flavor explosion that enhances your breakfast experience.
What Sauces to Eat With Dumplings?
When enjoying dumplings, opt for soy sauce for a salty umami burst, vinegar for a tangy twist, chili oil for a fiery kick, or hoisin sauce for a sweet-savory blend. These sauces elevate the dumpling experience.
What Do You Dip Egg Rolls in Reddit?
When dipping egg rolls, Reddit suggests trying spicy ketchup, sweet and sour sauce, soy sauce with vinegar and chili paste, hoisin sauce with Sriracha, or creamy peanut sauce for a delicious flavor experience.
Can the Dumpling Sauce also be used for the Fried Egg Quesadilla Toast?
Yes, the dumpling sauce can also be used for the fried egg quesadilla toast. The sweet and savory flavors of the sauce complement the egg and cheese in the toast perfectly, adding an extra kick to the dish. Try drizzling a little bit of the sauce on top for a delicious twist.
Conclusion
To sum up, the egg rollup and dumpling sauce offer a quick and delicious breakfast option that will surely delight your taste buds.
The mix of the savory egg filling with the tasty sauce is a wonderful way to kickstart your day.
So don't hesitate! Prepare this delightful meal and enjoy every mouthful, infusing a bit of culinary charm into your morning routine.
Francesca, as the creative force behind our compelling content, combines culinary expertise with journalistic flair. She has a deep appreciation for the cultural histories and artisanal traditions that influence remarkable flavors around the world. Through engaging narratives, she transports our audience to the heart of each culinary experience. Whether she’s documenting the centuries-old techniques of a Sicilian cheese maker or uncovering the personal stories of our producers, Francesca’s storytelling prowess drives our mission to connect people through food.
Breakfast
Milk Bar Cinnamon Roll Bread: A Sweet and Swirled Breakfast Treat
Lure your taste buds with Milk Bar's Cinnamon Roll Bread, a delectable blend of sweet cinnamon swirls in tender bread, perfect for a delightful breakfast.
Indulge in Milk Bar's Cinnamon Roll Bread, a fusion of sweet cinnamon swirls in tender bread, perfect for a delightful breakfast. The recipe features base ingredients like flour, sugar, and cinnamon, with cream cheese for richness. Incorporate nuts or raisins for texture and customize with different extracts for varied flavors. Drizzle with cream cheese glaze or maple icing for added sweetness. Bake in thin-walled loaf pans for best results. Serve warm with tea or as a dessert with vanilla ice cream. Proper storage in airtight containers guarantees freshness. Explore more tips and FAQs for an enriched baking experience.
Key Takeaways
- Incorporate cream cheese for richness and creaminess.
- Use a figure-eight motion for defined swirls.
- Experiment with nuts, toffee, or other add-ins.
- Consider cream cheese glaze or unique toppings.
- Serve warm with coffee or as a dessert.
Ingredients for Milk Bar Cinnamon Roll Bread
To make Milk Bar Cinnamon Roll Bread, gather flour, granulated sugar, baking powder, baking soda, and salt for the base ingredients. These elements form the foundation of the delectable Cinnamon Roll Bread, providing the structure and flavor that make it a delightful treat.
In addition to these essential components, the recipe incorporates cinnamon to infuse that classic spicy-sweet taste into each bite. To enhance the richness and creaminess of the final product, cream cheese is also included in the mix.
When combined in the right proportions, these ingredients create a harmonious blend of flavors and textures that will surely tantalize your taste buds. The granulated sugar adds a touch of sweetness, balancing out the warm notes of cinnamon, while the cream cheese brings a creamy and slightly tangy undertone to the bread.
Altogether, these ingredients work in unison to produce a mouthwatering loaf that's perfect for breakfast or a delightful snack.
Step-by-Step Recipe Instructions
When making Milk Bar Cinnamon Roll Bread, you'll start by mixing the ingredients to create a flavorful batter.
Next, you'll roll out the dough and layer it with a delicious cinnamon sugar mixture for that classic swirl.
Following these steps will guarantee a scrumptious bread that's perfect for any time of day.
Mixing the Ingredients
Start by combining flour, sugar, baking powder, baking soda, and salt in a large mixing bowl to create the base for the Milk Bar Cinnamon Roll Bread. Whisk together milk, a large egg, and melted butter in a separate large bowl until well combined. Gradually incorporate the wet ingredients into the dry mixture, stirring until a smooth dough forms.
Next, mix the remaining cinnamon with sugar to create the flavorful filling in a medium bowl. Once the dough is ready, roll it out into a rectangle and spread the cinnamon-sugar mixture evenly over the surface. Carefully roll the dough into a log shape, ensuring the filling is securely enclosed within.
Following the baking instructions, place the rolled and filled dough in the oven and bake for 50-55 minutes until golden brown and cooked through. Once baked, transfer the bread to a wire rack to cool.
Rolling the Dough
Once you have evenly spread the cinnamon-sugar mixture over the rolled dough, it's time to tightly roll it to create the signature swirl in the Milk Bar Cinnamon Roll Bread recipe. To start, gently lift one edge of the dough and begin rolling it into a log shape, taking care to keep the roll tight and even throughout the process. This step is essential in achieving the distinct swirl pattern that makes this bread so visually appealing.
After rolling the dough, place it seam side down on a prepared baking sheet and tuck the ends under slightly to secure the shape. Make sure that the seam is well sealed to prevent the filling from leaking out during baking. The tightly rolled dough will also help maintain the swirl design intact as the bread rises and bakes to perfection.
Once the dough is rolled and shaped, follow the specified baking time in the recipe to achieve a golden-brown crust and a tender interior. After baking, allow the bread to cool on a wire rack before frosting to ensure the ideal texture and flavor development. Cooling the bread properly will also prevent the frosting from melting too quickly, giving you a beautifully finished product ready to be enjoyed.
Tips for Perfect Swirls
For achieving perfect swirls in your Milk Bar Cinnamon Roll Bread, utilize a thin knife or toothpick to create defined swirls in the batter. Start by layering half of the batter in the loaf pan, then sprinkle with half of the cinnamon sugar mixture for a distinct swirl effect.
Repeat the layering process with the remaining batter and cinnamon sugar mixture to achieve a visually appealing swirl pattern throughout the bread. To enhance the swirls, gently swirl a butter knife through the batter in a figure-eight motion to blend the layers slightly for a marbled effect.
Remember to avoid overmixing the batter once the swirls are created to maintain the distinct cinnamon roll appearance after baking. By following these tips and techniques, you can make sure that your Milk Bar Cinnamon Roll Bread comes out with perfect, eye-catching swirls that not only look great but also add a delicious twist to your breakfast treat.
Customization Options for Flavors
Enhance your Milk Bar Cinnamon Roll Bread with a variety of customization options for flavors to suit your taste preferences and create a unique twist on this classic treat.
When looking to add a touch of sweetness, consider incorporating mix-ins like nuts, toffee, raisins, or diced apples into the batter. These additions not only provide extra texture but also introduce delightful bursts of flavor throughout the bread.
For a different taste profile, experiment with various extracts such as almond or butter; these extracts can elevate the overall taste experience.
If you prefer a tangy and creamy topping, opt for a cream cheese glaze instead of the traditional icing. Additionally, folding in up to ½ cup of your favorite ingredients can further personalize your Cinnamon Roll Bread.
To explore different icing options, try a maple glaze or a caramel drizzle for added sweetness and depth, giving your bread a delicious and unique finishing touch.
Icing and Glaze Ideas
To elevate the flavor profile of your Milk Bar Cinnamon Roll Bread, explore a range of enticing icing and glaze ideas. Consider classic options like a rich and tangy cream cheese glaze or a buttery frosting made from powdered sugar, vanilla, and milk for a sweet touch.
For a creative twist, experiment with different icing flavors such as maple, caramel, or a simple powdered sugar and water drizzle. To further customize the glaze, add spices like nutmeg or cardamom to enhance the traditional cinnamon roll taste.
For a decadent touch, drizzle the bread with a luscious chocolate ganache or a citrus-infused glaze. These variations can add depth and complexity to your breakfast treat, making each bite a delightful experience.
Don't hesitate to get creative with your icing choices to truly make your Milk Bar Cinnamon Roll Bread stand out.
Baking Pan Suggestions
Consider the type of baking pan you choose as it can greatly impact the outcome of your Milk Bar Cinnamon Roll Bread. For quick bread recipes like this one, thin-walled loaf pans are recommended to guarantee even baking and quicker baking times.
Glass loaf pans can also be a good choice, as they help distribute heat evenly, resulting in a consistent texture throughout the bread. If you want to switch things up, using an 8-inch round cake pan can offer a different presentation for your cinnamon roll bread. However, be cautious when using silicone mini loaf pans, as their material may affect the baking results.
After baking, it's important to let the bread cool in the pan for 30 minutes to an hour before removing it. This cooling period allows the bread to set properly, ensuring a better texture and easier removal from the pan.
Choose your baking pan wisely to achieve the best results with your Milk Bar Cinnamon Roll Bread.
Serving Suggestions and Pairings
For an enjoyable experience, pair your Milk Bar Cinnamon Roll Bread with various beverages and accompaniments to complement its flavors and textures. When serving this delectable sweet bread, consider these suggestions:
- Enjoy a slice of Cinnamon Roll Bread alongside a steaming cup of coffee or tea for a comforting breakfast option.
- Indulge your sweet tooth by serving warm slices of this delightful bread with a scoop of creamy vanilla ice cream for a satisfying dessert experience.
- Elevate your brunch table by pairing the Cinnamon Roll Bread with fresh fruit, yogurt parfaits, and a selection of invigorating juices for a well-rounded meal.
- Add a touch of elegance to your presentation by dusting the bread slices with a sprinkle of cinnamon or powdered sugar for a visually appealing finish.
These pairings will surely enhance the enjoyment of your sweet and swirled Cinnamon Roll Bread, whether you choose to savor it for breakfast or as a delightful dessert option.
Storage Tips for Freshness
To maintain the freshness of your Milk Bar Cinnamon Roll Bread, make sure you wrap it tightly in plastic wrap or store it in an airtight container.
Refrigerating the bread can extend its shelf-life, preserving its texture and flavor for up to a week.
These proper storage techniques will help you enjoy your delicious cinnamon roll bread for longer periods.
Proper Wrapping Techniques
Maintain freshness and preserve the texture of your Milk Bar Cinnamon Roll Bread by tightly wrapping it in plastic wrap.
Here are some tips to guarantee your bread stays delicious:
- Wrap the loaf tightly in plastic wrap to seal in moisture and prevent drying out.
- Allow the cream cheese glaze to set and harden before wrapping the bread to secure its quality.
- When gifting the bread, add a layer of plastic wrap before gift wrapping to protect it during transportation.
Proper wrapping techniques are essential for preserving the flavor and quality of the Cinnamon Roll Bread for an extended period.
Refrigeration for Longer Shelf-Life
Refrigerate your Milk Bar Cinnamon Roll Bread in an airtight container to guarantee its shelf-life and maintain its freshness. Storing the bread in the refrigerator helps preserve its quality by preventing it from drying out and retaining its moist texture. By following proper refrigeration practices, you can enjoy the deliciousness of the bread for up to 1 week. Avoid leaving the bread at room temperature for extended periods as it may lead to spoilage. Utilizing an airtight container ensures that the bread is shielded from external elements that could compromise its taste and texture. Here is a table summarizing the key points for refrigerating your Milk Bar Cinnamon Roll Bread:
Storage Method | Location | Duration |
---|---|---|
Refrigeration | Airtight Container | Up to 1 week |
Frequently Asked Questions (FAQs)
Explore the insightful Frequently Asked Questions (FAQs) to discover valuable tips and answers regarding Milk Bar Cinnamon Roll Bread. Here are some common inquiries and helpful responses:
- Ingredient Substitutions: Find out about suitable ingredient swaps to accommodate dietary restrictions or preferences.
- Baking Techniques: Learn expert tips on achieving the perfect texture and flavor in your Cinnamon Roll Bread.
- Storage Tips: Discover the best practices for storing your bread to maintain freshness and taste.
- Gifting Ideas: Get creative suggestions on packaging and presenting Milk Bar Cinnamon Roll Bread as a thoughtful gift.
These FAQs cover a range of topics from ingredient flexibility to presentation suggestions, ensuring you have all the information needed to master the art of making and enjoying this delectable treat. Whether you're a seasoned baker or new to the world of baking, these frequently asked questions offer valuable insights to enhance your experience with Milk Bar Cinnamon Roll Bread.
Frequently Asked Questions
Is a Cinnamon Roll Breakfast or Dessert?
Cinnamon rolls are a versatile delight, perfect for both breakfast and dessert. Enjoy their sweet, cinnamon-infused goodness in the morning or as a satisfying treat after a meal. Indulge in their warm, gooey deliciousness anytime!
What Does Cinnamon Roll Mean in Slang?
In slang, 'cinnamon roll' describes a character who's sweet, kind-hearted, and innocent. Originating from internet culture, it highlights endearing traits. Fans use it to show love and admiration for lovable, wholesome individuals.
What Does Cinnamon Roll Mean in Anime?
When you ask about "cinnamon roll" in anime, it refers to characters who are kind, pure-hearted, and often naive. Fans adore these individuals for their unwavering positivity, sense of justice, and willingness to help others.
What's the Difference Between a Cinnamon Bun and a Cinnamon Roll?
When it comes to cinnamon buns vs. rolls, the key differences lie in the dough type, size, shape, and toppings. Buns tend to have a yeast dough and are larger with cream cheese icing, while rolls use baking powder, are smaller, and feature various toppings.
Can Cinnamon Roll Bread and Fluffy Pancakes Be Combined for a Delicious Breakfast?
Craving the ultimate breakfast treat? Look no further than the fluffiest breakfast pancakes recipe, paired with the delightful flavors of cinnamon roll bread. Indulge in the perfect combination of sweet, fluffy pancakes and the warm, comforting taste of cinnamon for a breakfast that will satisfy your cravings.
Conclusion
To sum up, while the Milk Bar Cinnamon Roll Bread may not be the healthiest breakfast option, its decadent sweetness is sure to satisfy your cravings.
So go ahead, indulge in this sinfully delicious treat and start your day off on a sugary note.
Just remember, moderation is key – unless you enjoy living life on the edge of a sugar rush.
Francesca, as the creative force behind our compelling content, combines culinary expertise with journalistic flair. She has a deep appreciation for the cultural histories and artisanal traditions that influence remarkable flavors around the world. Through engaging narratives, she transports our audience to the heart of each culinary experience. Whether she’s documenting the centuries-old techniques of a Sicilian cheese maker or uncovering the personal stories of our producers, Francesca’s storytelling prowess drives our mission to connect people through food.
-
Vetted3 months ago
15 Best Non-Toxic Espresso Machines for a Healthier Brew at Home
-
Italian Cuisine6 months ago
What Italian Dishes Use Parsley
-
Vetted5 months ago
12 Best Coffee Pods for DeLonghi Espresso Machine to Elevate Your Caffeine Game
-
Vetted3 months ago
15 Best Coffee Beans for Your Breville Espresso Machine – Expert Picks for Perfect Brews
-
Vetted3 months ago
15 Best Coffee Beans to Elevate Your Breville Espresso Experience
-
Vetted5 months ago
15 Best Commercial Automatic Espresso Machines for Your Coffee Shop
-
Vetted6 months ago
15 Best ESE Pod Espresso Machines for Perfect Coffee Every Time
-
Vetted3 months ago
15 Best Fully Automatic Espresso Machines Under $1000 for Coffee Lovers on a Budget