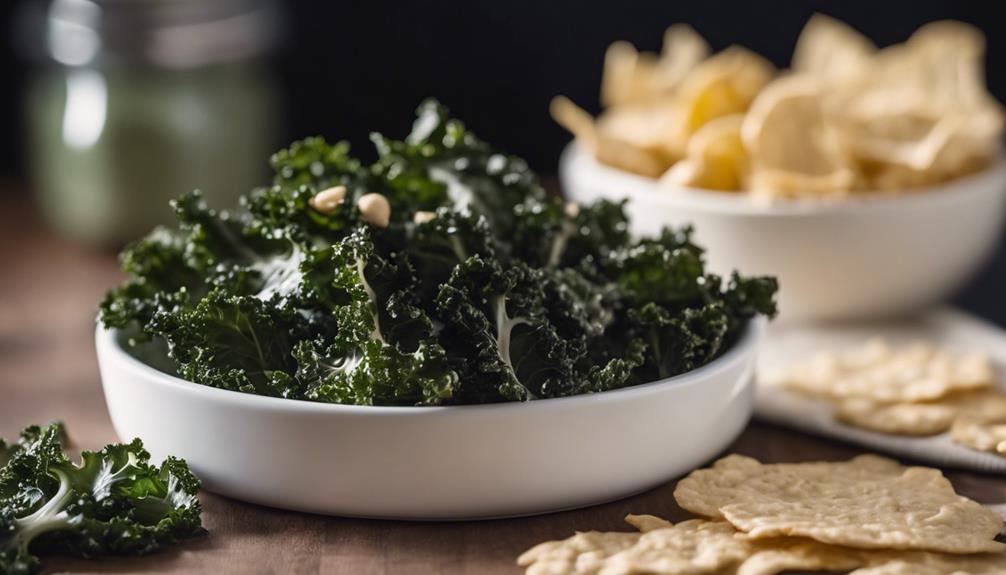
Snacks
Kale Chips With Cashew Queso: a Healthy Snack
Join the crave-worthy journey of kale chips with cashew queso, a guilt-free snack that combines deliciousness with nutrition in every bite.
Indulge in a nutritious treat by savoring kale chips coated with delectable cashew queso, a snack that combines health benefits with savory delight. Kale chips, brimming with essential minerals and vitamins, provide fiber and protein for satisfaction. Prepare them by seasoning kale leaves with olive oil, salt, and desired flavors, then bake for a gratifying crunch. Pair this with cashew queso, a dairy-free alternative rich in protein and antioxidants, for a creamy and flavorful experience. Create this healthy snack duo to enjoy a balanced blend of taste and wellness, perfect for your mindful eating routine.
Key Takeaways
- Kale chips offer vitamins, minerals, and protein for health.
- Cashew queso provides a creamy, dairy-free, nutrient-rich cheese alternative.
- Pairing kale chips with cashew queso creates a healthy, flavorful snack.
- Easy preparation and storage make kale chips and cashew queso convenient.
- Enjoy the benefits of antioxidants, fiber, and flavor in this snack combo.
Benefits of Kale Chips
Discover the nutritional perks of indulging in crispy kale chips for a guilt-free snack that packs a powerful punch of vitamins and minerals. Kale chips aren't just a tasty treat but also a healthy snack option that provides essential nutrients for your body.
These leafy greens are rich in Vitamin K, A, and C, offering a boost to your immune system and overall health. Additionally, kale chips contain minerals like copper, potassium, and iron, which are crucial for various bodily functions.
With each cup of kale providing about 3 grams of protein and a good amount of fiber, indulging in these crispy delights can help keep you fuller for longer and support your muscle health.
Incorporating kale into your diet is recommended due to its numerous health benefits, including antioxidants and anti-inflammatory properties. Make your snacking experience even more delightful by trying out cheesy kale chips, a flavorful twist on this already nutrient-packed healthy snack.
Ingredients Needed for Kale Chips
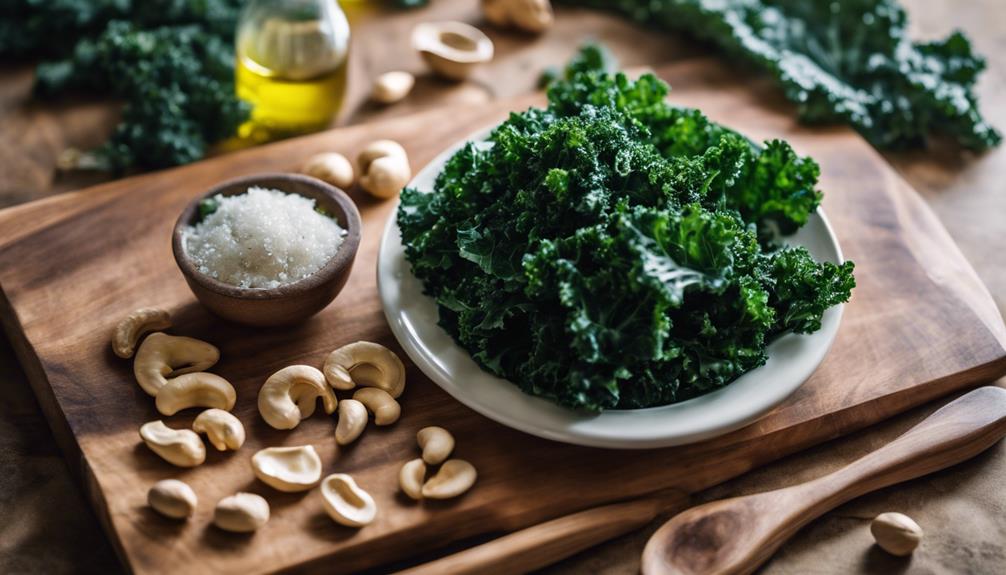
To prepare kale for chips, start by washing and thoroughly drying the leaves to guarantee crispiness.
Seasoning options for kale chips can range from simple salt and pepper to more complex flavors like garlic powder and smoked paprika.
Follow baking instructions carefully, typically involving a low temperature and a longer cooking time to achieve the perfect crunchy texture.
Kale Preparation Techniques
Start by gathering de-stemmed kale leaves, olive oil, salt, and any desired seasonings to prepare your kale chips.
To achieve that cheesy flavor reminiscent of traditional snacks, you can create a cashew queso using a blender. A key ingredient for this cheesy taste is nutritional yeast, a deactivated yeast known for its savory, umami-rich flavor profile.
Once you have your ingredients assembled, wash and dry the kale leaves thoroughly before tearing them into chip-sized pieces. Drizzle the kale with olive oil, sprinkle salt, and any desired seasonings, then massage the leaves gently to guarantee an even coating. This massaging process helps break down the tough fibers of the kale, aiding in flavor absorption.
Bake the prepared kale chips at a low temperature of around 200-225°F. The slow baking process removes moisture gradually, crisping up the chips without burning them.
Seasoning Options for Kale
Consider incorporating a blend of olive oil, garlic powder, smoked paprika, and salt to season your kale chips before baking for a delicious flavor profile. Olive oil not only adds a rich taste but also helps in crisping up the kale leaves during baking. Garlic powder provides a savory kick, while smoked paprika brings a subtle smokiness to the chips. The addition of salt enhances the overall taste and balances the flavors. These seasonings work together harmoniously to elevate the natural earthy flavor of kale into a delightful snack.
When combined with the creamy cashew queso dipping sauce, the seasoned kale chips offer a satisfying and nutritious snack option. The cashew queso, with its cheesy notes and nutty undertones, complements the seasoned kale chips perfectly. Additionally, the cashews used in the queso sauce not only enhance the flavor but also provide a dose of antioxidants and copper, adding to the nutritional value of the snack.
Baking Instructions for Kale
Preheat your oven to 275°F before washing, de-stemming, and breaking kale into pieces for baking.
To make delicious kale chips, follow these steps:
- Prepare Kale:
Wash kale leaves thoroughly, remove the tough stems, and tear the leaves into chip-sized pieces.
- Season Kale:
Drizzle the kale with olive oil and sprinkle salt over it. Massage the leaves to guarantee an even coating.
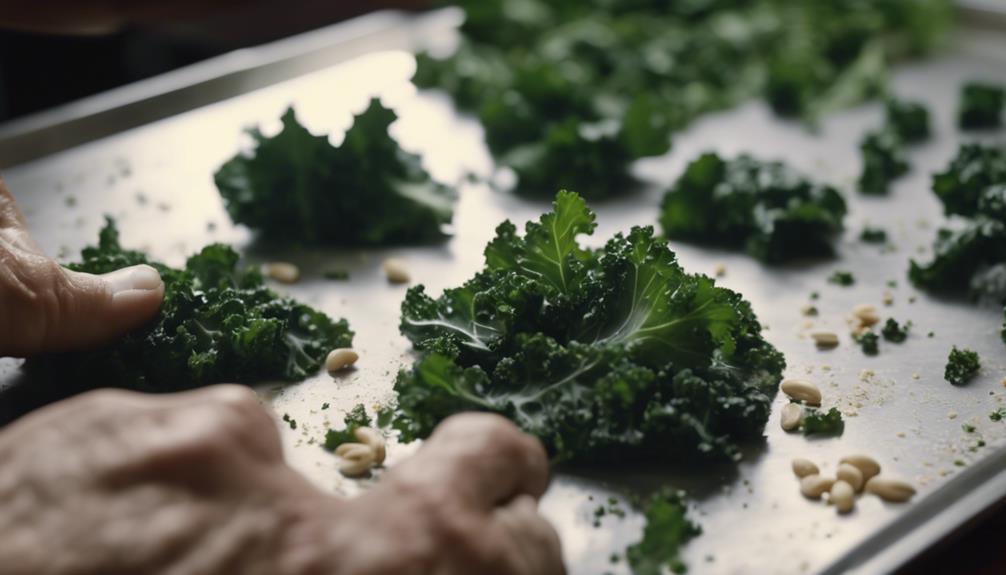
- Bake Kale:
Spread the seasoned kale on a baking sheet in a single layer. Place it in the preheated oven for about 15-20 minutes, rotating the baking sheet halfway through for even cooking.
- Cool and Store:
Once the kale chips are crispy, remove them from the oven and let them cool. Store them in an airtight container for up to a week.
For added flavor, you can season the kale chips with garlic powder, smoked paprika, and more salt before baking. Enjoy your crunchy and nutritious kale chips!
Step-by-Step Kale Chips Recipe
To make delicious kale chips, begin by thoroughly washing and drying the kale leaves. Preheat your oven to 275°F. Remove the tough stems from the kale and tear the leaves into bite-sized pieces.
In a bowl, toss the kale with olive oil and seasonings of your choice, such as salt, pepper, or nutritional yeast. Arrange the kale in a single layer on a baking sheet lined with parchment paper. Bake the kale chips in the preheated oven for about 20-25 minutes, or until they're crisp but not burnt.
While the kale chips are baking, you can prepare the cashew queso. Blend soaked cashews with nutritional yeast, lemon juice, garlic, and water until smooth and creamy. Adjust the seasoning with salt and pepper to taste.
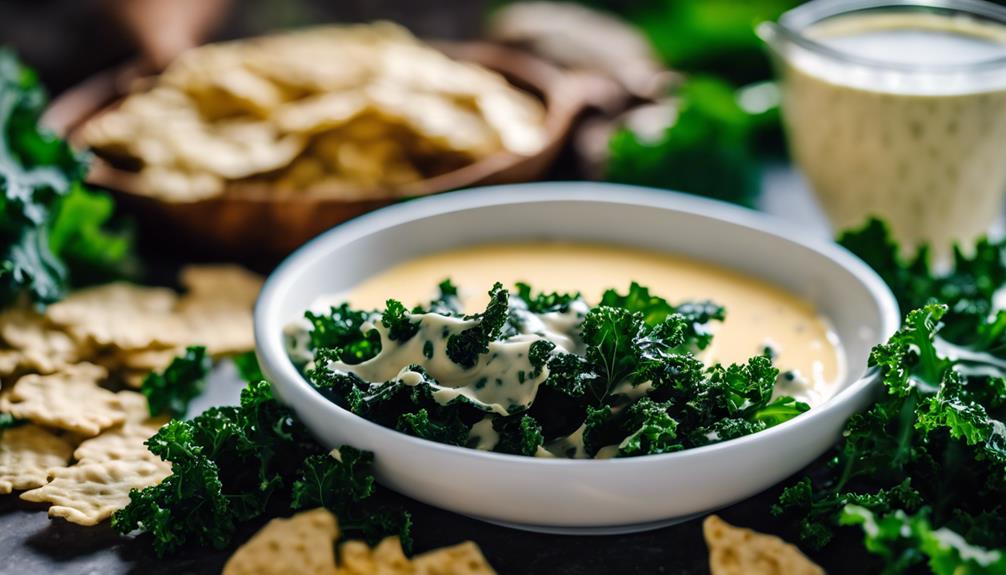
Once the kale chips are done, serve them warm with a drizzle of the cashew queso for a delicious and nutritious snack. Enjoy the crunchy goodness of these baked kale chips with the creamy cashew queso dip!
Health Benefits of Cashew Queso
Cashew queso, a dairy-free alternative rich in protein and healthy fats, offers a flavorful and nutritious accompaniment to the crunchy goodness of kale chips. Here are some health benefits of cashew queso:
- Nutrient-Rich: Cashew queso is a dairy-free alternative made from soaked cashews blended with nutritional yeast, bell pepper, and spices, providing essential nutrients in each serving.
- Protein and Healthy Fats: This creamy sauce is high in protein, offering 9g per serving, and contains 12g of healthy fats, making it a satiating and nutritious addition to your snack.
- Antioxidant Properties: Cashews are rich in antioxidants like copper, which help combat free radicals in the body, supporting overall health and well-being.
- Versatile and Delicious: The versatility of cashew queso allows it to be a delicious addition to various vegan dishes, enhancing flavors while providing the benefits of healthy fats and proteins.
Incorporating cashew queso into your diet can't only add a burst of flavor but also contribute to your overall well-being through its nutrient-rich composition.
Simple Cashew Queso Recipe
When making a simple cashew queso, you'll blend soaked cashews with nutritional yeast, bell pepper, and a blend of spices to create a creamy and flavorful dip.
The nutritional yeast adds a cheesy and umami flavor to the queso, enhancing its overall taste profile.
This easy-to-make cashew queso can elevate your snacks by providing a rich and satisfying dip option for kale chips or other dishes.
Creamy Cashew Dip
For a quick and delicious creamy cashew dip, blend soaked raw cashews with nutritional yeast, garlic, and spices.
Here are some key points to take into account when making this dairy-free dip:
- Creamy Texture: Soaked raw cashews are the star ingredient in this cashew queso, providing a rich and creamy texture to the dip.
- Antioxidant Power: Cashews aren't only creamy but also high in antioxidants, especially copper, which is beneficial for overall health.
- Customizable Seasonings: The versatility of cashew sauce allows you to tailor the dip with various seasonings, catering to different flavor preferences.
- Vegan Alternative: Cashew queso serves as a vegan-friendly substitute for traditional cheese dips, making it an ideal choice for individuals with dairy restrictions.
Nutritional Yeast Flavor
To enhance the flavor profile of your creamy cashew dip, incorporating nutritional yeast adds a cheesy and savory element that complements the richness of the cashews. Nutritional yeast is a key ingredient that brings a distinctive cheesy flavor to the cashew queso, making it a delightful and dairy-free alternative for those seeking a flavorful dip.
When combined with the creamy texture of cashews, nutritional yeast creates a velvety sauce that's both satisfying and delicious. The cheesy flavor provided by the nutritional yeast elevates the overall taste of the cashew queso, making it a versatile ingredient that can be used in various vegan recipes as a dairy-free cheese substitute.
The combination of nutritional yeast, cashews, and spices results in a flavorful dipping sauce that pairs perfectly with kale chips, offering a healthy and tasty snack option. Cashew queso, with its cheesy flavor profile, isn't only easy to make but also a nutritious addition to your meals and snacks.
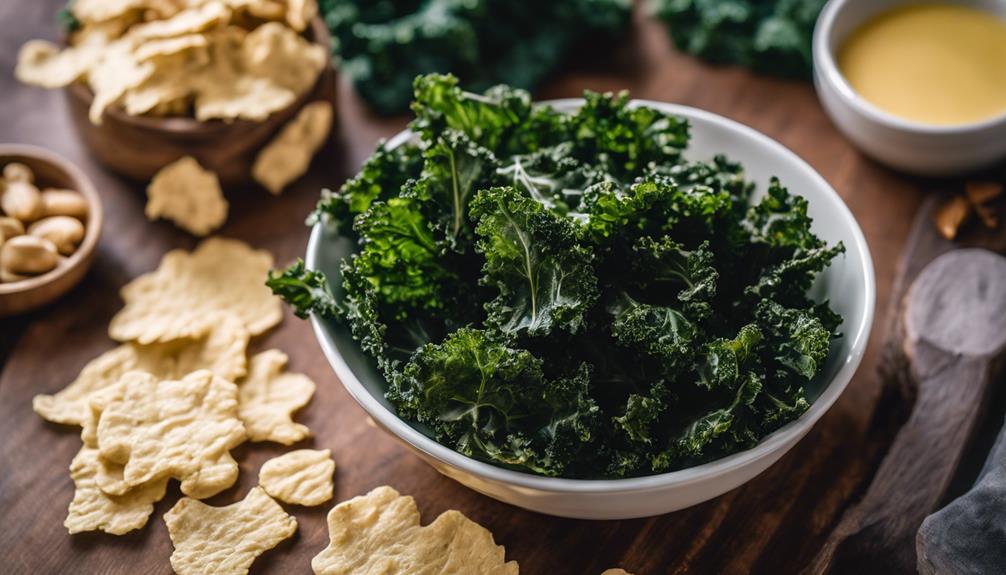
Serving and Storing Instructions
Keep leftover kale chips fresh by storing them in an airtight container for up to a week.
Here are some serving and storing instructions for your kale chips:
- Storage: Place the kale chips in a sealable container, ensuring it's airtight to maintain crispiness and flavor.
- Reheating: If the chips lose their crunch, you can revive them by briefly baking them in the oven at a low temperature.
- Serving: These kale chips are an excellent addition to any gathering, serving as a healthy and flavorful snack for up to four people.
- Variety: Experiment with different seasonings and spices to customize the flavor profile of your kale chips, catering to various tastes and preferences.
Frequently Asked Questions
Are Kale Chips a Healthy Snack?
Yes, kale chips are a healthy snack. They are packed with essential vitamins, fiber, and protein. Opting for homemade kale chips with cashew queso adds a flavorful twist while maintaining their nutritious benefits. Enjoy guilt-free snacking!
Are Kale Chips Low Calorie?
Yes, kale chips are low in calories, with approximately 50-80 calories per serving. Substituting high-calorie snacks with kale chips can help you manage your weight effectively while still enjoying a satisfying and nutritious snack.
Is Kale Still Healthy When Baked?
Yes, kale remains healthy even when baked. Baking retains its nutrients like vitamins A, C, and K, while maintaining fiber content. Enjoy crunchy kale chips as a nutritious snack alternative. Satisfy cravings guilt-free!
Are Kale Chips Easier to Digest?
Yes, kale chips are easier to digest than raw kale. Dehydrating breaks down tough fibers and removes water content, making them lighter. The crispy texture is gentler on your stomach. Adding cashew queso brings flavor without added bulk, providing a tasty, easily digestible snack.
Can Kale Chips and Cashew Queso be a Healthy Addition to a Fresh Salmon-Cucumber-Avocado Bowl?
Looking to spice up your fresh salmon cucumber bowl recipe? Consider adding kale chips and cashew queso for a healthy twist. This crunchy and creamy addition will elevate the flavors and textures of your dish, while providing added nutrients and a burst of flavor. Try it out for a delicious, nutritious meal.
Conclusion
To sum up, kale chips with cashew queso make for a delicious and nutritious snack option.
One study found that incorporating kale into your diet can help improve heart health and boost immunity.
By pairing it with a creamy cashew queso, you not only satisfy your cravings but also benefit from the healthy fats and plant-based protein.
So, next time you're looking for a guilt-free snack, consider whipping up a batch of these tasty treats.
Snacks
Savor Easy Homemade Flautas Tonight!
Indulge in the deliciousness of homemade-flautas with this simple recipe! Perfect for a family dinner or a festive gathering.
Imagine the delicious smell of sizzling chicken with tangy salsa and melting cheese in your kitchen. Picture yourself getting ready to bake these tasty treats. Wait for them to come out golden and crispy. That’s the happiness homemade flautas bring!
Flautas are a big deal at my home. They’re perfect for family dinners, parties with friends, or watching the game. They’re always a hit. With their yummy filling and crunchy outside, everyone loves them.
Making flautas at home is simple. You need just a few ingredients and easy steps. You’ll make flautas that are way better than store-bought ones.
Homemade flautas are not only more delicious but also healthier. Baking them cuts down on oil, making them a treat you can enjoy guilt-free. Plus, you’ll save money and tailor them to your taste.
Key Takeaways:
- Chicken Flautas are a flavorful and crispy delight that can be enjoyed for various occasions.
- Making homemade flautas is easy and economical compared to store-bought versions.
- Baking flautas in the oven instead of deep frying them is a healthier option.
- You can customize the filling of flautas to suit your preferences.
- Savor the joy of homemade flautas tonight and discover a delicious new addition to your repertoire!
What are Flautas?
Flautas are a tasty Mexican food with savory fillings wrapped in a flour tortilla. Instead of deep frying, this recipe uses baking for a healthier option. They look like small pipes or flutes, which is how they got their name.
The fillings inside are usually chicken or beef, cooked and seasoned just right. They are then rolled tightly in a tortilla and cooked. This mix of flavors is incredibly satisfying.
“Flautas are an amazing Mexican dish. They combine crispy tortillas with delicious fillings for a great taste!”
What is Inside a Flauta?
A flauta’s filling usually includes shredded meat like chicken or beef, melted cheese, and a flavorful sauce. We use shredded chicken, cream cheese, Monterey Jack, salsa, and spices for this recipe. These ingredients blend together perfectly to make a tasty filling.
Flautas are all about the harmonious blend of tender shredded meat, ooey-gooey melted cheese, and a tangy flavorful sauce. These ingredients work together to create a symphony of flavors with every bite.
The chicken is cooked until it’s tender and flavorful. Cream cheese makes the filling creamy and rich. Monterey Jack cheese adds a gooey touch. Salsa gives a tangy, spicy flavor, lifting the flautas’ taste. Balanced seasonings turn the filling into something you’ll want more of.
Experimenting with Flavors
You’re not limited to chicken. Try beef or pork for different tastes. Each meat adds a unique flavor. You can also change up the cheese for new cheesy flavors. The choice is all yours, from mild and creamy to sharp and tangy.
Want more flavor? Add spices like cumin or smoked paprika. For a smoky, spicy taste, use chipotle. Prefer something milder? Try a cilantro lime crema or honey mustard sauce. They make your flautas even tastier.
Ingredient | Taste |
---|---|
Shredded Chicken | Savory |
Cream Cheese | Creamy |
Monterey Jack Cheese | Melty |
Salsa | Tangy |
Seasonings | Well-balanced |
The Difference Between Flautas and Taquitos
Flautas and taquitos are both tasty Mexican meals, great for when you want something quick. They may look alike, but they are different in a key way: the tortilla. This difference changes the taste and experience of each dish.
Flautas are made with flour tortillas, giving them a soft, slightly chewy feel. The tortillas are big and flute-shaped, which is why they’re called “flautas.” Flour tortillas make the dish uniquely flavorful, making it a favorite for many.
On the other hand, taquitos use corn tortillas. These tortillas are smaller and roll up easily, perfect for stuffing with fillings. Corn tortillas bring a crispiness that flour tortillas can’t, adding a nice crunch with every bite.
Both flautas and taquitos can hold similar fillings, like shredded meat, cheese, and tasty sauces. This makes both great for a variety of flavors.
Understanding the tortilla difference helps you pick. Choose flautas with flour tortillas for softness or taquitos with corn tortillas for crunch. It’s all about what you enjoy in texture and taste.
Flautas | Taquitos |
---|---|
Flour tortillas | Corn tortillas |
Larger and shaped like a flute | Smaller and cylindrical shape |
Soft and slightly chewy texture | Crunchy texture |
Now you know the key differences between flautas and taquitos. Why not try making both at home? Whether you’re into the softness of flour tortillas or the crisp of corn, you’ll find both to be delicious. Enjoy making and eating!
Source:
https://www.example.com/flautas-taquitos-difference
Serving and Dipping Options for Flautas
There are many ways to enjoy chicken flautas. Meal options and tasty sides can make your dining special. Whether for a main dish or a party snack, here are some ideas to make your flauta meal better.
Serving Flautas as a Meal
Want a fulfilling meal? Have chicken flautas on their own. Pair them with a green salad or rice and beans. It’s a blend of tastes and textures that highlight the flautas’ crunch.
Delectable Dipping Sauces
To make your chicken flautas tastier, try some dipping sauces. Sour cream and guacamole add creamy, tangy flavors. Salsa offers zestiness, and Mexican crema brings richness. For something mild, ranch dressing is perfect.
Presentation is Key
How you serve flautas matters. Arrange them on fresh lettuce to make them look appealing. The lettuce’s green boosts the flautas’ golden brown. Add onion, avocado, pico de gallo, and cheddar cheese for more taste and color.
Explore Your Creativity
Feel free to mix things up with your meal and sauces. Try new salads like a citrus or corn and black bean salad. Create unique dipping sauces. There are endless options!
Summary
Serving chicken flautas gives you many choices. Serve them with salads or rice and beans for meals or snacks. Adding different sauces will make them even better. Enjoy these tasty flautas and be creative!
Tips for Making Chicken Flautas
You can choose either leftover chicken or cook your own for Chicken Flautas. Using leftover chicken is easy. But, if you start from scratch, try cooking chicken breasts in an Instant Pot. Add chicken broth and your favorite seasonings for flavor.
To make the chicken tastier, use spices. Cumin, chili powder, garlic powder, or paprika work well. They add great flavor to your flautas.
We suggest baking the flautas for a healthier option. Yet, for more crunch, try air frying or pan-frying them. Air frying gives a crisp texture similar to baking. Pan-frying, however, requires a lot of oil for a golden finish.
Feel free to experiment with cooking methods and spices. This will help you make Chicken Flautas that match your taste. It’s fun to get creative and personalize your dish!
Benefits of Homemade Shredded Chicken
Using leftover chicken or making your own lets you save money. Plus, you can choose the flavors and seasonings. It’s perfect for turning leftovers into a tasty meal.
Keep these tips in mind as you start your Chicken Flautas journey. Have fun cooking and enjoy your delicious creation!
Feedback from Readers
Hear what our readers say about their experience with these Chicken Flautas!
“A Big Hit at Dinner Parties”
“I made these flautas for a dinner party, and they were a huge hit! Everyone loved the crispy, flavorful taste. They really pleased the crowd!” – Sarah
“Easy and Delicious”
“I needed an easy dinner recipe and found this one. The flautas were simple to make and delicious. Even my picky eaters liked them.” – Emily
“Perfect for Leftovers”
“I made extra flautas for dinner. They were incredible that night, and great for snacks and lunches the next day. This dish is versatile and satisfying!” – Mark
“A New Family Favorite”
“I tried this recipe last week for the first time. It’s already a new favorite in our family. We loved the crispy outside and flavorful filling. Can’t wait to make them again!” – Jennifer
These are just a few of the many good reviews we’ve gotten on our Chicken Flautas recipe. Try it out and see why it’s so popular!
Variations and Substitutions for Chicken Flautas
This recipe uses shredded chicken and pepper jack cheese. But, you have other choices. You can pick beef, pork, beans, or tofu instead of chicken. Try different cheeses like cheddar or Oaxaca. This way, you make the flautas just how you like them.
Protein Options
Looking for something other than chicken? No problem. Shredded beef makes the flautas hearty and tasty. Or use pulled pork for a smoky flavor. Vegetarians can go for black beans or tofu. Each choice brings its own special taste and texture.
Cheese Options
Pepper jack is great, but there’s more. Cheddar brings a rich, sharp taste. For something milder, try Oaxaca cheese. It’s smooth and creamy. Feel free to mix and match cheeses to find your perfect flauta.
Vegetarian Options
Vegetarian flautas? Easy. Fill them with seasoned black beans for a hearty option. Or use tofu, which you can crumble, sauté, and spice up. Both are great ways to enjoy flautas without meat, packed with flavor.
There are many ways to make flautas your own. Pick from beef, pork, beans, or tofu. Choose cheddar, Oaxaca, or pepper jack cheese. Mix it up and find what you love. The adventure in cooking is all about trying new things!
Protein Options | Cheese Options |
---|---|
Shredded beef | Cheddar cheese |
Pulled pork | Oaxaca cheese |
Black beans (vegetarian) | Pepper jack cheese |
Tofu (vegetarian) |
Freezing Chicken Flautas
For those who want to have Chicken Flautas ready for later, freezing them is a smart choice. It’s perfect for meal planning or getting ready for hectic days. To freeze and reheat your Chicken Flautas, follow these instructions:
Freezing Baked Chicken Flautas:
- Let the baked flautas cool down completely.
- Put the cooled flautas in a container that seals well, keeping them separate.
- Write what’s inside the container and the date on it.
- Keep the container in the freezer and use within 3 months.
Freezing Unbaked Chicken Flautas:
- Get the flautas ready as the recipe suggests.
- Arrange the unbaked flautas on a sheet that has been lined.
- Freeze them on the sheet until they’re completely solid.
- Move the frozen flautas into a bag that can be sealed. Take out all extra air.
- Put the date and what’s in the bag.
- The bag can stay in the freezer for up to 3 months.
Reheating Chicken Flautas:
When you want to eat your frozen Chicken Flautas, you can warm them up in two ways:
- Oven: Heat your oven to 375°F (190°C). Spread the flautas on a sheet and bake for about 15-20 minutes. They should be hot and crispy.
- Microwave: Place the flautas on a plate that’s safe for the microwave. Use high power for 2-3 minutes until they’re warm.
After heating, enjoy your Chicken Flautas with your best-loved dips, sides, or toppings. It makes having a tasty homemade meal easy and fast!
Conclusion
Homemade Chicken Flautas are versatile and perfect for any occasion. They’re great for family dinners, snacks, or parties. This easy recipe lets you whip up a flavorful meal. Best of all, you can pick your filling, like the classic chicken and cheese, or mix it up.
Making Chicken Flautas is not only simple, but it’s also a quick choice for weeknights. With a few ingredients, you’ll have a tasty dinner ready fast. Plus, leftovers are excellent for snacks or lunch the next day.
Ready to try this do-it-all dish? Whether baked, air fried or pan-fried, your flautas will be a hit. Homemade beats store-bought every time. So get creative, enjoy the process, and savor the deliciousness of your homemade chicken flautas!
FAQ
What are flautas?
What is inside a flauta?
What is the difference between flautas and taquitos?
How should flautas be served?
What are the tips for making chicken flautas?
What have readers said about this chicken flautas recipe?
Can I make variations and substitutions for chicken flautas?
Can chicken flautas be frozen?
How can I reheat frozen chicken flautas?
Can I Use Garlic Herb Butter in My Homemade Flautas Recipe?
Yes, you can absolutely use homemade garlic herb butter recipe in your flautas. The rich and aromatic flavors of the garlic and herbs will add a delicious twist to your traditional flautas recipe. Simply spread a thin layer of the butter on the tortillas before filling and rolling them up. Enjoy!
Source Links
Snacks
Easy Homemade Garlic Herb Butter Recipe
Elevate your cooking with this easy homemade-garlic-herb-butter recipe, perfect for adding a flavorful touch to any dish!
Imagine this scene: you’re throwing a dinner party. Your friends are eager for the meal you prepared. The smell of sizzling steaks fills the room, boosting your excitement. But what can turn a great meal into an unforgettable one? The secret is homemade garlic herb butter.
Making this flavorful butter is simple and quick. You can use it to enhance almost any dish on your menu. Spread it on warm bread, put it on top of grilled steaks, or stir it into pasta. This butter will impress your guests. And it only needs 10 minutes to prepare!
Key Takeaways:
- Making homemade garlic herb butter is not hard and makes your food taste amazing.
- You only need a few ingredients and 10 minutes to prepare this recipe.
- You can use garlic herb butter in many dishes to make them taste better.
- Keep your garlic herb butter in a tight container in the fridge for a week, or freeze it for three months.(pkg>
- Try different herbs and spices with your garlic herb butter for new tastes.
Ingredients for Homemade Garlic Herb Butter
To make your own delicious homemade garlic herb butter, you’ll need these ingredients:
- 1 cup unsalted butter, softened
- 1 tablespoon minced garlic
- 1/4 cup grated Parmesan cheese
- 1 teaspoon garlic salt
- 1 teaspoon Italian seasoning
- 1/2 teaspoon ground black pepper
- 1/4 teaspoon ground paprika
You can find these ingredients at most grocery stores. Adjust the seasonings to suit your taste. If you love garlic, add more. If you’re watching your salt intake, use less.
Now you have everything you need. Let’s move on to learn how to make your delicious garlic herb butter!
Ingredients for Homemade Garlic Herb Butter
Ingredients | Measurement |
---|---|
Unsalted butter, softened | 1 cup |
Minced garlic | 1 tablespoon |
Grated Parmesan cheese | 1/4 cup |
Garlic salt | 1 teaspoon |
Italian seasoning | 1 teaspoon |
Ground black pepper | 1/2 teaspoon |
Ground paprika | 1/4 teaspoon |
How to Make Homemade Garlic Herb Butter
Follow these simple steps to make your own homemade garlic herb butter:
- In a bowl, combine the softened butter, minced garlic, grated Parmesan cheese, garlic salt, Italian seasoning, black pepper, and paprika.
- Mix all the ingredients together until they are well-combined and smooth.
- Taste and adjust the seasonings if necessary.
- Transfer the garlic herb butter to a shallow airtight container for storage.
By doing this, you’ll have a delicious and tasty homemade garlic herb butter.
Homemade garlic herb butter is a simple and versatile condiment that you can make in just a few steps. The mix of butter, garlic, herbs, and Parmesan cheese makes a flavorful spread. It can be used in garlic bread, sautéed vegetables, or grilled meats. This butter adds a special garlic flavor to your meals.
Uses for Homemade Garlic Herb Butter
Homemade garlic herb butter is very flexible. You can use it in many ways to bring extra taste to your meals. Here are some great ways to use this yummy butter:
- Spreading on bread or toast to make garlic bread
- Topping grilled or roasted steaks, chicken, or seafood
- Mixing into cooked pasta or rice for added flavor
- Incorporating into mashed potatoes or roasted vegetables
- Using as a dipping sauce for vegetables or breadsticks
You can start with these ideas and then try it in other recipes. This butter makes your meals special and tasty. It brings a fun twist to any dish, making your food unforgettable.
Storing Homemade Garlic Herb Butter
After making your tasty homemade garlic herb butter, storing it right is key. You want it to stay fresh and flavorful. Here’s how to keep your garlic herb butter just perfect:
- Transfer to an airtight container: Move the garlic herb butter to a shallow airtight container. This stops outside smells or tastes from getting in. It keeps the butter fresh.
- Refrigerate for up to one week: Put the container in the fridge and keep the garlic herb butter for up to one week. This keeps it safe to eat and tasty.
- Freeze for long-term storage: For keeping your garlic herb butter longer, freeze it. When frozen, it keeps its flavor and quality for three months.
- Divide into smaller portions: For easy use, split the garlic herb butter into smaller pieces. You can freeze it in ice cube trays by tablespoon. Or, use freezer-safe containers for individual servings.
By storing your homemade garlic herb butter correctly, you can enjoy its great flavors anytime. It doesn’t matter if it’s a week or months later. You’ll have a tasty and useful ingredient for your cooking.
The photo shows why keeping your garlic herb butter in an airtight container is smart. It stays fresh and keeps its great flavors.
Tips for Making Homemade Garlic HerbLo Butter
Making your own garlic herb butter is both fun and tasty. Here are some useful tips to get great results:
- Use softened butter: Soft butter blends easily. This gives your butter a smooth, creamy texture.
- Adjust the seasonings: Change the seasonings to fit what you like. You can add more or less garlic, salt, or others for the right flavor.
- Consider vegan or dairy-free alternatives: For those on a vegan or dairy-free diet, try margarine or plant-based butter. This way, you can still enjoy this tasty butter.
- Use minced garlic from a jar: No fresh garlic? No problem. Jarred minced garlic works well too. It gives a similar taste.
- Get creative with herbs and seasonings: Feel free to experiment with different herbs and spices. Adding rosemary, thyme, or even some heat with red pepper flakes can be fun.
Following these tips will help you make a delicious garlic herb butter. It’ll enhance the taste of your meals perfectly.
Nutrition Facts of Homemade Garlic Herb Butter
The nutrition info for homemade garlic herb butter can change a bit with different ingredients and amounts. Generally, a tablespoon of this butter has around:
- Calories: 109
- Fat: 12g
- Carbs: 0g
- Protein: 1g
- Sodium: 214mg
- Cholesterol: 32mg
These numbers come from the recipe’s suggested items. However, what you use and its brand can cause slight changes.
“The nutrition information for homemade garlic herb butter may vary slightly depending on the specific ingredients and quantities used.”
Elevating Your Cooking with Homemade Garlic Herb Butter
Homemade garlic herb butter can make your cooking special. It turns simple dishes, like garlic bread or grilled steaks, into something amazing. Garlic, herbs, and Parmesan cheese mix together, creating a tasty ingredient. This takes meals to a new level.
Using it in recipes boosts flavor and adds elegance. It gives your food a lovely smell and exciting taste. The butter’s creaminess makes every bite better.
It’s great because you can use it in many dishes. Spread it on bread for awesome garlic bread. It makes steaks taste like they’re from a fancy restaurant. Vegetables cooked in it become a delicious side dish.
“Garlic herb butter adds a burst of savory goodness and elegance to your dishes.”
Be creative with this butter. You can mix in different herbs like rosemary or basil. Use it on chicken or pork for a tasty main course. Or melt it on potatoes for extra flavor. It makes food delicious.
Experience the Magic of Homemade Garlic Herb Butter
Once you try it, you won’t go back to store-bought. It makes your cooking better and impresses everyone. It’s a secret weapon in the kitchen.
So, start making your garlic herb butter. Explore new flavors in your cooking!
Garlic Herb Butter for Steak and Prime Rib
Garlic herb butter is the best when you’re making steak or prime rib. It makes the meat taste rich and flavorful. This combo creates a delightful meal.
Just melt a pat of garlic herb butter over your cooked meat. It mixes in with the juicy flavors. You’ll get a taste that feels like it’s from a top restaurant.
Steak lovers have always loved garlic herb butter. It makes the beef taste better and richer. Whether you love tenderloin or a ribeye, garlic herb butter is a game-changer.
Prime rib also goes great with garlic herb butter. It’s already tender and tasty. Garlic herb butter makes it unforgettable.
To make this section look better, here’s a steak with garlic herb butter:
If you’re having a barbecue or a special dinner, try adding garlic herb butter. It will wow your guests and show off your cooking skills.
Creative Uses for Homemade Garlic Herb Butter
Garlic herb butter is not just for bread, steaks, and veggies. There are endless fun ways to use this tasty mix. Here are some unique ideas to try:
Spread it on corn on the cob for a savory twist instead of regular butter.
Toss cooked pasta with it plus grated Parmesan. This makes a simple, tasty pasta dish.
Use it to season roasted potatoes or sweet potatoes. This adds extra flavor.
Melt it over grilled or roasted seafood, like shrimp or scallops. It gives a burst of garlic herb taste.
Mix it into mashed cauliflower or carrots. It creates a flavorful side dish.
Be creative and try mixing it in different ways to find your own favorite garlic herb butter uses.
Conclusion
Homemade garlic herb butter is simple to make and changes your meals for the better. You decide the flavors, making it perfect for your taste. It’s great on bread, meat, or mixed in dishes.
Making your own garlic herb butter is easy with just a few ingredients. Garlic, herbs, and Parmesan cheese mix to make a tasty blend. Feel free to try different herbs to make it your own.
Why go for the usual when you can make something special? Upgrade your meals with homemade garlic herb butter. It’s fun to create and delicious to eat.FAQ
What is garlic herb butter?
How do I make homemade garlic herb butter?
What can I use garlic herb butter for?
How should I store homemade garlic herb can be stored?
Do you have any tips for making homemade garlic herb butter?
What are the nutrition facts of homemade garlic herb butter?
How can homemade garlic herb butter elevate my cooking?
What is a popular use for garlic herb butter?
Are there any creative uses for homemade garlic herb butter?
What are some key takeaways from this article about homemade garlic herb butter?
Can I Use Rosemary and Garlic Infused Olive Oil in Place of Garlic Herb Butter in Recipes?
Yes, you can absolutely use rosemary and garlic infused olive oil in place of garlic herb butter in recipes. The rosemary and garlic olive oil will add a unique flavor to your dishes and can be a healthier alternative to butter. It will infuse your dishes with rich, aromatic flavors.
Source Links
Snacks
Caprese Endive Boats: A Fresh, Elegant Appetizer
Delight in the simplicity of caprese-endive-boats, the perfect blend of crisp endive leaves with classic Caprese flavors for an elegant appetizer.
Imagine this: a summer dinner party in your beautiful backyard. The setting sun creates a soothing glow, and a soft breeze moves through the trees. Your friends chat and laugh, enjoying cool glasses of wine. They look excited as you serve the first course. Then, they see the Caprese Endive Boats on the serving platter. Their expressions change to delight.
Caprese Endive Boats are a top choice for fresh and elegant starters. They combine the tasty flavors of a Caprese salad with the crunch of endive leaves. This mix creates a perfect balance of easy-going and chic. Every bite is a mix of sweet cherry tomatoes, soft mozzarella, aromatic basil, and crisp, slightly bitter endive.
These appetizers fit any event, fancy dinners or laid-back hangouts. They’re also quick to put together. This means more fun time with your guests and less time cooking. And the biggest perk? Caprese Endive Boats will wow even the pickiest eaters.
Want to make your appetizers the talk of the party? Let’s get started on a simple, delicious recipe for Caprese Endive Boats. They’ll have everyone asking for seconds.
Key Takeaways:
- Caprese Endive Boats are an elegant and fresh appetizer that combines the flavors of a Caprese salad with crisp endive leaves.
- They are perfect for any occasion, from formal dinner parties to casual backyard gatherings.
- Capresse Endive Boats are easy to assemble, allowing you to spend more time with your guests.
- This recipe combines juicy cherry tomatoes, creamy mozzarella, fragrant basil, and the subtle bitterness of endive.
- Impress your guests with these delightful and sophisticated appetizers.
Ingredients for Caprese Endive Boats
Gather the ingredients below to whip up the tasty Caprese Endive Boats recipe:
- Endive leaves
- Tiny pearl mozzarella balls
- Cherry tomatoes
- Fresh basil
- Olive oil
- Grated Parmesan
- Red pepper flakes
- Kosher salt
- Freshly cracked black pepper
These ingredients mix together to give every bite of Caprese Endive Boats a perfect harmony of flavors, textures, and colors.
Benefits of Each Ingredient
Ingredient | Health Benefits |
---|---|
Endive leaves | Low in calories and high in fiber, aiding in weight management and promoting digestive health. |
Mozzarella balls | Provide protein and calcium for bone health and muscle repair. |
Cherry tomatoes | Packed with antioxidants and vitamins, supporting overall health and boosting the immune system. |
Fresh basil | Contains anti-inflammatory properties and adds a refreshing herbaceous flavor. |
Olive oil | Offers heart-healthy monounsaturated fats and antioxidants. |
Grated Parmesan | Enhances the dish with a nutty flavor and provides a good source of calcium and protein. |
Red pepper flakes | Adds a touch of heat and can boost metabolism due to the compound capsaicin. |
Kosher salt | Enhances the flavors of the other ingredients and provides essential minerals. |
Freshly cracked black pepper | Brings a subtle spicy and aromatic taste to the dish. |
Instructions for Making Caprese Endive Boats
To make the delicious Caprese Endive Boats, follow these simple steps:
- Start by separating the endive leaves and arranging them on a serving platter.
- In a medium bowl, mix the mozzarella, tomatoes, basil, olive oil, Parmesan, red pepper flakes, salt, and pepper together.
- Toss the ingredients until they are well combined. This will mix the flavors of mozzarella, tomatoes, and basil perfectly with olive oil and Parmesan.
- Fill each endive leaf with a heaping tablespoon of the mixture. The crispness of endive mixed with the delicious filling is amazing.
Your Caprese Endive Boats are now ready to enjoy. These elegant appetizers combine fresh and vibrant flavors for a great taste.
“The combination of the crisp endive and flavorful filling will create the perfect balance.”
Here is an image of the finished Caprese Endive Boats for a visual guide:
Ingredients | Quantity |
---|---|
Endive leaves | Bunch |
Mozzarella | 1 cup |
Tomatoes | 1 cup, cherry or grape |
Basil | ¼ cup, fresh |
Olive oil | 2 tablespoons |
Parmesan | ¼ cup, grated |
Red pepper flakes | ½ teaspoon |
Salt | to taste |
Pepper | to taste |
Serving and Variations for Caprese Endive Boats
Caprese Endive Boats are great for different events. You can tailor them to match your taste and the setting. They’re perfect for fancy dinners or casual gatherings. Impress your guests with these tasty starters. Here are tips on how to serve them, along with ideas for variations, toppings, and garnishes:
Serving Suggestions
These boats can be the main appetizer or part of a bigger selection. They fit well with many dishes. Here’s how to serve them:
- Put the Caprese Endive Boats on a dish with other starters for a vibrant mix.
- Combine them with a salad or grilled veggies for a light meal.
- Have them as a side dish with grilled meats or seafood.
Variations
The classic version is great, but trying new variations can spice things up. Here are some ideas:
Switch cherry tomatoes for sun-dried ones for stronger flavor.
Use creamy burrata instead of mozzarella for a luxurious twist.
Add slices of prosciutto or bacon for extra savory taste.
Toppings and Garnish
Enhance your Caprese Endive Boats with toppings and garnishes. Here are some ideas:
- A balsamic glaze adds a tangy, sweet touch.
- Fresh chopped herbs like basil or parsley offer freshness.
- Extra mozzarella balls or grated Parmesan add creaminess.
Be bold and try different mixes to find your favorite. There are so many ways to enjoy Caprese Endive Boats!
Health Benefits of Caprese Endive Boats
Caprese Endive Boats taste great and are good for you. They have healthy ingredients like endive, tomatoes, basil, olive oil, and mozzarella. These make the appetizer a smart choice for your health.
Endive is a vegetable that doesn’t have many calories but is full of fiber. It helps you manage your weight and keeps your digestion moving smoothly.
Tomatoes shine with their bright red color. This color means they have antioxidants like lycopene that protect your cells. They’re also packed with vitamins A and C, which keep your immune system strong.
Basil brings a fresh taste and smell, plus it fights inflammation. This helps your body stay healthy and comfortable.
Adding olive oil to Caprice Endive Boats boosts their health benefits. Olive oil is full of good fats that help your heart. It also helps your body absorb vitamins better, especially from tomatoes and basil.
Mozzarella adds protein, which is important for your body’s repair and growth. It also helps you feel full for a longer time.
By choosing Caprese Endive Boats, you get a delicious snack that’s also packed with nutrients. It’s not just food; it’s also a way to take care of yourself.
Give this tasty and healthy appetizer a try. It will impress your friends and be good for your body too.
Caprese Endive Boats as a Party Appetizer
Are you planning a party and need the perfect appetizer? Caprese Endive Boats are a fantastic choice. They’re easy to make and are a hit with guests. Plus, they pack a punch of fresh flavors.
For party appetizers, how they look is super important. Caprese Endive Boats score big here. They have juicy tomatoes, creamy mozzarella, and bright basil in crisp endive leaves. This mix is not only pretty but tastes amazing, too.
It’s simple to put these appetizers together. Start by spreading out the endive leaves on a dish. Then mix mozzarella, tomatoes, basil, olive oil, salt, and pepper in a bowl. Scoop this mix into the leaves, and you’re done.
You can tweak Caprese Endive Boats to your liking. Try adding extra toppings or some garnish. A little balsamic glaze or some chopped herbs can make them even better.
Caprese Endive Boats are perfect for any kind of party. They’re impressive and delicious appetizers that everyone loves. So, make sure to include them in your next party menu!
Caprese Endive Boats for Special Diets
Caprese Endive Boats cater to different dietary needs. They’re great for vegetarians or anyone on a gluten-free diet. These boats make a tasty addition to your dishes.
These dishes are gluten-free, offering a great option for those with gluten sensitivities. With endive leaves, mozzarella balls, cherry tomatoes, and more, they’re delicious without gluten.
Vegetarians will love Caprese Endive Boats too. They combine crisp endive, creamy mozzarella, juicy tomatoes, and basil. This blend is both flavorful and satisfying.
Remember, while they’re vegetarian and gluten-free, always check product labels. It’s key to ensure they meet your dietary needs. Ingredients can vary, so checking is important.
Caprese Endive Boats – Vegetarian & Gluten-Free Recipe
Here’s a simple vegetarian and gluten-free Caprese Endive Boat recipe:
Ingredients | Instructions |
---|---|
|
|
Caprese Endive Boats are elegant and perfect for anyone looking for a fresh, special diet appetizer. They’re ideal for gatherings or a quick, tasty snack. These boats will impress your guests.
Caprese Endive Boats: A Versatile Dish
Caprese Endive Boats are perfect for any event. Not just an appetizer, they can be a side or a refreshing salad. This dish is surprisingly versatile and always a hit.
As an appetizer, they are a classy choice. The mix of crunchy endive, soft mozzarella, ripe tomatoes, and basil is fantastic. The look of the dish is just as inviting as its taste.
Serving them as a side dish works great too. They pair nicely with grilled meats, seafood, or vegetarian options. The unique flavors and textures enhance any main dish.
Want a fresh salad? Just chop the endive and mix it with the other ingredients. You now have a Caprese Endive Salad. It’s perfect by itself or alongside other dishes.
So, whether it’s an appetizer, side dish, or salad, Caprese Endive Boats can be adapted. They meet your tastes and impress your guests every time.
Conclusion
Caprese Endive Boats mix the classic Caprese salad’s flavors with crisp endive leaves. They are a fresh and stylish snack. This dish is also very versatile. You can add lots of tasty toppings and garnishes. It’s perfect for a fancy dinner or a light appetizer.
These boats shine with their lively colors, nice textures, and blend of tastes. They strike a balance between being simple and fancy. They are eye-catching and simple to make. This makes them great for both beginners and seasoned cooks.
Why not try making this recipe today? It’s simple and full of flavor, a hit with everyone. Serve them at a fancy event or as a tasty snack. Caprese Endive Boats will make any moment special with their Italian flair. Enjoy making and eating this delightful dish!FAQ
What are Caprese Endive Boats?
What ingredients do I need to make Caprese Endive Boats?
How do I make Caprese Endive Boats?
How can I serve Caprese Endive Boats?
What are the health benefits of Caprese Endive Boats?
Are Caprese Endive Boats a good choice for party appetizers?
Are Caprese Endive Boats suitable for special diets?
How can Caprese Endive Boats be enjoyed?
How Can I Use Endive in Other Appetizer Dishes Like Caprese Grilled Cheese?
Endive can add a fresh and crunchy element to your flavorful caprese grilled cheese. Try using endive leaves as a bed for your grilled cheese bites, or add chopped endive to your caprese salad for a unique twist. The slightly bitter flavor of endive complements the richness of the grilled cheese.
Source Links
-
Italian Cuisine1 month ago
What Italian Dishes Use Parsley
-
Vetted3 weeks ago
12 Best Coffee Pods for DeLonghi Espresso Machine to Elevate Your Caffeine Game
-
Italian Cuisine4 weeks ago
Discover Italian Bliss at Osa-Bistrot-Firenze
-
IT1 month ago
Noberasco
-
Vetted3 weeks ago
15 Best Automatic Commercial Espresso Machines for Your Coffee Shop or Restaurant
-
IT1 month ago
Mix Bistro Sesto Fiorentino
-
Vetted3 weeks ago
15 Best Commercial Automatic Espresso Machines for Your Coffee Shop
-
Vetted3 weeks ago
15 Best Automatic Espresso Machines for Your Home Coffee Bar